Ingredients
Scale
- 300g unbleached bread flour
- 140g wheat or whole wheat flour
- 360g filtered water
- 90g ripe sourdough starter
- 9g kosher salt or fine sea salt
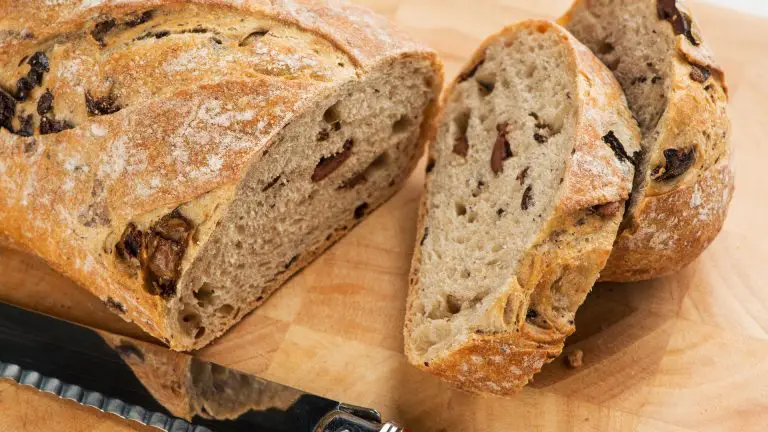
- 75g pitted castelvetrano olives (sliced in half)
- 75g pitted kalamata olives
- White rice flour
Instructions
- Prepare the autolyze: In a large bowl, add bread flour, and whole wheat flour, followed by 350g of water, and mix till thoroughly combined. Cover the bowl with plastic wrap and allow this to rest at room temperature for 1.5 hours. This is a crucial step, as it hydrated the flour, and helps build a good dough structure.
- Add starter and rest: Add the remaining 10g of water along with 90g of ripe sourdough starter. Use your fingers to gently smear the starter over the autolyzed mixture. Fold the edges of the dough into the center, then use your thumb and fingers to roughly pinch the dough until the mixture is perfectly incorporated. Cover and rest for 30 minutes.
- Add salt: Sprinkle 9g of kosher or fine sea salt over the surface of the dough. Use your fingers to pinch and absorb the salt into the dough. Ensure that you cannot see or feel any grains of salt at the end of mixing. This step should take around 5 minutes. Cover and rest for 15 minutes before the initial stretch and folds.
- Bulk fermentation: During this 45-minute bulk fermentation, you’ll need to perform 3 sets of stretches and folds at 15-minute intervals. Cover the dough and let it rest between each set.
- Add the olives: After the third set, cover and let the dough rest for 30 minutes. Spray your work surface with water and gently transfer your dough onto a work surface or kitchen countertop. Using both hands, gently grab and stretch the dough, to form a thin rectangular shape. The dough should be able to withstand rough stretching without tearing. Layer several pitted and halved olives across the surface of the dough. Fold the dough and shape it into a loose ball, before transferring this into a bowl.
- Bulk fermentation: Allow the dough to rest for 45 minutes, then it’s time to perform two coil folds. Using both hands, lift the dough from the center, allow each end to stretch, then fold the dough beneath itself. Repeat the process, rotating the bowl as your fold. Cover and rest between each fold. Then cover the dough and allow it to rest for 2 hours. The dough should double in size, with a few bubbles decorating its surface,
- Pre-shape: Transfer the dough onto a clean countertop. Use a bench knife to shape the dough into a smooth rounded shape. Pull the dough towards you, to help create some surface tension. Rest the dough for 15 to 20 minutes uncovered.
- Final shape: Dust a proofing basketwith rice flour, then sprinkle some bread flour onto the surface of the dough. Use a bench knife to gently lift and flip the dough flour side-down onto your work surface. Shape the dough into a round, or oval, depending on the shape of your basket. Lift the shaped dough, and transfer the dough to the pre-prepped proofing basket.
- Final proof: Cover and refrigerate for 16 hours. This is called cold fermentation and helps the dough develop unique flavors, as well as improves the final crust texture.
- Preheat the oven: Preheat a Dutch oven, in a 500 degrees F oven for 1 hour.
- Bake: Once your baking vessel and oven have preheated, remove the proofing basket from the fridge. Uncover the dough, and carefully place this into your hot Dutch oven. Score the shaped dough with a sharp razor blade. Bake the olive sourdough bread with the lid on for 25 minutes. Then remove the lid and reduce the temperature to 475 degrees F; bake for another 25 minutes, until the crust achieves a wonderful golden brown color.
- Transfer the baked loaf to a cooling rack and let this cool completely before slicing.
Notes
- For this recipe, you’ll require an active and ripe sourdough starter.
- Look out for those tiny stretching bubbles decorating the starter’s surface before you begin!
- Cook Time: 50 mins
- Category: bread