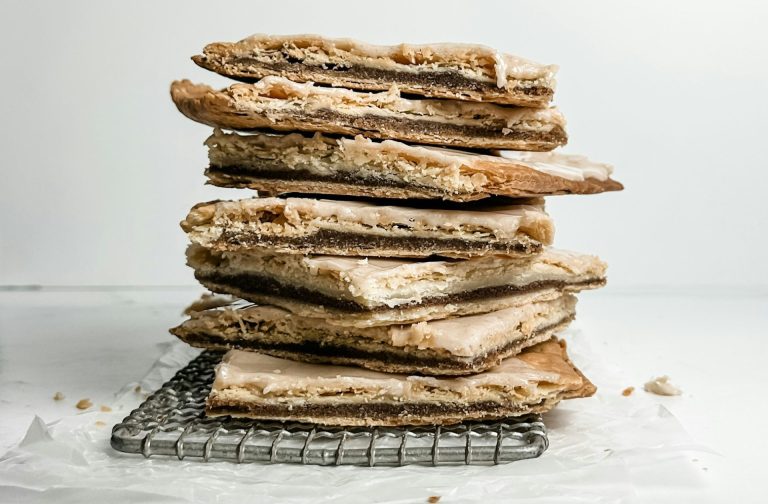
Ingredients
For the Pastry Dough:
- 2½ cups all-purpose flour
- 1 teaspoon salt
- 1 tablespoon granulated sugar
- 1 cup (2 sticks) cold, unsalted butter
- ½ cup sourdough discard
- 3-4 tablespoons ice water
- 1 egg + 1 tablespoon water (for egg wash)
For the Filling:
- ¾ cup strawberry jam or preserves
- 1 tablespoon cornstarch (optional, for thickening)
For the Glaze:
- 1 cup powdered sugar
- 2-3 tablespoons milk
- ½ teaspoon vanilla extract
- Sprinkles for decoration
This recipe makes 8-10 pop tarts (16-20 rectangles) using simple pantry staples. The key to success lies in ingredient temperature and quality – cold butter creates flaky layers through steam expansion, while sourdough discard adds tangy depth that balances sweet fillings perfectly. Quality jam makes all the difference in flavor, so choose preserves with visible fruit pieces and minimal added sugars. European-style butter with higher fat content will create even more impressive flaky layers, though regular unsalted butter works beautifully. Your sourdough discard should be relatively fresh – within a week of feeding works best, as it provides the optimal balance of tang without overwhelming sourness.
Instructions
- Make the dough: Whisk flour, salt, and sugar in a large bowl, ensuring even distribution to prevent pockets of overly salty or sweet dough. Grate frozen butter directly into flour mixture – this technique distributes butter more evenly than cutting cold cubes and is crucial for creating those flaky layers we’re after. Cut in butter with a pastry cutter until mixture resembles coarse crumbs with pea-sized pieces, working quickly to prevent the butter from warming and melting into the flour.
- Add wet ingredients: Mix sourdough discard with 3 tablespoons ice water before adding to flour mixture – this prevents the discard from clumping and ensures even distribution throughout the dough. Add to flour mixture, stirring with a fork until the dough just comes together. The dough should look slightly shaggy; overmixing develops gluten and results in tough pastry. Add more water if needed, but do so gradually as too much moisture will make the dough sticky and difficult to work with.
- Chill dough: Form into a disk, wrap tightly in plastic, and refrigerate for at least 1 hour or up to 48 hours for better flavor development. This chilling period allows the flour to fully hydrate, the butter to firm up, and the gluten to relax, resulting in a more tender pastry. The longer resting time also allows the sourdough flavors to meld with the other ingredients.
- Prepare filling: Mix jam with cornstarch if using – this prevents runny fillings from leaking during baking and helps maintain the proper consistency. Beat egg with 1 tablespoon water for egg wash, which will help seal the edges and give your pop tarts that beautiful golden finish.
- Roll and cut: On a floured surface, roll dough to ⅛-inch thickness, working from the center outward and rotating the dough frequently to maintain even thickness. Cut into 3×4-inch rectangles using a ruler or template for consistency – uniform sizes ensure even baking and a professional appearance. You should get about 16-20 rectangles, depending on efficiency.
- Assemble: Place half the rectangles on parchment-lined baking sheets, spacing them about 2 inches apart. Brush these bottom rectangles with egg wash around the edges – this creates the seal that holds everything together. Add 1-2 tablespoons filling, leaving a ¼-inch border, being careful not to overfill as this will cause leakage during baking. Top with remaining rectangles and press firmly around edges.
- Seal and vent: Press edges firmly with fingertips, then crimp with fork to create the classic pop tart appearance while ensuring the filling stays contained. Poke 6-8 holes in the tops with a fork or toothpick – these vents allow steam to escape and prevent excessive puffing that could cause bursting. Brush tops with egg wash for a golden color. Chill assembled pop tarts for 20 minutes to help them maintain their shape during baking.
- Bake: Following the detailed baking instructions below.
- Glaze: Whisk powdered sugar, milk, and vanilla until smooth, starting with less liquid than expected, as you can always add more. Spread on completely cooled pop tarts, add sprinkles immediately while the glaze is wet.
Pro tip: Keep ingredients cold for flakiest pastry – warm butter will melt into the flour instead of creating steam pockets. Don’t overfill or edges won’t seal properly, leading to messy leakage during baking.
Notes
- Preheat your oven to 350°F – this temperature gives you golden perfection without scorching those delicate edges
- Bake for 25-30 minutes, rotating your pan halfway through to ensure even browning
- Your kitchen will start smelling like a bakery around the 20-minute mark
- Look for that beautiful golden brown color across the entire surface
- The edges should be set and lightly golden
- Gently press the center – it should feel firm
- The pastry should look completely set, rather than soft or doughy
- Reduce the temperature to 325°F for convection ovens
- Start checking for doneness at 20 minutes
- The circulating air cooks faster, so watch for visual cues – golden tops and set pastry, rather than relying solely on timing
- Cool completely on the baking sheet before glazing – this prevents the glaze from melting and ensures the pastry maintains its structure