
Last updated on July 8th, 2026
Truly, sourdough baking is a delightful experience. And it’s not just about a plain loaf either, because there are so many sourdough recipes to be made! But how do you know your starter is ready to bake into sourdough bread? Here are signs to look out for so you can begin making that sourdough bread you’ve always dreamed of.
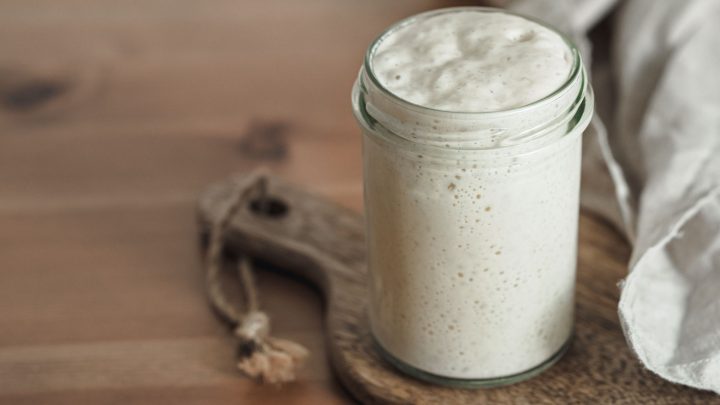
How Do I Know When My Sourdough Starter Is Ready
A sourdough starter is ready when it doubles in size 4-6 hours after feeding, has a bubbly surface, smells pleasantly tangy (not like acetone), and passes the float test.
New starters need 5-7 days of consistent feeding, while mature starters require 2-4 weeks to reach full strength.
How long until ready? New starter: 5-7 days | Mature starter: 2-4 weeks
Main signs: Doubles in size, bubbly surface, tangy smell, passes float test
Peak timing: 4-6 hours after feeding
Storage options: Refrigerate (slows activity) or freeze (long-term storage)
Starter Timeline for Reference
| Starter Age | What You’ll See | Baking Ready? |
|---|---|---|
| Day 1-2 | Paste-like consistency, no bubbles | ❌ Not yet |
| Day 3-4 | First bubbles appear, slight growth | ❌ Getting there |
| Day 5-7 | Consistent doubling, bubbly surface | ✅ Ready for simple breads |
| Week 2-4 | Strong rise/fall pattern, tangy aroma | ✅ Fully mature |
4 Signs That Show Your Sourdough Starter Is Ready
1. Volume Doubles After Feeding
Your starter should grow significantly within 4-6 hours of feeding. This expansion shows that the wild yeast is actively producing carbon dioxide gas, which creates the lift you need for bread.
| Time After Feeding | What to Expect | Starter Status |
|---|---|---|
| 1-2 hours | Little to no growth | Normal – just getting started |
| 4-6 hours | Doubled in size | Ready to use |
| 8-12 hours | Peaked and starting to fall | Past peak – feed again |
2. Bubbles Cover the Surface
Active fermentation creates bubbles that rise to the top. These bubbles show that yeast and bacteria are metabolizing flour sugars and producing the gas needed to lift your bread dough.
3. Pleasant Tangy Aroma
A healthy starter smells mildly sour and yeasty – similar to yogurt or beer. Avoid using starters that smell like:
- Acetone (nail polish remover)
- Vomit or rotten food
- Strong alcohol
- Musty or moldy odors
4. Passes the Float Test
Drop a spoonful of starter into water. If it floats, there’s enough gas trapped inside to leaven bread. If it sinks, give it more time or additional feedings.
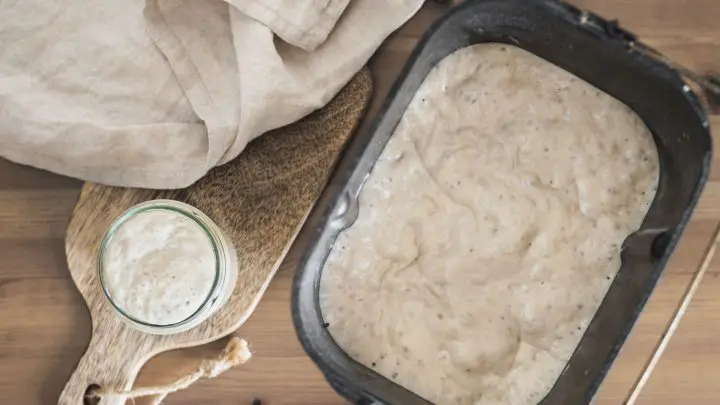
How to Boost a Sluggish Starter
Adjust Feeding Schedule
Feed every 8-12 hours instead of daily. More frequent feedings provide fresh nutrients and keep the microbial community active.
Basic feeding ratio: Equal parts starter, flour, and water by weight (1:1:1)
Control Temperature
Keep your starter between 75-85°F for faster fermentation. Cooler temperatures slow activity, while excessive heat (above 90°F) can harm the beneficial bacteria.
| Temperature Range | Activity Level | Feeding Frequency |
|---|---|---|
| 65-70°F | Slow | Every 24 hours |
| 75-80°F | Moderate | Every 12-18 hours |
| 80-85°F | Active | Every 8-12 hours |
Try the Pineapple Juice Method
For the first 2-3 days, replace water with unsweetened pineapple juice. The natural acidity creates conditions that favor wild yeast over harmful bacteria. After this period, switch back to regular water feedings.
Maintain Consistency
Stick to regular feeding times and ratios. Erratic feeding schedules stress the starter and slow development.
When Your Starter is Ready But You’re Not
Short-term Storage (1-7 days)
Refrigerate your starter after it peaks. Cold temperatures slow fermentation, so you only need to feed it once a week.
Long-term Storage (1+ months)
Freeze portions of mature starter in ice cube trays. Thaw and feed for 2-3 days before using.
Tips for Quick Revival
- Feed with a 1:2:2 ratio (starter:flour:water) to give extra nutrients
- Use room temperature or slightly warm water
- Keep in a warm spot until activity returns
If Something Goes Wrong
- Starter isn’t rising: Increase feeding frequency, check temperature, or try different flour types.
- Liquid on top (hooch): Normal byproduct. Stir it in or pour it off before feeding.
- No tangy smell: Young starters take time to develop flavor. Keep feeding consistently.
- Mold growth: Fuzzy growth in colors other than white means contamination. Discard and start over.
Signs Your Starter Has Gone Bad
Discard immediately if you notice:
- No activity after multiple feedings at proper temperature
- Fuzzy mold (any color)
- Pink or orange streaks
- Smell like acetone, vomit, or rotting food
Ready to Start Baking
Now that you know what to look for, you can confidently assess your starter’s readiness and create the bread you deserve.
Every starter develops at its own pace depending on your local environment, flour type, and feeding routine. Some reach peak activity in five days, while others need a bit more time to establish their full strength.
Once you recognize these signs in your own starter, you’ll develop an intuitive sense for when it’s at its best. Your starter is a living culture that will continue to evolve and strengthen with regular use, rewarding your patience with better flavor and more reliable results over time.
Keep feeding, keep watching for those telltale bubbles and that characteristic rise, and soon you’ll be pulling beautifully risen loaves from your oven. The wait is worth it.
FAQs
How do I know when my sourdough starter is ready to use?
Your sourdough starter is ready to use when it doubles in size within 4-6 hours of feeding and has a bubbly, frothy surface that indicates active fermentation. The starter should smell pleasantly tangy rather than like acetone or alcohol, and it should pass the float test where a small spoonful floats when dropped into water. For new starters, these signs typically appear after 5-7 days of consistent daily feeding, while the starter develops a predictable rise-and-fall pattern and reaches the consistency of thick pancake batter.
How do you know when sourdough starter is at its peak?
When it has doubled in size and reached its maximum height after feeding, typically 4-6 hours at room temperature. At this point, the surface will be covered in active bubbles, it will have a pleasant tangy aroma, and the texture will be light and airy from trapped gas. The starter will hold its shape when you stir it but still be pourable, and this is the ideal time to use it for baking since it has the strongest leavening power. After the peak, the starter will begin to deflate and fall back down as the yeast consumes the available food.
What does a ripe sourdough starter look like?
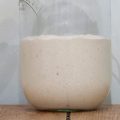
A ripe sourdough starter has a bubbly, frothy surface with active bubbles of various sizes covering the top. It will have doubled in volume from its fed state and appear light and airy with a slightly domed or peaked shape. The texture should be thick but pourable, similar to pancake batter, and when you stir it, you’ll see the interior is full of holes and air pockets from fermentation. The color is typically creamy white to slightly beige, and it should smell pleasantly tangy and yeasty without any off odors.
When can I use my sourdough starter from scratch?
You can use your sourdough starter from scratch after 5-7 days of consistent daily feeding, once it shows reliable signs of activity. The starter should double in size within 4-6 hours of feeding, have a bubbly surface, smell pleasantly tangy, and pass the float test. While a 5-7 day starter can make decent bread, it will continue to strengthen and develop better flavor over the next 2-4 weeks with regular feeding. For the best results, wait until your starter shows a predictable rise-and-fall pattern and maintains its activity consistently before using it for your first loaf.
What does sourdough starter look like at its peak?
A mature sourdough starter will have a bubbly, frothy texture on its surface, it will have doubled in volume after feeding, and release a pleasant and tangy aroma, revealing active fermentation. Its vibrant appearance signifies its readiness for baking delicious and well-risen sourdough loaves.
What should sourdough starter look like on day 1?
On day 1, a sourdough starter will have a simple mixture of flour and water, and have a paste-like consistency. There will be no signs of fermentation or bubbles. As the starter is fed regularly, it develops a characteristic appearance over the next few days.
How do i know if my sourdough starter is alive?
Your sourdough starter will show signs of activity, such as bubbles on the surface, or a very apparent increase in volume especially after feedings. It will also emit a pleasant tangy aroma, indicating fermentation. Signs like these indicate that your starter is very much alive, and ready for baking.
How to know if sourdough starter is bad?
If your sourdough starter has developed a foul odor, turned pink/orange, or has grown mold, then it is bad and must be tossed away. If it lacks any signs of fermentation, i.e., bubbles, or rising after consistent feedings, then it could be weak or contaminated. You should discard immediately and start from the beginning.
Related Articles:
 The Beginner’s Guide to Making Your First Sourdough Starter (Recipe + Schedule!)
 Sourdough Cinnamon Coffee Cake Recipe: 9 Steps to Irresistible Bakery-Style Results
 Strawberry Cinnamon Rolls Recipe: A Sweet Twist on a Classic Favorite
 Sourdough Cinnamon Banana Bread: Easy, Moist & Delicious Recipe
 How to Use Sourdough Starter Like a Pro (Even as a Beginner)
