Need help fixing the minor mishaps in your sourdough? Then you’ve come to the right place! There are many complications a new baker may run into, and that is no reason to panic. Fortunately, there are great solutions to every problem!
Table of Contents
- Why Sourdough Rises
- The Role of Salt in Sourdough Rising
- Proper Proofing Practices
- Temperature Control for Optimal Sourdough Rising
- Why is My Sourdough Bread not Rising?
- Why Are The Bottom Of My Loaves Burned?
- What is Sourdough?
- What is Sourdough Starter?
- What’s So Great About Sourdough Bread?
- Why So Many Flours?
- The Role of Hydration in Sourdough Rising
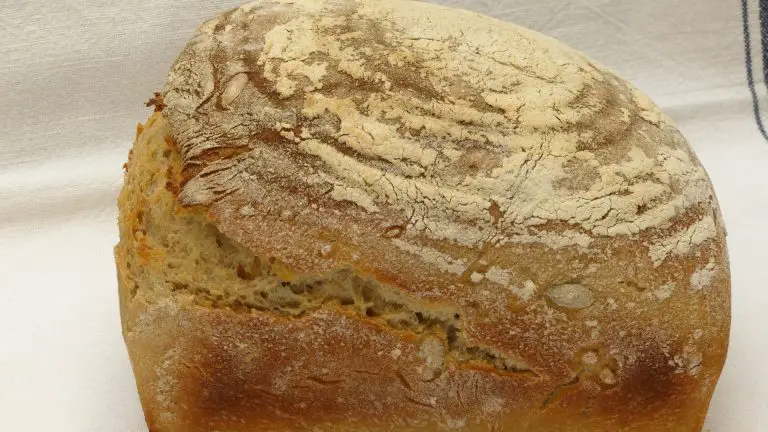
- How To Make Sourdough Bread
- The Difference Between Sourdough and Regular Bread
- Does Sourdough Starter Have Yeast?
- Can I Add Yeast to Sourdough that Doesn’t Rise?
- What To Eat With Sourdough Bread?
- Peaked Sourdough
- FAQs
How To Make Sourdough Bread
- Total Time: 13 hrs 30 mins
- Yield: 1 loaf 1x
Ingredients
- 250g water
- 150g bubbly, sourdough starter
- 2.5g olive oil
- 500g bread flour
- 10g fine sea salt
Instructions
- Squish the mixture together using your hands, until the flour is fully absorbed. The dough will feel dry, rough, and shaggy.
-
Cover the bowl with a plastic wrap, reusable wax wrap, or a very damp kitchen towel, and let rest or autolyze for about 30 minutes.
-
After the dough has had its rest, work it into a ball directly in the bowl.
-
Now that the dough is ready to rise, cover the bowl and let it start to rise at room temperature, at about 68-70 °F.
-
You’ll notice that the dough is ready when it has doubled in size, and no longer looks impenetrable. This can take anywhere from 3 to 12 hours depending on the room temperature, the potency of your sourdough starter and the specifics of your surrounding environment.
- About 30 minutes into the bulk rise, you’ll have the option to perform a series of stretches and folds, to strengthen the bread dough.
-
Remove the dough onto a lightly floured surface, then cut the dough in half to make 2 loaves, or leave it whole for a single loaf.
-
Starting at the top, fold the dough over towards the center, give it a slight turn, and then fold over the next section of dough.
-
After shaping the dough, it needs to rise again. Generously coat the bottom of your Dutch oven with cornmeal, or line the bottom with non-stick parchment paper, and place the dough inside. The dough is ready when its puffy and no longer dense. It doesn’t need to double in size. Preheat your oven to 450 degrees F during the end of the second rise.
-
After the second rise, and right before the dough goes into the oven, make a slash about 2 to 3 inches long down the center of the dough. This will allow the steam to escape and for the dough to expand during baking.
-
Place the lid on top of the pot and reduce the oven temperature to 400 °F. Bake the sourdough bread on the center rack for 20 minutes. When 20 minutes is over, remove the lid, your bread will be pale and shiny. Continue to bake the bread – uncovered – for another 40 minutes or until it’s a deep golden brown.
-
The internal temperature should be 205-210°F. Cool this on a wire rack for at least 1 hour before slicing
- Prep Time: 12 hrs 30 mins
- Cook Time: 1 hr
- Category: bread
Why Sourdough Rises
Your sourdough starter is home to a complex ecosystem of wild yeast and bacteria, primarily lactobacilli. The wild yeast, such as Saccharomyces exiguus, is responsible for the majority of the CO2 production that causes your dough to rise.
When you mix your active starter into your dough, the yeast and bacteria start feasting on the sugars and starches in the flour, kickstarting the fermentation process. As they munch away, the yeast produces carbon dioxide gas, which gets trapped in the gluten network of the dough. This is what causes your dough to expand and rise.
In sourdough baking, your starter acts as the primary leavening agent. Unlike commercial yeast, which is a single strain of yeast, sourdough starters contain a diverse range of wild yeast and bacteria. This microbial activity not only helps the dough rise but also contributes to the complex flavors and improved digestibility of sourdough bread.
Sourdough fermentation is a slower process compared to using commercial yeast. The wild yeast in your starter needs more time to produce enough CO2 to properly leaven your bread. This extended fermentation time allows for the development of those signature sourdough flavors and textures. So, if your dough seems to be taking forever to rise, don’t panic – it’s all part of the sourdough science!
The Role of Salt in Sourdough Rising
Salt is a vital ingredient in sourdough bread, not just for seasoning but also for its ability to regulate yeast activity. When you add salt to your dough, it actually slows down the fermentation process by inhibiting the wild yeast’s metabolic functions. This might seem counterintuitive – after all, don’t we want our yeast to be active for a good rise?
However, a controlled fermentation is key to developing complex flavors and achieving the right texture in your sourdough. Without salt, the yeast would go into overdrive, producing an overly acidic dough that rises too quickly and lacks depth of flavor. Salt helps to keep the yeast in check, allowing for a slower, more balanced fermentation.
So, how much salt should you use in your sourdough? A general rule of thumb is to use around 2% salt by weight of the total flour. For example, if you’re using 500 grams of flour, you’d add 10 grams of salt. This ratio provides enough seasoning to enhance the bread’s flavor while still allowing the yeast to do its job.
Keep in mind that the type of salt you use can also affect the flavor and rising of your dough. Finely ground table salt will dissolve more quickly and evenly throughout the dough compared to coarser salts like kosher or sea salt. If you’re using a coarser salt, you may need to adjust the quantity slightly to achieve the same level of seasoning.
In addition to the amount of salt you use, the timing of when you add it to your dough can also impact your sourdough’s rising power. Many bakers prefer to add salt after the autolyse stage, which is when the flour and water are mixed together and allowed to rest before adding the starter.
Adding salt later in the process gives the flour time to fully hydrate and the gluten network to begin developing without the inhibiting effects of salt. This can lead to a dough that’s easier to work with and has better structure for rising.
If you find that your sourdough consistently struggles to rise despite having a healthy starter and proper hydration, try experimenting with the timing of your salt addition. Mix your dough without salt, let it rest for 20-30 minutes, then incorporate the salt and continue with your usual folding and fermenting routine. This simple tweak could make a big difference in your loaf’s loft.
Proper Proofing Practices
To ensure your sourdough rises to its full potential, you’ll need to create an ideal proofing environment. Find a warm, draft-free spot in your kitchen where the temperature stays consistently between 75-80°F (24-27°C). If your home tends to be on the cooler side, you can create a makeshift proofing box by placing your dough in the oven with just the light turned on, or by using a proof setting if your oven has one.
Stretch and folds are a crucial technique for developing gluten strength and structure in your sourdough during the bulk fermentation stage. To perform a stretch and fold, wet your hands to prevent sticking, then gently lift one side of the dough and stretch it up and over itself. Rotate the bowl 90 degrees and repeat this process until you’ve completed a full rotation. Aim for a series of stretch and folds every 30 minutes during the first 2 hours of bulk fermentation.
One of the most common pitfalls in sourdough baking is under or over-proofing your dough. To check if your dough is ready for shaping, perform the poke test. Gently press your finger into the surface of the dough. If the indentation slowly springs back, leaving a small visible indent, your dough is ready to go. If the dough springs back too quickly, it needs more proofing time. If the indentation doesn’t spring back at all, you’ve likely over-proofed.
After shaping your loaves, it’s time for the final rise before baking. This stage, known as final proofing or retarding, is crucial for developing flavor and ensuring a good oven spring. Place your shaped loaves in proofing baskets (bannetons) dusted with rice flour or lined with clean tea towels. Cover them loosely with plastic wrap and let them proof at room temperature for 1-2 hours, or in the refrigerator for 8-12 hours for a longer, cold proof. The cool temperature of the fridge slows down fermentation, allowing for a more complex flavor development.
Temperature Control for Optimal Sourdough Rising
Proper temperature control is a game-changer when it comes to achieving a beautifully risen sourdough loaf. By managing the dough’s temperature throughout the fermentation process, you can create an environment that promotes optimal yeast activity and gluten development.
A good thermometer is an essential tool in any baker’s arsenal. When working with sourdough, monitoring the temperature of your dough, starter, and proofing environment is crucial for consistent results. Look for a thermometer that’s accurate, easy to read, and can measure both ambient and internal temperatures. Digital instant-read thermometers are a popular choice among bakers for their speed and precision.
Prices pulled from the Amazon Product Advertising API on:
Product prices and availability are accurate as of the date/time indicated and are subject to change. Any price and availability information displayed on [relevant Amazon Site(s), as applicable] at the time of purchase will apply to the purchase of this product.
If your kitchen tends to be on the cooler side, creating a warm, draft-free proofing box can help your sourdough rise. You can easily make a DIY proofing box using a large plastic container or a small cooler. Place a bowl of hot water inside the container to create a warm, humid environment, and use your thermometer to monitor the temperature. Aim for a proofing temperature between 75-80°F (24-27°C) for optimal yeast activity.
The temperature of your dough during mixing and fermentation can greatly impact the final rise and flavor of your sourdough. As a general rule, warmer dough will ferment faster, while cooler dough will develop flavor more slowly. Experiment with different dough temperatures to find the sweet spot for your starter and recipe. A good starting point is to aim for a final dough temperature around 75°F (24°C) after mixing.
Keep in mind that the proofing time for your sourdough will vary depending on the ambient temperature. In warmer conditions, your dough may rise faster, requiring a shorter proofing period. Conversely, cooler temperatures will slow down fermentation, necessitating a longer proofing time. Use your thermometer to monitor the dough’s progress and adjust your timeline accordingly. The poke test is a great way to determine when your dough is ready for the next step.
Why is My Sourdough Bread not Rising?
You might find yourself running into a few problems with sourdough bread, including flatness and burnt bottom. I myself came across this problem when making my wild garlic sourdough breads.
Here are some reasons why the bread doesn’t rise as beautifully as the ones that do on your favorite baking channel.
Problem With The Starter
Of the many reasons why your sourdough bread didn’t rise could be due to your starter not being ripe.
When you first guard a sourdough starter you’ll want to get backing as soon as you see the bubbles. Often this is not an issue, but its activity won’t match that of which has been carefully looked after for many years.
Apart from the starter being too young, there are other elements to consider, though these won’t prevent the bread from rising entirely, they will lower its activity, which can slow things down and have you give up.
These reasons might include:
Starter Was Fed a New Flour
Flour introduces bacteria to a starters ecosystem. Changing the flour to rye will improve the organic activity in the starter, but the starter is likely to disintegrate at the start.
The change of bacteria upsets the balance of the starter, and some enzymes might be in too high quantities and others too low. Expect the starter to spend the next three days adjusting to the new type of flour.
Starter Is Starving
If the starter repeatedly reaches its peak, and drops before it has been fed, then its going to be less effective. Depending on how long and how regularly the starter is left to its own devices, it will likely need to be regularly refreshed for a couple of days to revive it. If it has been days since it’s peaked, you’ll find yourself struggling to make a decent loaf, but if its a matter of a couple of hours you’ll be perfectly fine.
Starter Was Taken From The Fridge
Having your starter remain refrigerated is a great way to postpone its activity to an almost exhausted state. Yet asking something that is dormant to suddenly begin raising the dough is a little too much of an ask. Bread can be made from a starter that’s been forgotten in the fridge, just expect the results to appear after a little longer.
Cold Bacteria
Bacteria thrive in warmth. The ideal temperature band of bacteria and enzymes in bread dough ranges between 77 to 98 degrees Fahrenheit. Some of you bakers might be tempted to use a fridge rise in your sourdough creation. Involving the coolness of the fridge during first or second rise is a great way to manipulate the flavors, allowing your personal baking schedule to be more manageable.
Using the fridge for sourdough is perfectly fine but the dough should also spend some time above 77 degrees Fahrenheit. If your starter is weak, and the temperature is cold, then expect very little rising.
Proofing sourdough that is below 77 degrees Fahrenheit will rise a lot slower than its supposed to. When the temperature drops to 59 degrees Fahrenheit, chances of the sourdough rising are slim to none. If you find that this might be an issue then you need to warm up your dough.
You might want to use a proofer to control the temperature of your dough. This is a piece of equipment designed to provide a specific temperature and relative humidity conditions, to boost yeast activity of the fermenting dough.
The Yeast Has Died
Mix your starter with water that is over 155F, and it’ll potentially damage the bacteria trapped inside. You won’t actually kill the starter, rather lower its effectiveness. If the dough’s proofing temperature is above 104F, expect it to rise, at a very slow rate.
A Mountain of Salt
Too much salt never worked for anybody, and in this case it slows down the yeasts activity, by locking away its water supply through osmosis.
Adding too much salt will slow fermentation, however blaming salt for the inability of the sourdough rising, is quite unlikely.
Too Much Sugar
Much like salt, sugar diverts water from the yeast to soak it up itself, slowing down the yeasts ability to respire, consequently preventing the dough from rising.
If you want your sourdough to adopt a touch of sweetness then you should:
- Increase the amount of starter used
- Delay adding the sugar, until it has reached the development stage (near the end of mixing or midway through bulk fermentation)
- Switch to a liquid form of sugar so that it can be easily incorporated when added later on.
Too Much Fat
Adding fat and sugar to the dough slackens the gluten structure making it more challenging to entrap air. While this won’t be the sole cause of the dough not rising, it still remains a contributor. The amount of fat added would have to be considerable for it to have ruined the dough’s ability to rise entirely.

Your Water Might Be The Culprit
Not to sound too much like a bad workman blaming his tools when things go wrong, but I stand by my statement. Most of the time water might not be the issue, but there are exceptions. In some areas tap water will prevent activity in your sourdough. Especially if your water is heavily chlorinated, or you use a reverse osmosis water filter, you’ll need to take extra measures of precaution while making the bread.
Using Heavily Chlorinated Water
If your tap water has lots of chlorine in it, fill a jug with water and let it sit on the kitchen counter for 10 minutes before measuring. This will allow the chlorine to evaporate so you can use it to make bread. You might also prefer using a water filter, but the chances of this working are quite slim.
Is Hard Water the Problem?
If you live in a hard water then you have the perfect water for making bread. The extra minerals evident in hard water provide food and activity to bacteria in the starter. So bread made with hard water will rise quicker than soft water, so using a filter isn’t recommended for sourdough bread.
Hard Dough
If you don’t cover your dough, it will most likely dry out. Moisture is eliminated from the crust area of the bread and forms a skin. Once the skin dries, it’ll become so thick and heavy that it’ll prevent the dough from rising, which will result in huge welts while it bakes in the oven.
Why Are The Bottom Of My Loaves Burned?
Another common challenge found amongst sourdough home bakers is figuring out what works best for your oven.
For instance, you might think that your oven is set at the correct temperature to bake, when in reality the oven is actually way hotter than you think. Try using an oven thermometer to rule out that variable.
If your baking vessel is close to the heat source, it will burn the bread. Move the oven rack up as high as you can, while allowing the baking vessel to fit. Try placing a cookie sheet or pizza stone on the rack just below where your baking vessel will be placed. Preheat the oven with it inside, as this might help deflect the direct heat, allowing it to spread more evenly.
Another option is to try spreading cornmeal along the bottom of your baking vessel, then place a parchment paper over it. This will help keep the dough lifted off the bottom of the pan, though some people complain that it burns and releases an unpleasant smell.
Having a convection oven may work in your favour. Try reducing the temperature by 25F. For instance, if you normally preheat your oven to 475F and bake at 450F, then just preheat to 450F and bake at 425F. During the final moments keep a close eye on your bread, especially the first few times you use a convection oven, until you have mastered it.
What is Sourdough?
Essentially, sourdough is slow-fermented bread. It’s very unique because it does not require commercial yeast in order to rise.
Instead, sourdough bread is made with live, fermented culture – a sourdough starter – which acts as a natural leavening agent.
Sourdough is known for its distinct tangy flavor, chewy texture, and crisp, crackly crust.
The naturally occurring acids and long fermentation help break down the gluten, making it more digestible and easy for the body to absorb. And it’s undeniably delectable.
What is Sourdough Starter?
Sourdough starter is a live fermented culture of fresh flour and water. Once combined, the culture begins to ferment pursuing the natural yeasts found in our environment. A small portion is added to your bread dough, making it rise.
What’s So Great About Sourdough Bread?
Sourdough bread is one of the most nutritious breads you can find, packed with prebiotics that our bellies will surely appreciate. Essentially it is pre-digested by the millions of microbes in the starter, and many people who are gluten-sensitive are able to eat sourdough without any digestive issues.
Sourdough bread is made with wild yeasts and bacteria, the three main ingredients consisting of flour, water, and salt, coming together in harmony and raising the bread beautifully.
Why So Many Flours?
The many options and varieties of flours can be quite overwhelming, but here’s what you’ll need to know:
- White flour is either all-purpose flour or bread flour. It’s been highly processed and has had much of it’s nutrition removed. These two types have slightly different levels of protein.
- Whole wheat flour is less processed and so has high fiber and nutrition content. White whole wheat flour is not a blend of both, rather a whole wheat flour made from a specific type of wheat.
For making sourdough bread, all you need is whole wheat flour and white flour, either all-purpose or bread flour.
As a baker who has only just begun their baking, don’t target your stress at the type of flour you’re using. Once you begin to familiarize yourself with the types you grow accustomed to using, you can start experimenting with different types and brands.
The Role of Hydration in Sourdough Rising
When it comes to crafting the perfect sourdough loaf, hydration is a key player in the game. The hydration level of your dough, which is the ratio of water to flour by weight, can make or break your bread’s ability to rise. Too little water, and your dough may be dense and tight, struggling to expand. Too much water, and your dough might become a sticky, unmanageable mess.
So, what’s the sweet spot for hydration? Well, it depends on the type of flour you’re using. Different flours have varying protein contents and absorption capacities, which means they require different amounts of water to achieve the ideal dough consistency.
For example, bread flour, which is higher in protein, can handle higher hydration levels than all-purpose flour. A good starting point for bread flour sourdough is around 70-75% hydration, meaning for every 100 grams of flour, you’d add 70-75 grams of water. All-purpose flour, on the other hand, may work better with a slightly lower hydration level, around 65-70%.
Mastering the Moisture Balance
Getting the hydration level right is all about finding the balance between a dough that’s moist enough to rise well, but not so wet that it’s unworkable. A properly hydrated dough should feel tacky to the touch, but not overly sticky. It should have a smooth, elastic texture that holds its shape when stretched.
If your dough feels too dry and tough, it may not have enough water to support a good rise. In this case, you can try gradually adding small amounts of water until you reach the desired consistency. On the flip side, if your dough is excessively sticky and hard to handle, it may be over-hydrated. To fix this, you can gently fold in a bit more flour until the dough becomes more manageable.
Hydration Hacks for Better Rising
In addition to finding the right hydration percentage for your flour, there are a few other moisture-related tricks that can help boost your sourdough’s rising power:
- Autolyse: This technique involves mixing the flour and water together before adding the starter and salt. Letting this mixture rest for 20-30 minutes allows the flour to fully absorb the water, which can lead to better gluten development and a more extensible dough.
- Stretch and folds: During the bulk fermentation stage, performing a series of gentle stretches and folds can help strengthen the gluten network and distribute the moisture evenly throughout the dough. This can result in a more open, airy crumb structure.
- Dough consistency: Pay attention to how your dough feels at each stage of the process. Adjust the hydration level as needed to maintain a soft, supple dough that’s easy to work with and capable of rising well.
How To Make Sourdough Bread
Start by mixing the dough, and whisking the following ingredients in a large bowl:
- 250g water
- 150g bubbly, sourdough starter
- 2.5g olive oil
- 500g bread flour
- 10g fine sea salt
Squish the mixture together using your hands, until the flour is fully absorbed. The dough will feel dry, rough, and shaggy.
Cover the bowl with a plastic wrap, reusable wax wrap, or a very damp kitchen towel, and let rest or autolyze for about 30 minutes.
After the dough has had its rest, work it into a ball directly in the bowl.
What Does Autolyze Mean?
This is the first resting period, right after you mix the dough. This jumpstarts gluten development without kneading. Strong gluten means that you’ll have good bread.
Autolyze can range anywhere from 15 minutes to 1 hour or more depending on the type of bread you’re making and your baking schedule. Letting it sit for an hour will make the soft more manageable to work with afterwards.
Some bakers might prefer to add salt only after autolyse because it might slow down the gluten development.
Now that the dough is ready to rise, cover the bowl and let it start to rise at room temperature, at about 68-70 °F.
How Long Will The Dough Take?
You’ll notice that the dough is ready when it has doubled in size, and no longer looks impenetrable. This can take anywhere from 3 to 12 hours depending on the room temperature, the potency of your sourdough starter and the specifics of your surrounding environment.
For instance, in the summer the sourdough can take anywhere between 2-4 hours at 85 °F. In the winter, it will take about 10-12 hours at 68 °F. You can tell that temperature has time in its grips.
Also remember that sourdough bread does not contain rapid-rise yeast, and it will take longer to rise.
Stretching and Folding
About 30 minutes into the bulk rise, you’ll have the option to perform a series of stretches and folds, to strengthen the bread dough. Although this step is not exactly mandatory, this technique will add height and structure to the finished loaf, and it’s quite fun to do.
Divide and Shape the Dough
Remove the dough onto a lightly floured surface, then cut the dough in half to make 2 loaves, or leave it whole for a single loaf.
Starting at the top, fold the dough over towards the centre, give it a slight turn, and then fold over the next section of dough.
Choose a Baking Pot
You could bake your sourdough bread in a Dutch oven, this acts as a vessel and traps both heat and moisture which is essential to achieving artisan-style bread at home. Steam plays an essential role in how the bread will open up or bloom while baking, and the Dutch oven helps to control the process. You can use any oven-safe pot that can heat up to 450 °F including the lid and handles.
After shaping the dough, it needs to rise again. Generously coat the bottom of your Dutch oven with cornmeal, or line the bottom with non-stick parchment paper, and place the dough inside. The dough is ready when its puffy and no longer dense. It doesn’t need to double in size. Preheat your oven to 450F during the end of the second rise.
After the second rise, and right before the dough goes into the oven, make a slash about 2 to 3 inches long down the centre of the dough. This will allow the steam to escape and for the dough to expand during baking.
Baking The Sourdough Bread
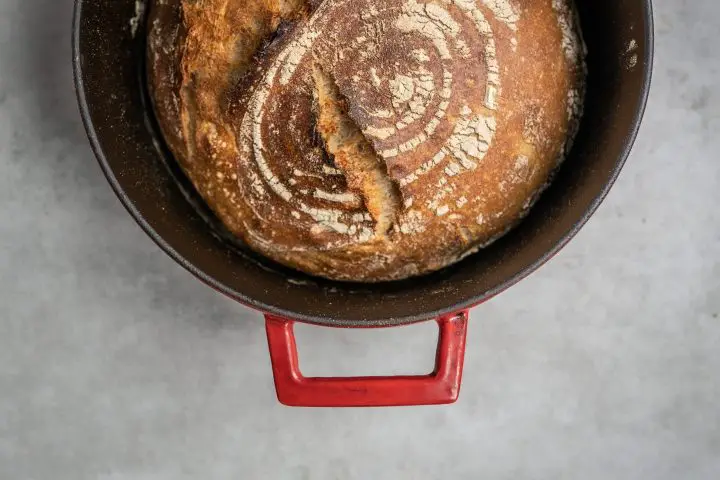
Place the lid on top of the pot and reduce the oven temperature to 400 °F. Bake the sourdough bread on the center rack for 20 minutes. When 20 minutes is over, remove the lid, your bread will be pale and shiny. Continue to bake the bread – uncovered – for another 40 minutes or until it’s a deep golden brown.
The internal temperature should be 205-210 °F. Cool this on a wire rack for at least 1 hour before slicing. If you cut it too soon the texture will be gummy, so remain patient! During the last 10 minutes of baking crack open the oven door, and watch the moisture escape into the atmosphere, leaving your sourdough with a crisp crust.
The Difference Between Sourdough and Regular Bread
Sourdough bread is leavened by wild yeast, and bacteria while regular bread is leavened by commercially cultivated yeast.
All breads prefer a leavening agent, which is a healthy population of microbes that undergoes fermentation to transform the starches in the bread into alcohol and carbon dioxide gasses. The leavening and fermentation process is quite vital in order for the bread to rise, and for the crumb and crust to set.
The leavening agent of a sourdough bread is called a sourdough starter, which consists of only wild yeast and bacteria found naturally in the flour, and there is no elements of commercially cultivated yeast added into the sourdough starter.
Regular bread however, consists of some wild yeast and bacteria, yet its ultimate leavening ability is obtained from the commercially cultivated yeast that was added to the dough.
Sourdough bread is made with pre-ferment while regular bread is not made using a pre-ferment. Sourdough breads are leavened by the sourdough starter, which has been abandoned to ferment separately for 4 to 8 hours prior to being incorporated into the final dough mix, allowing the population of the wild yeast and bacteria in the sourdough starter to strengthen in quantity before it is used in the bake.
Regular breads are leavened using commercially grown yeast, and they don’t require strengthening prior to baking, which is why the packaged yeast is toppled straight into the final dough mix and fermentation begins. All the flour used in the bake has experienced fermentation only once.
Does Sourdough Starter Have Yeast?
Sourdough starter contains wild yeast, but not commercially grown yeast. The wild yeast in sourdough starter originated from the flour that is used in the feedings, without additional packaged yeast being added to a sourdough starter.
Breads leavened with sourdough starter is much better than breads that are leavened with commercial yeast, due to the presence of matured acid producing bacteria in sourdough starters.
Can I Add Yeast to Sourdough that Doesn’t Rise?
By adding yeast to the sourdough’s dough that didn’t side, will effectively produce a well risen dough, if its given sufficient time for fermentation, so that the newly added yeast can strengthen its numbers. The dough is now no longer traditionally sourdough as commercial yeast had been introduced to the dough. In the end, the baked loaf will taste more like normal bread rather than its welcoming tangy flavors.
What To Eat With Sourdough Bread?
A perfectly risen sourdough bread, is enough to make your entire week. What can you do with that perfect loaf of tangy bread? Well you can get creative, and use the crusty rigidness of the sourdough bread to your advantage. Create snacks, or meals that’ll have you licking your fingers in sheer appreciation.
Sourdough bread is one of the healthiest bread, containing high levels of antioxidants than other types of bread. Wondering what to have with this super crusty bread? Well worry no more, because here are a variety of excellent recipes for you to choose from:
- Mango Toast
- Salad
- Tomato Toast
- Bread Bowl Sandwich
- Baked Crab Dip
Mango Toast
Sweet and savory fruit slapped on some lightly toasted sourdough is the new avocado toast. Eat this for breakfast, or a midday snack, when you’re craving that unique sourdough twang.
Ingredients
- 1 cup blanched hazelnuts
- 1 cup raw pumpkin seeds
- kosher salt
- 1/4 cup freeze-dried blueberries
- 2 teaspoons mild red pepper flakes
- 4 slices sourdough bread, toasted
- 2 tablespoons extra-virgin olive oil
- 2 large ripe mangoes, peeled and sliced
- Honey
- Flaky sea salt
Method
- Preheat the oven to 300 degrees, lay your hazelnuts onto a baking tray lined with a baking sheet, and toast the hazelnuts, tossing once, until they’re golden brown.
- Meanwhile, toast the pumpkin seeds on a separate baking sheet, tossing them once, until they’ve started to develop some brown spots, releasing a pleasant fragrance.
- Let the hazelnuts and pumpkin seeds cool down. Puree them in a food processor until it turns into a smooth paste. This will take some patience, and you’ll find yourself scraping the sides of the food processor a few times. Taste and season the hazelnut pumpkin seed butter with kosher salt.
- Finely grind the blueberries, red pepper flakes, and a pinch of kosher salt in a mortar and pestle. Drizzle the toast with 2 tablespoons of oil and spread 2 tablespoons of hazelnut-pumpkin seed butter over each of them.
- Top them with slices of mango, drizzle with honey and oil. Sprinkle with blueberry-red pepper mixture and sea salt.

Salad
Whether this is a breakfast salad, or a late evening treat, you will simply adore the ingredients placed in this tantalizing salad. Eggs paired with tangy sourdough toast, with a quick-pickled veg and marinated feta, makes for a colorful mess, that you’ll most certainly adore.
Ingredients
- 4 large eggs
- 1 tsp salt
- 1 tsp sugar
- 1 tsp ground turmeric
- 2 tbsp unseasoned rice vinegar
- 2 cups chopped cucumbers, radishes, and celery
- 1/4 sweet onion, thinly sliced
- 8 oz. feta, cut into thick slices
- 1/4 cup extra-virgin oil
- 4 slices sourdough bread, toasted and cooled
- 8 cups torn lettuce leaves
Method
- Lower the eggs into a medium saucepan of salted boiled water, and let the eggs cook for 6 and a half minutes. Transfer the eggs into a bowl of ice water, then peel and set aside.
- Meanwhile, whisk the sugar, turmeric, 1/2 cup of vinegar, 1tsp salt, and 1/2 cup of water into a medium bowl. Add vegetables and sweet onion and let it sit until they’re slightly softened and pickled (preferably for an hour)
- Place the feta in a small bowl and drizzle with 1/4 cup oil and the remaining 2 tbsp vinegar. Let it sit for 5 minutes.
- Drizzle the toast with oil, and rip it into large pieces, placing the pieces into a large bowl filled with lettuce.
- Drain the pickled vegetables and add them to the mix. Drizzle marinating liquid from the feta all over, and season with salt. Then toss well.
- Slice the boiled eggs into quarters, topping the salad with them. Add marinated feta and sprinkle with sumac.

Tomato Toast
For this vibrant yet tangy recipe, you’re going to want to have some of your favourite seasonings at the ready, Sprinkle the melted tomatoes with chives, sesame seeds, and flaky salt with fervour.
Ingredients
- 1 garlic clove, finely grated
- 1/2 cup mayo
- salt
- 1/2 lemon
- 4 thick slices of sourdough bread
- 3 medium tomatoes, thinly sliced
- 2 tsp. toasted sesame seeds
- Flaky sea salt
- Freshly ground black pepper
- Aleppo-style pepper
- Extra-virgin olive oil
Method
- Mix garlic and mayonnaise in a small bowl.
- Squeeze about 1 teaspoon of lemon juice into a bowl, and season with kosher salt.
- Spread a generous layer of seasoned mayonnaise over toast, layering some sliced tomatoes on top.
- Sprinkle with chives, sesame seeds, sea salt, black pepper, and Aleppo-style pepper.
- Lastly, grate some lemon zest and give the final a piece of drizzle of oil.

Bread Bowl Sandwich
This fantastic sourdough bread bowl, is perfect for outdoor picnics. Perhaps you’d like to test your cooking skills over a campfire. This recipe is all about layering, essentially a giant turkey sandwich, that’ll satisfy the hunger of a beast!
Ingredients
- 1 round loaf of sourdough bread
- 1/2 cup honey mustard salad dressing
- 4 slices sharp cheddar cheese
- 1/3 pound thinly sliced deli ham
- 4 slices smoked provolone cheese
- 1/3 pound thinly sliced deli smoked turkey
- 1 tbsp butter, melted
Method
- Set the grill on low heat.
- Cut a thin slice off the top of the sourdough bread. Hollow out the bottom of the loaf, leaving a 1/2 inch thick shell.
- Spread the dressing on the inside of a hollowed loaf and under the bread top. Layer the inside of the bread with cheddar, ham, provolone, and turkey. Replace the top.
- Place it on a piece of heavy-duty foil. Brush the loaf with butter, and fold the foil edges over the top, crimping to seal.
- Cook over campfire or grill until it has heated thoroughly. for 25 to 30 minutes.
- Let it rest for 15, before removing the foil, and cutting it into wedges.
Baked Crab Dip
Another sourdough bread bowl recipe for you to try, with its soft chunky contents filled with a scrumptious crab dip. You can even choose to make this dip recipe ahead of time by filling the bread bowl earlier in the day, letting it chill before serving.
Ingredients
- 8 oz. cream cheese softened
- 2 cups sour cream
- 6 ounces of crab meat, drained, flaked and cartridge removed
- 2 cups shredded cheese
- 4 green onions thinly sliced
- Round loaf, unsliced
- Assorted fresh vegetables, crackers, and toasted bread cubes
Method
- In a large bowl, beat the cream cheese until you achieve a smooth creamy texture. Fold in the crab, cheese and onions.
- Cut the top of the loaf of bread, then carefully hollow out the bottoms leaving 1 inch shells. Spoon the crab mixture into the bread bowl.
- Place the bread bowl on a baking sheet, then place the bread cubes in a single layer around the bowl.
- Bake uncovered at 350 degrees until the deep has significantly heated through.
- Garnish with green onions and serve with assorted vegetables, crackers or toasted bread cubes.

Peaked Sourdough
Struggling with your sourdough rising, try going through every possibility in the steps you’ve taken in making the sourdough, eliminating them one by one, before calling in professional help! Naturally the starter could be the initial problem, moving on to the next step without seeing bubbles forming, can be a cause for concern. Make sure your temperature is correct, so that your bacteria can go comfortably.
And remember to enjoy!
Trying and practicing is key to developing sourdough baking skills. Here are some recipes I suggest you try: Pesto Sourdough Bread, 100% Whole Grain Einkorn Sourdough Bread.
FAQs
What Do You Do When Sourdough Doesn’t Rise?
If you find that the sourdough bread hasn’t risen much during baking, it could be because a weak sourdough starter was used, the dough wasn’t shaped properly, or steam wasn’t utilised.
How Can I Make My Sourdough Rise More?
Crank up the temperature to as high as you can get the oven to go, making sure that the oven has preheated for long enough. This will nudge the bread into bursting open, achieving a high rise. Using a baking stone increases the temperature of your oven.
Why Is My Sourdough Flat and Dense?
Dense sourdough happens when a weak starter is used. An un-ripe starter doesn’t contain enough lactic acid, bacteria and yeast cells t produce the gas required to raise the loaf.
How Long Does Sourdough Take To Rise?
Your sourdough starter essentially will start to peak between 4 to 12 hours of feeding.


![Batard Sourdough Shaping [Your Ultimate Guide] 125 Batard sourdough shaping [the ultimate guide]](https://www.mydailysourdoughbread.com/wp-content/uploads/2022/12/CD-blog-images-2023-01-05T184157.343-120x120.jpg)


![How To Cold Proof Sourdough [Your Easy Guide] 128 How to cold proof sourdough [your easy guide]](https://www.mydailysourdoughbread.com/wp-content/uploads/2023/01/blog-images-40-120x120.jpg)
