Leaving your starter to fend for itself during the first few days might not always be the smartest of ideas. We get it, a sourdough starter needs its alone time, but that does not eliminate its need to be checked on every now and then. A common problem many bakers find themselves facing is an inconsistent starter. If you’re wondering why your starter is watery or runny, and how to obtain the best sourdough starter consistency, then you should know that the solutions to these minor setbacks are quite simple. So stick around, you might need them!
Table of Contents
- What is Sourdough?
- What is a Sourdough Starter?
- How to Make Sourdough Starter?
- Things That’ll Kill Your Sourdough Starter
- What is the Ideal Consistency for Sourdough Starter?
- How Can I tell that my Sourdough Starter is Healthy?
- What Affects the Consistency of a Sourdough Starter?
- How to Fix a Watery Sourdough Starter?
- Can You Use a Runny Sourdough Starter?
- When is my Starter Ready to Bake With?
- What Makes My Sourdough Starter Good?
- Sourdough Starter Consistency: Not Too Watery!
- FAQs
Best Sourdough Starter Recipe
Learning how to make a sourdough starter step by step is great for those who wish to make sourdough bread often. After feeding the starter for five days, you can use it to make a tangy sourdough loaf.
- Total Time: 72 hrs
Ingredients
- 8–10 tbsp Doves Farm Organic Wholemeal Spelt Flour
- 8–10 tbsp tepid water
Instructions
- On the first day, put one tablespoon of flour and one tablespoon of water into a 500ml glass bottle and mix them together.
- Wet a clean tea towel, squeeze out the water and lay it over the bowl, leaving it in a warm place for about 12 hours.
- After the 12 hours are over, add another tablespoon of flour and another of water, mix them together and cover with a damp tea towel, leaving it for another 12 hours.
- On day two, or 24 hours after beginning your starter, stir in a third tablespoon of flour with a third spoon of water, stirring to mix then cover it again with the damp tea towel and leave it in a warm place for 12 hours.
- For the second feed of day two, add a tablespoon of flour, and another with water, stir to mix then cover with a damp tea towel leaving it in a warm place for another 12 hours.
- On the first feed of day three increase the feed by adding two tablespoons of flour and two of water then stir to mix. Re-dampen the tea towel if needed, cover the bowl and let it sit in a warm place for 12 hours.
- On the second feed of day three, add two tablespoons of flour and another two of water. Combine and leave it to rest for 12 hours.
- At this point your starter should become bubbly and ready to create your ferment. If the starter hasn’t started to show bubbles yet, don’t panic. Repeat the 12-hour flour and water feeding routine, ensuring that the starter is constantly kept in a warm place.
- Prep Time: 72 hrs
What is Sourdough?
Sourdough, simply put, is leavened bread, that doesn’t manipulate commercial yeast to rise. Instead it uses a starter, which is a fermented flour and watery mixture, containing wild yeast and good bacteria to rise. This is what produces its heavily appreciated tangy flavors and slightly chewy texture that you’d have found when eating sourdough bread.
Wild yeast packs lots more flavors than commercial yeast, and doesn’t contain any additives.
What is a Sourdough Starter?
A sourdough starter is a combination of flour and water that hosts a stable blend of non-harmful bacteria and wild yeasts. This mixture is continually maintained with regular refreshments or feedings, which is used to expand and provide flavors to brand new dough.
The starter is the key element in achieving a successful sourdough bake.
What do I Need to Make a Sourdough Starter?
You’ll only need two ingredients and a vessel that can handle all the magic during the process, but its probably best to stick to glass.
You’ll need whole wheat flour or rye, and some water, followed by a glass starter container (without the lid) that’ll allow enough room for growth and feeding. Your sourdough starter should be fed consistently with equal parts flour (unbleached) and water. You can use a combination of grain-based flours to feed your sourdough starter.
How to Make Sourdough Starter?
Learning how to make a sourdough starter step by step is great for those who wish to make sourdough bread often. After feeding the starter for five days, you can use it to make a tangy sourdough loaf.
Ingredients
- 8-10 tbsp Doves Farm Organic Wholemeal Spelt Flour
- 8-10 tbsp tepid water
Method
- On the first day, put one tablespoon of flour and one tablespoon of water into a 500ml glass bottle and mix them together.
- Wet a clean tea towel, squeeze out the water and lay it over the bowl, leaving it in a warm place for about 12 hours.
- After the 12 hours are over, add another tablespoon of flour and another of water, mix them together and cover with a damp tea towel, leaving it for another 12 hours.
- On day two, or 24 hours after beginning your starter, stir in a third tablespoon of flour with a third spoon of water, stirring to mix then cover it again with the damp tea towel and leave it in a warm place for 12 hours.
- For the second feed of day two, add a tablespoon of flour, and another with water, stir to mix then cover with a damp tea towel leaving it in a warm place for another 12 hours.
- On the first feed of day three increase the feed by adding two tablespoons of flour and two of water then stir to mix. Re-dampen the tea towel if needed, cover the bowl and let it sit in a warm place for 12 hours.
- On the second feed of day three, add two tablespoons of flour and another two of water. Combine and leave it to rest for 12 hours.
- At this point your starter should become bubbly and ready to create your ferment. If the starter hasn’t started to show bubbles yet, don’t panic. Repeat the 12-hour flour and water feeding routine, ensuring that the starter is constantly kept in a warm place.
Things That’ll Kill Your Sourdough Starter
If you allow your sourdough starter to ferment in the oven with the light on, to keep it warm, forgetting that you had put it in there, and then turning on the oven, it’s pretty impossible for your sourdough starter to even be considered as alive. Yeast dies at 140 °F, and your sourdough starter is more than likely to suffer at temperatures lower than that. You’re better off maintaining your starter at comfortable room temperature (70 °F). Although a little higher or lower wouldn’t hurt.
If you neglect your starter for longer than usual, it will start to get invaded by bacteria. These are usually highlighted through the build up of mold appearing in various colors with a typical fuzzy appearance. Bad bacteria is generally recognized by an orange or pink tinge. Once your starter has lots its ability to chase off the bad guys, its time to start over.
How Do I Know if My Starter has Gone Bad?
Once your sourdough starter has begun to deteriorate you’ll find a liquid collecting at the top of your starter. This is called “hooch” and although this doesn’t always necessarily mean that your starter is in danger, it would most likely indicate that your starter is hungry and needs to be fed.
However when your starter has been neglected for an extended period, the hooch tends to transform from clear to dark-colored. Lots of bakers tend to panic when finding brown, black or grey splotches of hooch in their sourdough starter, with none of these transparently indicating that your starter has spoiled.
Nonetheless, when you find a pink or orange streak, this is an affirmed sign that your sourdough starter has gone bad. It should be thrown away and you should start over.
What is the Ideal Consistency for Sourdough Starter?
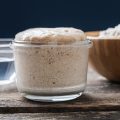
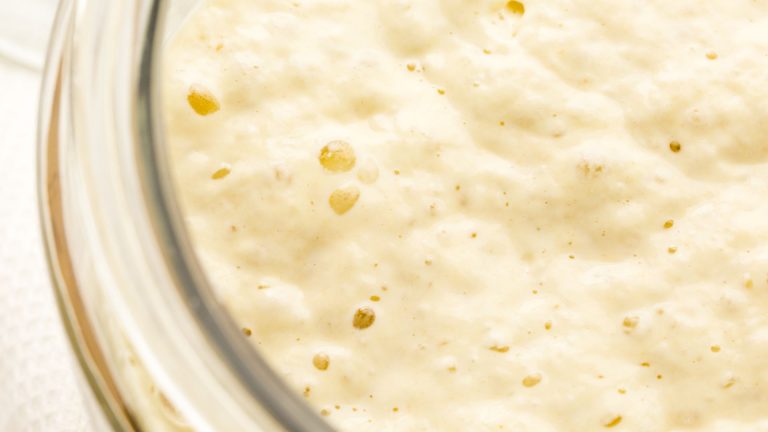
Ideally, the sourdough starter should be identical to the consistency of warm peanut butter. When it’s just been fed, it should be thick. It’s normally okay if it appears to be dry. As the starter ferments, it will absorb the flour and start to thin out a little. When it’s reached its peak it should be thick, airy, and mousse-like. If your sourdough is runny or watery, you might have to switch a couple of things to make it a little bit thicker.
Why is Watery Starter a Problem?
The problem with a runny or watery starter is that it may not achieve what it’s supposed to. In truth, it’ll only be problematic, and excessive water in your sourdough starter will mean that your starter isn’t performing properly. You’ll notice that your sourdough starter is releasing an unpleasant smell identical to acetone, or nail polish remover. There’ll be too many bubbles in the sourdough starter. More than expected produces hooch very often, and seems like it’s separating. It could also develop mold, and this would result in it being thrown away immediately.
How Can I tell that my Sourdough Starter is Healthy?
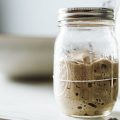
Knowing that your sourdough starter is fermenting healthily, will help eliminate the worrisome fears that have begun to seep in. A well maintained and ripe sourdough starter will double in size in around 3 to 8 hours. It’ll have plenty of small and large bubbles running through, with no froth to be seen. It would also release pleasant smells.
What Affects the Consistency of a Sourdough Starter?
The ability of different flours absorbing water varies. Some flours might appear less absorbent at first, but can simply be slower to absorb. What started off as a sloppy mess, can transform into the perfect consistency in just a few minutes!
The quality of sourdough starter relies heavily on the flour used to make it. The basic principles of selecting a flour for a starter include:
- The Amount of Protein in the Flour
- The Bran Content in the Flour
The Amount of Protein in the Flour
Protein is the most effective water absorber in flour. Moist protein transforms into gluten strands, which is responsible for preserving the gas produced by organic bacteria. Primarily these are natural yeasts and lactic acid bacteria. If you use high protein bread flour in a starter recipe that requires all-purpose flour, then the starter will appear dry and thick. Increasing the water content can fix this.
The Bran Content in the Flour
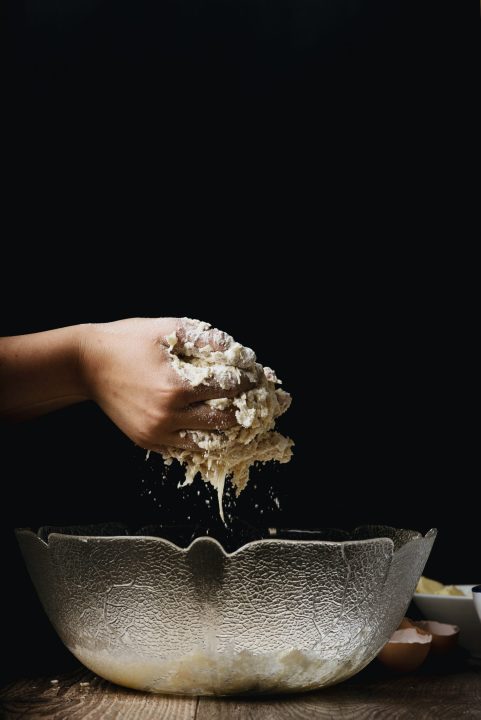
Bran is evident in wholemeal flour and other dark grains like dark rye and brown spelt. Noticeably these flours take longer to absorb water, and generally need more water. This is mainly due to the fact that bran absorbs lots of water, but requires more time to achieve this.
How to Fix a Watery Sourdough Starter?
Here are some troubleshooting tips, for those facing problems with their sourdough starter. Take notes:
- Sourdough Starter Feeding Ratio
- Weigh Ingredients by Weight
- Check the Temperature
- Change your Flour
- Feed Starter more Regularly
Sourdough Starter Feeding Ratio
The ratio you feed your sourdough starter can affect its consistency. It’s best to feed your starter 1:1:1, meaning that if you has 50g of starter, you’d feed it 50g of flour and 50g of water.
With this method, you can use any amount of starter, and feed it the same amount of flour and water. You could use 125g of starter and feed with 125g of flour and 125g of water.
If your starter is too runny you might have to increase the ratio. A ratio of 1:2:2 can work, essentially you’d double the flour and water. Alternatively, if your starter is very runny, a 1:2:1 ratio could be used.
This would translate that 50g of starter would acquire 100g flour, and 50g of water. At first you’ll find this quite stiff to mix, but it will gradually thin a little as it ferments. It might need a good stir around 1 hour after feeding so that all the flour has dissolved successfully.
Weigh Ingredients by Weight
Weighing the ingredients for your sourdough starter by weight is very important. If you’re using cups or spoons to measure the ingredients, you will risk having a watery sourdough starter that doesn’t rise. This is because measuring by volume is not accurate and will mean that you are not following a 1:1:1 ratio.
Check the Temperature
Temperature is a key element in the fermentation and growth of your sourdough starter. When the temperature is too cold the starter won’t rise. And when too warm your sourdough starter will absorb the flour and water provided instantly. This will mean that your starter will become runny and watery.
If it’s really warm, and the starter hasn’t been fed enough it can develop a hooch. Essentially you should keep your starter at a constant temperature like 24C to 28C. If this doesn’t always provide the results you’re looking to achieve, then you can artificially create a constant temperature for your sourdough starter using a bread proofer or even a yoghurt warmer.
Change your Flour
The type of flour you choose will heavily impact your starter. White flour (all purpose or bread) is perfectly fine for making a sourdough starter as long as it’s unbleached. However white flour does not absorb as much water as wholegrain or rye flour. Meaning that if you were to use all purpose or bread flour for your starter you might have to use slightly less water. Not every time, but it makes a difference.
If you’re having ongoing issues with your runny sourdough starter, adding some wholegrain flour like rye or whole wheat could be a better solution. You could try to use 50% and 50% rye for instance, or try feeding rye for a few days to assess the difference.
Feed Starter more Regularly
If you’re leaving your starter unfed for longer periods – 24 hours – it could become more runny than it should. If your starter is left on the counter, it needs to be fed every 12 hours. This will reduce its hunger, preventing it from developing hooch, which plays a part in making it more runny than normal.
If you notice that your starter is stiff at the start, then this is perfectly normal. It’ll gradually become thinner as it ferments.
Can You Use a Runny Sourdough Starter?
While it’s better for a sourdough starter to have a thicker consistency, you can still use a thinner starter. As long as it is being fed regularly without any recurring problems (as mentioned above) you can definitely use it to make sourdough. If you’re using a thinner starter, it’s probably best to reduce the water content in the recipe to restrain the extra liquid in the starter.
If you don’t reduce the liquid in the recipe you will end up with a much higher hydration dough. This implies that it will ferment faster and be at a risk of over fermenting and become impossible to shape. You’ll risk ending up with wet, sticky dough.
When is my Starter Ready to Bake With?
It’s best to use the starter when it’s reached its peak or when its doubled in size, during the rising and falling stages of growth. Wondering whether your starter is ready to use? Just mix your starter, distributing the bubbles evenly, then drop a spoonful of starter into a bowl of water. If the starter floats, it’s ready to go. But if it drops to the bottom, allow it to rest for a few hours longer.
What Makes My Sourdough Starter Good?
- Consistently feeding the starter at the same time everyday, twice a day will ensure perfected starter growth.
- Control the temperature of the environment and the water for feeding. A moderate 80F is optimal.
- Persistence is a great way to get a strong starter fit for baking bread
- A good starter should smell sweet, with a slightly sour or yeasty scent.
- When you’re about to make the bread, use the starter when it’s physically reached its peak level of rising with lots of bubbles seemingly attempting to topple over its surface.
- Place a rubber band or a piece of masking tape around the glass jar to measure the starters growth as it rises.
Sourdough Starter Consistency: Not Too Watery!
There are a few factors that could hold you back from achieving that perfectly non-watery and consistent sourdough starter. Making minor adjustments to the flour and water can impact the overall consistency of the starter, followed by the temperature and flour you plan to use. Trial and error is the way forward, don’t be afraid to experiment before becoming the expert baker.
If you want a beginner guide sourdough to make sourdough bread for beginners, I’ve got that on my blog!
FAQs
What Consistency Should Sourdough Starter?
Ideally, sourdough starter should manipulate the consistency similar to warm peanut butter. When it’s just been fed it should be quite thick, with no need to panic if it seems a little dry.
What Should my Sourdough Starter Look Like?
Your sourdough starter should appear very bubbly and slightly foamy at the surface. The scent is just as important as its appearance. It should release a pleasant yet acidic aroma which will bring forth the tangy flavor of the sourdough bread.
Is Sourdough Starter Supposed to be Sticky?
Sticky sourdough isn’t really ideal to work with, but it is completely normal, and something that’ll need getting used to if you’re planning to eventually make great loaves of sourdough bread.

