These sourdough glazed donuts will have you desperately looking up more sweet sourdough recipes to cure your newfound compulsion for sweet sourdough bread!
The snow on the roof window has finally melted and it was time to dip my hands into the dough again. I didn’t have to think for too long what my next challenge would be – sourdough doughnuts. There was a carnival this weekend in Slovenia and although I didn’t get dressed in any mask to scare the winter, I was in the carnival mode with my sourdough doughnuts. Fair enough.
I haven’t fried anything in my life yet, let alone doughnuts, so I decided to make them only this time – you know, to have an experience – but after trying them, my decision was long forgotten…Next week, I am making them again, they were so incredibly fluffy! I googled doughnuts and I was quite surprised by the variety of doughnuts around the world, so I just might try something different.

Table of Contents
PrintFluffy Sourdough Doughnuts
- Yield: 25 small doughnuts 1x
Ingredients
- 250 g active white wheat flour sourdough starter
- 310 g white wheat flour
- 3 egg yolks
- 1 tablespoon rum
- 3 tablespoons honey
- a pinch of vanilla
- 1/2 teaspoon of lemon juice + zest of one lemon
- 3 tablespoons of melted butter
- 100 g warm milk or water
- coconut oil for frying
- 1 70% cacao chocolate
- ground hazelnuts, desiccated coconut and lemon zest for sprinkle
Instructions
- In the morning, prepare two bowls. In one, first beat 3 egg yolks then add rum, honey, vanilla, lemon juice, lemon zest and melted butter. In the second bowl, first mix warm milk and 250 g your active white wheat starter from step 1 then add the liquids from the first bowl and 310 g of flour.
- Mix all the ingredients well and starting kneading the dough. If you want to have really airy doughnuts, knead the dough for at least for 10 minutes, 15 is even better. I mixed mine for 15 minutes by hand.
- You will notice that the dough is quite sticky in the beginning, so to handle the dough, you can:
- wet your hands before kneading + repeat wetting few more times
- use slap and fold technique
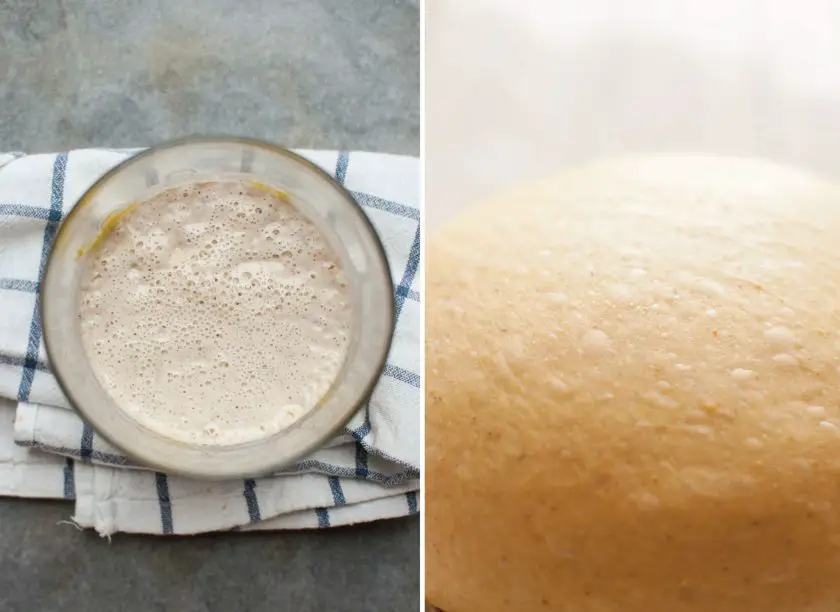
- By the end of the kneading, your dough should be elastic, alive and should have quite a smooth surface. When you shape it into ball, you will also notice small bubbles on the surface.
- Move your dough to a clean and slightly greased bowl and let it rise until doubled in volume. This may take up to 3 to 5 hours, depending on how warm the place where you keep your dough is. For the bowl, I used a cylindrical shape container where I marked the dough height at the beginning so I could know exactly when my dough was ready for shaping. I transferred the container on the bottom of the warm oven – it took the dough 3 hours to rise.
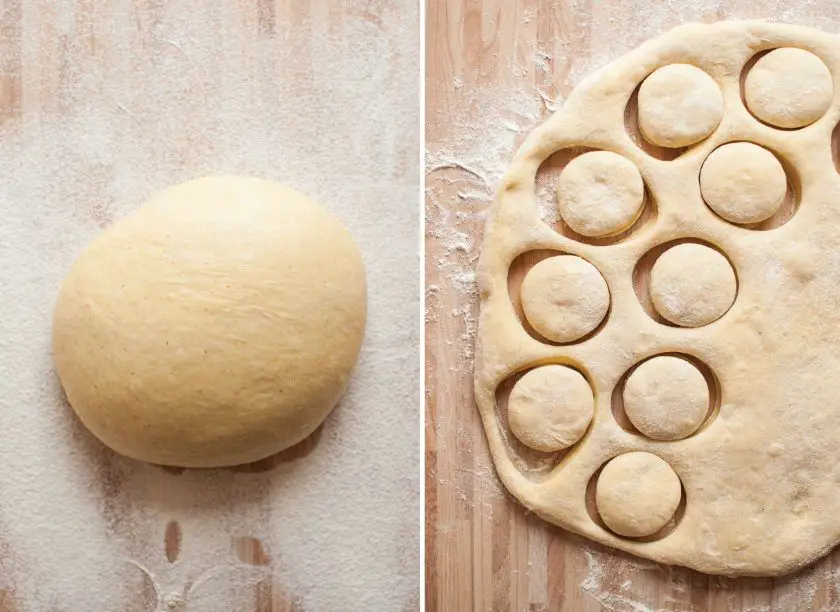
- When the dough has doubled in volume, use your plastic dough scraper to take it out on a non-floured working surface and shape it into a ball (having a bench knife or plastic dough scraper helps). The dough should be very alive and easy to work with.
- Next, take your ball of dough on a slightly floured surface. Stretch it to be approximately 1 cm /half inch thick. Use a round cookie cutter or a glass and cut out the doughnuts. Transfer each of them on a parchment paper. When your cut out a first series of doughnuts, you will be left with some dough which you simply knead one more time and cut the doughnuts again. Try not to knead the dough too long – the more you knead it, the less fluffy the doughnuts will be.
- Cover your doughnuts with a kitchen towel and let them rise for at least 1 (1.5 ) hour, depending on their size – the bigger the doughnut, the longer the resting/rising time. You will know your doughnut is ready, when the indent you make with your finger doesn’t come back quickly. If you let your doughnuts to rise for not enough time, you will find a big hole in the bottom.
- When doughnuts are risen, heat the oil. The height of the oil in the frying pan should be at least the height of three fingers. The oil is ready, when the bubbles appear when putting a handle of a wooden spoon in it.
- Fry each doughnut for 2-3 minutes on one side (with the lid on) and 2-3 minutes on another side (with the lead off). When baked, transfer them onto a plate lined with a napkin.
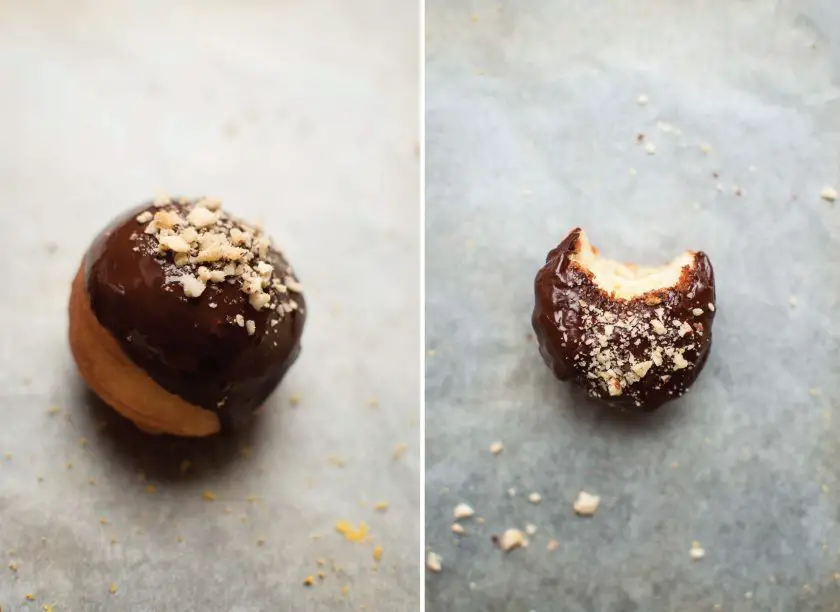
- Leave to cool and then dip each doughnut into melted chocolate. Sprinkle with ground hazelnut, desiccated coconut or lemon zest. You can wait for the chocolate to harden a little bit but I believe the more possible option is to eat them straight away.
Notes
- The dough for these sourdough doughnuts was mixed in the morning, left to rise for 3 hours and the doughnuts were fried in the afternoon of the same day. Sourdough starter was mixed a night before.
Airy and fluffy sourdough doughnuts
Yields
approximately 25 small doughnuts (for 1 hungry and sweet tooth person)
Baking schedule:
The dough for these sourdough doughnuts was mixed in the morning, left to rise for 3 hours and the doughnuts were fried in the afternoon of the same day. Sourdough starter was mixed a night before.

Ingredients:
- 250 g active white wheat flour sourdough starter
- 310 g white wheat flour
- 3 egg yolks
- 1 tablespoon rum
- 3 tablespoons honey (I used acacia honey which has quite neutral taste, you could also use floral honey)
- a pinch of vanilla
- 1/2 teaspoon of lemon juice + zest of one lemon
- 3 tablespoons of melted butter
- 100 g warm milk or water (I used milk)
- coconut oil for frying
- 1 70% cacao chocolate
- ground hazelnuts, desiccated coconut and lemon zest for sprinkle
Instructions:
1. The night before making doughnuts, mix 125 g of white wheat flower, 125 g of water and 1 tablespoon of active rye sourdough starter. Leave to ferment overnight or until risen and bubbly on the surface. Also, take out of the fridge 3 eggs so they will be warm in the morning.
2. In the morning, prepare two bowls. In one, first beat 3 egg yolks then add rum, honey, vanilla, lemon juice, lemon zest and melted butter. In the second bowl, first mix warm milk and 250 g your active white wheat starter from step 1 then add the liquids from the first bowl and 310 g of flour.
3. Mix all the ingredients well and starting kneading the dough. If you want to have really airy doughnuts, knead the dough for at least for 10 minutes, 15 is even better. I mixed mine for 15 minutes by hand. You will notice that the dough is quite sticky in the beginning, so to handle the dough, you can:
– wet your hands before kneading + repeat wetting few more times
– use slap and fold technique (see this video for demonstration)
By the end of the kneading, your dough should be elastic, alive and should have quite a smooth surface. When you shape it into ball, you will also notice small bubbles on the surface.

4. Move your dough to a clean and slightly greased bowl and let it rise until doubled in volume. This may take up to 3 to 5 hours, depending on how warm the place where you keep your dough is. For the bowl, I used a cylindrical shape container where I marked the dough height at the beginning so I could know exactly when my dough was ready for shaping. I transferred the container on the bottom of the warm oven – it took the dough 3 hours to rise.
5. When the dough has doubled in volume, use your plastic dough scraper to take it out on a non-floured working surface and shape it into a ball (having a bench knife or plastic dough scraper helps). The dough should be very alive and easy to work with.
6. Next, take your ball of dough on a slightly floured surface. Stretch it to be approximately 1 cm /half inch thick. Use a round cookie cutter or a glass and cut out the doughnuts. Transfer each of them on a parchment paper. When your cut out a first series of doughnuts, you will be left with some dough which you simply knead one more time and cut the doughnuts again. Try not to knead the dough too long – the more you knead it, the less fluffy the doughnuts will be.

7. Cover your doughnuts with a kitchen towel and let them rise for at least 1 (1.5 ) hour, depending on their size – the bigger the doughnut, the longer the resting/rising time. You will know your doughnut is ready, when the indent you make with your finger doesn’t come back quickly. If you let your doughnuts to rise for not enough time, you will find a big hole in the bottom.
8. When doughnuts are risen, heat the oil. The height of the oil in the frying pan should be at least the height of three fingers. The oil is ready, when the bubbles appear when putting a handle of a wooden spoon in it.
9. Fry each doughnut for 2-3 minutes on one side (with the lid on) and 2-3 minutes on another side (with the lead off). When baked, transfer them onto a plate lined with a napkin.
10. Leave to cool and then dip each doughnut into melted chocolate. Sprinkle with ground hazelnut, desiccated coconut or lemon zest. You can wait for the chocolate to harden a little bit but I believe the more possible option is to eat them straight away.

Perfectly fermented dough will result in very light, fluffy and airy doughnuts with large holes.

3 reasons you should try these airy and fluffy sourdough doughnuts
1. Easily digestible – no flatulence, foggy mind or heavy stomach after eating them.
2. Easy to make and you can easy adjust the preparation into your daily routine. For instance, you can rise the dough overnight until doubled and bake the doughnuts in the morning.
3. Absolutely mouthwatering – for a second you will believe this is better then winning a jackpot, I mean seriously.

Other doughnut recipes on my blog you might love:
- Sourdough Doughnuts with Strawberry and Apple Pie Cream
- Delicious Homemade Sourdough Baked Donuts Recipe
What are your favorite doughnuts?
Happy baking, Natasha
PS: This was the hardest post to write so far! #droolingbehindthescreen


![How To Make Fluffy Sourdough Hamburger Buns [Step By Step Guide] 143 Making fluffy sourdough hamburger buns](https://www.mydailysourdoughbread.com/wp-content/uploads/2022/09/burger-with-cheese-and-lettuce-stockpack-unsplash-scaled-120x120.jpg)

