Drying sourdough starter offers a practical solution for long-term storage, ensuring its viability and enabling convenient rehydration when needed. By converting the wet starter into a dry form, it becomes less susceptible to spoilage while retaining its beneficial microbial culture. The drying process involves spreading the ripe starter thinly, allowing it to air dry until it becomes brittle, and then breaking it into smaller pieces or grinding it into a powder. This guide will provide step-by-step instructions on how to successfully dry your sourdough starter, allowing you to preserve it for extended periods and effortlessly revive it for future baking endeavors.

Table of Contents
- What is Dry Sourdough Starter?
- What Do You Need to Make a Dry Sourdough Starter?
- Process of Drying Sourdough Starter
- Different Ways of Converting A Wet Starter to Dry
- How Long Does It Take to Dehydrate Sourdough Starter?
- How Old Should Your Starter Be When You Dry It?
- How to Store Sourdough Starter For Longer?
- Drying Sourdough Starter
- How to Dry Sourdough Starter – FAQs
What is Dry Sourdough Starter?
Dry sourdough starter refers to dehydrated or powdered form of the sourdough culture. It is created by spreading a thin layer of active starter onto a non-stick surface, such as parchment paper or a silicone mat, and allowing it to dry completely. Once dry, the starter is broken into small flakes or ground into a powder.
Dry sourdough starter has a long shelf life and is convenient for storage and transportation.
When ready to use, it needs to be rehydrated by mixing it with water and flour, allowing it to ferment and become active again before being incorporated into bread or other sourdough recipes.
Benefits of Dry Sourdough Starter
The benefits of using a dry sourdough starter are numerous.
- Firstly, a dry starter has an extended shelf life, making it an excellent choice for long-term storage. Unlike its liquid counterpart, it can be kept at room temperature for months or even years without losing its viability.
- Additionally, dry sourdough starter is convenient for transportation, as it is lightweight and takes up minimal space. Requiring no refrigeration, it can easily be shared or sent to friends and family.
- Another advantage is its versatility in recipe experimentation. With dry starter, you can easily adjust the amount needed and control the hydration level, resulting in consistent and reliable results.
- Lastly, dry sourdough starter acts as a backup in case of any mishaps or accidents with your liquid starter, ensuring you always have a reliable source of wild yeast and lactic acid bacteria at hand.
What Do You Need to Make a Dry Sourdough Starter?
To make a dry sourdough starter, you will need the following ingredients and materials:
- Active Sourdough Starter: Begin with a healthy and active liquid sourdough starter that has been regularly fed and maintained.
- Non-stick Surface: A non-stick surface such as parchment paper or a silicone mat to spread the starter on for drying.
- Dehydrator or Oven: You will need a dehydrator or an oven set to low temperature (around 100-120°F or 38-49°C) to dry out the starter. If using an oven, make sure it has good ventilation.
- Storage Containers: Air-tight containers or jars to store the dried sourdough starter flakes or powder once it is fully dehydrated.
- Labeling: Don’t forget to label the containers with the date and type of sourdough starter for future reference.
- Protection: Ensure cleanliness and take precautions to prevent contamination during the drying and storage process.
Process of Drying Sourdough Starter
Drying sourdough starter is a straightforward process that involves the following steps:
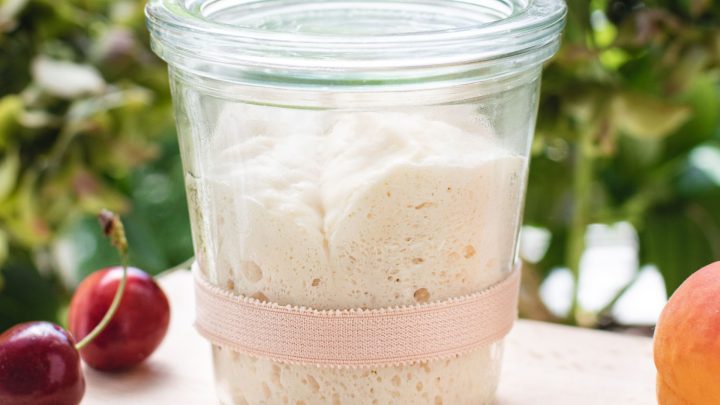
- Ripe Starter: Begin with a mature and active sourdough starter that has been recently fed and is at its peak of fermentation.
- Spread Thinly: Pour a portion of the ripe starter onto a non-stick surface, such as parchment paper or a silicone mat. Use a spatula or the back of a spoon to spread it into a thin, even layer.
- Air Dry: Place the spread starter in a well-ventilated area at room temperature. Allow it to air dry for several days, or until it becomes completely dry and brittle. The drying time can vary depending on humidity levels and thickness.
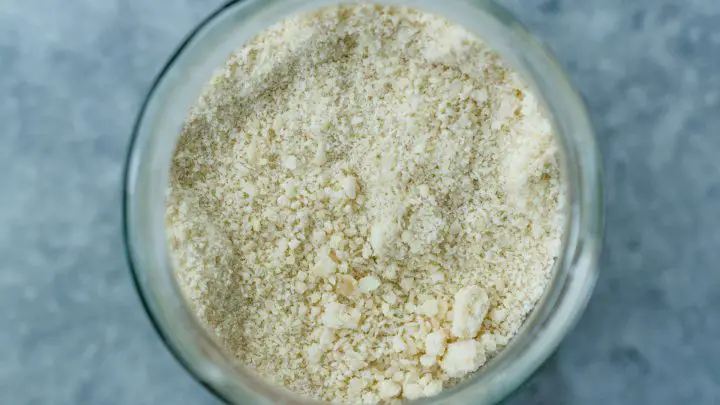
- Break or Powder: Once the starter is dry, carefully break it into small pieces or use a grinder to transform it into a fine powder. Choose the form that suits your storage preference.
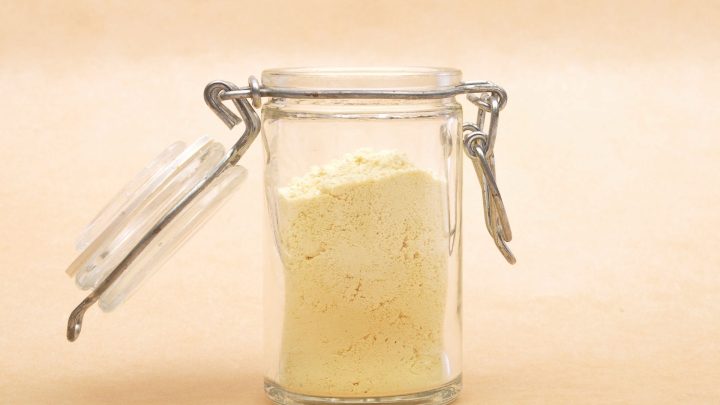
- Storage: Transfer the dried sourdough starter into an airtight container, such as a glass jar or a zip-top bag. Ensure it is tightly sealed to prevent moisture absorption. Store it in a cool, dry place away from direct sunlight.

Different Ways of Converting A Wet Starter to Dry
Converting a wet sourdough starter to a dry form offers convenience and long-term storage options. Some of the popular methods are outlined below:
Air Drying
Air drying your wet sourdough starter allows you to preserve it for an extended period, making it easy to revive and use whenever needed.
- Active Starter: Ensure your starter is active and has gone through a recent feeding to maximize its vitality.
- Spread Thinly: Pour a portion of your active starter onto a non-stick surface, such as parchment paper or a silicone mat. Spread it thinly and evenly using a spatula or the back of a spoon.
- Drying Time: Allow the starter to air dry at room temperature. The duration can vary depending on humidity levels, but it typically takes a couple of days to a week.
- Test for Brittleness: Once the starter has completely dried, it should become brittle and easily breakable. Gently touch the surface to ensure there is no moisture left.
- Break or Powder: Carefully break the dried starter into small pieces or use a grinder to transform it into a fine powder, whichever form is most convenient for you.
- Storage: Transfer the dried starter into an airtight container, such as a glass jar or a zip-top bag. Store it in a cool, dry place away from direct sunlight.
Pressed Between Papers
Pressing your wet sourdough starter between papers offers a convenient way to convert it into a dry form, ensuring its long-term viability and easy revival whenever you’re ready to use it again.
- Active Starter: Ensure your starter is active and recently fed to ensure its vitality.
- Spread Between Papers: Place a sheet of parchment paper on a flat surface and spread a thin layer of the active starter onto it. Use a spatula or the back of a spoon to achieve an even thickness.
- Cover and Press: Place another sheet of parchment paper on top of the starter layer. Use a rolling pin or a heavy object to gently press down, evenly compressing the starter between the papers.
- Drying Time: Allow the starter to dry between the papers. This can take a few days to a week, depending on the thickness and humidity levels.
- Check for Dryness: Once the starter is dry, carefully peel off the top parchment paper and check for moisture. The starter should be firm and no longer sticky to the touch.
- Break or Grind: Break the dried starter into smaller pieces or use a grinder to transform it into a fine powder, depending on your storage preference.
- Storage: Transfer the dried starter into an airtight container, such as a glass jar or a zip-top bag. Store it in a cool, dry place away from direct sunlight.
A Dehydrator
Using a dehydrator to convert your wet sourdough starter to a dry form offers a controlled and efficient drying process, preserving its quality for long-term storage and convenient rehydration whenever you need to revive it.
- Active Starter: Make sure your sourdough starter is active and has been recently fed to maximize its vitality.
- Spread Thinly: Pour a portion of the active starter onto a non-stick dehydrator tray. Use an offset spatula or the back of a spoon to spread it thinly and evenly.
- Dehydration Settings: Set your dehydrator to a low temperature, typically around 95°F (35°C). Adjust the settings according to your dehydrator’s instructions.
- Drying Time: Allow the starter to dehydrate in the machine. The duration can vary but typically ranges from 8 to 12 hours. Check for dryness periodically.
- Test for Brittleness: Once the starter has completely dried, it should become brittle and easily breakable. Gently touch the surface to ensure there is no moisture left.
- Break or Powder: Carefully break the dried starter into small pieces or use a grinder to transform it into a fine powder, depending on your preference.
- Storage: Transfer the dried starter into an airtight container, such as a glass jar or a zip-top bag. Store it in a cool, dry place away from direct sunlight.
How Long Does It Take to Dehydrate Sourdough Starter?
The duration to dehydrate sourdough starter can vary depending on factors such as humidity, the thickness of the spread, and the specific dehydrator used.
Generally, it takes approximately 8 to 12 hours to dehydrate sourdough starter at a low-temperature setting, typically around 95°F (35°C).
However, it’s important to periodically check the dryness by gently touching the surface. The starter should become brittle and easily breakable with no moisture remaining. Adjusting the drying time may be necessary based on the desired dryness and individual dehydrator settings.
It’s recommended to follow the instructions provided with your specific dehydrator model for optimal results.
How Old Should Your Starter Be When You Dry It?
It is generally recommended to have an established and mature sourdough starter before considering drying it. This usually takes around 2 to 4 weeks of regular feeding and maintenance.
During this time, the starter develops a stable and robust microbial population, making it more resilient to drying and rehydration processes. By allowing the starter to mature, you increase the chances of successfully preserving its vitality in a dry form.
So, aim to dry your starter once it has reached a consistent and active state, exhibiting a strong rise and fall during its feeding cycles.

How to Store Sourdough Starter For Longer?
Refrigerate The Starter
To store sourdough starter for longer periods, you can refrigerate it.
- Start by feeding your starter with equal parts of fresh flour and water to ensure it’s well-nourished. Allow the starter to ferment at room temperature for a couple of hours before transferring it to a clean, airtight container (check out my post on sourdough starter jars for best practices!).
- Place the container in the refrigerator, which will slow down the fermentation process.
- Remember to refresh the starter by discarding a portion and feeding it with fresh flour and water once a week to maintain its vitality.
- When ready to use, remove the desired amount from the refrigerated starter, let it come to room temperature, and feed it again before incorporating it into your sourdough recipes.
Refrigerating your sourdough starter will help extend its lifespan and give you the flexibility to bake when it suits your schedule.
Freeze The Starter
If you want to store your sourdough starter for an extended period, freezing is an option.
- Begin by feeding your starter with fresh flour and water to ensure the starter’s well-fed. Allow it to ferment at room temperature for a few hours before transferring it to a freezer-safe container. Ensure the container is airtight to prevent freezer burn.
- Place the starter in the freezer, where it will become dormant. When you’re ready to revive it, thaw the starter in the refrigerator overnight.
- Once thawed, allow it to come to room temperature and refresh it with fresh flour and water.
Freezing sourdough starter can help preserve it for several months, allowing you to revive it whenever you’re ready to bake again.
Drying The Starter
Drying your sourdough starter is an effective method for long-term storage.
- Begin by spreading a thin layer of your active starter onto a non-stick surface like parchment paper or a silicone mat.
- Let it air dry at room temperature for a couple of days, or until it becomes brittle.
- Once dry, carefully break it into small pieces or grind it into a powder.
- Store the dried starter in an airtight container in a cool, dark place.
- When you’re ready to use it again, rehydrate the dried starter by mixing it with equal parts water and flour until it forms a thick paste.
- Allow it to rest and reactivate for a few hours before incorporating it into your recipes.
Drying sourdough starter provides a convenient and space-saving storage option that can last for several months or even years.
Drying Sourdough Starter
Drying sourdough starter allows for long-term storage, convenience, and continued baking enjoyment. By spreading and air drying the ripe starter until brittle, it can be stored and easily revived when needed, ensuring the ongoing creation of delicious homemade sourdough treats.
How to Dry Sourdough Starter – FAQs
How to Store Sourdough Starter For Longer-Term or Long Periods?
To store sourdough starter for longer periods, follow these steps. First, ensure the starter is healthy and active. Feed it with equal parts flour and water, allowing it to ferment at room temperature for a few hours. Then transfer a small portion, about 1/4 cup, to a clean glass jar. Cover loosely with a lid or plastic wrap. Place it in the refrigerator, where it can stay dormant for up to a month. For even longer storage, freeze a portion of the starter in an airtight container for several months. Remember to refresh and reactivate the stored starter periodically to maintain its vitality.
Is It Better to Dry Your Starter Or Store it in The Fridge?
It is generally better to store your sourdough starter in the fridge rather than drying it. Refrigeration slows down the fermentation process, allowing the starter to remain active and ready for use. Drying the starter can be more challenging to revive and may result in a loss of microbial diversity and flavor complexity.


