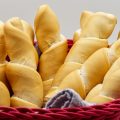
Eish shamsi, the beloved Egyptian sun bread, is a staple that often proves challenging to perfect at home. Dense, flat, or flavorless loaves can be discouraging, but fear not! In today’s recipe, we’ll unveil the secrets on how to make Eish shamsi right in your kitchen. Let’s get to it!
![How To Make Eish Shamsi [Easy 4 Ingredients Recipe] 63 How to make eish shamsi [easy 4 ingredients recipe]](https://www.mydailysourdoughbread.com/wp-content/uploads/2024/03/how-to-make-Eish-shamsi-2.jpg)
Table of Contents
- Ingredients Needed
- Preparation Steps
- Baking Process
- Serving Suggestions
- Expert Tips for Baking
- Wrap Up
- How to Make Eish Shamsi: FAQs
Ingredients Needed
- 4 cups all-purpose flour
- 1 1/2 cups lukewarm water
- 1 cup (200g) active sourdough starter ( you can also use 2 teaspoons active dry yeast or instant yeast)
- 2 teaspoons salt
Preparation Steps
With a few simple steps, you’ll be well on your way to creating your very own Eish Shamsi masterpiece.
Mixing the Dough
First things first, let’s get mixing! In a large bowl, combine the flour, salt, and leavener. Give them a quick whisk to ensure they’re evenly distributed. Then, gradually add the lukewarm water while stirring the mixture with a wooden spoon or your hands. As the dough starts to come together, get ready to get your hands dirty!
Kneading the Dough
Once the dough has formed a shaggy mass, turn it out onto a lightly floured surface. Now comes the fun part – kneading! Using the heels of your hands, push the dough away from you, then fold it back over itself. Give it a quarter turn and repeat the process. Continue kneading for about 10 minutes, or until the dough becomes smooth and elastic. This step is crucial for developing the gluten in the flour, which gives your Eish Shamsi its delightful texture.
Proofing the Dough
After all that kneading, your dough deserves a little rest! Shape it into a ball and place it in a lightly oiled bowl, turning it to coat the surface with oil. This will prevent the dough from drying out during the proofing process. Cover the bowl with a clean kitchen towel or plastic wrap and let it sit in a warm, draft-free spot for about an hour, or until the dough has doubled in size.
Once your dough has doubled in size, give it a gentle punch to deflate it. Now, you’re ready to shape your Eish Shamsi and let your creativity shine!
Baking Process
Now that your Eish Shamsi dough is shaped and ready to go, it’s time to bring it to life with the power of heat! Baking is where your bread develops its signature crust, aroma, and texture. Let’s dive into the process and transform your dough into a golden masterpiece.
Preheating the Oven
Before you pop your bread in the oven, it’s crucial to preheat it to the right temperature. For Eish Shamsi, you’ll want to set your oven to a piping hot 450°F (230°C). This high heat will help your bread develop a crispy crust and a soft, fluffy interior. While your oven is heating up, place a baking stone or a large baking sheet inside to ensure even heat distribution.
Creating Steam in the Oven
One secret to achieving that perfect crust on your Eish Shamsi is steam! Steam helps keep the surface of the dough moist, allowing it to expand and develop a beautiful, shiny crust. To create steam in your oven, place a shallow metal pan on the bottom rack while the oven is preheating. Just before you place your bread in the oven, carefully pour a cup of hot water into the pan. The water will immediately sizzle and create a burst of steam.
Tip: Be extra cautious when pouring water into the hot pan, as the steam can be quite intense. Use a long-handled cup or wear oven mitts to protect your hands.
Baking Time and Temperature
With your oven preheated and steam at the ready, it’s time to bake your Eish Shamsi. Gently transfer your shaped dough onto the hot baking stone or sheet, and quickly close the oven door to trap the steam inside. Bake your bread for about 30-35 minutes, or until the crust turns a deep golden brown and the loaf sounds hollow when tapped on the bottom.
As your bread bakes, resist the temptation to open the oven door too frequently. Each time you open the door, heat and steam escape, which can affect the rise and crust development of your bread. Trust in the process and let your oven work its magic!
Cooling and Enjoying Your Eish Shamsi
Once your Eish Shamsi is baked to perfection, carefully remove it from the oven and transfer it to a wire rack to cool. Letting your bread cool before slicing is important, as it allows the internal structure to set and the flavors to develop. We know it’s hard to resist the allure of freshly baked bread, but trust us, it’s worth the wait!
As your Eish Shamsi cools, take a moment to admire your handiwork. The sight of a beautifully baked loaf is truly something to behold. When your bread has cooled enough to handle, slice it up and enjoy the fruits of your labor. Whether you savor it on its own, pair it with your favorite spreads, or use it to make delicious sandwiches, your homemade Eish Shamsi is sure to impress.
Serving Suggestions
Now that you’ve baked your stunning Eish Shamsi, it’s time to explore the endless possibilities for serving this versatile bread. Whether you’re looking for a quick snack or an impressive addition to your dinner table, Eish Shamsi has got you covered.
Savory Pairings
Eish Shamsi is the perfect companion for a wide array of savory dishes. Slice it thick and toast it until golden, then top it with your favorite spreads like hummus, baba ganoush, or labneh. The bread’s slightly tangy flavor and chewy texture make it an ideal vehicle for scooping up hearty stews, soups, and curries. Try serving it alongside a warm bowl of lentil soup or a fragrant tagine for a truly satisfying meal.
Sweet Treats
Don’t limit yourself to savory options! Eish Shamsi’s subtle sweetness lends itself beautifully to desserts and breakfast treats. Toast a slice and slather it with rich, creamy mascarpone cheese and a drizzle of honey for an indulgent breakfast or snack. Or, cut the bread into bite-sized pieces, toss them with melted butter and cinnamon sugar, and bake until crispy for a delightful twist on traditional croutons.
Presentation is Key
When it comes to serving your Eish Shamsi, a little creativity can go a long way. Arrange slices on a rustic wooden board alongside an assortment of dips, spreads, and garnishes for an impressive appetizer spread. For a more formal occasion, cut the bread into elegant triangles and serve it in a lined basket or on a decorative plate. Don’t forget to add a sprinkle of fresh herbs or a dusting of paprika for a pop of color and flavor.
Tip: If you’re serving Eish Shamsi as part of a larger meal, consider timing your baking so that the bread is fresh out of the oven just before serving. The aroma of warm, freshly baked bread is sure to make your guests’ mouths water!
Expert Tips for Baking
As you embark on your journey to create the perfect loaf of Eish Shamsi, it’s essential to keep a few expert tips in mind. These insider secrets will help you navigate the art of bread-making like a seasoned pro, ensuring that every loaf you bake is a masterpiece.
Select the Right Ingredients
- Opt for high-quality, unbleached flour for better gluten development and enhanced flavor.
- Choose fresh starter or yeast to achieve a superior rise and texture.
- Use lukewarm water when mixing your dough
Mastering Dough Hydration
- Begin with the recipe’s recommended hydration and adjust based on your climate and flour absorption rates.
- Try the autolyze method:
- Let your mixed dough rest before adding salt and yeast.
- This process allows the flour to fully hydrate, resulting in better gluten development and easier dough handling.
Fermentation and Proofing
- During bulk fermentation, allow your dough to rise until it doubles in size for flavor development and structure.
- After shaping, let the dough rise again until puffy but not quite doubled for the perfect final texture.
Baking Environment
- Preheat your oven to the recommended temperature for at least 30 minutes before baking.
- Consider using a baking stone or steel for even heat distribution.
- Introduce steam into your oven during the first few minutes of baking:
- Place a tray of boiling water at the bottom of the oven.
- This allows the dough to expand freely and achieve a beautiful crust.
Cooling and Storing
- Allow the bread to cool on a wire rack for at least an hour before slicing, giving the interior texture time to set properly.
- Store Eish Shamsi in a bread box or a paper bag to maintain its quality.
- Avoid storing the bread in plastic, as it can soften the crust and compromise its texture.
Wrap Up
Making Eish Shamsi is a rewarding experience that anyone can master. Get ready to create a delicious, versatile loaf perfect for any occasion.
Your family and friends will be impressed, and your taste buds will thank you!
Check out this other Egyptian recipe:
How to Make Eish Shamsi: FAQs
How do you make the Egyptian bread?
To make Egyptian bread, mix flour, water, salt, and yeast to form a dough. Knead the dough until smooth, then let it rise in a warm place. Punch down the dough, shape it into flat rounds, and let rise again. Bake the bread on a hot stone or in a very hot oven until golden brown and cooked through.
How did the Egyptians make their bread?
Ancient Egyptians made bread by mixing flour, water, and salt to create a dough. They would then knead the dough, shape it into loaves, and let it rise. The risen dough was then baked in clay ovens or on hot stones. Some recipes included yeast or sourdough starter for leavening, while others relied on the natural yeast in the air.
How was ancient bread made?
In ancient times, bread was made by grinding grains into flour, and mixing it with water and sometimes salt to form a dough. The dough was kneaded, shaped into loaves, and allowed to rise using wild yeast or sourdough starter. The risen dough was then baked on hot stones, in clay ovens, or even under hot ashes, resulting in a dense, flavorful bread.
Where did Egyptians get yeast?
Ancient Egyptians likely obtained yeast for breadmaking from two sources: wild yeast in the air and sourdough starter. Wild yeast is naturally present in the environment and can settle on the dough, causing it to ferment and rise. Sourdough starter, made from flour and water, contains wild yeast and bacteria that leaven the bread. These methods were used before the cultivation of commercial yeast.
![How To Make Eish Shamsi [Easy 4 Ingredients Recipe] 64 How to make eish shamsi [easy 4 ingredients recipe]](https://www.mydailysourdoughbread.com/wp-content/uploads/2024/03/how-to-make-Eish-shamsi-1-768x432.jpg)
Eish Shamsi
Here’s the recipe for Eish Shamsi using sourdough starter!
Ingredients
- 4 cups all-purpose flour
- 1 cup (200g) active sourdough starter
- 1 1/4 cups to 1 1/2 cups lukewarm water
- 2 teaspoons salt
Instructions
- In a large bowl, combine the all-purpose flour and salt. Mix well. Add the active sourdough starter to the dry ingredients. Gradually add the lukewarm water, starting with 1 1/4 cups and mixing until a shaggy dough forms. If the dough seems too dry, add more water, 1 tablespoon at a time, until the desired consistency is reached.
- Turn the dough out onto a lightly floured surface. Knead the dough for about 10-15 minutes, using the heels of your hands to push the dough away from you, then folding it back over itself. Give it a quarter turn and repeat the process until the dough becomes smooth and elastic.
- Shape the dough into a ball and place it in a lightly oiled bowl, turning it to coat the surface with oil. Cover the bowl with a clean kitchen towel or plastic wrap and let it sit in a warm, draft-free spot for about 4 to 8 hours, or until the dough has doubled in size. The proofing time will depend on the strength of your sourdough starter and the ambient temperature.
- Once the dough has doubled in size, gently punch it down to deflate it. Shape the dough as desired and place it on a baking sheet lined with parchment paper or dusted with flour.
- Preheat your oven to 450°F (230°C) and place a baking stone or a large baking sheet inside to ensure even heat distribution. Place a shallow metal pan on the bottom rack while the oven is preheating.
- Just before placing the shaped dough in the oven, carefully pour a cup of hot water into the shallow metal pan to create steam. Gently transfer the shaped dough onto the hot baking stone or sheet, and quickly close the oven door to trap the steam inside. Bake the bread for about 30-35 minutes, or until the crust turns a deep golden brown and the loaf sounds hollow when tapped on the bottom.
- Remove the baked Eish Shamsi from the oven and transfer it to a wire rack to cool. Allow the bread to cool before slicing and serving.
Notes
- When using sourdough starter instead of commercial yeast, the proofing time will be longer, as the wild yeast and bacteria in sourdough work more slowly than commercial yeast. Be patient and allow the dough to rise and proof fully for the best results.
- Category: bread
- Cuisine: Egyptian

![Soft Sourdough Bread [Easy Recipe + Tips] 65 Soft sourdough bread [easy recipe]](https://www.mydailysourdoughbread.com/wp-content/uploads/2024/02/Soft-Sourdough-Bread-120x120.jpg)
![How To Make Bazlama [Turkish Flat Bread Recipe] 66 How to make bazlama [turkish flat bread recipe]](https://www.mydailysourdoughbread.com/wp-content/uploads/2024/03/Bazlama-4-120x120.jpg)


