Aish merahrah, the tasty Egyptian flatbread, has been around for a long time. But making it can be tricky if you don’t know how. Lots of folks have trouble getting the texture right or using the best ingredients. Today, allow me to spill the secrets of how to make great Aish merahrah. With easy steps and helpful tips, your bread turns out great every time. Learn how to make this yummy bread like a pro!
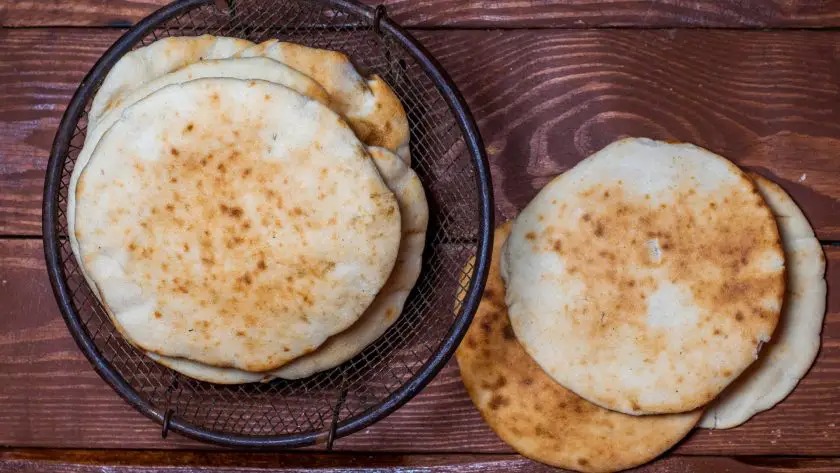
Table of Contents
- Ingredients
- Preparation of the Dough
- Fermentation Process
- Shaping and Baking
- Expert Tips for Authentic Aish Merahrah
- Serving Suggestions
- Egyptian Flatbread Goodness
- How to Make Aish Merahrah: FAQs
Ingredients
- 3 cups bread flour or all-purpose flour
- 1 cup (200g) active sourdough starter or 1 packet (2 1/4 teaspoons) active dry yeast (instant yeast can be substituted)
- 1 tablespoon fenugreek seeds
- 1 1/4 cups warm water
- 1 teaspoon sugar
- 1 teaspoon salt
- 2 tablespoons olive oil (optional, for a richer taste and softer texture)
Preparation of the Dough
Mixing the Ingredients
To begin, grab a large mixing bowl and your trusty kitchen scale. Precision is key when it comes to baking, so let’s start by weighing out the dry ingredients. Add the bread flour, starter/yeast, fenugreek seeds, sugar, and salt to the bowl. Give them a quick mix with a whisk or your hands to ensure an even distribution.
Next, create a well in the center of the dry ingredients and pour in the warm water. If you’re opting for a richer, softer bread, now’s the time to add the olive oil. Using a wooden spoon or your hands, mix the ingredients until a shaggy dough forms. Don’t worry if it looks a bit messy at this point; that’s perfectly normal!
Kneading and Resting
Once your dough has come together, turn it out onto a lightly floured surface. It’s time to put some muscle into it and start kneading! This process helps develop the gluten in the flour, giving your Aish Merahrah its signature texture and structure. Knead the dough for about 8-10 minutes, until it becomes smooth and elastic. You’ll know it’s ready when you can gently poke the dough with your finger, and it springs back.
Now, place the dough in a lightly oiled bowl and cover it with a damp kitchen towel or plastic wrap. Find a warm, draft-free spot in your kitchen and let the dough rest and rise for about an hour, or until it has doubled in size.
Shaping the Bread
After the dough has doubled in size, gently punch it down to release the excess air. Turn it out onto a lightly floured surface once more and shape it into a round or oval, depending on your preference. Place the shaped dough onto a baking sheet lined with parchment paper, cover it again, and let it rest for another 30 minutes. This second rise gives the dough a chance to develop even more flavor and texture.
As the dough rests, preheat your oven to 450°F (230°C). When the dough has finished its second rise, it’s time to add the signature Aish Merahrah touch: the beautiful criss-cross pattern on top. Using a sharp knife or bread lame, gently score the surface of the dough in a diamond pattern. This scoring not only adds a decorative flair but also helps the bread expand evenly during baking.
With your dough prepared and ready to go, you’re one step closer to enjoying a warm, fragrant piece of Aish Merahrah. In the next section, we’ll dive into the baking process and discover the secrets to achieving that perfect golden crust and tender crumb.
Fermentation Process
After shaping your Aish Merahrah, it’s time to let the dough ferment and develop its distinctive flavor and texture.
Creating the Ideal Environment
To ensure optimal fermentation, you’ll need to create a warm, humid environment for your dough. Place the shaped piece in a large, lightly oiled bowl and cover it with a damp kitchen towel or plastic wrap. Find a spot in your kitchen, away from drafts, where the temperature stays around 75-80°F (24-27°C).
The Fermentation Timeline
The fermentation process for Aish Merahrah usually takes about 1-2 hours. Monitor your dough during this time, as it should nearly double in size. You’ll know it’s ready when you gently poke the dough with your finger, and the indentation slowly springs back, leaving a small dent.
Developing Flavor and Texture
The longer the fermentation time, the more noticeable flavors will be, giving your Aish Merahrah a slightly tangy, mildly sweet taste.
Shaping and Baking
Now t’s time to shape and bake your bread to perfection. This final stage is where you’ll witness the magic happen, as your dough transforms into a beautifully golden, crispy bread.
Preparing the Baking Tray
Before you start shaping your bread, prepare your baking tray. Line a large baking sheet with parchment paper or lightly grease it with olive oil. This will prevent the bread from sticking and ensure a smooth release once it’s baked.
Shaping the Aish Merahrah
Gently remove the fermented dough from the bowl and place it on a lightly floured surface. Using your hands, flatten the dough into a round or oval shape, depending on your preference. The dough should be about 1 inch thick. If you want a more traditional look, you can create a criss-cross pattern on the surface of the dough using a sharp knife.
Preheating the Oven
While you’re shaping the dough, preheat your oven to 450°F (230°C). It’s crucial to have a hot oven ready when you place your shaped Aish Merahrah inside. The high heat will help the bread develop a crispy crust and a soft, fluffy interior.
Baking the Aish Merahrah
Carefully transfer the shaped dough onto the prepared baking tray. Place the tray in the preheated oven and bake for 25-30 minutes, or until the bread turns a beautiful golden brown color. You’ll know it’s done when you tap the bottom of the bread, and it sounds hollow.
Cooling
Once your Aish Merahrah is baked, remove it from the oven and let it cool on a wire rack for at least 10-15 minutes before slicing. This allows the bread to set and develop its final texture.
Expert Tips for Authentic Aish Merahrah
Perfecting Traditional Techniques
- Use a hot oven and a preheated baking stone or cast iron skillet for a crispy crust and fluffy interior
- Ensure a well-floured work surface when shaping your dough to prevent sticking and maintain the bread’s structure
Sourcing Quality Ingredients
- Choose high-quality, unbleached bread flour with a protein content of at least 12% for optimal structure and texture
- Use fresh, active starter or dry yeast that hasn’t expired for proper fermentation
- Opt for whole fenugreek seeds rather than ground for the best flavor
Mastering the Fermentation Process
- Maintain a consistent temperature between 75-80°F (24-27°C) during bulk fermentation
- Consider using a proofing box or placing your dough in the oven with just the light on if your kitchen is cooler
- Allow sufficient time for the dough to double in size to develop flavor and texture
Handling Dough with Care
- Use gentle pressure and avoid overworking the dough when shaping to prevent a dense, tough bread
- Lightly oil your hands instead of adding more flour if the dough feels too sticky
- Aim for a soft, supple dough to achieve a light, airy bread.
Baking to Perfection
- Preheat your oven to 450°F (230°C) for at least 30 minutes before baking for a crispy crust and rapid rise
- Position your baking sheet or stone in the center of the oven for even heat distribution
- Remove the bread from the oven once it turns rich, golden brown, and cool on a wire rack.
Serving Like a Pro
- Pair warm, freshly baked slices with a variety of Egyptian dips and spreads, such as dukkah or baba ghanoush
- Arrange the bread on a rustic wooden board and garnish with fresh herbs, a drizzle of olive oil, and a sprinkle of sea salt for a stunning presentation
- Get creative and use Aish Merahrah as a base for open-faced sandwiches or as a side for heartwarming soups and stews.
Serving Suggestions
Now that you’ve baked your perfectly golden Aish Merahrah, it’s time to enjoy the fruits of your labor! This classic Egyptian bread is incredibly versatile and can be served in a variety of ways to suit your taste preferences and the occasion.
Pairing with Traditional Egyptian Dishes
Aish Merahrah is a staple in Egyptian cuisine and pairs beautifully with many traditional dishes. Serve it alongside a warm bowl of ful medames, a hearty fava bean stew, for a satisfying and protein-packed meal. Or, tear off pieces of your freshly baked bread to scoop up baba ghanoush, a smoky eggplant dip that perfectly complements the subtle sweetness of Aish Merahrah.
Enhancing Your Bread Basket
Elevate your bread basket by including Aish Merahrah alongside other Egyptian favorites like pita bread and baladi bread. The varying textures and flavors will create an enticing assortment that’s sure to impress your guests. For a pop of color and added nutrition, serve your Aish Merahrah with a vibrant salad, such as tabouleh or fattoush.
Presentation is Key
When serving Aish Merahrah, don’t forget about the presentation! Cut your bread into attractive wedges or slices and arrange them artfully on a wooden cutting board or rustic platter. Drizzle a bit of high-quality olive oil over the bread and sprinkle with a pinch of za’atar, a fragrant Middle Eastern spice blend, for an extra burst of flavor. Your guests will be wowed by both the taste and visual appeal of your homemade Aish Merahrah.
Egyptian Flatbread Goodness
You’ll be able to bake flatbread that’s crispy on the outside, soft on the inside, and super tasty. Serve your Aish Merahrah with traditional Egyptian foods or mix it up with other breads. Have fun and enjoy baking this classic bread at home!
Other flatbreads on the blog:
How to Make Aish Merahrah: FAQs
How is Aish Baladi made?
Aish Baladi, an Egyptian flatbread, is made with whole wheat flour, water, salt, and yeast. The dough is kneaded, allowed to rise, and then divided into rounds. These rounds are flattened and baked at high temperatures in ovens, often lined with baking stones or pebbles. The result is a hearty, flavorful bread with a unique texture and pockets.
How to make Egyptian bread?
To make Egyptian bread, mix whole wheat flour, water, salt, and yeast to form a dough. Knead the dough until smooth and elastic, then let it rise. Divide the dough into rounds, flatten them, and place them on a preheated baking stone or in an oven lined with pebbles. Bake at high heat until puffed and golden brown.
How did they make bread in ancient times?
In ancient times, bread was made by grinding grains into flour using stones. The flour was mixed with water to create a dough, which was then shaped into flatbreads or loaves. Leavening agents like yeast or sourdough starter were sometimes used. Breads were baked on hot stones, in clay ovens, or even under ashes, resulting in various textures and flavors.
How did man figure out how to make bread?
The discovery of bread-making likely occurred by accident when ancient people realized that grains could be ground into flour and mixed with water to form a dough. Over time, they discovered that allowing the dough to sit before baking resulted in a lighter, more flavorful bread due to natural fermentation. Through experimentation and observation, various cultures developed their own unique bread-making techniques.
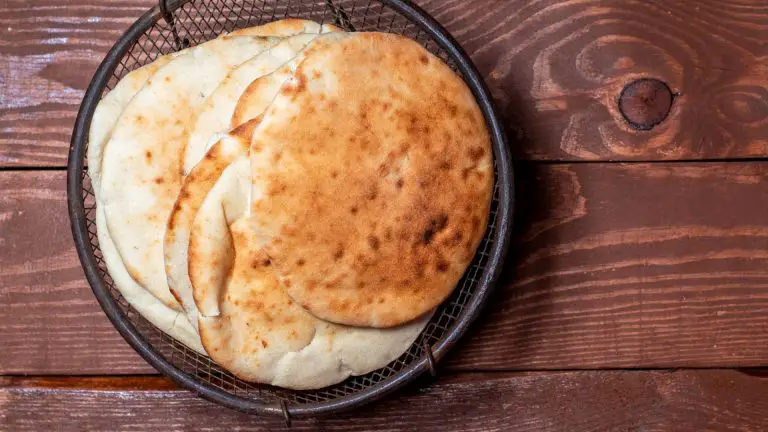
Aish Merahrah
Try making this Egyptian flatbread today!
Ingredients
- 3 cups bread flour or all-purpose flour
- 1 cup (200g) active sourdough starter
- 1 tablespoon fenugreek seeds
- 1 1/4 cups warm water
- 1 teaspoon sugar
- 1 teaspoon salt
- 2 tablespoons olive oil (optional, for a richer taste and softer texture)
Instructions
- In a large mixing bowl, combine the bread flour, fenugreek seeds, sugar, and salt. Mix well.
- Create a well in the center of the dry ingredients and add the active sourdough starter, warm water, and olive oil (if using).
- Mix the ingredients until a shaggy dough forms.
- Turn the dough out onto a lightly floured surface and knead for about 8-10 minutes, until it becomes smooth and elastic.
- Place the dough in a lightly oiled bowl, cover it with a damp kitchen towel or plastic wrap, and let it rest in a warm, draft-free spot for about 1-2 hours, or until it has nearly doubled in size.
- Gently remove the fermented dough from the bowl and place it on a lightly floured surface. Flatten the dough into a round or oval shape, about 1 inch thick. If desired, create a criss-cross pattern on the surface using a sharp knife.
- Line a large baking sheet with parchment paper or lightly grease it with olive oil. Transfer the shaped dough onto the prepared baking tray.
- Preheat the oven to 450°F (230°C).
- Place the baking tray with the shaped dough in the preheated oven and bake for 25-30 minutes, or until the bread turns a golden brown color and sounds hollow when tapped on the bottom.
- Remove the bread from the oven and let it cool on a wire rack for at least 10-15 minutes before slicing.
Notes
- When using sourdough starter, the fermentation time may be longer compared to using commercial yeast. Be patient and allow the dough to rise and proof fully for the best results.
- Category: bread
- Cuisine: Egyptian

![How To Make Bazlama [Turkish Flat Bread Recipe] 99 How to make bazlama [turkish flat bread recipe]](https://www.mydailysourdoughbread.com/wp-content/uploads/2024/03/Bazlama-4-120x120.jpg)
