Baked goods can bring people together like nothing else. Amish Friendship Bread is a sweet, sticky sweetbread passed down for generations. More than a recipe, it starts friendships through sharing the Amish bread.
I’ll show you how to make Amish friendship bread. Anyone can master this heartwarming heirloom recipe.
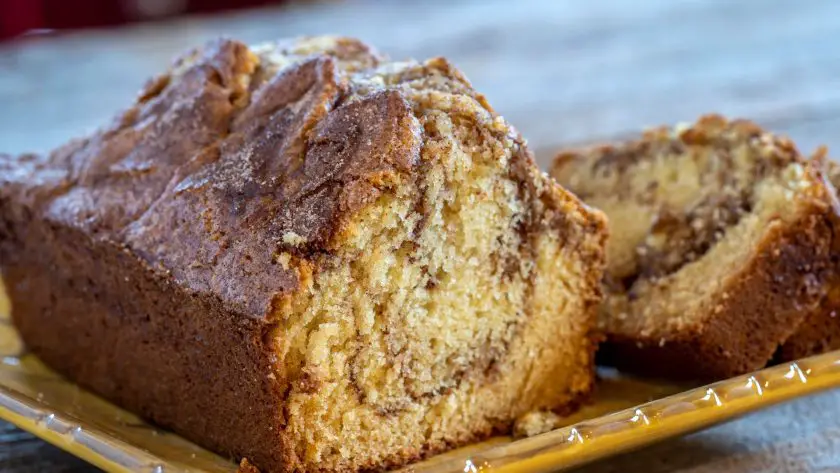
Table of Contents
- Ingredients
- Preparing the Starter
- First Fermentation Process
- Shaping the Bread
- Baking the Bread
- Serving and Storing
- How To Make Amish Friendship Bread With Customized Flavor
- Cultivating Community with Amish Friendship Bread
- How To Make Amish Friendship Bread: FAQs
Ingredients
Making great Amish friendship bread starts with gathering the right ingredients. Here’s what you’ll need:
- 3 1⁄2 cups all-purpose flour
- Use unbleached flour for the best flavor and texture
- Good options include Gold Medal or King Arthur
- 1⁄2 cup white granulated sugar
- Avoid brown sugar so the molasses doesn’t overpower the tang
- Granulated sweetens without altering the flavor
- 1 cup milk
- Whole milk works best to interact with the yeast
- 2% milk is an acceptable alternative
- Do not use skim milk
- 1 tablespoon active dry yeast
- Proof the yeast by dissolving it in the warmed milk before adding it to the dough
- Check the expiration date to ensure the yeast is still active
Tips
- Weigh your flour for consistent results rather than using cup measurements, which can vary
- Warm the milk slightly before mixing – about 110°F allows the yeast to bloom properly
- Mix the yeast, sugar, and milk first to activate before adding the flour
- Use all ingredients at room temperature for best results
With quality ingredients prepared properly, your Amish friendship bread will turn out light and airy every time.
- Two, 8 oz. resealable stand up bag (0.5 lbs.)
- Gluten Free; Vegan; Vegetarian; Paleo Friendly; Kosher Pareve
- Manufactured in a dedicated gluten free facility; R5-ELISA tested gluten free
- Stores up to 1 year in the refrigerator
- Premium Qual
Prices pulled from the Amazon Product Advertising API on:
Product prices and availability are accurate as of the date/time indicated and are subject to change. Any price and availability information displayed on [relevant Amazon Site(s), as applicable] at the time of purchase will apply to the purchase of this product.
Preparing the Starter
Creating a starter is the first step to baking this sweet and tangy loaf. Having an active, healthy starter is key for raising the bread and developing the signature sourdough flavor.
When preparing your starter, be sure to use fresh, high-quality ingredients for the best outcome. You’ll need to mix flour, sugar, yeast, and warm water to create an environment where the yeast can feed and multiply.
Activating the Yeast
The most critical ingredient is the yeast, which serves as the leavening agent for the bread.
To activate and proof the yeast:
- Use active dry yeast within the expiration date for optimal viability
- Heat tap water until warm to the touch, about 110°F
- Sprinkle the yeast over the warm water and let stand for 5-10 minutes until frothy
This indicates the yeast is active and ready to feed on the sugar and flour.
Combining the Ingredients
Next, you’ll want to thoroughly combine the starter ingredients:
- 3 cups flour – all-purpose unbleached
- 1 cup white sugar – granulated
- 1 packet of active dry yeast
- 3 cups very warm water – 110°F
Mix the ingredients in a large container, ideally with a lid, until a smooth, lump-free batter forms. The flour feeds the growing yeast culture.
Letting the Starter Mature
Now set the starter aside in a warm area around 70-80°F to give the yeast time to grow and develop its signature tang.
- Mark the start date on your container
- Allow at least 5 days for fermentation
- Stir the starter daily to distribute the yeast
The starter will likely expand, bubble, and develop a sour, beer-like aroma as the natural yeasts grow. This is the lactobacillus bacteria responsible for the tang.
By day 5 your Amish starter should have a sponge-like texture with tiny bubbles throughout. At this point, it’s mature and ready for baking. You can now scoop out what’s needed for your recipe and “feed” the remainder to preserve it.
First Fermentation Process
The first fermentation is a critical point in developing flavor complexity within your Amish friendship bread. After preparing the starter according to the recipe, you’ll allow natural yeast fermentation to commence.
Allowing the Starter to Ferment
Place the freshly mixed starter into a glass or ceramic container with ample headspace to accommodate expansion. Glass jars used for canning are ideal. Cover the starter loosely with a clean kitchen towel or lid.
The fermentation conditions need to foster yeast growth. Set the container on your kitchen counter, away from direct sunlight. An average room temperature around 68-75 ̊F works well. Avoid areas that get too cold overnight.
Over the next 5-10 days, the natural wild yeasts will feed on the flour and sugar, producing gas bubbles and organic acids that give sourdough its characteristic tang. The starter will likely double or even triple in size as the yeast multiplies. Dark dots may form on the surface – this is normal mold that can be stirred back in.
Stir the starter batter once a day with a clean spoon. This distributes the yeasts and bacteria evenly so they remain active. Letting it sit stagnant could result in only surface microbes growing.
Monitoring the Fermentation
After several days you should notice the starter expanding with tiny bubbles throughout. The smell will become quite sour and beer-like. You may see some bubbling activity, fluid separating, or alcohol notes emerging.
Taste the starter directly each day with a clean spoon. The sourness should steadily increase. By days 5-7 that tangy flavor should have fully developed, indicating a mature starter ready for bread making.
If the smell turns quite rotten, mold forms, or it develops a pink, blue, red, or green hue, discard the batch and start over. A healthy, properly fermented Amish starter should retain its normal batter color with just a strong, sour aroma.
Shaping the Bread
After the Amish friendship bread has gone through its first and second rises, it’s time to shape it into loaves. Forming your dough into known sourdough shapes properly ensures the bread bakes up tall and even.
Preparing the Dough
Lightly grease a 9×5 inch loaf pan with butter or non-stick cooking spray. This prevents the dough from sticking as it rises and bakes. An oblong loaf pan yields the signature Amish bread shape.
Turn the risen dough out onto a floured surface. The dough will be soft, sticky, and smooth. Flour your hands to prevent sticking.
Shaping Techniques
Gently pat and stretch the dough into a rectangle approximately the dimensions of your prepared loaf pan. Try to achieve an even thickness throughout.
Starting from a shorter end, roll the dough up snugly into a cylinder. Pinch the seam tightly closed. Place the loaf seam-side down in your greased pan.
Cover and set aside to proof until doubled in size, about 45 minutes. The shaped dough will puff up the pan.
Baking the Bread
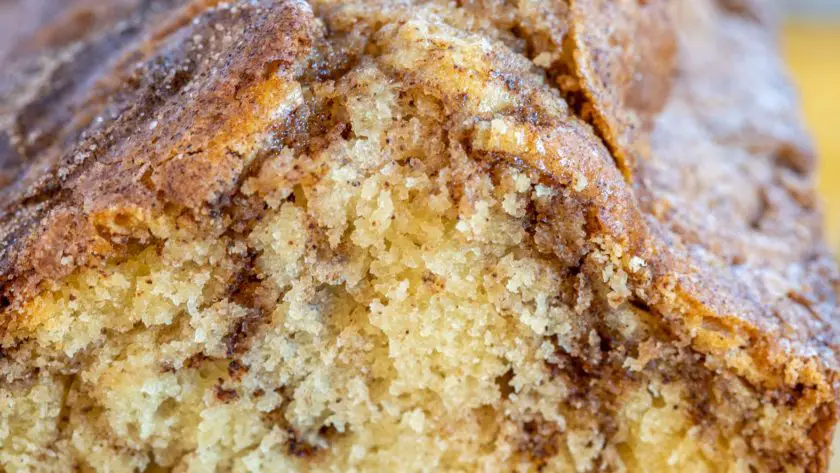
Bake with care and precision to achieve the perfect golden-brown crust and airy, even crumb. With the right technique, you’ll be rewarded with a fragrant, delicious loaf that looks as good as it tastes.
Preparing for Baking
Before sliding your shaped dough into the oven, ensure your baking environment is fully prepped and optimized for Amish bread success.
Start by preheating your oven to 350°F, which allows ample time for the oven cavity to reach the target temperature. Place an oven thermometer inside and adjust the temperature setting if needed until 350°F is displayed. While the oven preheats, prepare your baking pan or sheet.
Line a metal baking sheet with parchment paper or a silicone baking mat. The nonstick surface is key for preventing the bottom crust from getting too dark or overbaked. Avoid using unlined cookie sheets or glass bakeware which conduct heat too quickly to the loaf.
An insulated sheet pan further regulates the baking temperature for even browning. If you only have cookie sheets, create a faux-insulated effect by doubling up two sheets with air space between them.
Proofing the Dough
After shaping, let the dough adequately proof before baking to allow the yeast one final rise. Proofing creates air bubbles inside the dough for maximum oven spring and the lightest texture.
Place the loaf pan on top of the prepared baking sheet, whether lined or insulated. The elevated position allows air flow all around for even cooking on all sides of the pan versus setting directly on the oven rack.
Then, cover the pan loosely with lightly oiled plastic wrap or a towel and let sit in a warm area around 75-85°F. Near the heating vent or gas oven works perfectly to proof dough without hot spots forming.
Test doneness after 30-45 minutes by gently pressing two fingers into the surface. If the indentation remains, proofing is complete. Expect the dough to nearly double in size when fully proofed and ready to bake.
Baking Time and Temperature
When proofing finishes, bake the Amish bread at a moderate 350°F oven temperature. Baking too hot, like 375°F, risks a crispy, thick crust with an undercooked interior.
At 350°F, you achieve superior results – a delicate, tender crust with a fully baked crumb. Monitor closely near the end to prevent over-baking.
Start checking doneness after a minimum of 35 minutes, although the total baking time ranges widely from 40-65 minutes. Every oven has hot and cool spots which affects baking uniformity.
Insert an instant-read thermometer into the thickest section of bread without touching the pan bottom or sides. It should register 205-210°F when done.
If needing a bit more time, tent foil loosely over the bread to prevent excess browning on top. Then let the center continue heating to the target temp.
Serving and Storing
Amish friendship bread deserves to be served and enjoyed fresh whenever possible for maximum flavor and texture. However, proper storage techniques can help extend the shelf life of any leftovers.
Here are some serving suggestions and storage tips to get the most out of your homemade loaf.
Slicing and Presenting Amish Bread
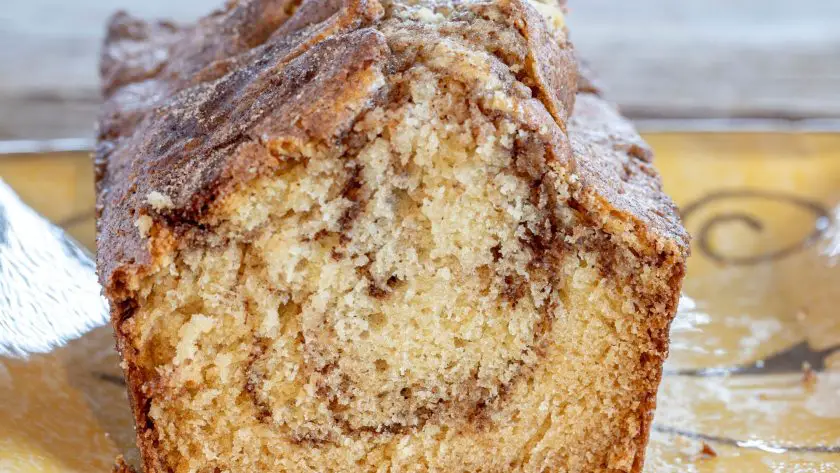
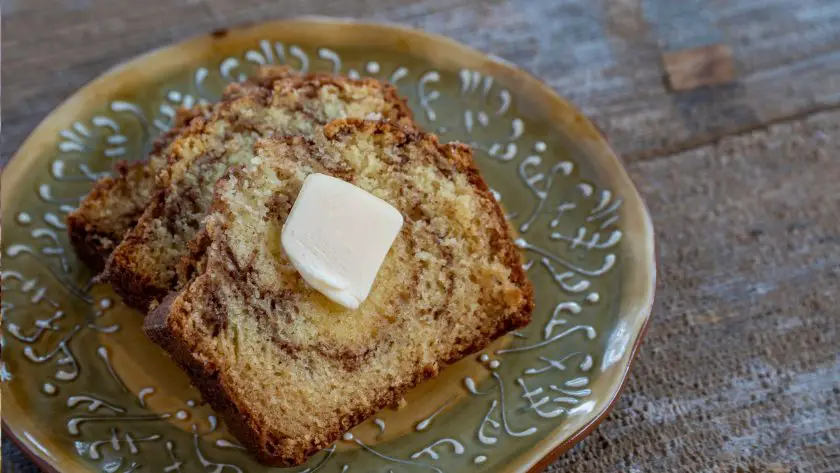
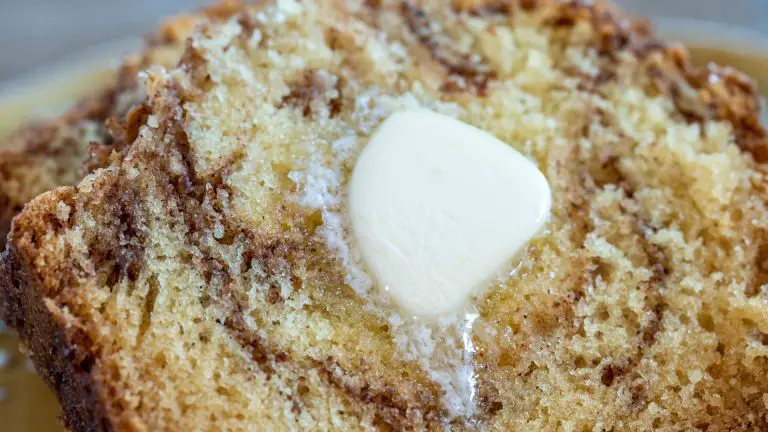
Allow the fully cooled Amish bread to rest at room temperature for at least an hour before slicing. This helps settle the crumb structure so neat slices can be cut. Use a serrated bread knife and cut with a gentle sawing motion. Slice evenly from end-to-end to yield rectangular pieces that showcase the lovely swirl pattern inside.
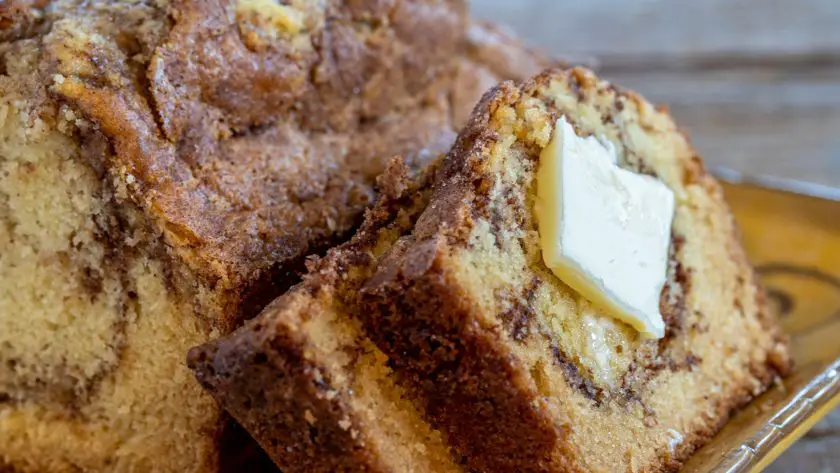
For a casual meal, simply smear the slices with butter or cream cheese. The tang pairs perfectly with sweet jams or fruit preserves as well. For special occasions, elevate the presentation by fanning out slices in a basket lined with a cloth napkin. Accompany with honey butter, chutney, or your favorite dipping oil and balsamic for dipping.
Optimizing Storage to Maintain Freshness
To extend freshness between uses, wrap cooled leftover Amish bread tightly in plastic wrap or foil and store at room temperature up to two days. The plastic helps retain moisture in the crust.
For longer freezer storage, slice the fully cooled loaf and seal it airtight in a freezer bag. Squeeze out excess air before sealing and freeze for 2-3 months. Thaw frozen bread slices at room temp a few hours before serving. Refresh in a low oven for a few minutes to re-crisp if desired. You can reheat this sourdough bread if you want in the oven, not the microwave.
Freezing extended storage works best for hearty whole-grain Amish bread over sweeter versions, as the sugars can crystallize upon thawing. For maximum flavor and texture, enjoy your homemade Amish friendship bread within a week of baking.
How To Make Amish Friendship Bread With Customized Flavor
The beauty of Amish friendship bread lies in its versatility to adapt to a wide range of flavors. Once you’ve mastered the basic sweet dough recipe, experiment with custom add-ins to make it your own. Play with fruits, nuts, spices, and more to create signature loaves reflecting your personality.
Cinnamon Friendship Bread
For a comforting aroma and warmth, cinnamon takes this bread to the next level.
Simply add 1-2 teaspoons of ground cinnamon to the dry ingredients when mixing the dough. Feel free to boost up to 1 tablespoon if you love that spicy-sweet flavor. The cinnamon swirls beautifully through the bread, pairing especially nicely with raisins or craisins if you want to add dried fruit. Topping with a cinnamon sugar crumble adds extra decadence.
For more cinnamon sourdough bread recipes, check out my Sourdough Cinnamon Raisin Bread and Sourdough Cinnamon Bread.
Apple Walnut Friendship Bread
For a more robust bread, mix in chopped apples and walnuts to create harvest-inspired loaves.
- First, peel and finely dice one large apple. Toss the chunks in a bit of flour to prevent sinking.
- Then add 1/2 cup chopped walnuts and the apple pieces when combining the wet and dry ingredients.
- If you like, finish with an apple butter glaze or dipping sauce.
Lemon Poppyseed Friendship Bread
Brighten up your bread baking with a sunny citrus twist. Add 2 teaspoons of lemon zest and 2-3 tablespoons of fresh lemon juice to the wet ingredients for a bright tang. Then mix in 2-3 tablespoons poppy seeds for little bursts of flavor and crunch. Top slices with a drizzle of lemon glaze or icing to make the zesty lemon shine.
The options for flavors are endless, so take inspiration from your favorite fruits, nuts, and mix-ins when deciding how to personalize your Amish bread. Swap out the sugar for honey or maple syrup. Add mini chocolate chips, dried cranberries, pumpkin spice, rosemary, olives – anything your creative spirit desires! Playing with flavors makes this bread completely your own.
Cultivating Community with Amish Friendship Bread
Amish Friendship Bread can indeed bring people together – through food and tradition. This recipe lets anyone bake fragrant loaves to share. With time and care, you can master the starter and shape beautiful loaves.
Beyond the enjoyment of eating warm, tangy bread, making Amish Friendship Bread teaches lessons about patience and living harmoniously. So nurture your starter batch after batch. Gifting the starter and bread blesses both the giver and receiver, making bonds stronger with each tasty bite.
How To Make Amish Friendship Bread: FAQs
How do I know if my Amish Friendship Bread starter is good?
If your starter bubbles, ferments, and smells yeasty – not rotten or moldy – it’s good. The starter should double in size in 4-12 hours when kept at room temperature, showing signs of active fermentation.
Is Amish friendship starter the same as a sourdough starter?
No, Amish friendship starter contains commercial yeast while sourdough relies on wild yeasts and bacteria for leavening. However, both use fermentation to produce compounds that give bread flavor.
How long can you keep Amish Friendship Bread starter?
Amish friendship bread starter can be kept refrigerated for up to 2 weeks between uses. For long-term storage up to several months, the starter should be refrigerated and fed weekly with flour and sugar to maintain viability.
Why is my Amish Friendship Bread dry?
The bread may be dry if the starter is old and inactive, too much flour was used, kneading was insufficient, the dough didn’t rise properly or bake long enough, or it cooled too quickly after baking. Adjusting ingredients, starter, kneading and baking can improve moisture.
Amish Friendship Bread
Enjoy your homemade Amish Friendship Bread, perfect for sharing with friends and loved ones!
- Total Time: 5 days
- Yield: 1 loaf/12 slices 1x
Ingredients
- 3 1/2 cups all-purpose flour
- 1/2 cup white granulated sugar
- 1 cup whole milk (2% as an alternative)
- 1 tablespoon active dry yeast
Instructions
Starter Preparation
- Dissolve the yeast in warm milk (about 110°F) and let stand for 5-10 minutes until frothy.
- In a large container, mix 3 cups flour, 1 cup sugar, the activated yeast, and 3 cups very warm water (110°F). Stir until smooth.
- Let the starter ferment at room temperature for 5 days, stirring daily. It should bubble and expand, developing a sour aroma.
Bread Making
- Proof the yeast as described in the starter preparation.
- In a large bowl, combine 3 1/2 cups flour, 1/2 cup sugar, and proofed yeast mixture. Gradually add warm milk, stirring to form a smooth dough.
- Turn the dough onto a floured surface and knead until smooth and elastic, about 10 minutes.
- Place the dough in a greased bowl, cover, and let it rise in a warm place until doubled in size, about 1-2 hours.
- Punch down the dough, divide it in half, and shape each half into a loaf. Place each loaf into a greased 9×5 inch loaf pan.
- Cover the pans and let the loaves rise until doubled, about 30-45 minutes.
- Preheat oven to 350°F. Bake the loaves for 30-40 minutes, or until golden brown and the loaves sound hollow when tapped.
- Remove the bread from the pans and let cool on wire racks.
Notes
- Weigh your flour for consistent results.
- Use all ingredients at room temperature for optimal yeast activity.
- Warm the milk slightly before mixing to help the yeast bloom.
- Prep Time: 7 hrs
- Cook Time: 40 mins
- Category: bread
- Cuisine: American
Nutrition
- Serving Size: 1 slice
- Calories: 200 kcal
- Sugar: 10 g
- Sodium: 30 mg
- Fat: 2 g
- Saturated Fat: 1 g
- Carbohydrates: 35 g
- Fiber: 2 g
- Protein: 4 g
- Cholesterol: 5 mg


![Soft Sourdough Bread [Easy Recipe + Tips] 96 Soft sourdough bread [easy recipe]](https://www.mydailysourdoughbread.com/wp-content/uploads/2024/02/Soft-Sourdough-Bread-120x120.jpg)

![How To Make Bazlama [Turkish Flat Bread Recipe] 99 How to make bazlama [turkish flat bread recipe]](https://www.mydailysourdoughbread.com/wp-content/uploads/2024/03/Bazlama-4-120x120.jpg)