Baking scrumptious sourdough bread sans gluten may seem impossible, but with a few simple tricks, anyone can craft loaves that are light, airy, and delicious.
With step-by-step directions from start to finish, you’ll learn how to make gluten free sourdough bread with just a few basic ingredients and a little effort. Get ready to impress your family and friends with gluten-free bread that looks and tastes like bread with gluten!
Table of Contents
- Ingredients Needed
- Preparing the Starter
- Mixing and Fermenting the Dough
- Baking
- Troubleshooting Common Issues
- Creative Variations to Customize Your Gluten Free Sourdough Loaf
- Savor the Flavor: Gluten-Free Sourdough Breadmaking Simplified
- How To Make Gluten Free Sourdough Bread: FAQs
Ingredients Needed
Gluten-free sourdough bread requires some specialty ingredients in specific proportions to achieve the right texture and rise. Here are the key items you’ll need:
- Gluten-free flour blend:
- 1 cup rice flour: Provides structure
- 1/2 cup tapioca flour: Lightens texture
- 1/2 cup sorghum or millet flour: Adds fiber and nutrients
- Xanthan gum: 1⁄2 to 1 teaspoon per cup of flour blend. This acts as a binder to mimic gluten.
- Yeast: 1 tablespoon active dry yeast helps dough rise. Opt for a gluten-free variety.
- Sourdough starter: 1/2 cup mature, active starter gives sourdough its tangy flavor and helps with rising. Use gluten-free flour in your starter.
- Salt: 1-2 teaspoons sea salt or kosher salt
- Fat: 1 tablespoon olive oil or 2 tablespoons melted butter to enrich the bread.
- Sweetener (optional): 1-2 tablespoons honey or maple syrup. Adds flavor complexity.
- Eggs and dairy (optional): 1 egg and 2 tablespoons milk or non-dairy milk. Can help achieve a softer texture.
- Mix-ins and flavorings: 2-3 tablespoons of herbs, olives, nuts, seeds, raisins, chocolate chips etc. Let your creativity run wild!
The key is having a variety of specialty flours on hand in the right proportions, as well as binders like xanthan gum. Don’t forget an active, mature starter as your secret leavening weapon!
- One, 8 oz. resealable stand up bag (0.5 lbs.)
- Gluten Free; Vegan; Vegetarian; Paleo Friendly; Kosher Pareve
- Manufactured in a dedicated gluten free facility; R5-ELISA tested gluten free
- Stores up to 1 year in the refrigerator
- Premium Qual
Prices pulled from the Amazon Product Advertising API on:
Product prices and availability are accurate as of the date/time indicated and are subject to change. Any price and availability information displayed on [relevant Amazon Site(s), as applicable] at the time of purchase will apply to the purchase of this product.
Preparing the Starter
While cultivating a starter without gluten takes patience and care, it opens up a world of tangy, wholesome baked goods.
Selecting Ingredients for the Starter
When creating a gluten-free sourdough starter, choose ingredients carefully:
- Gluten-free flour: Use a blend like sorghum, rice, millet, or teff flour. Avoid all-purpose flour with gluten.
- Water: Filtered or bottled water works best. Avoid using tap water which can inhibit fermentation.
- Gluten-free yeast: Choose a yeast specifically formulated to be gluten-free, not regular active dry yeast.
Making a starter is all about finding the right balance of flour, water, and yeast to achieve an active culture brimming with wild yeast and good bacteria.
Beginning the Fermentation Process
Cultivating a lively gluten-free starter takes patience through a 3-5 day process:
- Day 1: Mix equal parts gluten-free flour and water with a pinch of gluten-free yeast. Allow mixture to sit at room temperature, stirring occasionally.
- Day 2: Discard half the mixture and add equal parts fresh flour and water. Let ferment for 24 hours.
- Day 3: Repeat the process of discarding and feeding with fresh ingredients. Bubbles may begin forming.
- Day 4-5: Continue the daily stir, discard, and feed routine until the starter bubbles actively and doubles in size. This means your gluten-free wild yeast is awake!
The fermentation timers can vary based on factors like temperature and humidity. Don’t become discouraged if it takes a week or so to see active signs of life.
Maintaining and Feeding the Starter
Once your gluten-free starter is bubbly and doubling in size after feedings, maintain energy by:
- Feeding equal parts flour and water daily or twice a day
- Allowing the starter to rise for 4-8 hours between feedings
- Storing starter in the fridge between uses, feeding it weekly
- Monitoring its sour aroma, bubbles, and rise.
Mixing and Fermenting the Dough
Once you’ve cultivated your gluten-free sourdough starter, it’s time to mix up a batch of dough and let the fermentation magic happen. With some simple techniques, you can achieve a properly fermented loaf with a nice rise and complex flavor.
Achieving the Right Dough Consistency
Getting the right moisture level is key for gluten-free bread. Too dry and the dough won’t rise well; too wet and it will be sticky and structurally unsound when baked. Generally, 60-65% hydration is a good target. That means if you have 300g flour, use 180-195g water.
Beyond moisture, there are some tricks to ensure your dough comes together into a workable blob that will still expand nicely:
- Mix the dry ingredients first – your gluten-free flour blend, xanthan gum, and salt. Whisk so they are well combined.
- Mash the wet ingredients together – water, starter, eggs, oil, etc.
- Gradually add the wet mix to the dry ingredients. Use a stand mixer fitted with the paddle attachment or robust spoon to incorporate.
- The dough should end up slightly tacky to the touch but not crazy sticky. Add a teaspoon more flour or water as needed.
- Knead gently until the dough feels cohesive, about 3 minutes max. Overmixing makes the gluten-free dough tough.
Proofing and Fermenting
This is when the yeast and bacteria in your starter work to expand and flavor the dough before baking:
- First rise: After kneading, place dough in a lightly oiled bowl, cover with plastic wrap, and let rest at room temperature for at least 4 hours and up to 8 hours.
- The dough should nearly double in size as gas bubbles inflate it. Gently poke and watch it slowly deflate and return to shape.
- Shape dough: Pour onto a clean surface and gently shape into a round boule. Avoid overhandling.
- Final proof: Place shaped sourdough dough in a floured sourdough proofing basket or towel-lined bowl, seam side up. Cover and proof for 1-2 more hours.
Baking
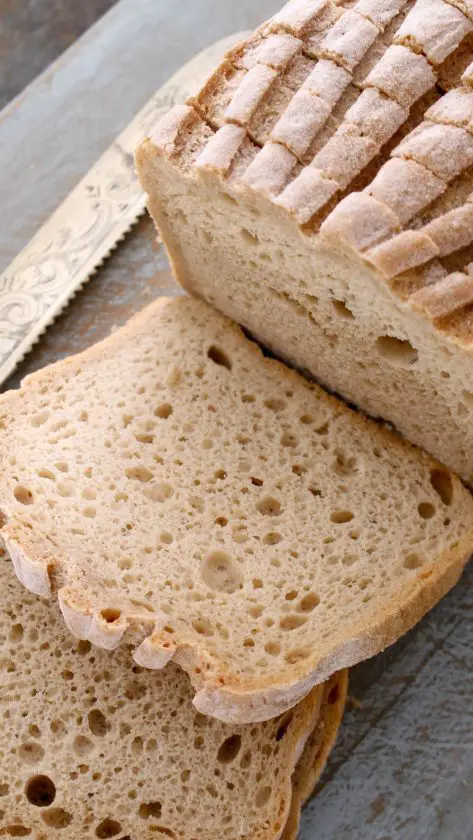
You’ve kneaded your gluten-free sourdough dough and allowed it to proof. Now it’s time to transform that bubbly blob into a beautiful, crusty loaf.
Baking sourdough requires precision, but have no fear – you’ll be pulling picture-perfect loaves from the oven in no time.
Preheating the Oven
Gluten-free sourdough needs a nice hot oven to rise and form a crisp crust. Crank that baby up to 450°F about 30 minutes before you plan to bake. If you have a baking stone, place it on the bottom rack to heat up as well – this helps mimic the conditions of a professional bread oven.
While the oven heats, place a metal or cast iron Dutch oven with a lid inside. This vessel helps create the initial steam necessary for optimal expansion and oven spring. The heavy material also retains consistent heat. Don’t have a specialty pot? A metal cake or pie pan filled with lava rocks can work too.
Scoring For An Artistic Rise
After your dough has properly proofed, transfer it seam-side up into your preheated Dutch oven or pan. Dust lightly with rice flour if it feels sticky.
Now comes the fun part – scoring your loaf!
Using a sharp blade or lame, make 4-5 quick cuts across the top of your dough at 45° angles. Your scores should be 1⁄4 to 1⁄2 inch deep. This helps guide the direction of the oven spring so your loaf can rise into a thing of beauty. Get creative with score designs! Leaf patterns, wheat stalks, and spirals all give your gluten-free loaf a lovely character.
Baking in Stages
Here comes the baking magic. Follow this process precisely:
- Place lid on pot and carefully put in the oven. Bake 30 minutes covered.
- Remove lid and bake 15-25 minutes more until deep golden brown.
- The initial steam ensures maximum rise before forming the crust. Leaving the lid off at the end allows the crust to crisp up.
- To test for doneness, tap the bottom of the loaf – it should sound hollow. An instant-read thermometer inserted in the center should read 205°F when done.
Cooling and Storage
As tempting as it is to tear into that beautifully baked sourdough, wait at least 30-60 minutes before slicing. This allows the crumb and moisture to settle and firm.
Once completely cool, store your gluten-free sourdough bread tightly wrapped at room temperature for 2-3 days. Freezing is another great option to enjoy slices for weeks – just thaw beforehand.
Troubleshooting Common Issues
Baking the perfect gluten-free sourdough loaf takes some finesse. With practice, you’ll be pulling beautiful loaves from the oven every time. But when issues pop up, take a deep breath and try these handy tips before tossing a dense brick out the window. We’ve all been there!
Fixing a Dense Texture
A heavy sourdough with the texture of a brick means your dough didn’t rise sufficiently. The yeast needs time to produce those lovely air bubbles for an airier crumb. Check for these common culprits:
- Old flour or yeast: Inactive ingredients won’t rise well. Use fresh flour and yeast. Check expiration dates!
- Over-kneading: Excess handling makes the gluten-free dough tough. Knead just until combined.
- Insufficient fermentation: Let your dough proof longer, at least 4 hours for the first rise. Be patient!
- Too much flour: Extra flour absorbs moisture needed for rising. Add water a teaspoon at a time if the dough is too dry.
With a better understanding of where things went awry, tweak your technique next time. Your patience will pay off with a perfectly airy loaf!
Dealing With Sticky Dough
Is your beautifully mixed gluten-free dough glopping all over your hands and refusing to hold its shape? A sticky mess can be frustrating, but don’t despair. Try these fixes:
- More flour: Add extra rice or millet flour 1 tablespoon at a time until the dough firms up.
- Oil your hands: Grease hands with olive oil when shaping to prevent sticking.
- Use wet hands: Dunk hands in water before handling, flouring between touches.
- Loosen the dough: Add 1/2 teaspoon more water to hydrate flour before kneading again lightly.
Getting the moisture level right can be tricky with gluten-free doughs. But soon you’ll have a feel for the perfect tacky yet workable texture. Keep baking!
Trouble With Rise
Your shaped dough rises nicely but then sinks or deflates upon baking. Help your oven spring soar with these tips:
- Sharper blade: Use a fresh, sharp lame for deeper score marks to guide oven rise.
- Steam the oven: Place lava rocks or ice cubes on the oven floor to create steam for lift.
- Hotter oven: Crank heat to 500°F for initial expansion boost.
- Preheat vessel: Heat pot in oven 30 minutes before baking for a jump start.
- Rotate loaf: Turn bread midway for even all-around browning and rise.
Creative Variations to Customize Your Gluten Free Sourdough Loaf
Now it’s time to unleash your inner artisan baker!
Try out some of these tempting ideas to whip up signature loaves that’ll have your friends and family begging for seconds.
Savory Herb and Cheese
Transform your basic dough with savory add-ins like fresh herbs, olives, sun-dried tomatoes, and spices. You can add one of the following ingredients:
- 1⁄4 cup of chopped rosemary, basil, or thyme leaves
- 1⁄2 cup grated parmesan, cheddar or gouda
- 1⁄3 cup kalamata olives or oil-packed sun-dried tomatoes
- a sprinkling of garlic powder, onion powder, or cayenne.
Hearty Seed and Nut
Crunch up your gluten-free loaf with mixes of healthy seeds and nuts.
- Toss in 2 tablespoons each of raw pepitas, sunflower, and sesame seeds for a superfood crunch.
- For nutty decadence, try 1⁄3 cup roughly chopped walnuts, pecans, or slivered almonds.
- Raisins, dried cherries, or cranberries also blend nicely for a fruited twist (the sweet nuttiness plays perfectly against sourdough’s characteristic tang).
Sweet and Savory Swirl
If you can’t decide between creating a sweet or savory loaf, why not both? Make two separate dough batches:
- one with cinnamon-sugar
- one with herbs.
Layer dollops of each dough together in a banneton and let proof.
- YOU WILL GET 2 STLYES OF BREAD BASKETS: 10 inch round proofing baskets and 9.6 inch oval proofing baskets, which holds 2 pounds of dough. With 2 sizes of washable linen, a metal dough scraper perfect for cutting and transferring bread dough. Scoring lame and 5 blades allows you to make exquisite patterns on the surface of bread. Dough Whisk with double eyes design, double times effect, ideal for mixing flours for bread Design.
- 100% NATURAL RATTAN: Our round & oval banneton bread proofing basket is made of top grade 100% Natural Rattan Cane. Exquisite handmade craftsmanship, smooth surface and no splinter, free from dye and chemicals, lightweight, sturdy and durable.
- SPLINTER-FREE, SMOOTH AND NON-STICK: Always expose the dough and maintain a smooth surface. When fully dusted, the Sourdough will easily stay in shape as well as slipping out smoothly onto baking surface. Suitable for any dough rising including sourdough bread. And Both for home use or bread shop.
- PERFECT GIFT: This bread proofing basket set is specially designed for professional bakers or amateurs alike. So it is helpful for a baker and people who like to make fresh and healthy bread. Also its a good gift for your friends in christmas, halloween, wedding, mothers day, fathers day, etc.
- EASY CLEANING: Simply shake the excess flour out after each use, and if dough has stuck to it, wait till it dries, then use a stiff brush to take it off. Keep dry after clean, not easy to mold. With linen liner cloth, making cleaning more convenient! If you have any questions about our specific products, please contact us in time, we will provide you with a satisfactory soluti
Prices pulled from the Amazon Product Advertising API on:
Product prices and availability are accurate as of the date/time indicated and are subject to change. Any price and availability information displayed on [relevant Amazon Site(s), as applicable] at the time of purchase will apply to the purchase of this product.
Savor the Flavor: Gluten-Free Sourdough Breadmaking Simplified
Crafting the perfect gluten-free sourdough requires some effort, but it isn’t as hard as you might think. Some key things to remember are: thoughtfully selecting specialty ingredients, patiently cultivating an active starter, meticulously kneading the dough, and artfully scoring before baking. With practice, anyone can create nutritious loaves that rival artisan bakeries.
Explore creative ways to make this versatile dough your own by mixing in herbs, nuts, seeds, or sweet swirls. Gluten-free sourdough offers an inclusive way for all to enjoy the nourishing tradition of homemade bread.
How To Make Gluten Free Sourdough Bread: FAQs
Can sourdough bread be gluten-free?
Yes, you can make gluten-free sourdough bread using gluten-free flours like rice, tapioca, buckwheat, or brown rice flour and a gluten-free sourdough starter. It won’t have as much rise as regular wheat sourdough though.
What flour is best for gluten-free sourdough starter?
A 50/50 blend of brown rice flour and tapioca flour makes the best gluten-free sourdough starter, as the starch in these flours feeds wild yeast effectively for a nice rise without any gluten development.
Why didn’t my gluten-free sourdough bread rise?
Gluten-free breads don’t rise as well because the lack of gluten means the dough can’t trap as many air bubbles. Ensure your starter is active, knead thoroughly, proof sufficiently long, and use binders like xanthan gum to improve rise.
What is the trick to making good gluten-free bread?
The keys to good gluten-free bread are using flours that combine well like rice and tapioca, kneading very thoroughly to develop structure, allowing for a long proof time, and adding binders like xanthan gum or psyllium husk to mimic gluten.
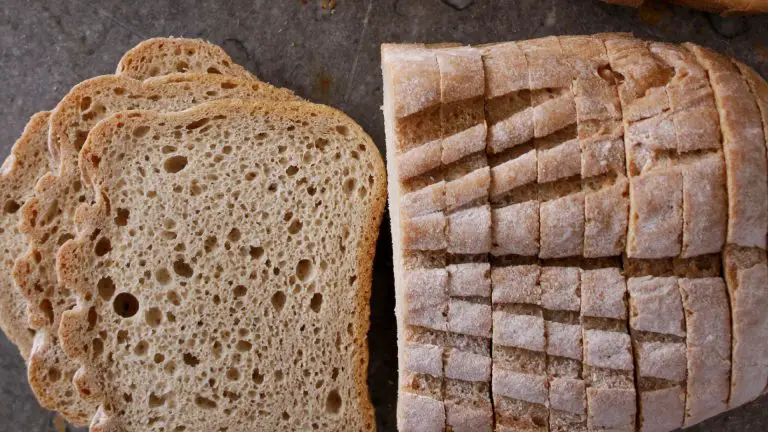
Gluten-Free Sourdough Bread Recipe
Enjoy this homemade gluten-free sourdough bread! Remember, don’t hesitate to experiment and adjust the recipe to suit your tastes and textures.
- Total Time: 5 days
- Yield: 1 loaf/12 slices 1x
Ingredients
Gluten-Free Flour Blend
- 1 cup rice flour
- 1/2 cup tapioca flour
- 1/2 cup sorghum or millet flour
- 1/2 to 1 teaspoon xanthan gum per cup of flour blend
Other Ingredients
- 1 tablespoon active dry yeast (gluten-free)
- 1/2 cup mature, active gluten-free sourdough starter
- 1–2 teaspoons sea salt or kosher salt
- 1 tablespoon olive oil or 2 tablespoons melted butter
- 1–2 tablespoons honey or maple syrup (optional)
- 1 egg (optional)
- 2 tablespoons milk or non-dairy milk (optional)
- 2–3 tablespoons mix-ins like herbs, nuts, seeds (optional)
Instructions
Preparing the Sourdough Starter
- Day 1 – Mix equal parts gluten-free flour (such as sorghum, rice, millet, or teff) and water with a pinch of gluten-free yeast. Let it sit at room temperature, stirring occasionally.
- Days 2-5 – Daily, discard half the mixture and add fresh equal parts of flour and water. By Day 4 or 5, the starter should be active, bubbling, and doubling in size.
Making the Dough
- Whisk together the gluten-free flour blend, xanthan gum, and salt.
- In a separate bowl, mix water, starter, eggs, oil, and sweetener (if using).
- Gradually add the wet mixture to the dry ingredients, using a stand mixer with a paddle attachment or a robust spoon.
- Knead the dough for about 3 minutes. It should be slightly tacky but not overly sticky.
Fermentation
- Place the dough in a lightly oiled bowl, cover with plastic wrap, and let it rest at room temperature for 4-8 hours.
- Shape the dough into a round boule on a clean surface, avoiding overhandling.
- Place the dough in a floured sourdough proofing basket or towel-lined bowl, seam side up, for 1-2 more hours.
Baking
- Preheat the oven to 450°F with a baking stone or Dutch oven inside.
- Transfer the dough seam-side up into the preheated vessel. Score the top of the dough with a sharp blade or lame.
- Bake covered for 30 minutes, then uncovered for an additional 15-25 minutes until deep golden brown.
- Allow the bread to cool for 30-60 minutes before slicing.
Notes
- Store the bread tightly wrapped at room temperature for 2-3 days, or freeze for longer storage.
- Prep Time: 10.5 hrs
- Cook Time: 1 hr 30 mins
- Category: bread
Nutrition
- Serving Size: 1 slice
- Calories: 120 kcal
- Sodium: 400 mg
- Fat: 2 g
- Carbohydrates: 25 g
- Fiber: 2 g
- Protein: 3 g


![Soft Sourdough Bread [Easy Recipe + Tips] 146 Soft sourdough bread [easy recipe]](https://www.mydailysourdoughbread.com/wp-content/uploads/2024/02/Soft-Sourdough-Bread-120x120.jpg)

![How To Make Bazlama [Turkish Flat Bread Recipe] 149 How to make bazlama [turkish flat bread recipe]](https://www.mydailysourdoughbread.com/wp-content/uploads/2024/03/Bazlama-4-120x120.jpg)
