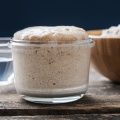
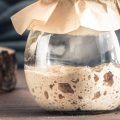
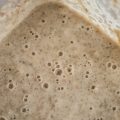
Achieving a bubbly, balanced liquid sourdough starter is easier than you think. I will walk you through how to make liquid sourdough starter from scratch with just a few simple ingredients and a bit of patience – no previous bread-baking experience required. Let’s start!
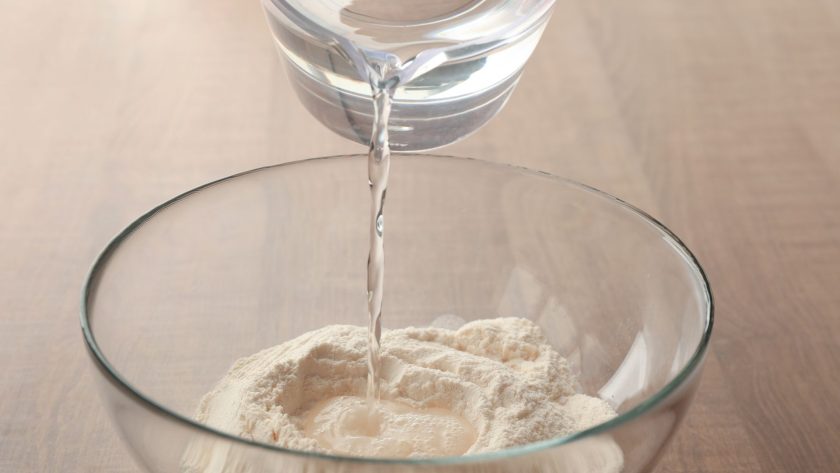
Table of Contents
- What is a Liquid Sourdough Starter?
- Benefits of a Liquid Starter
- What You’ll Need
- How to Make Liquid Sourdough Starter
- How to Speed Up the Sourdough Starter Process
- Common Issues You Might Encounter and Solutions
- Maintenance and Storage
- Liquidy Starter for Great Sourdough
- FAQs
What is a Liquid Sourdough Starter?
A liquid sourdough starter, sometimes called a wet starter or batter starter, is a type of starter used for baking sourdough bread. As the name suggests, liquid starters have a thinner, more fluid-like consistency compared to traditional firm starters.
The main difference lies in the hydration level, which refers to the ratio of water to flour in the starter. Liquid starters typically have a hydration level of 100% or higher, meaning the weight of the water equals or exceeds the weight of the flour.
For example, a common liquid starter recipe calls for equal weights of water and flour at 100g each to achieve 100% hydration. The high moisture content gives liquid starters a loose, batter-like texture that pours smoothly instead of holding a solid form.
Liquid sourdough starters offer some advantages:
- The increased hydration creates an ideal environment for yeast and helpful bacteria to thrive and produce more acids and gases. This extra lift gives the bread a lighter, airier crumb.
- The loose texture incorporates air bubbles easily when mixed into the dough, boosting rise.
- Higher moisture starter blends smoothly into doughs, allowing home bakers to experiment with wet, sticky doughs that suit artisan loaves.
Benefits of a Liquid Starter
A liquid starter is better than a stiff sourdough starter because of its high water content. As a home baker, I’ve tried both and found that wet starters make better bread.
More Flavor
The extra moisture allows more fermentation. This results in more acidic flavors that give bread complexity. My tastiest artisan loaves used a liquid starter in the dough.
Lighter Bread
The thin, batter-like liquid starter mixes air into the dough well. Fully proofed bread turns out with a nice lift and light texture. With practice, you can get large irregular air pockets in the crumb. Liquid starters help make that rustic look at home.
I suggest trying a wet starter for your next homemade bake!
What You’ll Need
To make a liquid sourdough starter from scratch, you’ll need a few simple ingredients and kitchen tools. Let’s take a quick look at the essentials.
Whole Grain Flour
The base of your starter is 100 grams of unbleached whole grain flour – typically whole wheat. The natural yeast and bacteria present help kickstart fermentation.
Filtered Water
Use 100 grams of lukewarm filtered water, not tap water, which inhibits fermentation. The starter prefers pure H2O at room temperature.
Jars and Other Supplies
You’ll need a glass jar or container to house your new starter and allow it to double or triple in size. A digital kitchen scale helps weigh out flour and water amounts precisely. And you’ll need a clean spoon for stirring.
That covers the core ingredients and amounts! With:
- 100 grams of whole-grain flour
- 100 ml of filtered water
- a 1-quart glass jar
- digital scale
- spoon
… you have everything needed to mix up a homemade liquid sourdough starter. The simple ingredients are easy to gather from a well-stocked baker’s kitchen. Now the fun begins!
How to Make Liquid Sourdough Starter
Day 1
- Combine 100g whole wheat flour and 100g filtered water in a jar
- Mix well until fully incorporated into a loose, thick batter
- Cover the jar loosely and let sit at room temperature for 24 hours
Day 2
- Remove and discard half the starter (about 100g)
- Add 50g whole wheat flour and 50g filtered water
- Stir well until fully blended and smooth
- Cover and let sit at room temperature for 24 hours
Day 3
- Remove and discard half the starter (about 100g)
- Add 50g whole wheat flour and 50g filtered water
- Stir to combine and cover loosely
- Expect to see some bubbles on the surface!
Day 4
- Discard half the starter (about 100g)
- Add 50g whole wheat flour and 50g filtered water
- Stir, cover, and ferment for 24 hours
Day 5
- Discard half the starter (now frothy and expanded)
- Add 50g flour and 50g water, mix and cover
- Let double in size at room temperature
Day 6
- Discard half the starter
- Feed with equal weights of flour and water
- Signs of fermentation should be noticeable!
Day 7
- Discard half, feed remaining as before
- Your starter should be bubbly and pungent
- It’s ready to use in baking!
How to Speed Up the Sourdough Starter Process
Keep Your Starter Warm
Sourdough starters develop best between 75-85°F. Keep your starter at a warm room temperature as much as possible during the first week. You can place the jar near a warm appliance like an oven or on a heating pad on low. The warmth speeds up fermentation, cutting activation time.
Use Rye and Whole Wheat Flour
Combining rye flour and whole wheat flour kickstarts starter activity faster than other flours. Rye contains enzymes that boost fermentation while whole wheat feeds wild yeast well. Mix 100g each of rye and whole wheat flour with 100g filtered water to make your starter.
Increase Feeding Frequency
Instead of feeding your new starter once every 24 hours, try feeding it 2-3 times per day. For example, feed in the morning, afternoon, and evening. The extra feedings accelerate bubble production, resulting in an active sourdough starter in just 3-5 days. Then resume daily feedings.
Common Issues You Might Encounter and Solutions
Making a liquid sourdough starter from scratch involves cultivating yeasts and bacteria to produce a lively, bubbly mixture perfect for baking. However, beginners often encounter some common hiccups. Here’s help identifying and resolving three typical starter problems.
Dealing with Mold
You may notice fuzzy mold growing on the starter’s surface or sides of the jar. This indicates unwanted bacteria infiltrated the ecosystem. Scoop out and discard the mold, washing the jar with hot soapy water. Then rebuild your starter from scratch with fresh ingredients in a sanitized container to control contamination. Feed a new starter daily until active again.
Managing Excess Alcohol (Hooch)
If your starter separates with a layer of pale yellow liquid on top, this “hooch” is excess alcohol from over-fermented yeast. Stir it back in, discard half the starter, and resume feedings with regular amounts of flour and water. Frequent feedings prevent the yeast from producing too much alcohol.
Boosting Fermentation
If your starter isn’t bubbling or doubling in size after feedings, the yeast may need a jump start. Try stirring in a teaspoon of fresh active starters from a friend to introduce more wild yeast. Switch up your flour and use filtered water to reboot sluggish fermentation. Pay close attention to feedings until the starter perks up.
Maintenance and Storage
Once your liquid sourdough starter is bubbly and active, you’ll want to keep it healthy for ongoing baking. Proper sourdough starter maintenance is key for longevity.
As an enthusiastic home baker, I prefer to bake weekly or more often. But life sometimes gets busy. Thankfully, liquid starters handle interruptions in their feeding schedule quite well.
Refrigeration Lets Starters Rest
For breaks of a week or longer without baking, refrigerate your starter. The cold environment dramatically slows fermentation to a near halt. This lets wild yeasts and bacteria go dormant without dying off.
To store, discard half the starter as usual, feed the remainder, mix well, and loosely cover. Place it in the back of the fridge furthest from the door. Refrigeration preserves starters for at least a month before feeds are needed.
Reviving Chilled Starters
Remove starters from the fridge a day before baking to let them wake up and regain activity. Discard half and refresh with equal weights of flour and water.
Within 8-12 hours at room temperature, chilled starters double in size and become bubbly again. The wild yeasts and bacteria revive to full fermentation power. Then your refreshed starter is ready to leaven dough.
In summary, refrigeration lets you safely store liquid sourdough starters for weeks between bakings. And reviving dormant chilled starters is a cinch.
Liquidy Starter for Great Sourdough
Liquid sourdough starters are an accessible entry point for aspiring bakers to make artisan sourdough bread at home. Their thin, batter-like texture encourages vigorous fermentation for maximum rise and complex flavor compared to firmer starters.
Putting this lively leavening agent to work unlocks sourdough’s full potential right in your kitchen.
FAQs
How do you make a liquid sourdough starter?
To make a liquid sourdough starter, mix together equal parts flour and water by weight (100% hydration) and let it ferment for 3-5 days, feeding it daily with equal parts flour and water until it’s bubbly and sour smelling.
What is the difference between solid and liquid sourdough starter?
Solid sourdough starter has a lower hydration level (around 50-75%), resulting in a thick, dough-like consistency, while liquid sourdough starter has 100% hydration for a batter-like consistency that flows more easily.
Is sourdough starter just flour and water?
No, basic sourdough starter ingredients are flour and water but a natural yeast called lactobacilli forms from the air and ferment the flour and water mixture into a bubbly sourdough starter over 3-5 days with proper feeding.
How do you make a 100% hydration sourdough starter?
To make a 100% hydration liquid sourdough starter, combine equal weights of flour and water in a jar, mix, cover loosely, and let ferment for 3-5 days, feeding it daily with equal parts flour and water.

