Baking hearty, delicious gluten-free bread at home? With some patience and a few simple ingredients, you can cultivate your live sourdough starter for gluten free recipes right in your kitchen. Let me share my pro tips on how to make gluten free sourdough starter, without needing access to commercial yeast or wheat flour. With a vibrant homemade starter, a world of nutritious gluten-free loaves, pancakes, and more will open up for you to bake and enjoy.
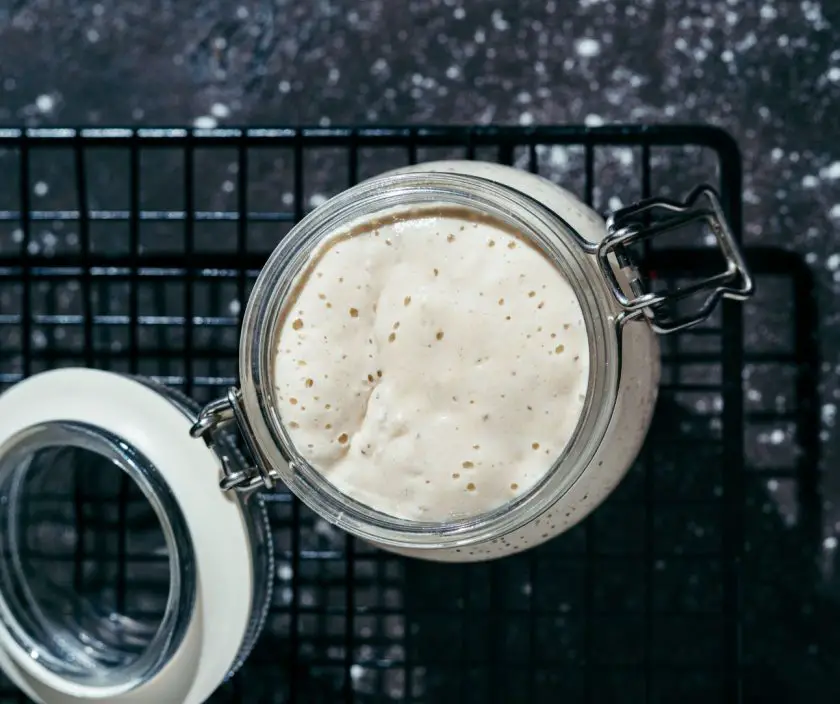
Table of Contents
- Choosing the Right Gluten-Free Flour
- Water Quality and Its Starter Impact
- Additional Ingredients for Flavor and Nutrition
- Making the Starter
- Problems and Troubleshooting Your GF Startr
- Maintaining Your Sourdough Starter
- Benefits of Gluten-Free Sourdough
- How to Bake with a Gluten-Free Starter
- Gluten Free Goodness
- FAQs
Choosing the Right Gluten-Free Flour
When creating a gluten-free sourdough starter, your choice of flour matters. Without gluten, the proteins in wheat flour that help bread rise, we must carefully select alternative flours that can still ferment and produce gas. While no flour mimics the elasticity of gluten, several gluten-free options create tasty sourdough loaves.
Use Whole Grain Gluten-Free Flours
Whole grain flours retain more nutrients as they contain all parts of the original grain. Try experimenting with whole grain rice flour, buckwheat flour, sorghum flour, millet flour or quinoa flour for your starter. These whole grains still have fiber and intact starch molecules for the yeast to feed on. Many commercial gluten-free flour blends also incorporate various gluten-free whole grains to optimize texture, rise and nutrition. Such blends simplify starter creation.
Incorporate Non-Gluten Cereals
While you can exclusively use 100% gluten-free flour for your starter, adding 10-30% non-gluten cereals boosts nutrition and flavors. Consider adding certified gluten-free oats, gluten-free cornmeal, amaranth, teff, or certified GF oats. Oats specifically introduce more sugars and proteins to help feed wild yeast. Just ensure any additional cereals are clearly labeled gluten-free to prevent contamination.
- Finally, gluten-free versions of classic yeasted recipes like artisan boules, bagels, cinnamon rolls, and burger buns are all possible with Gluten Free Bread Flour from King Arthur.
- Baking Tips: Substitute this flour 1:1 (by volume or weight) in bread recipes that call for wheat flour. Add 2-3 tablespoons more liquid per cup of flour called for in your recipe. Each 2lb bag makes three artisan boules in a 4 qt. Dutch Oven.
- Dough made with Gluten-Free Bread Flour will rise about 50% faster than non gluten-free dough. Preheat your oven early and bake for longer; add an extra 5-15 minutes to the total bake time depending on the bread.
- This flour uses Gluten Free Wheat Starch to allow those with celiac disease, gluten intolerance, or simply living a GF lifestyle to experience and enjoy delicious yeasted recipes as intended. This ingredient provides yeasted baked goods made with King Arthur Gluten Free Bread Flour a similar flavor and texture of traditional recipes.
- INGREDIENTS: Gluten-Free Wheat Starch*, Corn Starch, Cellulose and Psyllium Fiber Blend, Sorghum Flour, Pea Protein, Xanthan Gum, Enzymes. CONTAINS: Wheat.
Prices pulled from the Amazon Product Advertising API on:
Product prices and availability are accurate as of the date/time indicated and are subject to change. Any price and availability information displayed on [relevant Amazon Site(s), as applicable] at the time of purchase will apply to the purchase of this product.
Water Quality and Its Starter Impact
Tap Water
Tap water contains disinfecting chlorine and fluoride added by municipalities to eliminate pathogens. However, these chemicals impede fermentation by damaging wild yeast cells attempting to propagate in the starter. Consider investing in a filtering pitcher or faucet attachment to remove chlorine and fluoride while retaining healthful mineral content.
Filtered Water
Using filtered or distilled water eliminates potential hindrances to fermentation like chlorine while retaining some beneficial minerals. Without chemicals or heavy metals, yeast can develop well. The consistency of filtered water helps bakers achieve reliable rise times and starter activity batch after batch.
Spring Water
Sourdough starters fare well with spring water high in bioavailable calcium, magnesium, and potassium which feed microbes. Test different brands to find one with an ideal pH balance and moderate mineral levels to encourage yeast but avoid inhibiting growth. Once discovered, spring water delivers vital nutrients and allows starters to thrive long-term.
Additional Ingredients for Flavor and Nutrition
While a basic gluten-free sourdough starter contains just flour, water, and wild yeast, adding supplemental ingredients introduces complex flavors and enhances nutritional value.
- A tablespoon of honey lends sweetness and gives wild yeast extra fuel to thrive during fermentation. Apple cider vinegar interjects tangy brightness. Both options tweak the pH to optimize yeast activity in your homemade starter.
- If aiming for a probiotic boost, stir a spoonful of yogurt into the starter mixture when feeding for gut-friendly cultures.
- For an extra dose of nutrition, mix in a teaspoon of flaxseed meal when refreshing stale starter to introduce fiber and omega fatty acids. Or add a sprinkle of nutritional yeast for enrichment with B vitamins.
Experiment with layers of flavor via these wholesome additions while amplifying nutrition. Just steer clear of any ingredients containing traces of gluten to keep your starter safe for special diets.
Making the Starter
Creating a hearty gluten-free sourdough starter from scratch does require some patience, but I promise it’s easier than it looks. With just a few simple ingredients and some care over the first week, you’ll cultivate a lively starter perfect for baking wholesome loaves.
Grab your scale, jar, and flour – let’s do this!
1. Selecting the Right Jar
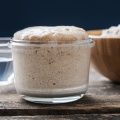
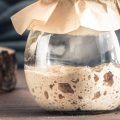
First things first – you need a container to house your new sourdough colony as it bubbles to life. A wide-mouth glass jar with at least a 1-quart capacity works best. Make sure it’s clean. Leave the lid loose at first to allow airflow. Once vigorous fermentation starts watch for overflow! Some bakers use rubber bands to loosely secure a cloth over the top.
2. Mixing the Initial Starter Culture
Combine 60g brown rice flour and 60g tapioca flour with 120g filtered water in your jar. Mix thoroughly with a fork or whisk until no dry spots remain – you don’t need to knead this starter dough like bread. Cover loosely and set aside somewhere draft-free with roughly room temperature around 70°F to 80°F. Now the wait for wild yeast begins!
3. First Fermentation Period
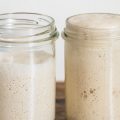
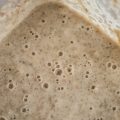
Within 1-2 days you should witness bubbles and rise indicating yeast activity. Stir the starter daily to incorporate more oxygen and feed the microbes. Don’t worry if nothing happens for 3 days – just keep waiting! The natural yeast floating around us needs time to populate the starter.
After 4-7 days your starter should be alive, rising and falling predictably. You’ll also notice a fruity acidic aroma. Does it smell vinegary or booze-like? That’s the lactic and acetic acid from wild bacteria, which is perfect. Time to start feeding!
4. Feeding the Starter
Transitioning your fragrant, freshly fermented starter to a hearty leavening agent takes 1-2 weeks to maintain a strict feeding schedule. Feed in the morning after its peak rise.
First discard 80% of the starter, keeping just 2-4 tablespoons. Add 60g each brown rice flour and tapioca flour and 120g water. Mix thoroughly until smooth, cover loosely, and allow to double in size before the next feeding.
Repeat this once or twice daily. After 3-5 days it should reliably double in 4-8 hours after feeding. The starter’s aroma, texture, and rise time indicate when it’s mature and ready for bread recipes. Store mature starter in the fridge, feeding weekly.
The key is discarding and then refreshing with fresh flour and water. This controls acidity while allowing the wild yeast and bacteria to thrive long-term. With time the starter will develop flavor complexity perfect for crafting gluten-free loaves with rich depth.
Problems and Troubleshooting Your GF Startr
Even seasoned sourdough bakers run into issues with their starters. Don’t be discouraged – with some troubleshooting, you’ll have a bubbly gluten-free starter in no time.
Dealing with Mold
Mold often develops when the starter isn’t acidic enough. Discard any portion showing mold, then rebuild your starter from scratch with a clean jar and utensils.
From now on, maintain your starter with more regular feedings to control acidity and use filtered water to prevent mold spores. Keep the texture smooth and hydrated to prevent mold growth. Address any issues before your next use. Eventually, you’ll learn the ideal hydration and activity level to prevent mold.
Kickstarting Slow Fermentation
Be patient, as gluten-free starters often need 2-3 weeks to fully activate. If your starter seems stuck, move it to 75°F to 80°F to trigger yeast activity.
Try switching flours or feeding twice daily. Control temperature and acidity while providing ample food for yeast growth. Gluten-free starters eventually bubble away reliably with care.
Storage Between Bakes
After baking, keep the leftover starter separate. Feed this reserved starter as usual, then store covered in the refrigerator.
When ready to bake again, bring the starter back to room temperature and refresh with 1-2 extra feedings to reactivate. Well-maintained starters live indefinitely. With some TLC your gluten-free starter will thrive through storage.
Maintaining Your Sourdough Starter
A healthy sourdough starter requires tender loving care to keep it active for baking. With a consistent feeding schedule and proper storage methods, your starter can live indefinitely – allowing you to bake up fresh loaves of gluten-free sourdough whenever the craving strikes!
Establish a Routine
Get into a rhythm of feeding your starter once a week if storing it in the fridge, or every 24 hours if left out at room temperature. Remove your starter from the fridge and let it warm up for a few hours before feeding to reactivate the yeast. Discard 80% of the starter, then add equal parts flour and water (about 60g each) to refresh what remains.
Control Acidity
The more often you feed the starter, the less acidic it becomes. But don’t feed too frequently or yeast won’t have time to produce those bubbles! Pay attention to how your starter smells and tastes to gauge whether to adjust feeding frequency or hydration level.
Proper Storage
An airtight container prevents your starter from absorbing fridge odors but allows gases to escape. Glass jars work perfectly. Before refrigeration bring the starter to room temperature and give it a good feed for plenty of food while dormant. Then store for up to 2 weeks. Freezing is also an option for long-term storage up to a few months.
Benefits of Gluten-Free Sourdough
Gluten-free sourdough offers several health and dietary advantages for those avoiding gluten. As the sourdough fermentation process breaks down some of the harder-to-digest compounds in grains, sourdough bread is often easier to digest and less likely to cause gastrointestinal issues compared to regular bread.
Increased Nutrient Bioavailability
The fermentation from the natural yeast and bacteria in sourdough breadmaking increases the bioavailability of nutrients like iron, zinc, magnesium, and B vitamins in the grains used in the bread. These nutrients become more accessible for absorption after the microbial activity breaks down gluten. This makes gluten-free sourdough an excellent source of vitamins and minerals.
Probiotic Properties
The lactic acid bacteria present in a sourdough starter hold probiotic benefits. As the bread is fermented and baked, probiotics make it to the final product. Consuming gluten-free sourdough introduces gut-healthy bacteria that can improve digestion and boost immunity in those with dietary restrictions.
Supports a Healthy Gluten-Free Diet
For those avoiding gluten, nutrient deficiencies can occur when relying too heavily on processed gluten-free products. With its increased nutrient bioavailability and digestibility, regularly eating homemade gluten-free sourdough allows following a gluten-free diet while still consuming nutritious, whole food. The tasty bread makes healthy gluten-free baking enjoyable.
How to Bake with a Gluten-Free Starter
Baking with gluten-free starters does require some adjustments from typical wheat-based sourdough. Our gluten-free grains lack binding proteins, so structure and moisture levels need special attention.
Creating Loaf Structure
When shaping your dough pre-bake, be gentle. Overworking the dough damages the starches needed for the rise. Use parchment paper to transfer delicate dough into Dutch ovens or rimmed baking sheets. The paper prevents sticking and supports the dough’s shape. Inside a preheated Dutch oven, moisture gets trapped for an artisan crust, while baking stones yield a crisp crust and even heat distribution.
Controlling Proofing and Baking
Without gluten, moisture evaporates faster from the dough. Prevent drying by proofing loaves in closed ovens with a pan of hot water to maintain humidity. Monitor proof times, as our gluten-free doughs rise faster, between 45-90 minutes on average. Bake for 10 minutes covered for an initial burst of steam before finishing uncovered at 375°F – 415°F. Internal temperatures should hit 200°F – 210°F. Cool completely before slicing.
Gluten Free Goodness
Gluten-free sourdough bread is easier to digest than regular bread. The fermentation breaks down hard compounds in grains. This makes nutrients like iron and magnesium easier to absorb. The bacteria also provide probiotics for gut health. Homemade sourdough allows you to avoid unhealthy store-bought gluten-free products.
With care and feeding, the starter lasts indefinitely and can be used for fresh nutritious loaves. The tasty bread supports healthy gluten-free eating with more nutrients and fewer digestion issues.
FAQs
Can you convert sourdough starter to gluten-free?
Yes, you can convert a regular wheat sourdough starter to be gluten-free. Feed the starter with gluten-free flour for 5-7 days, discarding and refreshing daily, to eliminate gluten and activate gluten-free flour’s wild yeasts and bacteria.
Can I feed my sourdough starter with gluten-free flour?
You can feed a regular or gluten-free sourdough starter with gluten-free flour. It may take a few feedings for the starter to adjust and become active enough to rise the gluten-free dough. Check for bubbles and increase to rise before baking.
Can sourdough be gluten-free?
Yes, sourdough can be made gluten-free by using gluten-free flours. Gluten-free sourdough tends to be denser and has less rise due to the lack of gluten. A strong starter, proper proofing time, and light hand mixing can help lift the crumb.
Why won’t my gluten-free sourdough starter rise?
Gluten-free starters often don’t rise well due to lack of gluten. Ensure the starter is active by checking for bubbles. Let it proof longer, at least 8 hours, or overnight. Gently mix to retain air pockets. Add a binding ingredient like psyllium husk or xanthan gum.


