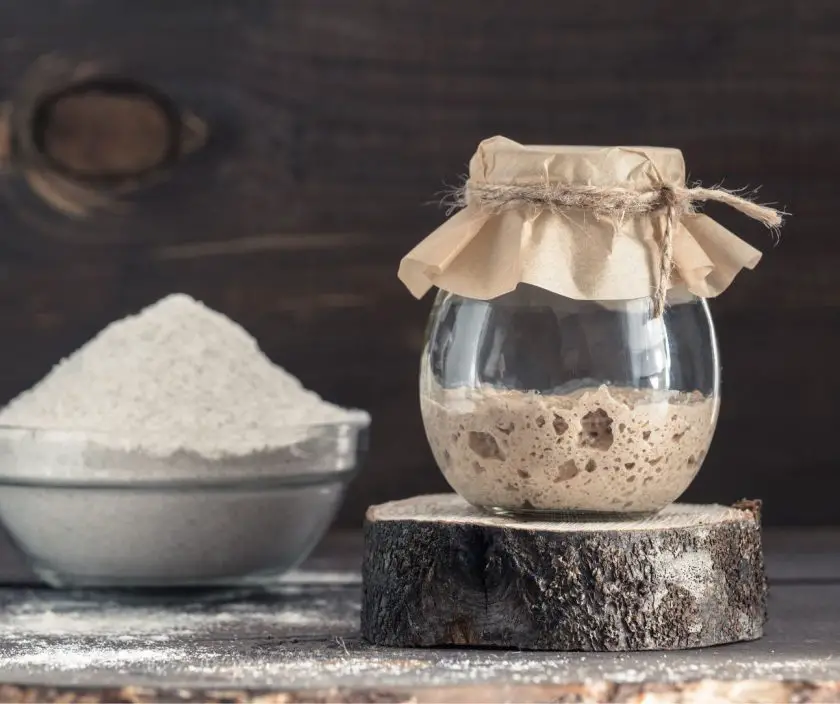
Achieving a strong, vigorous sourdough starter is key to baking lofty, open-crumbed sourdough bread. But troubleshooting a weak, runny starter leaves many bakers frustrated. Let’s cut through the noise to pinpoint why starters can lack oomph—and how to make stiff sourdough starter. Create a stiff starter perfect for baking flavorful loaves with an airy interior crumb and crackly crust. No more dense bricks for you. Just a few simple tweaks, and you’ll have a robust starter raring to leaven!

Table of Contents
- How to Know You Have a Stiff Sourdough Starter
- Ingredients Needed
- Making a Stiff Sourdough Starter
- Common Things You Might Encounter and Solutions
- Maintaining Your Starter
- How to Improve Your Starter
- Stiffen Up That Starter!
- FAQs
How to Know You Have a Stiff Sourdough Starter
Stiff sourdough starter has some unique properties that set it apart from more liquid starters. Understanding these characteristics helps explain why stiff starters create such delicious sourdough bread.
Thick, Scoopable Texture
The first defining trait of a stiff starter is its thick, clay-like texture. With a lower hydration level of around 50-60%, stiff starters hold their shape and can be scooped and handled like dough. The thick texture comes from using equal parts whole grain and all-purpose flours absorbed by only half as much water by weight.
This stiff consistency makes the starter easier to refresh and feed before baking without losing much previous rise. The density also allows it to trap more gas bubbles during proofing for an excellent oven spring.
Moderate Fermentation Activity
Despite less available moisture, a properly maintained stiff starter remains pleasantly active with yeasts and bacteria to leaven bread. A healthy starter left at room temperature doubles in size within 4-8 hours after feedings and passes the “float test” indicating adequate fermentation gases.
The firm texture causes gas bubbles to expand more slowly compared to wet starters. This extends fermentation time which allows more complex flavors to develop from the symbiotic yeast and bacteria. The resulting bread boasts a tangy sourdough taste.
Impacts Crust and Crumb Characteristics
Bakers praise stiff starters for producing bread with a crackly crisp crust and open, irregular crumb structure. The thicker starter helps create an initial dough strength that achieves sufficient rise yet avoids over-proofing.
This balance between moderate fermentation rate and dough structure makes bread that rises beautifully without collapsing while baking. That gives the charming holes and texture in the crumb that artisan sourdough is known for.
Ingredients Needed
To make a stiff sourdough starter you need:
- Flour – Using a mix of 50% whole-grain flour (like rye or wheat) and 50% all-purpose white flour creates a stiff starter. The higher protein content of whole grain flour gives more structure.
- Water – Use only 50-60% as much water as flour. Using less water makes the starter thick and scoopable. For example:
- 100g flour
- 50g water
Keeping the water percentage low is important for a stiff starter that still rises well for baking. Experiment to find the right ratio of flours and water amount that gives you the starter consistency you want.
Making a Stiff Sourdough Starter
Day 1: Mixing the Initial Dough
Gather your essential sourdough tools: a digital kitchen scale, mixing bowls, a dough scraper, and storage containers. Using a scale for accuracy, combine equal weights of whole grain and all-purpose flours along with 60% as much water by weight. For example, mix 100g wheat flour, 100g white flour, and 120g water. Stir thoroughly until fully incorporated. This initial dough will be quite stiff.
Cover loosely and let sit at room temperature for 48 hours. Mark your calendar to maintain a consistent 12-hour feeding schedule.
Day 2: First Feeding
After letting the dough ferment for 48 hours, “feed” your starter by stirring in another 50g each of whole grain and all-purpose flour along with 60g water. Use your dough scraper to reincorporate everything smoothly. The starter may begin bubbles and rise slightly.
Days 3-5: Twice-Daily Feedings
Repeat this feeding process every 12 hours for the next 5-7 days, discarding a little starter as necessary to keep the volume manageable. Maintain 60% hydration and a 1:1 ratio of whole grain to white flour. After 3-5 days you should notice the starter becoming bubbly, doubling in size, and smelling pleasantly sour.
Once your starter peaks reliably after feedings, maintains a pleasant sour aroma, and passes the “float test” it is mature and ready to use for baking.
Preserving Freshness & Consistency
To preserve a mature stiff starter between uses, feed it as usual then immediately refrigerate. The cold significantly slows fermentation. Remove from the fridge 1-2 days before you plan to bake and resume every-12-hour feedings at room temp to reactivate.
When ready to bake, your revived starter should double in size within 4-8 hours of feeding. The bubbles and rise indicate lively yeast activity essential for oven spring and rise. Use your mature stiff starter as you would any liquid sourdough starter in your favorite baking recipes.
Maintaining a consistent feeding schedule and 60% hydration preserves the ideal viscosity and fermentation activity for exceptional sourdough baking.
Common Things You Might Encounter and Solutions
As you nurture your stiff sourdough starter, you may encounter some common issues that affect the health and leavening power of your starter. Don’t fret – with a few simple troubleshooting tips, you can get your starter back on track.
Dealing with Mold
If you notice mold growing on the surface of your starter, don’t panic. Carefully scoop out the mold, then feed your starter as usual. Going forward, try a warmer spot or cover with a coffee filter to block airborne mold spores. The acidic environment of a healthy starter prevents mold growth inside.
Signs of a healthy starter include a pleasant sour aroma, bubbles, and doubling in size after feedings. If mold recurs despite adjusting conditions, discard the starter and begin again.
Boosting Slow Fermentation
A common starter trouble is poor rise and minimal bubbles between feedings. This indicates slow yeast activity. Try moving it to a warmer area around 75°F and feed with whole grain flour, which has more nutrients to “wake up” the yeast.
Also, chlorinated water can inhibit fermentation. Use filtered water or let tap water sit out overnight before mixing your starter.
Balancing Acidity
Over time, a starter can become too acidic, evidenced by a very tart smell or failure of the “float test.” This over-acidity hampers yeast growth. To balance pH, mix in some buffering whole milk or yogurt along with the usual flour and water at your next several feedings.
Maintaining Your Starter
Keeping your precious sourdough starter healthy requires attentive, ongoing care. Like a pet or plant, your starter relies on you for consistent feedings to thrive. As Natasha says, she has nurtured it from just a bit of flour and water into a lively leavening agent.
Feed at Room Temperature
- Store your stiff starter at room temperature when actively using it for baking. Around 75°F fosters ideal yeast fermentation and rise.
- Cover loosely to prevent drying out.
- Feed your starter once or twice daily by stirring in fresh flour and water. Equal amounts of whole grain and all-purpose flours supply nutrients and structure.
- Maintain your target 60% hydration level. The bubbles and doubling in size indicate lively cultures converting starches into gases that will later leaven your bread.
Refrigerate for Long-Term Storage
When not baking regularly, you can refrigerate your mature starter for weeks at a time. The cold temperature significantly slows fermentation to preserve freshness.
- Before refrigerating, feed your starter as usual to provide needed food for the yeasts.
- Tightly seal your starter container to prevent drying out in the fridge over time.
- Remove from refrigeration 1-2 days before you plan to bake again.
- Set on the counter to reinvigorate and resume feedings every 12 hours until active bubbles return.
I always feed and use my refreshed starter within 5 days for the best oven spring and rise. But a healthy stiff starter can last 2 weeks refrigerated before it starts to lose oomph.
Signs of Starter Health
With practice, you will recognize when your stiff starter needs a booster feed or signs indicating it has turned.
- A healthy sourdough starter has a smell that is pleasantly sour but not too strong.
- They should readily double after feedings, releasing tiny bubbles throughout.
- The starter also passes the “float test” by bobbing like a boat atop a bowl of room-temperature water.
How to Improve Your Starter
Your stiff sourdough starter is the engine that drives delicious sourdough bread. Optimizing your starter’s health and leavening power ensures consistent results every time you bake.
Choose Optimal Flours
Use an equal mix of whole grain and bread flour. The extra protein and nutrients in whole grains bolster yeast activity. Bread flour has more gluten strength. Combining both makes a starter with plenty of rise and structure.
Control Ambient Temperature
Fermentation thrives at 75-80°F. Colder temperatures cause slow, weak rise while overheating kills yeast. Maintain starter at an ideal temp to keep it liv+ely for baking. During summer, a cooler spot prevents over-proofing between feedings.
Adjust Hydration As Needed
If your starter seems too dry and stiff or turns runny, tweak the flour-to-water ratio. For a drier starter, reduce hydration to 50%. For a looser texture, go up to 65%. Find the “goldilocks” zone for your perfect starter consistency.
Stiffen Up That Starter!
Stiff sourdough starters make tasty sourdough bread with a holey and light crumb. The thick, doughy texture lets you handle it easily. It rises slower than liquid starters, making more sour flavors. The slower rise creates a balanced dough that rises well in the oven. This makes bread with an even texture full of holes.
Pay attention to signs that your sourdough starter is healthy. Experiment with ingredients and feeding to optimize it. A well-maintained stiff starter can reliably make great sourdough bread over and over.
FAQs
How do you keep a sourdough starter stiff?
To keep a sourdough starter stiff, only add enough flour and water when feeding to achieve a thick, dough-like consistency. Aim for a 1:1 ratio of flour to water by weight. Stir thoroughly after feeding and allow it to rise and fall at room temperature before refrigerating.
How do you convert liquid starter to stiff starter?
To convert a runny, liquid starter to a stiff starter, pour off the hooch (the liquid on top), add equal parts flour and water by weight, and stir vigorously to combine. Let it rise and fall at room temperature, stirring occasionally, until it takes on a thick, doughy texture before refrigerating.
How do you make a strong sourdough starter?
Feed a sourdough starter equal amounts of flour and water by weight 1-2 times per day, allowing it to rise and fall at warm room temperature in between. As it develops, transition from all-purpose to bread flour for food and stir vigorously after feedings to build gluten strength. Mature starters have bubbly rises and a pleasant sour aroma.


