In this post, you’ll learn to create a basic sourdough starter from scratch at home, following a simple step-by-step process. All you’ll require are flour, water, and a dash of patience. Soon enough, you’ll have a lively, active starter good to go!
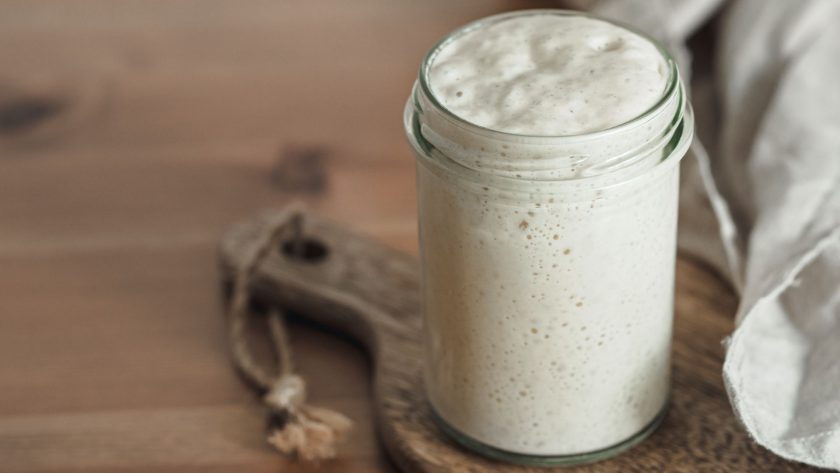
Table of Contents
- What is Sourdough Starter?
- What to Know Before You Start
- The Ultimate Sourdough Starter Recipe + Schedule
- Maintaining and Feeding Sourdough Starter
- When is Sourdough Starter Ready
- Tips for a Successful Sourdough Starter
- Common Sourdough Starter Mistakes (and Solutions)
- How to Use Sourdough Starter
- How to Store Sourdough Starter
- Why Sourdough Starter?
- Embracing the Sourdough Experience
- FAQs
What is Sourdough Starter?
First, let’s make “sourdough starter” intimidating. Picture it as a living combo of flour and water, bustling with wild yeast and beneficial bacteria.
This blend is your secret weapon in bread making, giving your loaves of beautiful rise and incredible flavor.
Think of sourdough starter as both the secret to and core of sourdough bread. It replaces the need for commercial yeast in your baking. Without it, we wouldn’t have the delicious sourdough bread we love.
What is Sourdough Starter Made Of?
What’s amazing is that a sourdough starter is incredibly simple. It’s just flour and water. That’s it!
Flour: Acts as the food source. It provides the sugars and nutrients necessary for the yeast and bacteria to thrive.
Water: Hydrates the flour, enabling the enzymes to break down the starches into sugars that the yeast and bacteria can consume.
When flour and water are combined and left in a conducive environment, they begin to attract yeast and bacteria present in the air and on the grains of the flour. As they consume the sugars from the flour, these microorganisms produce carbon dioxide gas and organic acids. This results in a bubbly mixture that has a tangy aroma – the hallmark characteristics of a sourdough starter.
What is Sourdough Starter For?
Let’s talk about why sourdough starter is your best friend in bread baking.
It’s the superstar that leavens your dough, giving it that wonderful rise. Thanks to the carbon dioxide produced during bread fermentation, air bubbles appear, giving us airy and chewy loaves.
But it’s not just about leavening; starter is also responsible for the unique flavor and texture that define sourdough bread. The organic acids produced by the bacteria give sourdough its signature tangy flavor.
Common Types of Sourdough Starter
Sourdough starters come in different flavors and styles, often influenced by the type of flour used or regional traditions. Common sourdough starter types include:
| Type of Starter | Ingredients | Taste |
|---|---|---|
| Traditional Sourdough Starter | all-purpose or bread flour + water | pleasantly tangy or sour, slightly sweet |
| Rye Sourdough Starter | rye flour + water | earthy, nutty, milder tangyness compared to traditional sourdough |
| Whole Wheat Sourdough Starter | wheat flour + water | slightly sweet, milder tangy flavor compared to traditional sourdough, less earthy than rye sourdough |
| Gluten-Free Sourdough Starter | brown rice flour (or other GF flours) + water | clean and light, mild sweetness, not earthy or nutty |
What to Know Before You Start
Sourdough starter creation requires patience, especially in the initial days when you may not see much activity. It’s essential to trust the process and continue with daily feedings.
How Long
How long should a sourdough starter take to make? Creating a sourdough starter using the traditional method can take about 5 to 7 days. Some methods can take longer, but we’re only talking about the basic method today.
Difficulty
Do you need to be an expert? Nope!
If you have prior experience with bread making or working with yeast, you may find the process easier. However, beginners can also successfully create a starter. With the right guidance and patience, anyone can successfully create a sourdough starter
Maintaining a consistent feeding schedule is crucial for a successful starter. It requires daily feeding for the first several days, which can be a bit demanding. Once the starter is established, the maintenance becomes less frequent.
Flour
Use good-quality flour. If possible, opt for organic flour which is free from additives that might interfere with fermentation.
To elevate your starter, use whole wheat or rye flour. Whole wheat flour is rich in nutrients and retains most parts of the grain. This not only provides a great source of food for the wild yeast but also results in a more active and robust starter. Rye flour contains a high mineral content, fostering a conducive environment for fermentation. Additionally, its unique flavor can add a delightful complexity to your sourdough.
If you don’t have access to these flours, all purpose flour still works well! It’s a favorite among many bakers, too. In fact, you can even mix flours. Just know that there will be differences in activity as a result. Different flours can react in different ways.
Keeping an eye on your starter’s behavior is key to ensuring it stays healthy for the long haul.
Water
As little chlorine in water as possible is essential. Chlorinated water can inhibit the growth of the beneficial microorganisms needed for fermentation. Opt for filtered or bottled water if you can.
The mineral content in the water can also play a subtle role in the taste and activity of your starter. Some bakers even go the extra mile to use spring water, valuing its natural mineral composition.
Equipment
The type of container you use to house your starter can influence its health.
Use a clean, non-reactive container like glass or plastic, and avoid metal containers. Glass jars are preferred as they’re non-reactive. Ensure they’re clean and dry before transferring your starter. Every once in a while, it’s also a good idea to sterilize the jar to kill any lurking pathogens.
Likewise, always use clean utensils when handling your starter.
Lastly, do not use a small jar. Remember that your starter will expand, so a medium to large jar should do.
The Ultimate Sourdough Starter Recipe + Schedule
Here’s a detailed guide to crafting your own sourdough starter from scratch, including a detailed schedule for the best results:
Ingredients
- 1 cup flour (whole wheat or rye)
- 1/2 cup lukewarm water (filtered, non-chlorinated)
Tools
- wooden spoon
- clean big bowl
- glass jar with lid
Step by Step Procedure and Complete Timeline
Having a schedule can increase your chances of success, especially if you’re new to sourdough starter-making.
Day 1
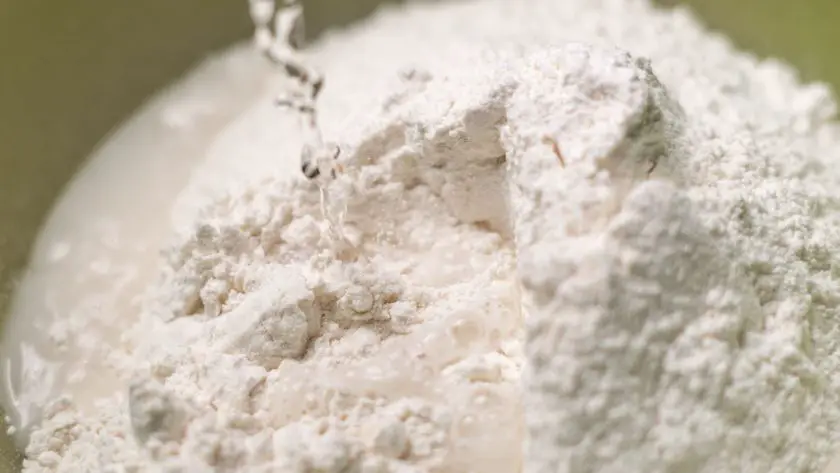
This stage is the easiest. Just combine the ingredients, mix well, transfer to your jar or container, and wait.
- In a clean glass or plastic container, combine 1/2 cup of flour and 1/4 cup of lukewarm water.
- Stir the mixture well until all the flour is hydrated (no dry pockets). Stirring thoroughly ensures even hydration and introduces aeration, which is crucial for yeast activity. After mixing, the consistency should resemble a thick paste.
- Transfer your mixture to your jar.
- Cover the container loosely with a clean kitchen towel or plastic wrap.
- Allow it to sit at room temperature (around 70-75°F or 21-24°C) for 24 hours. Put your starter in a warm (not hot!) spot in your house, if you live somewhere cold.
Day 2
This is when you start feeding, which is vital for the growth and health of your starter.
- Check your mixture. You might see some bubbles and get a whiff of a dough smell, indicating activity. This is a good sign. If there are little to no bubbles, that’s okay, too. They can take time to be obvious in size and amount.
- Discard half of the mixture, about 1/2 cup. This is an important step, otherwise you will have too much starter.
- Add another 1/2 cup of flour and 1/4 cup of lukewarm water to the remaining mixture.
- Stir well to maintain an even consistency and introduce aeration.
- Cover, and let it sit for another 24 hours.
Day 3
- By now, your mixture should be showing more bubbles and have a slightly tangy smell.
- At this point (basically when there’s activity), I recommend to transfer the starter into a clean glass jar where you want to house it indefinitely as long as you use it.
- Discard half of the mixture again.
- Add 1/2 cup of flour and 1/4 cup of lukewarm water, stirring thoroughly.
- Cover and let it sit for another 24 hours.
Days 4 and 5
- Repeat the feeding process (discarding half, adding flour, and water) twice daily, roughly every 12 hours.
- Your starter should become more active with more bubbles and a pleasant sour aroma.
Day 6
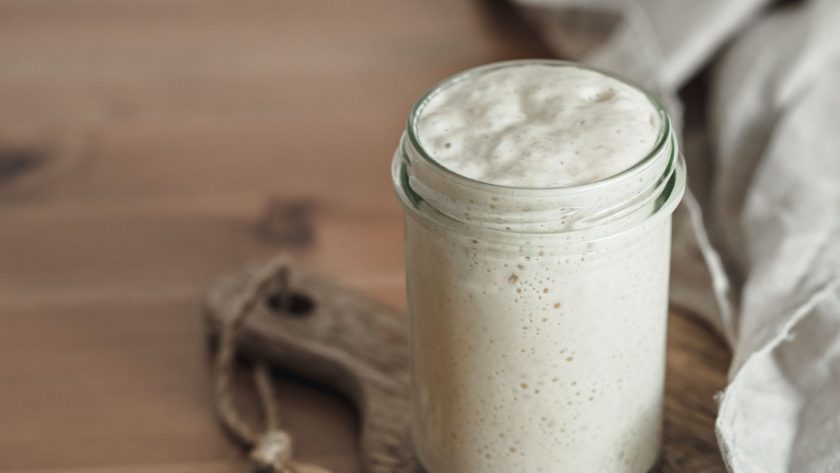
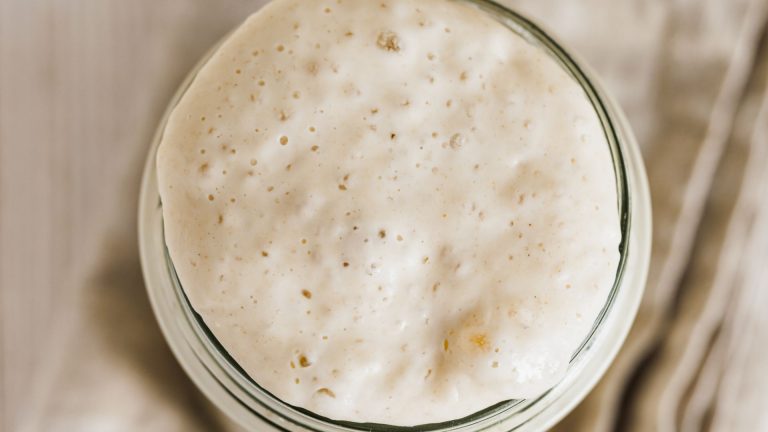
Your sourdough starter should now have a lot of bubbles (both big and small), have a pleasantly tangy aroma, and have doubled in volume compared to Day 1.
You can now consider it ready to use in sourdough recipes.
Maintaining and Feeding Sourdough Starter
Maintaining a sourdough starter is a little bit like caring for a pet. Active mature starters kept in room temperature require regular attention and care to stay alive and thrive.
Here are some basic steps to maintaining your starter daily:
- Have a regular feeding schedule. It helps to set a reminder on your phone so you won’t forget!
- Remove and discard half of your starter (this can be used in other recipes or shared with friends).
- Add equal parts of flour and water (typically 1 cup of flour to 1/2 cup of water) to the remaining starter. Mix until smooth.
- Cover loosely and let it sit at room temperature.
Note that this is only for room temperature starters. If you’re storing your starter in the refrigerator, a once-a-week feeding schedule is sufficient. For longer baking periods, consider drying some starter flakes as backup. Rehydrate and feed them when you’re ready to bake again.
When is Sourdough Starter Ready
A starter that has been fed regularly and properly for at least a week is considered mature. By this point, has a stable microbial community and is more likely to be ready for baking.
Signs of a Healthy Starter
Here are some tell-tale signs that your starter is active, healthy, and ready to use in recipes:
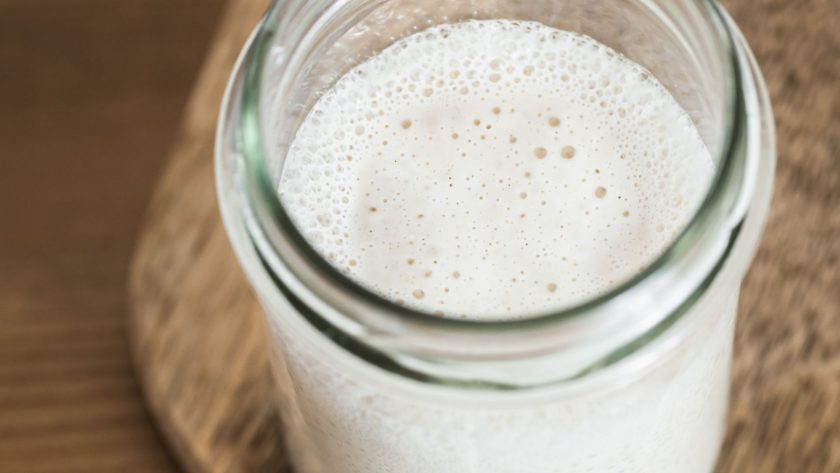
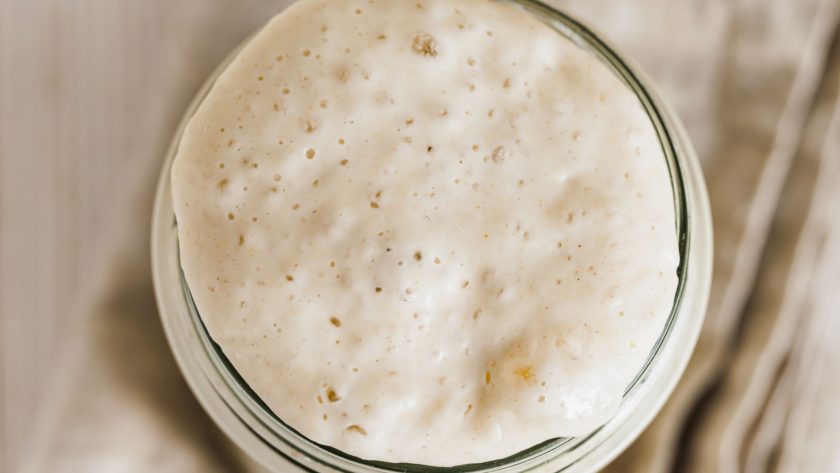
- Bubbles: A bubbly surface is no cause for worry. That means the yeast and bacteria are doing their thing and fermenting away!
- Aroma: If it’s got a tangy, kinda sour smell, you’re on the right track. That’s the signature scent of a solid starter.
- Doubling in Volume: If your starter grows twice its size in just 4-6 hours after feeding then you’ve got yourself a powerhouse starter!
- Float Test: This is a popular method among bakers. Take a small spoonful of your starter and drop it gently into a glass of water. If it floats, it’s a sign that your starter is full of gas and ready to be used in your bread recipe. If it sinks, it might need more time or another feeding.
- Predictable Rising and Falling: Once you’ve been feeding your starter regularly, you should notice a predictable pattern of when it rises after feeding and when it starts to fall or deflate. When it reaches its peak height and just starts to fall, it’s typically at its prime for baking.
- Consistency: The starter should have a thick, but pourable consistency, much like a thick pancake batter.
All this said, some flours can be a bit tricky and might make your sourdough starter take its sweet time. I’ve heard starters taking a whole 2 weeks before they’re good to go. So, the trick is to just keep an eye on it and be on the lookout for signs of contamination.
Tips for a Successful Sourdough Starter
Feeding
- Always ensure it’s fed regularly. Maintain a consistent feeding schedule and temperature (around 70-75°F or 21-24°C) to encourage yeast growth.
- Remember that creating a sourdough starter takes patience and practice. The longer you maintain and feed your starter, the more complex and flavorful it will become.
- Skipping a couple of isn’t the end of your starter. It might just look underfed or flat, so just feed it again to get it right again. And if your starter’s been out of action for a while, it might need a couple of feeds to bounce back. No worries if results are not immediate.
- Remember to discard before feeding, otherwise you will be overwhelmed by too much starter. Feed your starter every time you bake with it or discard it.
Storage
- If you plan on baking often, store your starter on the counter and feed it daily.
- If you plan to bake occasionally, store your starter in the refrigerator and feed it once a week. You can feed it either straight out of the fridge or after it reaches room temperature.
- Thinking of baking for an extended time? It’s a good idea to dry out some starter flakes and keep them handy. Just add water and give them a feed when you’re all set to bake again.
- Always opt for a clean vessel when you’re moving or storing your starter. Glass jars are the best since they don’t mess with your starter’s vibes.
- Your jar should be roomy. Remember, the starter grows – so think double its current volume.
Common Sourdough Starter Mistakes (and Solutions)
Like any journey, there might be a few bumps along the way. Let’s chat about the typical sourdough troubles newcomers face and, more importantly, how you can steer clear of them.
Overfeeding Your Starter
It’s like giving too much candy to a kid – it’s just not beneficial in the long run. If you feed your starter too often, you might dilute the concentration of yeast and bacteria, making it less active.
Tip: Stick to a regular feeding schedule. If you’re keeping it on the counter, once a day should do. In the fridge? Once a week is perfect.
Not Feeding It Enough
On the flip side, if your starter develops hooch (boozy liquid layer) on top, or if it gets watery and develops a bad smell, it’s probably hungry. An underfed starter can lead to a sluggish fermentation process.
Tip: Don’t forget to feed your starter! Keep an eye out for any changes in aroma or appearance – they’re usually your starter’s way of telling you it’s feeding time.
Consistency Issues
A well-maintained sourdough starter should have a consistency that’s somewhat like a thick pancake batter. However, there are times when you might find your starter straying from this ideal consistency.
If your starter feels more like a dough than a batter, it’s too thick. This can be due to using a flour type that absorbs more water or a change in ambient temperature. A starter that’s too runny might not be able to trap enough gas, which can lead to breads that don’t rise well.
Tip: If the consistency becomes too thick or thin, adjust with a little water or flour during feedings. If your starter develops an unpleasant odor, pink or orange discoloration, or mold, throw it away and start over.
Storing Your Starter Wrong
Sourdough starter, while hardy, does have its preferences and dislikes, especially when it comes to its living quarters.
The last thing you want is mold creeping into your starter. If your starter isn’t stored correctly, you’re essentially rolling out the welcome mat for mold.
A dark or orange liquid (different from the clear or grayish hooch) or a really off smell (different from the usual tangy aroma of sourdough) can indicate mold.
Tip: Always use a clean jar when transferring your starter, and if you see any signs of mold, it’s safer to start fresh. Use clean utensils when handling your starter.
How to Use Sourdough Starter
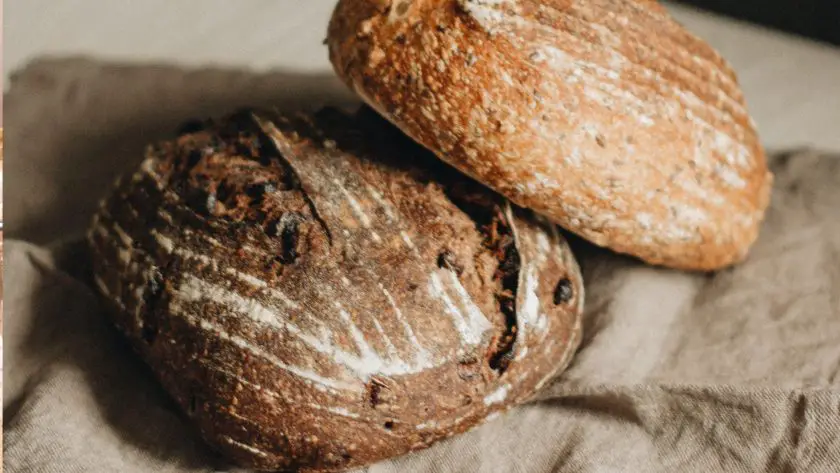
Baking with a sourdough starter doesn’t just introduce fantastic flavor and texture to your bread, it also brings with it the satisfaction of crafting something truly artisan.
Here’s how to effectively use your starter and integrate it into your favorite recipes:
Basic Sourdough Bread Recipe
Ingredients
- 1 cup active sourdough starter
- 1 1/2 cups lukewarm water
- 4 cups bread flour
- 1 1/2 teaspoons salt
How to Make Sourdough Bread
- Combine the starter, water, and 3 cups of the flour. Mix until smooth.
- Add the remaining flour and salt, kneading until the dough is smooth and elastic (about 10 minutes).
- Place the dough in a lightly greased bowl, cover, and let it rise until it has doubled in size (this can take anywhere from 4 to 8 hours, depending on your starter’s potency and ambient temperature).
- Gently shape the dough into a round or oval loaf. Let it rise again for 1 to 2 hours.
- Preheat your oven to 425°F (220°C). Make a few slashes on top of your loaf to allow it to expand while baking.
- Bake for 25 to 30 minutes, or until the crust is golden brown and sounds hollow when tapped.
More Sourdough Starter Uses
- Adjusting for Taste: Sourdough is naturally tangy, but you can adjust the sourness level. For a milder flavor, use the starter earlier during its peak. For a tangier loaf, extend the rise time or use a more mature (longer since feeding) starter.
- Incorporating into Other Recipes: Your sourdough starter isn’t limited to just bread! Consider adding it to pancakes, muffins, crackers, or even pizza dough. When doing so, remember to adjust the amount of liquid and flour in your recipe to account for the hydration of the starter.
- Discarding Sourdough Starter: Regular feedings of your starter require you to discard some of it to maintain a manageable quantity and keep it healthy. But “discard” doesn’t mean waste! You can use the sourdough discard for many recipes as well. If you find yourself with too much discard, consider reducing how often you feed or the amount you keep. You can compost discard if you have too much or no time to use it.
How to Store Sourdough Starter
Not yet in the mood to bake? That’s okay. You can store your sourdough starter for future use. Let’s get into how to best store your starter to ensure it stays alive, kicking, and ready for your next baking venture.
Refrigeration (Cold Storage)
- When to Go for It: This method is a go-to if you’re not in the mood for daily baking but still want to keep your starter without much fuss.
- How to Do It: Give your starter a good feed within the last day. Transfer it to a glass jar with a loosely fitting lid. You could also opt for plastic wrap, but ensure some space for the gases. Pop it into the fridge. Make it a ritual to feed your chilled starter weekly. You can technically feed the starter as-is out of the fridge, but if your house is too cold, you can wait for the starter to warm up a bit.
Room Temperature Storage
- When to Go for It: If you’re the kind who’s baking pretty often, like every couple of days.
- How to Do It: Store that starter in a glass jar. But here’s a tip: cover it with a cloth and secure it with a rubber band. Feed it daily – it’s hungry more often at room temp! Find a cozy spot at consistent room temperature, away from any pesky sunlight.
The Long Game (Long-Term Storage)
- When to Go for It: Say you’re taking a baking hiatus.
- How to Do It: Dry it out. Spread the starter thin on some parchment and let it air out until dr. Crumble it up, store it in an airtight container, and you’re golden. When the baking bug bites again, just add water, throw in some flour, and bring your starter back to life.
Why Sourdough Starter?
Once you taste sourdough bread and understand its health benefits, you’ll wonder why you didn’t start sooner. Sourdough starter is your gateway to all these advantages.
Sourdough Starter vs Yeast
Sourdough starter brings a multitude of benefits to the world of bread baking, surpassing the capabilities of commercial yeast.
- Sourdough starter harnesses wild yeast and lactic acid bacteria and this natural fermentation process results in bread that has a unique, complex flavor profile. This taste is difficult to replicate with commercial yeast.
- The long fermentation process in sourdough bread breaks down gluten and phytic acid, making the bread more digestible for many people. Some individuals with gluten sensitivities find that they can tolerate sourdough bread better than bread made with commercial yeast.
- Sourdough bread tends to stay fresh longer than bread made with commercial yeast.
- Sourdough bread has a milder impact on blood sugar levels, compared to breads using commercial yeast.
- Sourdough starter can be used not only for bread but also for a wide range of baked goods, including pancakes, waffles, muffins, and more.
Why Make Sourdough Starter?
When you have an active sourdough starter, you don’t need to rely on store-bought commercial yeast. Crafting your starter is not only satisfying but also budget-friendly. Sourdough starter, when cared for, can last for years, and some starters have even been passed down through generations.
You get to tailor your starter to achieve your preferred flavor profile. Not just that, you have complete control over the quality of the flour and water you use, which you can’t do with commercial leaveners.
The versatility of your own sourdough starter also enables you to make so many baked goods, not just bread. It’s a valuable addition to your baking repertoire.
Bonus, making sourdough starter isn’t as hard as you might think and it’s so rewarding!
Embracing the Sourdough Experience
Starting your own sourdough journey might seem daunting at first, but like all things, practice and patience go a long way. The unique aroma, texture, and taste of a fresh sourdough loaf are (in this baker’s humble opinion) incomparable and worth every effort.
So, whether you’re a seasoned baker or a newbie, dive in! Experiment, learn from your mistakes, and enjoy the incredible journey that is sourdough baking. Apply what you’ve learned to this easy sourdough bread for beginners recipe!
Remember, sourdough isn’t just about following steps. It’s about embracing the nuances and understanding the rhythm of your starter. Some days it might surprise you, other days it might test your patience, but that’s all part of the charm.
Happy baking!
FAQs
How is sourdough starter made?
By combining equal parts flour and water and letting it ferment at room temperature, the mixture becomes an active sourdough starter.
Can I make sourdough starter without discarding?
Yes, but it’s not recommended. When you don’t discard, the quantity of the starter will increase rapidly with each feeding, requiring more flour and water to maintain and eventually leading to an impractically large volume.
Can you use any kind of flour to make a sourdough starter?
Yes, you can use various types of flour to make a sourdough starter, but some flours work better than others.
Is it worth making your own sourdough starter?
If you love the idea of cultivating your own wild yeast, enjoy hands-on kitchen projects, and appreciate the unique taste of sourdough, it’s definitely worth making your own starter. However, if you’re looking for a quick and straightforward baking experience without the commitment of maintenance, it might not be the right choice for you.
Sourdough Starter Recipe
Here’s a detailed guide to crafting your own sourdough starter from scratch, including a detailed schedule for the best results.
- Yield: 1 jar of starter 1x
Ingredients
- 1 cup flour (whole wheat or rye)
- 1/2 cup lukewarm water (filtered, non-chlorinated)
Tools
- wooden spoon
- clean big bowl
- glass jar with lid
Instructions
Day 1
- In a clean glass or plastic container, combine 1/2 cup of flour and 1/4 cup of lukewarm water.
- Stir the mixture well until all the flour is hydrated (no dry pockets). Stirring thoroughly ensures even hydration and introduces aeration, which is crucial for yeast activity. After mixing, the consistency should resemble a thick paste.
- Transfer your mixture to your jar.
- Cover the container loosely with a clean kitchen towel or plastic wrap.
- Allow it to sit at room temperature (around 70-75°F or 21-24°C) for 24 hours. Put your starter in a warm (not hot!) spot in your house, if you live somewhere cold.
Day 2
- Check your mixture. You might see some bubbles and get a whiff of a dough smell, indicating activity. This is a good sign. If there are little to no bubbles, that’s okay, too. They can take time to be obvious in size and amount.
- Discard half of the mixture, about 1/2 cup. This is an important step, otherwise you will have too much starter.
- Add another 1/2 cup of flour and 1/4 cup of lukewarm water to the remaining mixture.
- Stir well to maintain an even consistency and introduce aeration.
- Cover, and let it sit for another 24 hours.
Day 3
- By now, your mixture should be showing more bubbles and have a slightly tangy smell.
- At this point (basically when there’s activity), I recommend to transfer the starter into a clean glass jar where you want to house it indefinitely as long as you use it.
- Discard half of the mixture again.
- Add 1/2 cup of flour and 1/4 cup of lukewarm water, stirring thoroughly.
- Cover and let it sit for another 24 hours.
Days 4 and 5
- Repeat the feeding process (discarding half, adding flour, and water) twice daily, roughly every 12 hours.
- Your starter should become more active with more bubbles and a pleasant sour aroma.
Day 6
- Your sourdough starter should now have a lot of bubbles (both big and small), have a pleasantly tangy aroma, and have doubled in volume compared to Day 1.
- You can now consider it ready to use in sourdough recipes.

![How To Freeze Sourdough Starter [Top Tips For Success] 144 How to freeze sourdough starter [top tips for success]](https://www.mydailysourdoughbread.com/wp-content/uploads/2023/06/storing-starter-in-freezer-120x120.jpg)
