Bread shaping is one of the most important elements of sourdough bread baking. Before we bake the perfect loaf, we must learn how to create perfect sourdough shapes! Whether you’re opting for a simple oval, or want to go a step further and bake a delicious plaited sourdough loaf, then I’ve got you covered! So why not explore some of these incredible bread shaping techniques and tips, to help you through your sourdough journey?
Table of Contents
- Why Shape Sourdough?
- How to Make Sourdough Loaves
- How to Shape Sourdough Bread – Popular Sourdough Shapes
- How to Score Your Sourdough
- Shape-Shifting Sourdough
- FAQs – Sourdough Shapes
Why Shape Sourdough?
Before you begin the process of shaping your sourdough, it’s important to understand why we must do it.
When manipulating your sourdough into the shape you desire, the main goal is to create surface tension on the outer section of the dough, without stressing the interior of the dough.
The surface tension encourages the loaf to maintain its shape while baking, as well as produce a good oven spring.
Different Sourdough bread Shapes
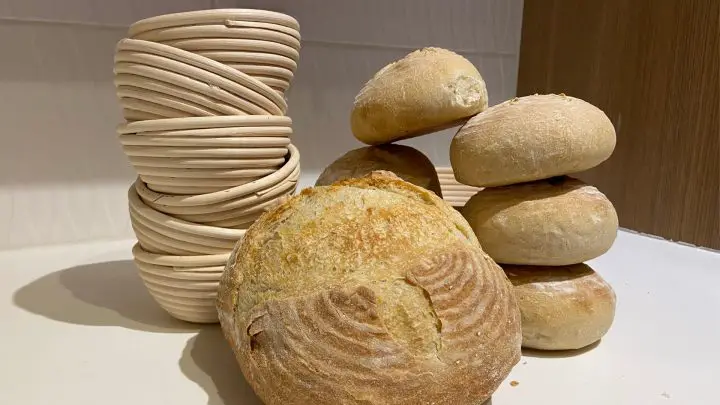
Sourdough loaves come in all sorts of shapes and sizes.
Below is a list of sourdough bread shapes:
- Batard – A bit like a baguette but much shorter and thicker
- Boule – A round loaf
- Baguette – Long and thin, tube-shaped loaf
- Focaccia – A thick, dimpled Italian flatbread
- Baton – A short baguette
- Ficelle – Similar to a baguette, but much thinner
- Plait – A braided loaf
- Ball plait – A round braided loaf

How to Make Sourdough Loaves
This delightful sourdough bread recipe, produces a beautifully crisp and flavorful oval loaf, that can be enjoyed at any time of day.
Take a look at the recipe below. Then head over to what to eat with sourdough bread, for some of the most scrumptious pairings!
Ingredients
For the levain
- 28g unbleached all-purpose flour
- 28ml water
- 28g mature sourdough starter
For the dough
- 270g unbleached all-purpose flour
- 56g sifted whole wheat flour
- 240ml water
- 8g salt
- Rice flour
Instructions
- For the levain: In a clean glass jar combine flour, water, and starter until smooth. Cover and ferment in a warm place (78F-80F) until it triples in volume. This should take about 5 hours.
- For the dough: When there is 1 hour of fermentation time remaining for the levain, take a large bowl and add both all-purpose and whole wheat flour. Use a rubber spatula to stir in the water until a rough dough forms, with no dry bits clinging to the dough. Cover the dough with plastic wrap and let this rest for 1 hour at room temperature.
- Using a clean wet hand scrape 65g of levain onto the dough. Use your wet fingers to evenly distribute the levain into the dough. Cup the palm of your hand and scoop the dough around the ball, ensuring that the levain has completely merged with the dough. Cover and rest for 30 minutes.
- Sprinkle some salt all over the dough, then use wet fingers to dimple the dough. Cup your hands and mix the dough in a scooping motion. Transfer the dough to an 8-inch square baking dish, then cover the dough with plastic wrap and rest for 45 minutes. The dough should relax enough to be ready for coiling and folding. If the dough is too tough, give it some more time to relax before proceeding with the next step.
- First fold: Wet your hands, and slide both hands beneath the right and left sides of the dough. Lift the dough ever so slightly and bring it towards you. The dough will stretch as your hands grip the bottom of it, whilst the top and bottom parts of the dough remain stuck to the baking dish.
- Continue to lift the dough until the top and bottom release the baking dish. Once the dough is in your hands, you’ll need to dangle it so that one side of the dough touches the baking dish, then naturally folds into itself. Meanwhile, rotate the dish 180 degrees. Repeat the process with each edge of the dough, and rotate the dish 90 degrees then 180 degrees. Your dough should eventually form a nice square shape. Cover your square dough and proof it for 60 minutes at room temperature.
- Second fold: Repeat the stretching and folding process, then cover and proof the dough for 90 minutes.
- Third fold: Repeat the stretch and folds, then cover and proof the dough until it has increased by about 60% in size (90-180 minutes).
- Shaping and bulk fermentation: Lightly dust your work surface with all-purpose flour, then uncover the dough and transfer it to the floured surface to prevent sticking. Dip your hands in some flour so that they don’t stick to the dough, then gently pinch the right side of the dough, stretching outwards, then gently fold it over so that the edge rests in the middle of the dough. Repeat the stretching and folding on the left side.
- Starting from the top of the dough, use both hands to lightly stretch the dough, then roll it over to the center of the dough. Proceed to gently roll the dough towards yourself until the seam is facing the countertop and the dough is an almost perfect oval shape. Use a bench scraper to gently flip the dough, so that the seam side is facing up. Use both hands, to gently lift the dough, cradling it in your palms, then gently lay it seam side down in a pre-prepped banneton. Cover and proof the dough for 15 to 20 minutes.
- Place the proofed dough inside a refrigerator to rest overnight for 12-16 hours.
- Scoring and baking: Cut a 9-inch by 7-inch rectangle of parchment paper, and trim the corners till you’ve produced a roughly oval shape. Place a Dutch oven for sourdough bread in your oven, and preheat it to 485F for 45 minutes. Remove the dough from the refrigerator, uncover and place the prepared parchment paper over the banneton. Use both hands to flip the banneton so that the dough drops out and onto the parchment paper.
- Carefully remove the preheated Dutch oven from the heated oven, and place it on a heatproof surface. Use a bread lame or sharp knife to make one long ½ inch deep slash running the length of the dough. Carefully pick up the dough, and slide it into the Dutch oven.
- Cover and bake bread for 25 minutes, then remove the lid and cook uncovered at 450F for a further 20 minutes. Once baked, remove the sourdough loaf from the oven, and place it on a cooling rack. Do not slice the bread until it has cooled down completely, this can take up to 2 hours.
How to Shape Sourdough Bread – Popular Sourdough Shapes
Shaping your dough before your bread bakes is actually an essential step in the bread-baking process, as it creates surface tension on the outside of the dough without affecting the gluten development within the dough.
When baking sourdough bread it’s important to know what kind of shape you’ll want your final bread dough to look like. There are many shapes to choose from, and it all boils down to your personal preference because the shape of the dough won’t affect the taste!
Below are some sourdough bread shaping tips and techniques that should boost your confidence in time for your next bake!
Batard
If you choose to bake a sourdough batard for the perfect oven spring, you’ll need an oval-shaped banneton and an oval-shaped Dutch oven. You also need to ensure that your banneton fits inside your Dutch oven, as this will indicate whether your shaped dough will fit as well. This method works best for high hydration dough:
- First, lightly flour the countertop and the top of your round dough. Use a bench knife to flip the dough onto the countertop. With clean hands, fold up the bottom third of the round dough and bring it to the middle. Then fold the left side of the dough across and toward the middle so that it overlaps the previously folded flap.
- Repeat this for the right side, then grab the top of the dough and fold it down towards the middle, pressing lightly to seal. This process should have created a rough rectangle.
- Next, use both hands to grab a small corner of the dough at the top corners, and fold one hand over the other to form an X of the dough. Repeat this for both the middle and bottom of the dough.
- Use both hands to grab the top of the rectangular dough, and gently roll it over itself to form a tight rectangle. Gently tuck a bench knife beneath the shaped bread dough, then lift and place the dough seam-side up to a sourdough proofing basket or alternatives for the final rise.
Boule
Boule refers to bread in a round shape and happens to be one of the simplest shaping styles in sourdough baking. I prefer to shape most of my sourdough loaves as boules especially if they’re very large loaves or contain more whole grains.
You’ll need a round proofing basket, and a Dutch oven or cast iron pot.
Take a look at the step-by-step guide below:
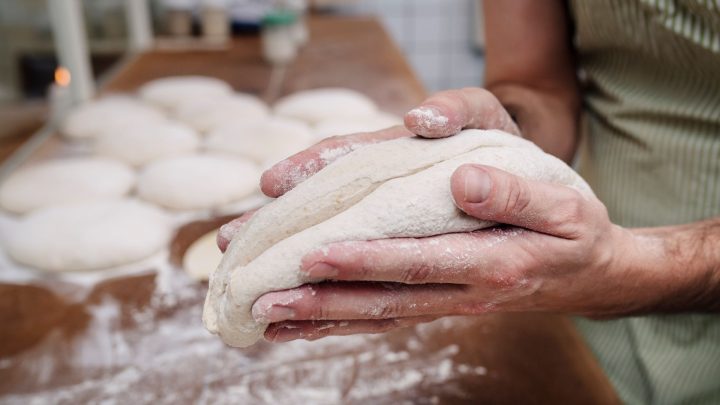
- Before you begin shaping your dough into a boule, start with a rested and rounded dough. Flip the dough onto a lightly floured work surface and gently spread it out.
- Pull both sides of the bottom part of the dough away from each other in a rough wing shape.
- Fold the right side of the dough over to the middle, and the left to the middle over the right. You should now have a rough envelope-shaped dough.
- Use both hands to pull the top of the envelope up and away from you slightly, then fold it over and down to the middle, sealing it against the dough.
- Grab the bottom and pull it up and over to the top of the dough.
- Tuck and drag the dough downwards against the kitchen counter to create tension on the outer part of the dough. With each drag, spin the dough on the work surface, continuing to drag the dough, until it has achieved its shape, with a smooth exterior. Make sure there are no lumps or tears in the dough.
- Use a bench knife to gently lift the dough and place it in the proofing basket seam side up.
Baguette
Baguettes are a classic French bread. They are deliciously crisp, with an alluring aroma, that’ll have you marching to your local bakery desperate to take a dozen home!
Sourdough baguettes on the other hand are a bit more magical than that. Though crisp, they’re subtly sour, enabling you to enjoy the best of both worlds with this traditional French bread!
When shaping bread dough into a baguette, you’ll need to consider the length of your baking stone. Your sourdough baguette must fit comfortably on your baking stone, to ensure the perfect bake.
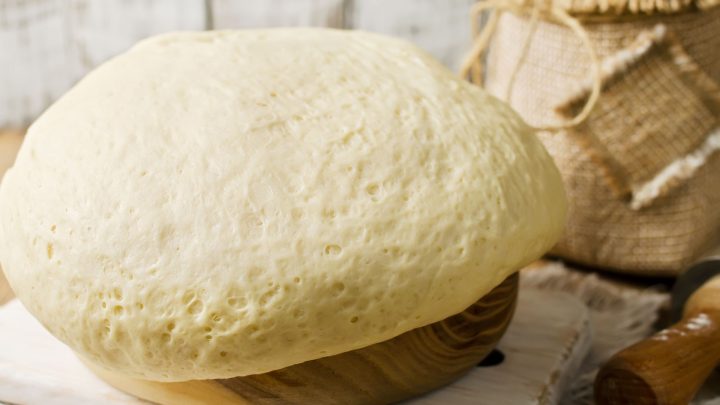
Once your dough has completed the initial fermentation, it’s time to shape your dough into baguettes.
- Use a dough scraper to tip the rounded dough onto the counter, and divide the dough into portions to make the baguettes.
- Preshape each portion of dough into a round and allow the dough to rest for 30 minutes. Meanwhile, rub a heavy linen dish towel with rice flour, so the baguettes don’t stick during the final proof.
- Take a portion of sourdough and stretch it out so that it’s a flat rectangle. Then take the top edge of the dough and fold it into the center of the dough, pressing down gently with the tips of your fingers, or the heel of your hand.
- Pull the lower edge of the dough up and over, then use the counter to stretch the dough into a baguette shape. Gently pull the ends of the dough into a point using your fingertips.
- Gently lift the baguette, place it onto your prepped cloth, and then proceed to shape the next baguette.
Baton
A baton is essentially a baby version of the baguette. It’s smaller, thicker, and incredibly delicious.
- Flatten your dough into an oval. Take the top sides of the dough and fold them diagonally into the center. Use your fingertips to gently press down so that it remains firmly bound to the center of the dough.
- Repeat the first step with the opposite edge of the oval, and you should be left with a rough canoe-shaped dough.
- Then fold one of the long edges over to the opposite edge of the dough, and press down firmly to create a seam. Your dough should now look like a sausage!
- Use your fingers to gently roll the sausage dough, slightly elongating the shape. Gently press down on the ends of the dough to create a point that will fatten up while proofing.
Ficelle
The type of bread flour you choose for your sourdough bread baking will determine the strength of your loaf, even through shaping. You must ensure that your dough doesn’t tear while shaping because this can create further complications, i.e., no rise.
I’ve found that a colder dough is much easier to work with, especially when trying to create surface tension through shaping.
These slim baguettes require a simple but effective shaping technique.
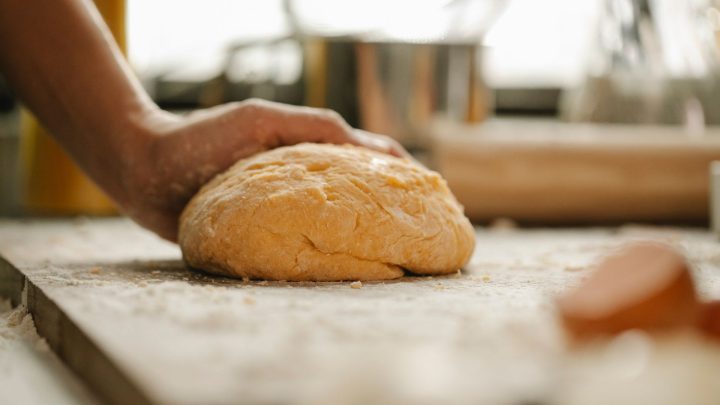
- Transfer the dough onto a work surface, and divide the dough into four equal parts. Shape each part into a rectangle, then cover and rest for 10 minutes, or refrigerate for 10 minutes.
- Shape each rectangle by folding both sides to the center, and fold again, then carefully seal the dough using the heel of your hand.
- Roll the dough using your hands starting from the center of the dough, and gradually spreading it to the sides with a soft, sweeping motion.
- Finish shaping the ficelle with some pointed ends, then cover this with clingfilm and leave it to rest for 20 minutes.
Plait
While a plaited loaf may look incredible, it is quite tricky to do. For starters, you’ll need to divide your dough into 6 equal pieces. Make sure you weigh them before proceeding so that they’re exactly the same. For the smoothest dough ropes, you’ll need to prep each piece.
- Flatten each piece of dough, then take the upper edge and fold it over, so that it meets the center. Seal this seam by pressing down gently with your fingers.
- Fold the bottom edge over to the center so that it touches the counter. Seal this seam with the tips of your fingers. You should have a short rope, with one seam, and a smooth surface.
- Roll each strand of dough to form an elongated rope about 14-16 inches long.
- It’s time to lay them out for braiding. Take your 6 ropes of dough and set them side by side, bringing them together at the top. Pinch the tops so that they remain in place. Take a look at the video below to help guide you through this process.
How to Score Your Sourdough
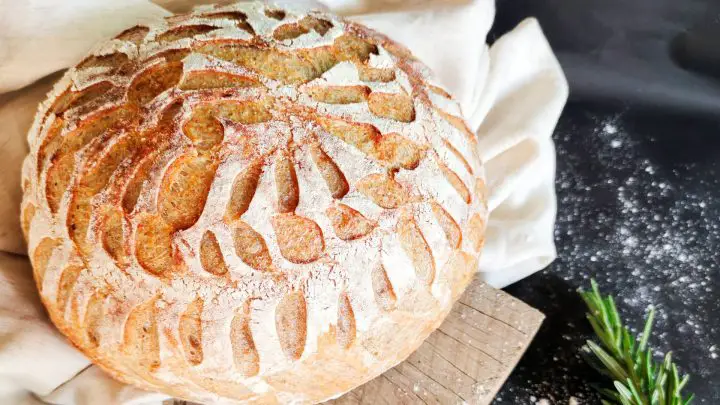
Scoring sourdough is quite a fun task, especially when you get the hang of it! Albeit, you may struggle the first couple of times, I assure you, soon you’ll be carving the most intricate designs in your loaves, that’ll have you and your friends gushing at your masterpiece!
You’ll need the sharpest knife or blade you own, so that the instrument doesn’t snag, or become stuck in the dough, as this will only destroy the dough’s structure whilst baking. Essentially, scoring your bread encourages a crispier crust, with a perfectly browned edge.
Have your dough resting on a flat surface. Then in a quick and swift motion, make a rapid incision, starting from the top of the dough, and ending halfway.
You can get really creative, and incorporate a bunch of designs. Perhaps a leaf, or small petals will decorate your oval loaf.
For thorough insight on how to score sourdough correctly, check out the best tips for scoring sourdough.
Shape-Shifting Sourdough
Shaping the dough, is probably one of the most challenging, and rewarding results one can achieve. Once you’ve made your first boule, it’s time to experiment with the next shape.
Pretty soon you’ll have adopted a personal preference, and find yourself gravitating towards that shape more often!
FAQs – Sourdough Shapes
How do You Make Sourdough Shapes?
You can shape your sourdough into any shape you like, and this is influenced by the stretch and fold stage. For a rounded loaf, you’ll need to gently cup the loaf with your hands and move it in a circular motion to tighten its shape.
How do I Know When to Shape My Sourdough?
Your dough is ready to shape once it has risen about 30%. You’ll also notice lots of air bubbles pooling in your dough.
How Many Times do You Shape Sourdough?
You only have one opportunity to shape your dough, so take your time!
Sourdough Loaf Recipe
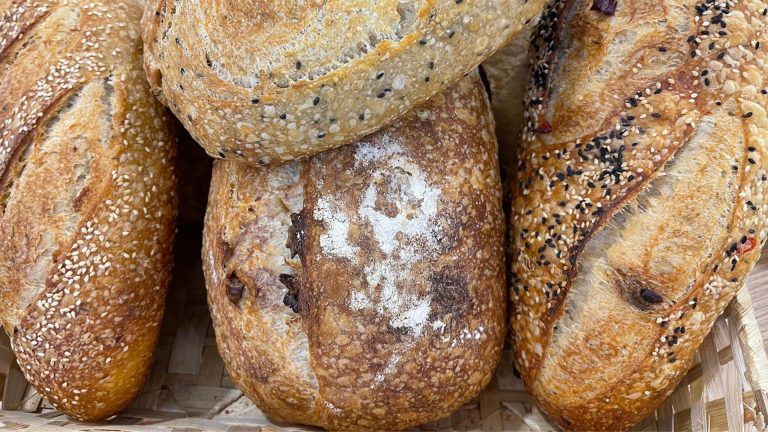
This delightful sourdough bread recipe, produces a beautifully crisp and flavorful oval loaf, that can be enjoyed at any time of day.
Ingredients
For the levain
- 28g unbleached all-purpose flour
- 28ml water
- 28g mature sourdough starter
For the dough
- 270g unbleached all-purpose flour
- 56g sifted whole wheat flour
- 240ml water
- 8g salt
- Rice flour
Instructions
For the levain
- In a clean glass jar combine flour, water, and starter until smooth. Cover and ferment in a warm place (78F-80F) until it triples in volume. This should take about 5 hours.
For the dough
- When there is 1 hour of fermentation time remaining for the levain, take a large bowl and add both all-purpose and whole wheat flour. Use a rubber spatula to stir in the water until a rough dough forms, with no dry bits clinging to the dough. Cover the dough with plastic wrap and let this rest for 1 hour at room temperature.
- Using a clean wet hand scrape 65g of levain onto the dough. Use your wet fingers to evenly distribute the levain into the dough. Cup the palm of your hand and scoop the dough around the ball, ensuring that the levain has completely merged with the dough. Cover and rest for 30 minutes.
- Sprinkle some salt all over the dough, then use wet fingers to dimple the dough. Cup your hands and mix the dough in a scooping motion. Transfer the dough to an 8-inch square baking dish, then cover the dough with plastic wrap and rest for 45 minutes. The dough should relax enough to be ready for coiling and folding. If the dough is too tough, give it some more time to relax before proceeding with the next step.
First fold
- Wet your hands, and slide both hands beneath the right and left sides of the dough. Lift the dough ever so slightly and bring it towards you. The dough will stretch as your hands grip the bottom of it, whilst the top and bottom parts of the dough remain stuck to the baking dish.
- Continue to lift the dough until the top and bottom release the baking dish. Once the dough is in your hands, you’ll need to dangle it so that one side of the dough touches the baking dish, then naturally folds into itself. Meanwhile, rotate the dish 180 degrees. Repeat the process with each edge of the dough, and rotate the dish 90 degrees then 180 degrees. Your dough should eventually form a nice square shape. Cover your square dough and proof it for 60 minutes at room temperature.
Second fold
- Repeat the stretching and folding process, then cover and proof the dough for 90 minutes.
Third fold
- Repeat the stretch and folds, then cover and proof the dough until it has increased by about 60% in size (90-180 minutes).
Shaping and bulk fermentation
- Lightly dust your work surface with all-purpose flour, then uncover the dough and transfer it to the floured surface to prevent sticking. Dip your hands in some flour so that they don’t stick to the dough, then gently pinch the right side of the dough, stretching outwards, then gently fold it over so that the edge rests in the middle of the dough. Repeat the stretching and folding on the left side.
- Starting from the top of the dough, use both hands to lightly stretch the dough, then roll it over to the center of the dough. Proceed to gently roll the dough towards yourself until the seam is facing the countertop and the dough is an almost perfect oval shape. Use a bench scraper to gently flip the dough, so that the seam side is facing up. Use both hands, to gently lift the dough, cradling it in your palms, then gently lay it seam side down in a pre-prepped banneton. Cover and proof the dough for 15 to 20 minutes.
- Place the proofed dough inside a refrigerator to rest overnight for 12-16 hours.
Scoring and baking
- Cut a 9-inch by 7-inch rectangle of parchment paper, and trim the corners till you’ve produced a roughly oval shape. Place a Dutch oven for sourdough bread in your oven, and preheat it to 485F for 45 minutes. Remove the dough from the refrigerator, uncover and place the prepared parchment paper over the banneton. Use both hands to flip the banneton so that the dough drops out and onto the parchment paper.
- Carefully remove the preheated Dutch oven from the heated oven, and place it on a heatproof surface. Use a bread lame or sharp knife to make one long ½ inch deep slash running the length of the dough. Carefully pick up the dough, and slide it into the Dutch oven.
- Cover and bake bread for 25 minutes, then remove the lid and cook uncovered at 450 degrees F for a further 20 minutes. Once baked, remove the sourdough loaf from the oven, and place it on a cooling rack. Do not slice the bread until it has cooled down completely, this can take up to 2 hours.


![[Video] From The Seed To The Peasant Bakery With Nicolas Supiot 133 [video] from the seed to the peasant bakery with nicolas supiot](https://www.mydailysourdoughbread.com/wp-content/uploads/2022/11/image-18-120x120.jpeg)

![Is Keto Sourdough Bread Low Carb - What You Need To Know [Plus Bonus Recipe] 135 Is keto sourdough bread low carb - what you need to know [plus bonus recipe]](https://www.mydailysourdoughbread.com/wp-content/uploads/2022/09/CD-blog-images-2022-09-28T221612.311-e1665964918416-120x120.jpg)

