That crusty sourdough loaf from the bakery, with its chewy interior and tangy scent, seems lightyears beyond what you could make at home. But unlocking real San Francisco sourdough’s lava bubble delights is simpler than you think. You’ll discover how even busy folks can help wild yeast yield loaves bursting with complex flavor using just flour, water, and time. So escape flat grocery store varieties and take your first steps towards the bakery-quality sourdough that San Franciscans proudly enjoy every day.

Table of Contents
- What is San Francisco Style Sourdough Bread?
- What Makes San Francisco Sourdough Bread Different?
- Things to Know Before Making San Francisco Sourdough
- San Francisco Sourdough Recipe
- Common Problems and Solutions When Making San Francisco Sourdough
- What to Serve with San Francisco Sourdough Bread
- The Art of San Francisco Sourdough
- FAQs
What is San Francisco Style Sourdough Bread?
San Francisco is renowned as the birthplace of a distinctive sourdough bread that bears its name. This crusty, tangy loaf has characteristic properties setting it apart from other sourdough varieties.
A Slice of History
Gold rush pioneers journeying westward during the 19th century brought sourdough starter cultures with them as they settled in San Francisco. The cool, foggy climate proved ideal for the natural fermentation process. Local bakers tapped into the starter’s complex flavor profile to produce loaves with a signature tang and chew.
Over generations, the “San Francisco sour” became an anchor of the city’s culinary identity.
Characteristic Crust and Crumb
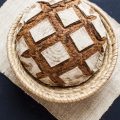
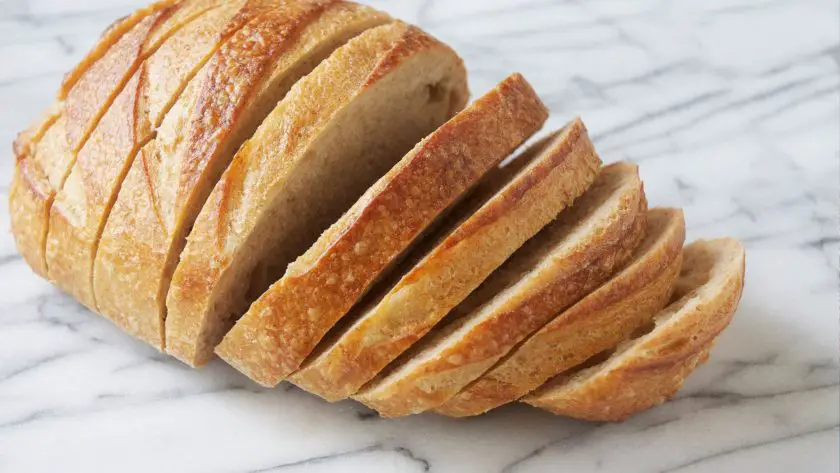
A freshly baked San Francisco sourdough loaf sports a crisp, mahogany crust enveloping an open, irregular crumb structure. The slice crumbles easily rather than compressing. Mild lactic sourness mingles with influences of toasted grain and fruit for a balanced tanginess. An appealing cream color comes from relatively low bran content in the dough. This light texture formed the basis for San Francisco’s famous grilled cheese sandwiches.
What Makes San Francisco Sourdough Bread Different?
San Francisco sourdough stands out from other sourdough breads thanks to the unique starter culture, climate, and baking process that shape its distinctive tang and texture. While formulas vary between bakeries, several key attributes give rise to its signature flavor and aesthetic.
Complex, Balanced Fermentation
A classic San Francisco-style sourdough loaf is much tangier compared to regular sourdough bread. Generally, to achieve a true San Francisco-style sourdough bread you’ll need a special starter from San Francisco!
The lactobacilli and wild yeasts thriving in San Francisco sourdough starter cultivate intense, prolonged fermentation unmatched by other sourdoughs. Cold overnight proofing enables hearty sourdough microbes like Candida milleri and Saccharomyces exiguus to produce lactic and acetic acids for a layered tanginess. This cool fermentation tempers the acidity, preventing an overly sour or sharp flavor. The result is a mild, balanced tang that complements the cereal and malty notes.
Open, Irregular Crumb
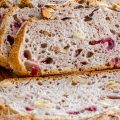
San Francisco loaves showcase an irregular, craggy crumb pockmarked with large and small holes. This comes from the starter’s extended fermentation time allowing bubbles to inflate and pop uniformly. Stretching the dough into shape gives rise to further pockets and voids. While rustic in appearance, this jagged texture produces superior chew and locates the tangy acids within the crumb rather than just the crust.
Thick, Crisp Crust
Wood-fired brick ovens supply the intense heat needed to produce San Francisco sourdough’s signature crackly crust. Rapid steam and heat transfer from the baking surface causes the dough exterior to gelatinize and dehydrate into a thick brown crust enveloping the loaf.
Crisp, with hints of caramel and toast, this crust provides satisfying contrast to the springy interior. Slashes across the top offer tantalizing glimpses of the holes waiting inside.
Mild Wheat and Sour Flavors
San Francisco sourdough brings wheat and sour flavors into greater balance compared to many loaves. Lower proportions of wheat bran soften bitterness and astringency for a mellower cereal taste. Bright sourness remains detectable without totally dominating.
This equilibrium of tang and wheat makes it an ideal canvas for sandwiches, toast, and dipping thanks to the hint of acidity dancing with the wheaten richness.
Things to Know Before Making San Francisco Sourdough
Understanding the time commitment, critical equipment, and ingredients will set you up for success baking this San Francisco specialty.
With a little foresight, home bakers can adopt the time-honored techniques that SF artisans leverage to coax spectacular flavor and aromatics from everyday ingredients.
Have patience and let wild microbes work their magic!
Time and Planning Are Key
Plan for at least 3 days from starter refresh through overnight proof to shaping, second rise, scoring, and baking. Block out time for stretching, folding, shaping, and monitoring rise progress. Rushing the process risks a dense or bland loaf.
Quality Ingredients Matter
San Francisco’s unique starter culture may get much of the credit for true sourdough’s glory. However, the flour, water, and salt merits equal consideration for their influence over the finished loaf’s crust, crumb, flavor, and structure.
- Flour: Most artisan bakers recommend high protein bread flour in the 12-13% range. The extra gluten helps the dough stretch readily and hold the bubbles from extensive fermentation. The wheat flavor also comes to the forefront.
- Water: Filtered water yields better consistency and keeps wild yeast happy. Adjust water temperature to help control dough temperature and fermentation pace.
- Salt: In sufficient quantities (around 2% of flour weight), salt checks yeast activity from totally dominating. It also enhances overall flavor.
Must-Have Equipment
- Digital Kitchen Scale: Sourdough has a picky nature, and a digital scale offers accuracy that impacts rise and crumb texture.
- Bannetons: The perforated sides of these rounded proofing baskets support the dough’s rise, preventing spreading.
- Lame or Razor: Makes clean scores in the surface for the dough. Sharpen before each use.
- Dutch Oven: Home bakers can mimic conditions by placing a covered Dutch oven or combo cooker in a hot oven.
- Kitchen Thermometer: Tracking fermentation and proofing temperatures helps align the sourdough process. Thermometers also confirm the Dutch oven has preheated sufficiently to generate adequate steam.
San Francisco Sourdough Recipe
This incredible San Francisco Sourdough bread recipe is brimming with unique sourdough flavor, thanks to the fed sourdough starter.
It has a thick and chewy texture, perfect for making crispy sourdough grilled cheese sandwiches for breakfast!
Starter Ingredients
- 4 oz. sourdough starter (100% hydration)
- 4 oz. of bread flour
- 4 oz. water
San Francisco Sourdough Ingredients
- 8 oz. water
- 12 oz. pre-fermented starter
- 16 oz. bread flour or wheat flour (you can also use grain flour, whole grain flour, or rye flour if you wish, depending on what was used in the starter)
- ½ tbsp. salt
How to Make San Francisco Sourdough
- Combine all the ingredients for the pre-fermented starter in a medium bowl, and leave it to rest overnight, covered, at room temperature (80F).
- The next day, pour room-temperature water into the bowl of your stand mixer. Add the San Francisco starter and gently break it up with a wooden spoon, stirring until dissolved.
- Add 1 cup of bread flour and salt, mixing until everything is well combined.
- Place the dough hook attachment on the mixer and gradually add the remaining flour into the mixer bowl, until the dough starts to separate from the sides of the bowl.
- Knead the dough for 12 minutes on medium speed, then transfer the dough to a lightly floured surface and knead the dough using your hands. You don’t have to knead so much during this step, as you are only attempting to gather the dough for the next step.
- Place the dough into a lightly oiled bowl, cover the dough with plastic wrap and let it rise in a warm place for 45 minutes.
- Remove the plastic cover and stretch the dough out, then fold it over itself. Grab the section of dough that is furthest away from you, stretch it up and out, then fold it back into the center of the dough.
- Rotate the bowl 90 degrees to the right, then grab the next portion of dough that is furthest away from you and repeat the stretch and fold exercise.
- Repeat this twice more, rotating the bowl each time, until you have stretched and folded every part of the dough.
- Cover the bowl with plastic wrap and let the dough rise for another 45 minutes.
- Repeat the stretch and fold process, then cover and rise for 60 minutes.
- Place the expanded dough over a lightly floured portion of parchment paper, and carefully form the dough into a ball.
- Let the dough ball rise for 45 minutes.
- Shape the dough into a long loaf. Stretch the dough into a curved square shape. Lift the top two corners of the dough and fold them into the center of the dough. Lift the bottom corners of the dough and fold them up into the center, overlapping the previous edge.
- Bring the edges into the center, then turn the dough and carefully roll the dough into a log. Tuck the ends of the log underneath the dough so they’re out of sight. Ensure that the seam side is down.
- Let the dough proof for 1 hour, on parchment paper, at room temperature. The dough won’t double in size, instead, it will become puffier.
- Cover the dough with a dish towel and place the dough in the fridge overnight.
- Place a small metal baking tray on the bottom rack of the oven (this will help generate steam while you bake, and produce a loaf with a great chewy texture). Place a baking stone or pizza stone on the rack above it. You can skip this step and use a Dutch oven instead, depending on how you shaped your loaves.
- Remove the shaped loaf from the refrigerator, and preheat the oven to 450 degrees Fahrenheit.
- Meanwhile, score your bread with a sharp knife or lame (blade). Carefully transfer the dough with the parchment paper onto the baking stone. Toss a few ice cubes into the baking tray below, to create some steam. Bake the San Francisco sourdough bread for 10 minutes.
- Then reduce the oven temperature to 425 degrees Fahrenheit and bake for 35 minutes.
- Transfer the baked loaf onto a wire rack to cool completely for several hours before slicing.
Common Problems and Solutions When Making San Francisco Sourdough
While problems can arise at any stage with temperamental sourdough, a little tweaking and fine-tuning help override most issues. Trust in wild yeast’s resilience! With practice, those incredible San Francisco-style loaves will showcase their trademark tang and open crumb.
Starter Not Rising
A starter that fails to bubble and rise sufficiently will lead to dense loaves.
First, confirm your water meets the appropriate temperature range. Too hot will kill microbes while too cool slows activity. Try discarding half the starter and refreshing with equal parts flour and water. Move to a warm area around 78-82°F. Feed twice daily until foamy and doubled in size before mixing your dough.
Lackluster Oven Spring
While the elongated fermentation cultivates flavor, an additional expansion arises from rapid heating in the oven called “oven spring.” Insufficient spring yields a squat loaf lacking airy texture.
Ensure your Dutch oven or baking vessel thoroughly preheats for 30 minutes at 450°F to supply ample initial steam. Score slashes at least 1⁄4 inch deep so the dough can billow outward. Proof the loaf completely until puffy.
Dense, Gummy Crumb
A tight crumb lacking irregular holes suggests insufficient gluten development. This chewy, dense texture arises from under-kneading the dough or letting shaping destroy air pockets.
With high protein content flour, knead vigorously until the dough becomes smooth and passes the “windowpane test.” Handle the dough gently when preshaping and final shaping to preserve interiors air blisters.
Lackluster Color and Flavor
Bland flavor or pale color means the prolonged, cool fermentation didn’t fully develop.
Use highly active starter at its peak to lower pH for tanginess. Ensure bulk fermentation lasts at least 4-6 hours with a slow overnight proof in the fridge. Give dough sufficient time in a hot Dutch oven to encourage caramelization for a rich mahogany crust.
Burnt Bottom Crust
A brilliant crust easily veers into scorched territory in high oven heat.
Place loaf seam-side up to shield bottom. Lower oven 25°F after initial steam stage. Tent with foil if over-browning. For extra insulation, set a baking sheet on rack below Dutch oven. Follow recipe guidelines and know your oven’s hot spots.
What to Serve with San Francisco Sourdough Bread
With its mild tang and hearty crumb, San Francisco sourdough serves as a versatile canvas for countless meals and snacks. Explore some tasty pairing ideas to bring out the unique flavor dimension this bread contributes to any table.
Meal Pairings
The balanced acidity of true San Francisco sourdough shines alongside rich and fatty dishes. Its airy chew stands up well to stews, braises, and roasted vegetables.
Try these winning combinations:
- Beef stew: The beef and red wine broth soaks delightfully into the nooks of the sourdough crumb.
- Coq au vin: The wine sauce drizzled over torn chunks of bread is divine.
- Pot roast: Sourdough makes quick work of those pan juices and gravy.
- Roasted root vegetables: Earthy beets, carrots, and parsnips match nicely with nutty whole grain loaves.
- Ribs or pulled pork: Barbecue sauce loves something sturdy to cling to.
Spreads and Toppings
Take toast to new heights by loading up slices of San Francisco sourdough with sweet and savory treats.
- Nut butter and jam: Toasted sourdough can hold up to anything from strawberry to ginger to orange marmalade without falling apart.
- Smashed avocado: Salt, black pepper, and red pepper flakes liven up the creaminess.
- Ricotta and honey: Sprinkle on some cinnamon or lemon zest too.
- Bacon, lettuce, and tomato: A BLT on sourdough is the quintessential lunch.
- Cream cheese and smoked salmon: Red onion and capers complete this tasty appetizer.
Snack Time
With a mild tang and hint of crunch from the scoring slashes, San Francisco sourdough also shines unadorned as a versatile snack.
- Toast soldiers for dipping into soup or runny eggs
- Bread sticks with herbed olive oil for dipping
- Croutons tossed in olive oil and garlic salt
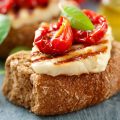
- Bruschetta base rubbed with garlic clove
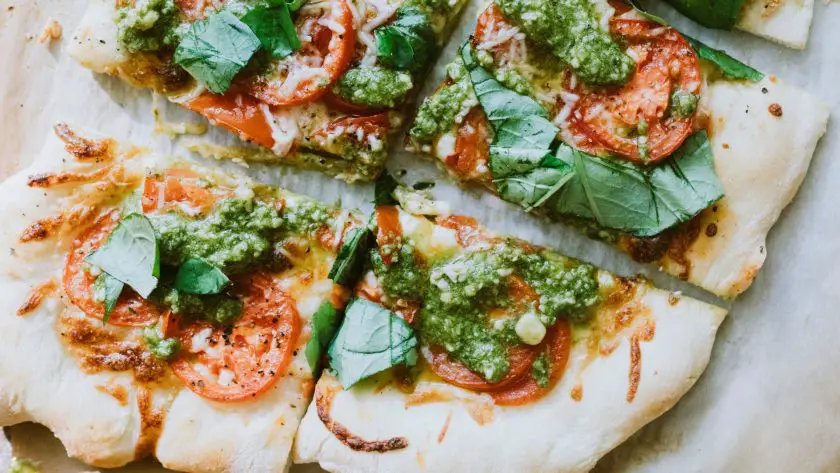
- Pizza crust with creative toppings
The Art of San Francisco Sourdough
San Francisco sourdough emerges as an iconic loaf thanks to the magical synergy between wild starter cultures, ideal proving conditions, and artisan baking practices that unlock profound flavor and texture.In capturing the storied soul of San Francisco within each chewy, aromatic loaf, bakers pass on living history through proper starter care and handling.
Now home cooks can adopt the tips and time-tested recipe to share transcendent slices with friends and family.
FAQs
What Makes San Francisco Sourdough Bread Different?
San Francisco’s foggy climate happens to be a perfect environment for wild yeast cells and naturally occurring bacteria, providing sourdough with a distinct sour flavor.
What is The Difference Between Sourdough and San Francisco Sourdough?
Sourdough is leavened by the wild yeasts and bacteria found in the sourdough starter. However, in San Francisco, the wild yeasts come from the air providing a more unique taste.
What is San Francisco Style Sourdough Bread?
San Francisco sourdough bread has a characteristically tangy flavor compared to regular sourdough bread.
Is San Francisco Sourdough Bread Healthy?
Yes, San Francisco sourdough bread can be considered a healthier option compared to many other types of bread, due to several unique aspects of its preparation and composition
Why is San Francisco Sourdough Bread so Distinct and Difficult to Match?
The reason why San Francisco sourdough bread is almost impossible to match is due to a specific strain of bacteria that exists only in San Fran’s climate.
San Francisco Sourdough Recipe
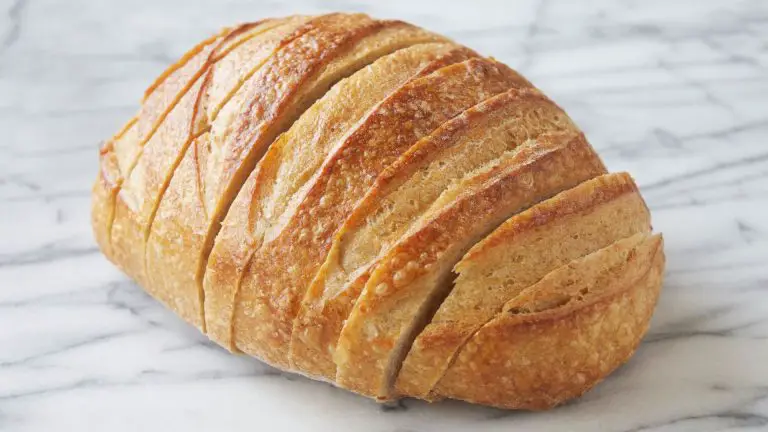
This incredible San Francisco Sourdough bread recipe is brimming with unique sourdough flavor, thanks to the fed sourdough starter. It has a thick and chewy texture.
- Total Time: 1 day, 6 hours, 45 minutes
- Yield: 1 loaf (12 servings) 1x
Ingredients
The Starter
- 4 oz. sourdough starter (100% hydration)
- 4 oz. of bread flour
- 4 oz. water
San Francisco Sourdough Ingredients
- 8 oz. water
- 12 oz. pre-fermented starter
- 16 oz. bread flour or wheat flour (you can also use grain flour, whole grain flour, or rye flour if you wish, depending on what was used in the starter)
- ½ tbsp. salt
Instructions
- Combine all the ingredients for the pre-fermented starter in a medium bowl, and leave it to rest overnight, covered, at room temperature (80F).
- The next day, pour room-temperature water into the bowl of your stand mixer. Add the San Francisco starter and gently break it up with a wooden spoon, stirring until dissolved.
- Add 1 cup of bread flour and salt, mixing until everything is well combined.
- Place the dough hook attachment on the mixer and gradually add the remaining flour into the mixer bowl, until the dough starts to separate from the sides of the bowl.
- Knead the dough for 12 minutes on medium speed, then transfer the dough to a lightly floured surface and knead the dough using your hands. You don’t have to knead so much during this step, as you are only attempting to gather the dough for the next step.
- Place the dough into a lightly oiled bowl, cover the dough with plastic wrap and let it rise in a warm place for 45 minutes.
- Remove the plastic cover and stretch the dough out, then fold it over itself. Grab the section of dough that is furthest away from you, stretch it up and out, then fold it back into the center of the dough.
- Rotate the bowl 90 degrees to the right, then grab the next portion of dough that is furthest away from you and repeat the stretch and fold exercise.
- Repeat this twice more, rotating the bowl each time, until you have stretched and folded every part of the dough.
- Cover the bowl with plastic wrap and let the dough rise for another 45 minutes.
- Repeat the stretch and fold process, then cover and rise for 60 minutes.
- Place the expanded dough over a lightly floured portion of parchment paper, and carefully form the dough into a ball.
- Let the dough ball rise for 45 minutes.
- Shape the dough into a long loaf. Stretch the dough into a curved square shape. Lift the top two corners of the dough and fold them into the center of the dough. Lift the bottom corners of the dough and fold them up into the center, overlapping the previous edge.
- Bring the edges into the center, then turn the dough and carefully roll the dough into a log. Tuck the ends of the log underneath the dough so they’re out of sight. Ensure that the seam side is down.
- Let the dough proof for 1 hour, on parchment paper, at room temperature. The dough won’t double in size, instead, it will become puffier.
- Cover the dough with a dish towel and place the dough in the fridge overnight.
- Place a small metal baking tray on the bottom rack of the oven (this will help generate steam while you bake, and produce a loaf with a great chewy texture). Place a baking stone or pizza stone on the rack above it. You can skip this step and use a Dutch oven instead, depending on how you shaped your loaves.
- Remove the shaped loaf from the refrigerator, and preheat the oven to 450 degrees Fahrenheit.
- Meanwhile, score your bread with a sharp knife or blade. Carefully transfer the dough with the parchment paper onto the baking stone. Toss a few ice cubes into the baking tray below, to create some steam. Bake the san Francisco sourdough bread for 10 minutes.
- Then reduce the oven temperature to 425 degrees Fahrenheit and bake for 35 minutes.
- Transfer the baked loaf onto a wire rack to cool completely for several hours before slicing.
- Cook Time: 45 minutes
- Category: bread
- Cuisine: American
Nutrition
- Calories: 188 kcal
- Fat: 0 g
- Saturated Fat: 0 g
- Carbohydrates: 38 g
- Protein: 6 g

