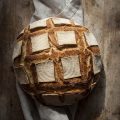
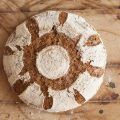
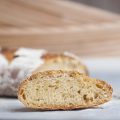
Did you know, you don’t need a separate starter culture to bake amazing homemade sourdough? Let me share with you my secrets to harnessing wild yeast naturally present in all flour for easy, foolproof sourdough. Baking sourdough bread without a starter opens the doors to a world of versatile, wholesome loaves using just a few simple pantry ingredients. My starter-free guide ensures you’ll enjoy warm, crusty homemade sourdough bread straight from your oven!
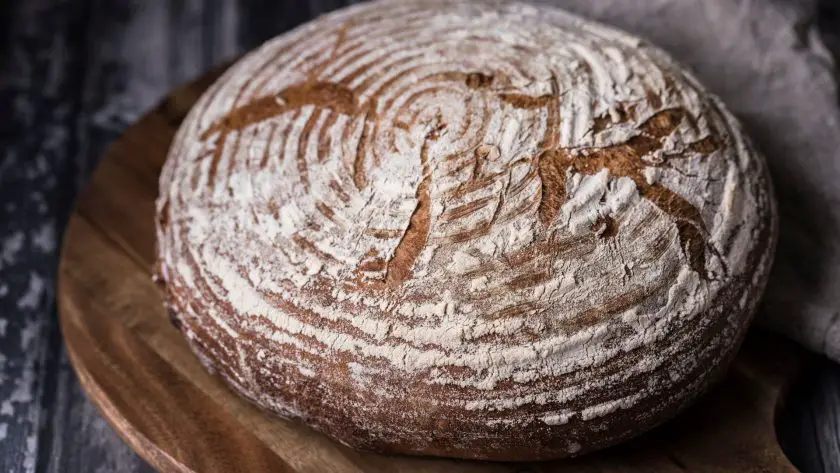
Table of Contents
- Why No Starter?
- No-Starter Sourdough vs Traditional Sourdough Bread
- Ingredients
- Fermentation Process
- Adjusting for Temperature
- Baking
- Tips for Perfect Crust and Crumb
- Avoid These Mistakes
- Serving and Storage Tips
- Alternative Methods for No-Starter Baking
- Variations in No-Starter Sourdough Recipes
- Enjoying Your Sourdough Bread to the Fullest
- No Starter, No Problem
- Sourdough Bread Without Starter FAQs
Why No Starter?
Many sourdough recipes call for creating and maintaining a starter, which is a fermented mixture of flour and water that contains wild yeast and bacteria. However, starter-free sourdough is actually an accessible option for beginners and those who just don’t have the time to dedicate to creating an active starter. You can indeed make sourdough bread without a mature starter.
This no-starter method uses the natural yeast in flour to leaven bread, avoiding the need to create and “feed” a starter culture.
(Speaking of beginner recipes, you can start from the top with my beginner sourdough bread recipe!)
Convenience of No Starter
Working with a mature, established starter requires regular feedings to keep it alive and active. For busy home cooks, this can feel like an added chore.
Going starter-free eliminates the need to tend to a sourdough starter every day. You simply mix up a dough when you want to bake. The yeast naturally present in flour serves as the leavening agent, fermenting the dough over 8-12 hours.
While this fermentation time is longer than using a ready starter, it removes the maintenance required of a separate starter culture.
Beginner-Friendly Baking
Maintaining a healthy starter takes practice and experience. The pH, texture, bubbles, smell and taste all provide clues on a starter’s viability. For baking novices, managing starter health can prove daunting. A no-starter recipe sidesteps this learning curve. You do not need to monitor starter activity or “read” it before baking.
The dough itself contains all the microbes needed for leavening. This simplifies the process, making sourdough more approachable for first-timers.
Making Use of Wild Yeast in Flour
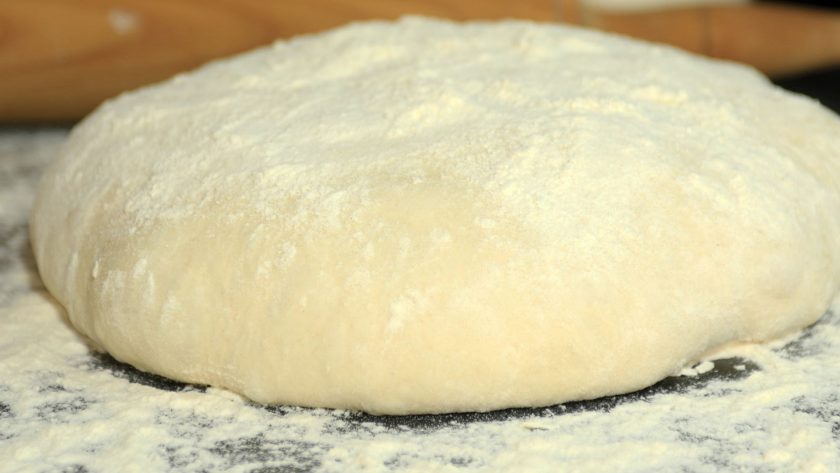
All flour contains naturally occurring yeast spores that cause bread to rise when exposed to moisture. In a starter-free dough, these wild yeasts have time to wake up, feed on sugars and produce carbon dioxide that gives rise to the dough.
Typical baker’s yeast is a single strain optimized for speedy fermentation. In contrast, wild yeast comprises a diverse mélange of yeast species and microflora that contribute complex flavors. These “native” yeasts bring a depth of flavor and character to sourdough impossible to replicate with commercial yeast.
No-Starter Sourdough vs Traditional Sourdough Bread
These two breads do have some key differences in both process and finished results. Both utilize wild yeast for rise, and they take their own paths to get there.
Fermentation Time
The most salient difference lies in the fermentation timeframe.
Old school sourdoughs leverage an active starter teeming with yeast and bacteria that rapidly produce gases to leaven the dough. This cuts the bulk ferment down to just 4-6 hours. In contrast, a starter-free dough relies on native yeasts that need 8-12 hours to slowly wake up, multiply and generate rise.
So while hands-on time is comparable, the overall timeline is extended without a starter’s “head start.” However, this slower ferment allows more complex flavors to build.
Texture and Crumb
Texture and crumb can vary as well.
A mature starter contains a balanced community of microbes, yielding bread with an open, irregular crumb studded with holes. The acids they produce also weaken gluten, creating a tender texture. No-starter loaves typically have a tighter, more uniform crumb structure since wild yeasts work alone without bacteria. The longer proofing time still relaxes gluten for a pleasantly chewy texture, but expect a finer, more even crumb sans starter.
Sour Flavor
Traditional sourdough’s starter provides a welcome tanginess from lactic and acetic acids. In a starter-free dough, there are no bacteria to produce these souring acids. However, the longer ferment allows natural yeasts more time to create acids on their own for subtle sourness. While less assertive than a conventional sourdough, a pleasant low-key acidity still comes through.
Ease of Process
No-starter sourdough definitely wins for simplicity. There’s no need to mix, feed, maintain and monitor a starter before baking. The ingredients can be quickly combined and left alone to ferment. Traditional sourdough requires regular starter care and rising the dough in stages. Starter-free sourdough offers an easier path to tasty homemade loaves.
Ingredients
With just a handful of simple ingredients, you can make a delicious sourdough bread, without needing a starter.
Don’t be afraid to tailor ingredients to suit your taste once you grasp the basics. Half the fun of no-starter sourdough lies in tweaking components for your perfect homemade loaf!
Flour
For starter-free recipes, you want to use unbleached bread flour, which has a higher protein content. This develops the gluten strands needed to trap gas bubbles produced by yeast during fermentation. All-purpose flour can work too but may yield denser loaves. Stay away from cake or pastry flours, as these lack the protein vital for rise.
Use flour stored at room temperature. Cold flour inhibits yeast activity. Whole wheat flour adds nutty flavor and fiber but use no more than 30% in your total amount. Any more can overly strengthen gluten. Rye flour contributes earthy notes but also weakens structure, so limit to 20% of total flour weight.
Water
Use lukewarm water around 80°F/27°C, which hastens yeast fermentation versus cold water. Filtered, bottled or spring water works best, as harsh chlorinated tap water can inhibit yeast. The dough’s final consistency should be shaggy and sticky but still able to be shaped. Too much water makes handling difficult.
Salt
Use fine sea salt or kosher salt, about 1.5-2% of the flour’s weight. Avoid iodized table salt, which gives an unpleasant flavor.
Natural Yeast
No commercial yeast needed here! The yeast naturally occurring in flour gives rise to the dough. Over 8-12 hours, these wild yeast spores feed on sugars and produce carbon dioxide gas, leavening the bread.
Using unbleached bread flour boosts the yeast population versus other flours. Warm water, salt, and sufficient ferment time allows yeast to multiply and work their magic.
Fermentation Process
To wake up wild yeast, create a warm, slightly wet environment using whole grain flours. Adjust temperature and hydration levels to encourage yeast growth and activity. During fermentation, starches break down into sugars, which yeast consumes to produce alcohol and carbon dioxide. This CO2 gets trapped in the gluten network, creating air pockets while gluten proteins strengthen, improving the dough’s structure.
Manage fermentation by controlling temperature, timing, and dough consistency. Cooler temperatures slow yeast activity for flavor development, while warmer temperatures accelerate fermentation for faster results. Underproofed dough can be dense, while overproofed dough may become sticky and difficult to handle.
Adjusting for Temperature
Temperature contributes a lot in achieving the best results for your bread.
Warmer Kitchens
In warmer environments, the fermentation process will happen faster. The dough will feel softer and may be stickier, potentially making it more challenging to handle.
Consider the following adjustments:
- Reduce the hydration slightly to create a firmer dough.
- Mix your dough to a lower temperature and use a cool box or cool bag with an ice brick to regulate the temperature during fermentation, slowing down the process.
- Decrease the amount of sourdough starter used to inoculate the levain and the amount of levain used to inoculate your dough to slow the process down.
Cooler Kitchens
When your kitchen is on the cooler side, the fermentation process will take longer, and the dough may feel stiffer. While this scenario is generally easier to adjust for than a warmer one, extremely low temperatures can cause the process to stall.
These tips should help:
- Mix your dough to a warmer temperature and keep it in a warmer location during fermentation.
- Slightly increase the hydration if your dough feels too stiff.
- Increase the amount of sourdough starter used to inoculate the levain and the amount of levain used to inoculate your dough to speed up the process.
Baking
Mixing the Dough
Mix together the flour, water, and salt in a large bowl until no dry bits remain. Use a wooden spoon or your hands to combine everything into a shaggy, sticky dough. Cover the bowl with a damp towel or plastic wrap and let it rest for 30 minutes. This autolyse period allows the flour to fully hydrate and the gluten to start developing.
Kneading and Stretching
With wet hands, grab one side of the dough and stretch it up and over to the opposite side. Rotate the bowl and repeat this stretching motion for about 5 minutes. You’ll notice the dough starting to smooth out and strengthen. If it feels too sticky, wet your hands again. This gentle kneading process, also known as stretch and fold, helps align the gluten strands without overworking the dough.
Bulk Fermentation
Cover your dough and let it sit at room temperature for 8-12 hours, or until it has doubled in size. During this time, the wild yeast will work its magic, producing carbon dioxide and lactic acid which give sourdough its signature rise and tang. If your kitchen is on the cooler side, you may need to extend the fermentation time. Warmer temperatures will speed things up, so keep an eye on your dough’s progress.
Shaping and Final Proof
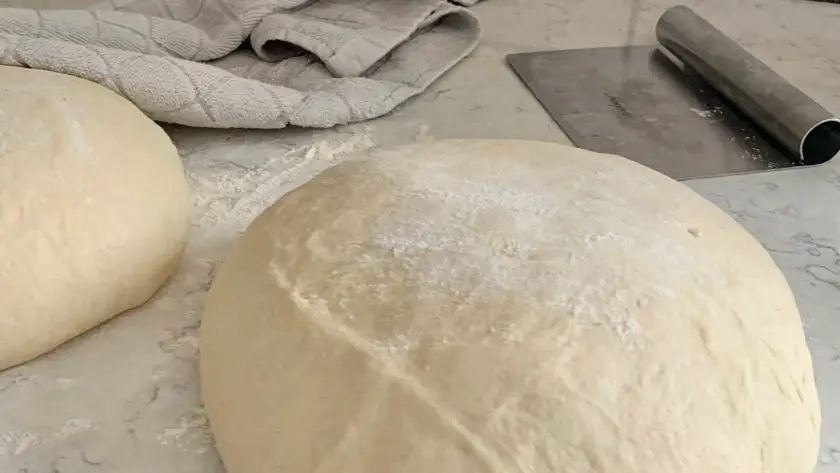
Gently turn it out onto a floured surface and use your hands to form it into a round or oval shape. Be careful not to deflate too much of the air that has built up during fermentation. Place the shaped dough into a proofing basket or bowl lined with a floured towel, seam side up. Cover and let it proof for another 30-60 minutes, until it has puffed up slightly but still springs back when poked.
Baking
Preheat your oven to 450°F (230°C) with a Dutch oven or baking stone inside. When ready to bake, carefully transfer your dough onto the hot surface, seam side down. Score the top with a sharp knife or razor blade to allow for expansion. Cover with a lid if using a Dutch oven, and bake for 20 minutes. Then remove the lid and continue baking for another 20-30 minutes, until the crust is deep golden brown and the internal temperature reaches 200-210°F (93-99°C).
Tips for Perfect Crust and Crumb
- Aim for a dough that’s tacky to the touch but not overly sticky. During bulk fermentation, perform stretch and folds to build gluten strength without adding more flour.
- Those Instagram-worthy “ears” on artisan loaves come from proper scoring. Use a sharp knife or razor blade to slash the dough’s surface right before baking. This allows the bread to expand in a controlled way, creating a beautiful crust. Make swift, confident cuts about 1/4 inch deep at a 45° angle. A curved lame gives you extra control for fancy designs.
- Crank it up to 450-500°F to start. Preheat your Dutch oven for even heat distribution. Using a baking stone or steel concentrates heat at the bottom for extra crunch and oven spring. Toss some ice cubes in a preheated tray to create steam, which keeps the crust soft enough to rise. After 20 minutes, remove the lid or tray to finish browning and crisping the crust.
Avoid These Mistakes
With a few tweaks and troubleshooting tips, you can get your loaf back on track – so don’t be afraid! Every loaf teaches you something!
Dense, Heavy Bread
If your sourdough lacks rise and has a dense crumb, there are a few possible culprits. Using bread flour will give more lift versus all-purpose. Make sure yeast has time to multiply by fermenting for the full recommended window. Letting the dough warm up to room temperature before shaping can help. Finally, be sure your oven doesn’t run cool, as inadequate heat can prevent oven spring.
Lack of Open Crumb
Use warmer water of at least 80°F/27°C to stimulate yeast. Knead thoroughly to develop the gluten structure that traps gas bubbles. And allow for adequate proof time for the dough to gain volume before baking.
Poor Oven Spring
Score gently, 1⁄4 to 1⁄2 inch deep. Place dough seam side down in the hot Dutch oven to maximize rise. And preheat your oven fully so it’s hot enough when dough goes in.
Dense Bottom Crust
To avoid an overly dense bottom crust, ensure your Dutch oven is well preheated before carefully placing dough inside. Brush the heated pot with oil or line with parchment so the dough doesn’t stick. Don’t let dough overproof before baking, making it deflate. And bake on a middle rack so bottom gets sufficient heat.
Too Dry Inside
Sourdough should be moist but not wet. A dough that’s too dry won’t rise well and can bake up dry inside. Make sure to use the full amount of water at the warmer temperature recommended. Add small amounts of extra water if needed to achieve the right tacky texture that sticks to the bowl. And don’t overknead, which can dry out the dough.
Deflating After Shaping
If your beautifully risen dough starts deflating after shaping, the gluten likely wasn’t relaxed enough. After bulk fermentation, let the dough rest for 20-30 minutes. Then shape gently without degassing too much.
Use a bench scraper to lift and shape if the dough fights you. And shape seam side up for support.
- Great for cutting dough, sectioning crusts, scraping baking sheets, chopping veggies and more
Prices pulled from the Amazon Product Advertising API on:
Product prices and availability are accurate as of the date/time indicated and are subject to change. Any price and availability information displayed on [relevant Amazon Site(s), as applicable] at the time of purchase will apply to the purchase of this product.
Serving and Storage Tips
After your tantalizing loaf emerges golden and fragrant from the oven, it’s time to enjoy the fruits of your labor!
Wait Before Slicing
Resist the urge to tear into your steaming loaf straightaway. Let it rest on a wire cooling rack for at least an hour so the crumb can set. Cutting too soon will squish your carefully crafted airy pockets.
Once cooled, grab a serrated bread knife and get slicing. For even cuts, press the blade’s serrations gently into the crust. Then use long, smooth strokes, letting the knife do the work. Squashing your slices is a surefire way to ruin that light, fluffy texture you worked so hard to achieve.
Reheating
Leftovers can be just as tasty with a few reheating tricks.
Spritz your slices with water, wrap them in foil, and pop them in a 350°F oven for 10-15 minutes. The moisture and heat will reinvigorate your bread, making it soft and steamy inside with a crisp crust.
For a quick fix, try toasting slices and brushing with butter or olive oil. The heat revives sourdough’s signature tang and chew.
Keeping It Fresh
For storing, first, make sure your bread is completely cool to avoid trapped moisture and mold.
Homemade sourdough keeps best in a breathable container like a ceramic bread box, cloth bag, or even a paper bag. These allow air circulation to maintain the crust’s crunch while keeping the interior soft. Avoid airtight plastic containers, which can make bread damp and stale.
Room temperature storage is ideal, as refrigeration can actually speed up staling. For longer storage, slice and freeze your loaf in an airtight bag. Thaw at room temp and reheat for fresh-baked vibes anytime.
- One 60 count box of Ziploc Gallon Food Storage Freezer Bags to protect food in the fridge or freezer
Prices pulled from the Amazon Product Advertising API on:
Product prices and availability are accurate as of the date/time indicated and are subject to change. Any price and availability information displayed on [relevant Amazon Site(s), as applicable] at the time of purchase will apply to the purchase of this product.
Alternative Methods for No-Starter Baking
Did you know there are other options for leavening your loaf without a starter?
Commercial Yeast
Some bakers add a small pinch of commercial yeast like active dry or instant yeast to starter-free recipes. This gives the dough a boost for quicker rise time of 4-6 hours.
The standard yeast strains don’t provide the complexity of flavor that wild yeast offers. However, adding just 1/4 to 1/2 teaspoon per loaf allows enough time for sourdough tang to develop.
Natural Leavening Agents
For a purely wild ferment, natural leaveners can be used in place of a starter. Options like pineapple juice, grapes, raisins, apples and coconut water provide food for yeasts to multiply and generate rise.
These fruit-based ingredients introduce wild yeasts and enzymes that break down carbohydrates into sugars to feed yeast growth. About 1 to 1 1/2 cups of leavening per loaf does the trick. The fruit also contributes subtle flavor and sweetness.
Sourdough Sponge
A sponge starts the fermentation process before mixing the final dough. To make a sponge, combine flour, water and leavening agent in a jar. Allow to ferment for 8-12 hours before adding to the remaining ingredients.
The sponge gives a head start for leavening. The lengthy ferment also develops acidity for more complex flavor. You can use any leavening agent in the sponge – wild yeast from flour, grapes, pineapple juice or commercial yeast.
Storing and Refreshing Dough
Instead of a separate starter culture, some maintain a supply of stored dough. Yes, the actual dough. After mixing a batch, save a portion in the fridge. Use this as a starter for your next loaf.
To refresh it, take the dough out 1-2 days before baking and feed it with flour and water. This nourishes yeasts for renewed activity. Avoid going longer than 2 weeks between refreshments. The stored dough contains the needed microbes for leavening and flavor development.
Variations in No-Starter Sourdough Recipes
Small tweaks create breads tailored to your taste and dietary needs. Explore endlessly variable sourdough combos!
Flour Combinations
Varying the flours creates new flavor profiles. Mixing flours lets you balance flavor, texture and nutrition.
For nuttier loaves, use up to 30% whole wheat or rye flour. Heartier 200% hydration recipes utilizing whole grain flours result in rustic, crusty loaves. Light rye adds earthiness without compromising rise. For tender sandwich bread, incorporate soft wheat flour.
Ancient Grain and Gluten-Free
Incorporate ancient grains like einkorn (like in my einkorn sourdough bread recipe), spelt or amaranth for nutrition and hearty texture. For gluten-free sourdough, try buckwheat, millet or sorghum flours with xanthan gum to mimic gluten’s stretch.
Ferment for 24 hours to let gluten-free flours fully hydrate and rise. Adding seeds adds crunch and visual appeal.
Herbs and Spices
Herbs like rosemary, oregano and thyme complement sourdough’s tang. Fennel, caraway and cumin lend warmth while chili flakes add kick. Sprinkle them on the shaped loaf before baking or knead them into the dough itself. Go savory with roasted garlic or onions baked into the bread.
Sweet and Fruity
For a breakfast treat, add raisins or dried cranberries to the dough or dust baked bread with cinnamon. Grated citrus zest provides brightness. Drizzle honey, maple, or agave over sliced homemade bread for sweetness.
Refrigerator and Sourdough Discard Recipes
Store boldly flavored doughs like garlic herb in the refrigerator for up to 5 days of use. As it ages, the sourness develops. Maintain a dough supply to bake fresh loaves as needed.
Don’t discard those scraps! Use them for sourdough focaccia, pizza, pretzels, sourdough discard pancakes or biscuits. The acidic discard adds tang to baked goods.
Enjoying Your Sourdough Bread to the Fullest
For a classic breakfast, slice your loaf thick, toast until golden, and top with avocado mash, red pepper flakes, and a poached egg. Or, layer on smoked salmon, cream cheese, and capers for an open-faced sandwich.
Sourdough bread pairs perfectly with soups and salads for lunch or dinner. Transform it into garlic bread to accompany pasta dishes or use it as a base for bruschetta with fresh tomatoes, basil, and mozzarella.
Snack away by cutting sourdough into bite-sized pieces, tossing with olive oil and herbs, and baking until crispy for addictive croutons. Slice it thin and toast for crostini to top with whipped ricotta, roasted garlic, or sautéed mushrooms. Day-old sourdough finds new life in bread pudding, homemade breadcrumbs, or rustic croutons.
Soak thick slices in vanilla and cinnamon-spiked custard for French toast, layer cubed bread with fresh fruit and nutmeg-scented cream for summer bread pudding, or simply slather a warm slice with salted butter and honey.
No Starter, No Problem
Sourdough bread brings immense satisfaction when home baked from scratch. ]
While no-starter sourdough takes more time, it rewards with delicious loaves. Starter-free sourdough offers unlimited potential!
Happy baking!
Sourdough Bread Without Starter FAQs
What Can I Use if I Don’t Have a Sourdough Starter?
If you don’t have a sourdough starter, you can use kombucha instead. Kombucha contains yeasts as well as bacteria, which means that it can be used to start a sourdough starter or ferment your grains.
Does All Sourdough Need a Starter?
Without a sourdough starter, your bread won’t rise. If you were to replace the sourdough starter with commercial yeast then your baked bread will be a simple loaf void of sourdough flavors.
Can I Skip Feeding My Sourdough Starter?
Without regular feeds, your sourdough starter will begin to emit an alcohol-like smell. You’ll also notice your starter will begin to lose its activity but don’t worry it can easily be revived in time for your next bake.
Do You Have to Use a Starter for Sourdough Bread?
No, you don’t necessarily have to use a starter for sourdough bread. Methods often involve using commercial yeast, yogurt, vinegar, or other ingredients to mimic the sour flavor and leavening effect of a starter.
Can I Use Yeast Instead of Sourdough Starter?
Yes. Using commercial yeast is a common alternative for achieving the leavening effect in bread without the need for maintaining a sourdough starter.
Quick Sourdough Bread Without Starter Recipe
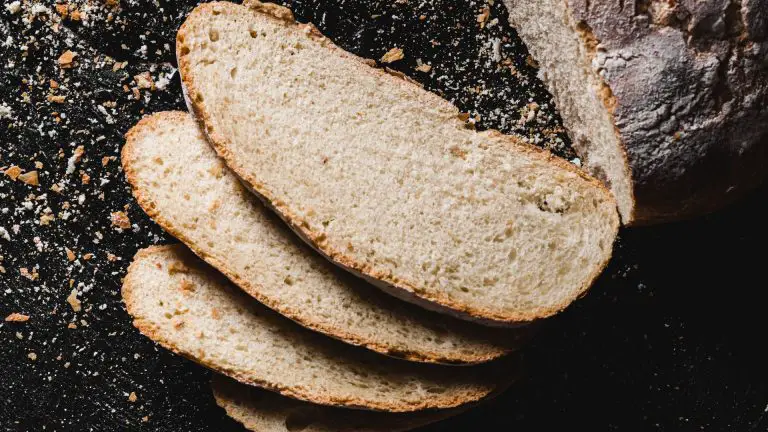
Make a simple loaf of homemade artisan sourdough bread with a crisp, golden crust, and plush interior. You won’t need a starter for this one!
- Total Time: 2 hrs 25 mins
- Yield: 1 loaf 1x
Ingredients
- 400g strong white bread flour
- 100g rye flour
- 100ml plain white natural yogurt
- 200ml water
- 1–2 tsp caraway seeds
- 1 tsp sea salt
- 1.5 tsp brown sugar
- 2 tsp vinegar
- 1 sachet of Instant Sourdough yeast
Instructions
- Add your dry ingredients to a large mixing bowl. In a separate bowl, combine water, vinegar, and yogurt, then add this to the dry ingredients.
- Stir with a wooden spoon, then transfer the dough to a clean kitchen surface, and use your hands to start kneading.
- Knead the bread for 10 minutes, and your dough should become elastic and smooth.
- Place the dough back into the bowl, and cover it with a tea towel, till the dough rises to double its size. This can take 40-60 minutes depending on the warmth of your kitchen.
- Once the dough has risen, shape your bread dough, and let the bread rise once more. You can place your dough into a proofing basket for a crisp crust.
- Meanwhile, preheat your oven to 450 degrees F and place a Dutch oven into the oven.
- Carefully remove the heated Dutch oven from the hot oven, and slice the top of the bread with a sharp knife, before carefully lowering the dough into the oven.
- Bake for 20 minutes, then remove the Dutch oven from the oven, lower the temperature to 400 degrees F, and replace the half-baked bread in the oven, to bake for another 20 minutes.
Notes
- Ensure that you are using some form of sourdough yeast, otherwise it will not be a sourdough loaf
- Prep Time: 5 mins
- Cook Time: 40 mins
- Category: bread
Nutrition
- Serving Size: 1 slice
- Calories: 178 kcal
- Fat: 1 g
- Carbohydrates: 37 g
- Fiber: 3 g
- Protein: 5 g


