A hearty sourdough loaf starts with an active bubbling starter culture. Yet cultivating this microbial ecosystem in the ideal habitat challenges even artisan bakers. The humble sourdough starter container supports the entire process. Without a properly prepared vessel tailored to individual baking needs, starters fail to thrive. This essential guide eliminates starter jar confusion. Equipped with actionable insights on choosing and using starter containers, say goodbye to lackluster loaves and let the fermentation begin!
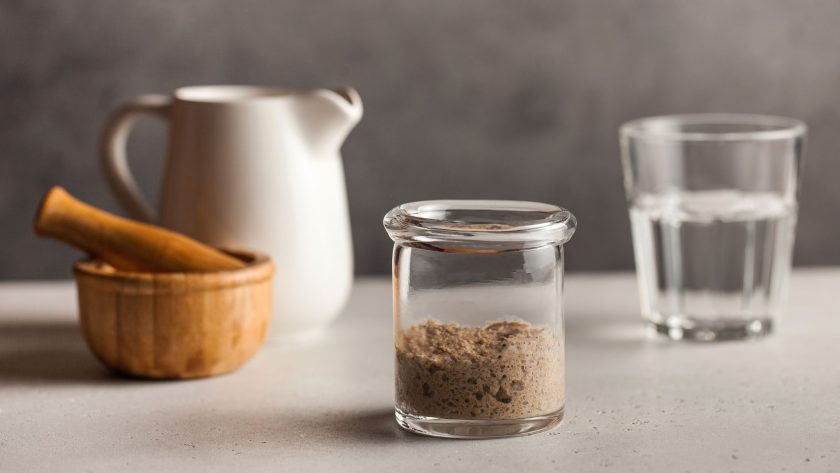
Table of Contents
- What is a Sourdough Starter Jar?
- Things to Consider When Choosing a Sourdough Starter Jar
- Types of Jars
- Preparing Your Starter Jar for Use
- Maintaining Your Sourdough Starter Jar
- Common Issues and Solutions with A Sourdough Starter Container
- Sourdough Starter Containers are Important!
- FAQs
What is a Sourdough Starter Jar?
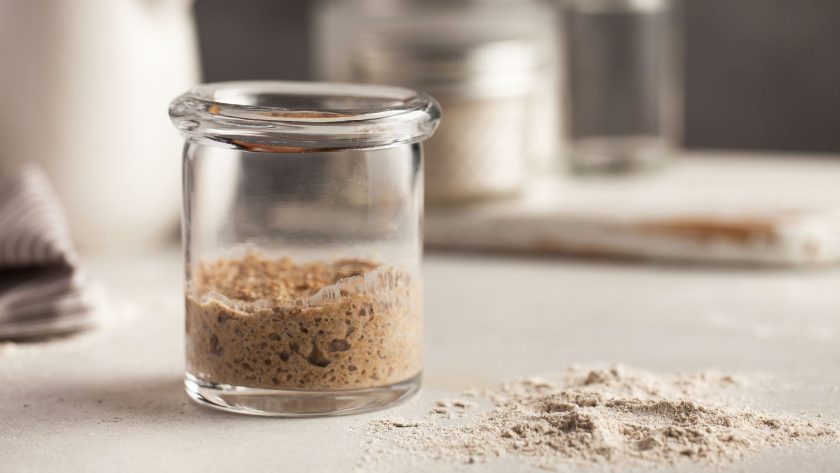
A sourdough starter jar is the vessel used to contain and ferment a sourdough starter. Just as a sourdough starter acts as the engine that leavens bread, the jar houses this mixture of flour and water, allowing it to safely bubble away.
In its simplest form, a sourdough starter jar is any glass, plastic, or ceramic container that enables effective fermentation. However, certain features make for an ideal sourdough jar.
These containers are often wide-mouthed to allow for easy access when feeding the starter. Their smooth surfaces discourage mold growth and make cleaning easier. Lastly, their clear sides let bakers monitor the starter’s rise and fall.
Let’s get deeper into it.
Things to Consider When Choosing a Sourdough Starter Jar
Finding the perfect vessel ensures hassle-free fermentation and maintenance. Use these tips to choose a jar tailored to individual baking needs.
Size
Match jar size to the volume of starter used. Standard sourdough recipes produce 1-2 cups of mixture. Choose a 1-2 quart wide-mouth canning jar to provide plenty of room for rising and feeding. Mini 4 oz jars work for smaller amounts but require frequent attention.
Leave ample headspace – around 30-50% of the jar volume. This prevents overflow as yeast activity causes expansion. Wider jars allow monitoring fermentation while narrow vessels maximize vertical rise. Stick to glass or plastic under 4 quarts; larger batches do better in ceramic crocks with >1 gallon capacity.
For bakers maintaining multiple starters, smaller jars keep different strains separate. Labeled mini jars prevent mix-ups. Simply scale each one according to feeding schedule and baking plans.
Material
There are 3 jar materials to choose from:
- Glass jars are ideal for beginner bakers. Canning jars perform perfectly at a reasonable cost.
- Plastic containers are an affordable option.
- Ceramic crocks bring old-world appeal. Artisanal designs specifically for sourdough add aesthetic charm.
Mouth Width
Look for wide mouth jars over 3 inches across. Their open access eases stirring in flour and water when feeding. Narrow openings make maintaining starters frustrating and increase risks of spilling during mixing.
Mason jars and most commercial kitchen jars provide ample clearance. Vintage containers tend toward smaller openings that ultimately limit functionality. Check mouth size before selecting unique antique jars.
Lid Type
Lids must seal tightly to retain rising gases while preventing unwanted airborne microbes. Mason jar style threaded caps allow customizing the seal. Flip-top clamps on hinged lids create excellent closure too.
Some bakers prefer loose-fitting lids that “burp” excess gas, avoiding excessive pressure buildup. These work better for established starters but invite early contamination in young ones.
Matching glass or plastic lids improve visibility for monitoring the starter without unscrewing the lid. If using a loose ceramic cover, simply remove it halfway to peek inside.
Ultimately, the ideal container comes down to the individual baker’s preferences and baking frequency. The jar material impacts durability over years of use while size accommodates individual batch yields.
Types of Jars
When selecting a vessel for a new sourdough starter, bakers can choose from glass, plastic, or ceramic jars. Each material offers distinct advantages and drawbacks.
| Material | Pros | Cons |
|---|---|---|
| Glass Jar | – best and most popular choice – full visibility of inside – stain and scratch resistant – easy to clean | – light exposure that can inhibit yeast growth – fragile |
| Plastic Jar | – lightweight – portable – very affordable – shatter-resistant | – scratches easily, which can house unwanted microbes – develops hard to clean easily scratched |
| Ceramic Jar | – unglazed and glazed crocks both offer benefits – artisinal and aesthetic | – requires seasoning to avoid absorption – chips and cracks over time if not cared for |
Glass Jars
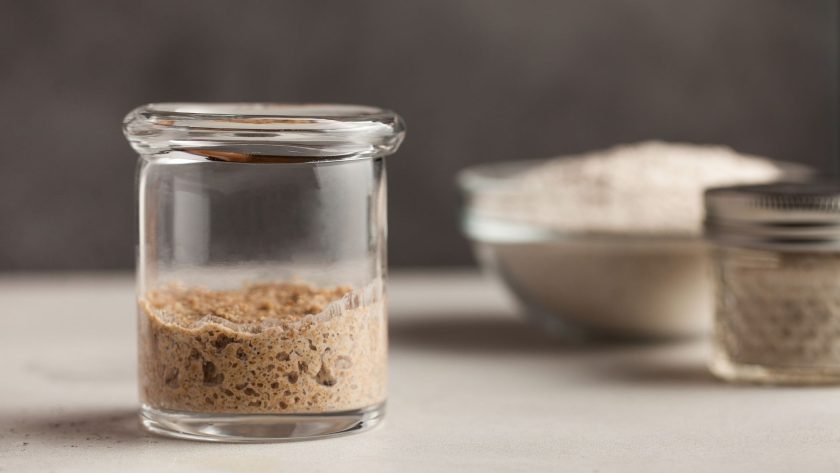
Clear glass jars allow full visibility into fermentation activity, making them the most popular choice for sourdough bakers. Their nonporous surface resists staining and limits microbe growth compared to plastic. Glass also provides an inert material that won’t leach chemicals.
Mason jars offer a classic option with modular lids to easily regulate airflow. Canning jars work similarly well for housing starters. For larger batches, wide-mouth glass jars over 32 oz prevent overflow as the starter expands. Mini 4 oz jars suit smaller starters too.
The transparent glass does pose one downside – light exposure can inhibit yeast growth. Simply storing the jar away from direct sunlight prevents this issue.
Overall, glass jars tick all the boxes for an ideal sourdough vessel.
- ✅ Elegant Classic Design
- ✅ Healthy and Easy Living
- ✅ Food Preservation –
- ✅ 𝐏𝐄𝐑𝐅𝐄𝐂𝐓 𝐀𝐋𝐓𝐄𝐑𝐍𝐀𝐓𝐈𝐕𝐄 𝐅𝐎𝐑 𝐏𝐋𝐀𝐒𝐓𝐈𝐂 𝐁𝐎𝐓𝐓𝐋𝐄𝐒
Prices pulled from the Amazon Product Advertising API on:
Product prices and availability are accurate as of the date/time indicated and are subject to change. Any price and availability information displayed on [relevant Amazon Site(s), as applicable] at the time of purchase will apply to the purchase of this product.
Plastic Containers
Plastic containers offer a lightweight and stackable alternative to glass jars. Their lower cost and resistance to shattering also appeals to some bakers. Containers with snap-lock lids prevent spills and ease portability.
However, plastic can scratch more easily, developing hiding spots for unwelcome microbes. Over time, stains also develop which require aggressive cleaning. Bakers must take care to select food-grade plastic that won’t leach chemicals. Smooth surfaces further discourage mold growth.
For those opting for plastic, regular replacement provides the best results. Dedicate containers specifically for sourdough starters rather than multi-use. Proper cleaning and dry storage limits deterioration.
- QUALITY-MATERIAL
- ACCESSORIES
- EASY LABELING
- CLIMATE CONTROL
Prices pulled from the Amazon Product Advertising API on:
Product prices and availability are accurate as of the date/time indicated and are subject to change. Any price and availability information displayed on [relevant Amazon Site(s), as applicable] at the time of purchase will apply to the purchase of this product.
Ceramic Crocks
The old-world charm of ceramic fermentation crocks offers an aesthetic choice for sourdough starters. These porous vessels must be properly seasoned to prevent absorption of liquids and flavors. Once conditioned though, ceramic makes an excellent starter jar.
Unglazed crocks allow beneficial air exchange while glazed interiors resist staining. Small stoneware crocks around 1 quart specially designed for sourdough work perfectly. Matching ceramic lids provide a tight seal during fermentation.
Just take care not to jostle the heavy crock once filled. While ceramic lasts ages if cared for, chips and cracks ruin structural integrity. Thankfully various artisanal potters now craft specialty sourdough crocks for form and function.
- 👨🍳A BAKERS DREAM
- 👨🍳BUILT TO LAST
- 👨🍳OPTIMAL CAPACITY
- 👨🍳MULTIPURPOSE AND FUNCTIONAL
- 👨🍳A THOUGHTFUL PRESENT
Prices pulled from the Amazon Product Advertising API on:
Product prices and availability are accurate as of the date/time indicated and are subject to change. Any price and availability information displayed on [relevant Amazon Site(s), as applicable] at the time of purchase will apply to the purchase of this product.
Preparing Your Starter Jar for Use
Before housing a new sourdough starter, proper preparation of the fermentation jar establishes optimal conditions for yeast activity. These steps can ready any vessel for culturing a vigorous sourdough culture.
Cleaning
Wash the starter jar, lid, and any utensils to be used with hot soapy water. Avoid fragrant cleansers like citrus-scented detergents which can impart tastes. Use a soft brush or sponge to scrub away debris and residues.
Rinse thoroughly several times to eliminate all soap. Clean hands prevent transferring unwanted microbes. Allow all parts to air dry completely before the next sterilization phase.
Sterilizing
Destroy lingering unwanted yeasts and bacteria by sterilizing the starter jar using heat, steam, or chemical solutions. This precaution prevents early contamination sabotaging starter development.
The dishwasher’s high heat drying cycle effectively sterilizes glass and plastic vessels. Place lids loosely atop jars during this phase to allow penetration of hot air.
Alternatively, submerge jars in boiling water for 10-15 minutes to heat-sterilize surfaces. Covering pots accelerates the disinfection. For plastic containers, monitor distortion.
Chemical options like food-grade Star San solution or 70% isopropyl alcohol also sanitize surfaces on contact. Thoroughly rinse and dry vessels after an alcohol soak.
Starter Placement
Select a convenient home for the starter vessel to underscore its importance in the daily baking routine. Near the flour and water supplies simplifies feeding. A kitchen island or countertop spot enables easy monitoring of fermentation.
The top shelf of the refrigerator works for mature starters, offering stable cool temperatures. Just bring them down to room temperature before feedings. Inside drawers hides starters from view so use for long-term storage only.
Choose locations away from heatgenerating appliances that might stunt yeast growth with excess warmth. Direct sun exposure also disrupts fermentation. Stick to inner countertops or kitchen tables instead.
First Feeding
Once cleaned, sterilized, and placed, add the freshly mixed starter ingredients according to recipe directions. Typically equal parts flour and water fermented for 48 hours establishes the culture before proceeding with a standard feeding schedule.
When transferring the young active starter, avoid contact with exterior jar walls to leave headspace. This allows stirring without overflow upon rising. After covering with the tightened lid, label jars with the starter variety and date before moving to its permanent housed spot.
Maintaining Your Sourdough Starter Jar
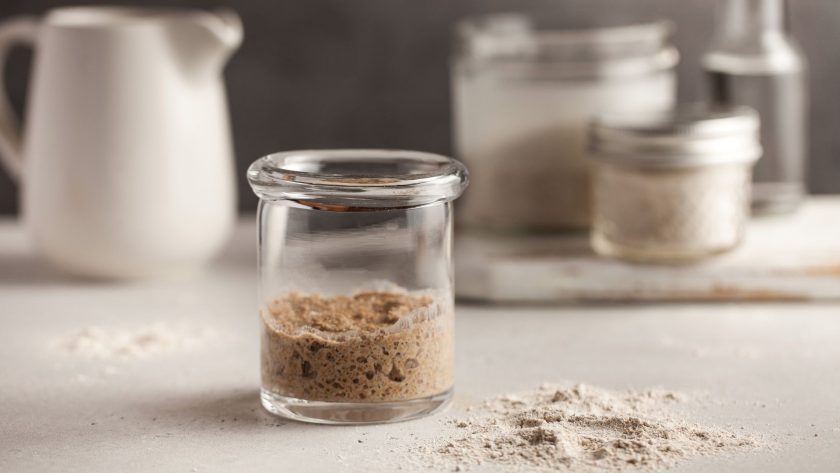
Caring for a sourdough starter jar ensures years of consistent performance and delicious baked results. Simple regular cleaning and attentive storage preserves fermentation power over time.
From my experience, here are my tips for maintaining a starter container effectively.
Cleaning Routines
Wash starter jars and lids after every 2-3 uses to prevent residue accumulation. Use hot water and mild unscented dish soap,scrubbing inside with a soft brush. Rinse thoroughly afterwards.
For plastic vessels, replace scratched containers to discourage microbe harboring. Glass jars last indefinitely if kept smooth; gently buff away stubborn spots.
Monthly deep cleaning further prevents contamination:
Soak jars overnight in a 50/50 vinegar/water bath to descale and disinfect. Baking soda and water pastes scrub away stains. Rinse and dry completely upside down; lingering moisture invites mold.
Dedicated Use
Designate jars solely for housing starters, avoiding crossover uses that might impart other flavors. Vintage containers lend nostalgic charm but verify prior contents before dedicating to sourdough.
If maintaining multiple starter varieties, uniquely colored lids or labels prevent accidental mix-ups when working with multiple vessels. Just keep strains clearly defined.
Feed the Starter, Not the Jar
Focus cleaning efforts on the starter itself rather than over-scrubbing jar walls to avoid damaging beneficial yeasts taking hold. These naturally acidic cultures self-clean through regular feeding cycles.
Simply stir in fresh flour and water, discarding a portion of the starter to replenish food supplies. The most active yeasts and bacteria remain mixed in while waste products exit.
Storage Savvy
Let starters rise and ferment on countertops at room temperature for peak vitality. Placing jars inside cabinets or drawers limits visibility during this active period.
Once mature and bubbly after a fresh feeding, move vessels to the refrigerator for slower fermentation up to a week. Ensure tight lids prevent drying or airborne contamination.
During prolonged downtimes without baking, transfer starters to freezer storage. Use wide mouth jars to allow spoon access for portioning out. Thaw overnight in the refrigerator before restarting culture.
Common Issues and Solutions with A Sourdough Starter Container
Even the best maintained sourdough starter jars may encounter occasional issues. Don’t discard bubbling starters at the first sign of trouble! Accidents happen but most common starter jar issues resolve with some extra attention.
Review these common problems and their simple solutions to restore jarred starters to full vigor.
Mold Development
Mold on your sourdough starter is a very real possibility.
SURFACE MOLD forms harmless fuzzy spots on starter tops when prolonged air exposure dries out the mixture. Scrape off the growth and stir the starter well before feedings resume as normal.
JAR MOLD develops dark streaking down interior walls from residue buildup. Hand wash jars in hot soapy water using a bottle brush. Sterilize with vinegar or bleach solution before restarting with fresh starter.
Cracked or Chipped Jars
GLASS CRACKS from temperature shocks or drops compromise structural integrity. Carefully transfer starters to new matching jars before fractures spread. Plastic superglue bandages very small stable cracks.
CERAMIC CHIPS that expose porous surfaces provide footholds for contaminants and absorption issues. Seal any stable interior flaws with food-safe epoxy resin to maintain a nonstick surface.
Loose or Faulty Lids
Ill-fitting lids that don’t fully seal lead to dried out sourdough crusting around jar rims. Refresh starters with clean water and monitor closely. Wash lids thoroughly to remove residues along sealing surfaces.
Sticky lids that resist opening may indicate extreme gas pressure buildup from very active fermentation. “Burp” jars briefly before resealing to release excess carbon dioxide. Consider switching to a vented lid design.
Sourdough Separating
Runny gray liquid floating atop firmer starter layers signals a pH drop that compromises yeast. Stir back together well and refresh with an extra feeding to stabilize acidity. Boost the flour ratio to increase food for fermenting microbes.
Slow Rising or Sinking Starter
Minimal bubbles and rise after feedings indicate depleted yeast levels. Transfer starters to warmer spots away from chilling refrigerator air. Increase feeding ratios to 1 part mature starter, 2 parts water and 2 parts flour until restored.
Sourdough Starter Containers are Important!
Properly housing fermenting starter in jars tailored to individual needs ensures hassle-free rising and maintenance. With myriad styles to match personal aesthetics and baking habits, a quality jar keeps starter healthy for decades.
The humble jar plays a leading role in sourdough’s magical transformation from mere flour and water into an airy, life-giving loaf. I hope this article has illuminated the art and science behind starter containers. Now filled with tips and inspiration, begin your own delicious journey – choose a quality crock, ready the jar, and let the bubbling commence!
FAQs
What kind of jar is best for sourdough starter?
You’ll need a wide container to store your sourdough starter for fermentation. Wide-mouth jars, crocks, and slightly larger glass containers are all examples of good containers for your sourdough starter.
Should I close my sourdough starter jar?
While the temperature of the starter plays an essential role in its overall outcome, the sourdough starter does not need to be sealed in an airtight container. Though it should be covered to prevent any mess.
Should sourdough starter container be glass or plastic?
Most containers for the sourdough starter are made from two types of materials: plastic and glass. Plastic containers can’t shatter, so they’re a lot more durable than glass.
How often should I clean my sourdough starter jar?
It’s generally recommended to clean your sourdough starter jar once a week, or whenever you notice residue building up or any off smells.




![How To Use A Banneton: Learning Proofing Basics 10 How to use a banneton [easy to follow guide]](https://www.mydailysourdoughbread.com/wp-content/uploads/2023/01/How-to-Use-a-Banneton-120x120.jpg)
