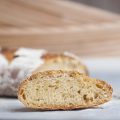
Today, I’m sharing with you the secrets that I know to crafting the perfect broa de Milho, a traditional Portuguese cornbread. Together, let’s create an authentic, mouthwatering treat that will impress your family and friends!
![How To Make Broa De Milho (Portuguese Corn And Rye Bread) 90 How to make broa de milho [portuguese corn and rye bread]](https://www.mydailysourdoughbread.com/wp-content/uploads/2024/04/Broa-de-Milho-3-840x473.jpg)
Table of Contents
- What is Broa de Milho?
- Ingredients
- Preparation
- Baking
- Variations You Can Try
- Storage Tips
- Advice for Mistake You May Face
- Make Broa de Milho ASAP!
What is Broa de Milho?
Broa de Milho is a bread that comes from Portugal and Brazil. It is different from white bread and American cornbread because it is made with cornmeal, which gives it a special texture and flavor. Cornmeal makes the bread a little bit rough and hearty.
This bread tastes a little bit sweet and nutty. You can eat Broa de Milho by itself, with butter, or with soups and stews. It’s a bread that many people enjoy, and you should, too!
Ingredients
- 2 cups fine yellow cornmeal (regular cornmeal can be used, but may result in a more crumbly texture)
- 1 cup all-purpose wheat flour (bread flour can be substituted for a higher protein content)
- 1 cup active sourdough starter (at room temperature) (or 1 tablespoon active dry yeast – 2 teaspoons instant yeast can be used instead, no proofing required)
- 1 1/2 cups warm water (to activate the yeast and bring the dough together)
- 1/2 cup milk (optional, adds richness and softens the crumb)
- 1 teaspoon salt (enhances flavor and balances sweetness)
- 1 tablespoon sugar (feeds the yeast and aids in browning)
Equipment Needed
Don’t worry if you don’t have every single item on this list – you can use what you have on hand!
- First and foremost, you’ll need a couple of sturdy mixing bowls to combine your ingredients. A large bowl for the main dough mixture and a smaller one for proofing the yeast will do the trick. If you don’t have a second bowl, a measuring cup or even a mug can work in a pinch. You’ll also want a wooden spoon or dough whisk to bring everything together.
- You’ll need a baking sheet or two. Line them with parchment paper for easy cleanup and to prevent sticking. No parchment paper? A light dusting of cornmeal or flour on the baking sheet can help.
- Of course, you’ll need an oven. Make sure it’s in good working order and can hold a steady temperature. A pizza stone or cast iron skillet can help create a crispy crust, but they’re not essential for this recipe.
- While not strictly necessary, a kitchen scale can be incredibly helpful for accurately measuring ingredients.
- A dough scraper is also useful for dividing the dough and keeping your work surface clean.
- And if you plan on making Broa de Milho regularly, consider investing in a proofing basket for that artisanal look.
- PERFECT FOR THE BAKER IN YOUR HOME: You will be impressed with our bread proofing baskets quality and performance. Dimpola sourdough proofing baskets are made of high-quality, natural rattan cane that allows for excellent airflow and moisture absorption, resulting in perfectly proofed bread every time.
Prices pulled from the Amazon Product Advertising API on:
Product prices and availability are accurate as of the date/time indicated and are subject to change. Any price and availability information displayed on [relevant Amazon Site(s), as applicable] at the time of purchase will apply to the purchase of this product.
Preparation
In a large mixing bowl, combine the cornmeal, flour, salt, and sugar. Add starter, water, and milk to the dry ingredients. Mix with a wooden spoon or dough whisk until a shaggy dough forms. Knead the dough on a lightly floured surface for about 5-10 minutes, until it becomes smooth and elastic.
Place the kneaded dough in a lightly oiled bowl, cover with a damp towel or plastic wrap, and let it rise in a warm, draft-free spot for about 1-2 hours, or until it has doubled in size. This proofing step allows the yeast to work its magic, creating a light and airy texture in the final bread.
Once the dough has risen, punch it down and divide it into two equal portions. Shape each portion into a round or oval loaf, depending on your preference. Place the shaped loaves on a parchment-lined baking sheet, cover loosely with a towel, and let them rise again for about 30-45 minutes.
Baking
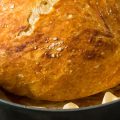
To achieve the perfect Broa de Milho, preheat your oven to 450°F (230°C). This high temperature will help create a crispy, golden-brown crust while ensuring the inside is cooked through. If you have a baking stone or cast iron skillet, place it in the oven during preheating to provide extra heat for a crispier bottom crust.
Once your oven is preheated and your loaves are ready, it’s time to bake! Carefully transfer the risen loaves to the hot oven, either directly onto the baking stone or skillet, or keep them on the parchment-lined baking sheet. Bake the Broa de Milho for about 35-45 minutes, depending on the size of your loaves. To check for doneness, tap the bottom of the bread – it should sound hollow when fully baked.
For an extra crispy crust, try creating steam in your oven by placing a metal tray on the bottom rack during preheating. When you put the bread in the oven, pour a cup of hot water into the tray, quickly closing the oven door to trap the steam inside. This steam will help create a thin, crispy crust that crackles as the bread cools.
Once your Broa de Milho is baked to perfection, remove it from the oven and let it cool on a wire rack for at least 30 minutes before slicing. This cooling time allows the bread’s structure to set, making it easier to slice without crumbling. Serve your homemade Broa de Milho warm with butter, as a side to your favorite soups and stews, or enjoy it on its own as a tasty snack. Leftover bread can be stored in an airtight container at room temperature for up to 3 days, or frozen for longer storage.
Variations You Can Try
Across Portugal, bakers use different types of cornmeal, like yellow or white, to create unique flavors and colors. Some modern recipes add a touch of sweetness with honey or sugar, while others play with herbs and spices for new taste combinations.
You can easily customize Broa de Milho to your liking or dietary needs. Swap wheat flour with gluten-free alternatives, try different cornmeal ratios, or experiment with other flours like rye or spelt.
Traditionally baked in wood-fired ovens for a smoky flavor and crisp crust, Broa de Milho can also be made in a regular oven at home. Some recipes even suggest steaming or frying the dough for a softer texture.
![How To Make Broa De Milho (Portuguese Corn And Rye Bread) 92 How to make broa de milho [portuguese corn and rye bread]](https://www.mydailysourdoughbread.com/wp-content/uploads/2024/04/Broa-de-Milho-2-840x473.jpg)
Storage Tips
If you want your homemade Broa de Milho to stay yummy for a couple of days, just put it in a sealed container or plastic bag and keep it on your kitchen counter. This way, it won’t get too hard or dry out too fast.
Want your Broa de Milho to stick around a bit more? No problem! You can keep it in the fridge for up to a week. Just wrap it up nicely and snug in some plastic wrap or aluminum foil before you put it in there. This will make sure it doesn’t pick up any weird smells or flavors from your fridge. When you’re ready to chow down, let it sit out for a bit to warm up or toss it in the oven for a couple of minutes to make it taste like it’s fresh out of the oven.
Made a bunch of Broa de Milho that you can’t eat right away? This bread freezes like a champ. Cut it up into slices, wrap each piece in plastic wrap, and toss them in a freezer bag or container. Don’t forget to write the date on the bag, so you remember how long it’s been in there. You can keep your frozen Broa de Milho for up to 3 months.
When you’re ready to dig in, just let it thaw on the counter or in the fridge overnight. Then, heat it up in the oven for a few minutes, and it’ll taste like you just baked it!
Advice for Mistake You May Face
Broa de Milho is a simple bread, but don’t worry if you make mistakes. I am here to help you!
Overmixing the Dough
While it’s important to ensure all the ingredients are well combined, too much mixing can lead to a tough, dense bread. Mix just until the dough comes together and no dry flour remains.
Inaccurate Measurements
As with any baking recipe, accurate measurements are key to success. Too much flour can result in a dry, crumbly bread, while too much liquid can make the dough overly sticky and difficult to work with. Use measuring cups and spoons to ensure precision, or better yet, invest in a kitchen scale for the most accurate results.
Skipping the Proofing Steps
It may be tempting to rush the proofing process, but allowing the dough adequate time to rise allows for really great bread. Skipping or shortening the proofing steps can lead to a flat, dense loaf lacking that delightful airy crumb we all crave.
Make Broa de Milho ASAP!
Broa de Milho is a delightful Portuguese and Brazilian cornbread that combines the unique taste and texture of cornmeal with traditional bread ingredients. It is a must-try recipe that won’t disappoint. I’ve guided you you through making your own Broa de Milho at home, so let me know how it turns out!
Print![How To Make Broa De Milho (Portuguese Corn And Rye Bread) 93 How to make broa de milho [portuguese corn and rye bread]](https://www.mydailysourdoughbread.com/wp-content/uploads/2024/04/Broa-de-Milho-768x432.jpg)
Broa de Milho (Portuguese Corn and Rye Bread)
- Yield: 1 loaf 1x
Ingredients
- 2 cups fine yellow cornmeal
- 1 cup all-purpose wheat flour
- 1 cup active sourdough starter
- 1 1/4 cups warm water
- 1/2 cup milk
- 1 teaspoon salt
- 1 tablespoon sugar
Instructions
- In a large mixing bowl, whisk together the cornmeal, flour, salt, and sugar.
- In a separate bowl, mix the sourdough starter with the warm water and milk (if using). Pour this mixture into the dry ingredients. Stir with a wooden spoon until a shaggy dough forms.
- Turn the dough out onto a lightly floured surface and knead for about 8-10 minutes, until the dough is smooth and elastic. The dough should feel slightly tacky but not sticky.
- Place the kneaded dough in a lightly oiled bowl, cover with a damp cloth, and let it rise in a warm, draft-free place for 3-4 hours, or until nearly doubled in size. Sourdough takes longer to rise than yeast.
- After the rise, gently punch down the dough to deflate it. Divide it into two equal portions. Shape each into a round or oval loaf. Place on the prepared baking sheets, cover loosely, and let rise for another 1-2 hours. The dough should look puffy and be slightly risen.
- Heat your oven to 425°F (220°C). If you have a baking stone or cast iron skillet, place it in the oven to preheat as well.
- Place the loaves in the oven (directly on the stone or skillet if using, otherwise keep on the baking sheet). Bake for 30-40 minutes, until the crust is golden brown and the bottoms sound hollow when tapped.
- For a crispy crust, you can create steam by placing a metal tray with water in the bottom of the oven when you put the bread in.
- Remove the bread from the oven and let it cool on a wire rack for at least 30 minutes before slicing.
Notes
- Serve as an accompaniment to soups, stews, or use as a robust base for sandwiches.
- Enjoy with a cup of coffee or tea for a hearty snack.
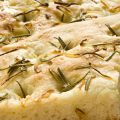
- Mix in herbs like rosemary or thyme to the dough for an aromatic twist.
- Use a combination of different cornmeals or substitute part of the cornmeal with other flours like rye for a unique flavor.
- Store in an airtight container at room temperature for up to 2-3 days.
- For longer storage, wrap well and refrigerate for up to a week, or freeze for up to 2 months. Thaw and reheat gently before serving.
- For a sweeter cornbread, add a bit more sugar or drizzle honey over the top before baking.
- Category: bread
- Cuisine: Portuguese/Brazilian


