If you plan on trying to make Pain de campagne, a classic French country bread, do I have a recipe for you today. You’ll want to achieve an ideal crusty exterior and chewy, flavorful interior. And so, I’ll share my secrets on how to make Pain de campagne successfully. Prepare for a resounding success.
![How To Make Pain De Campagne (French Country Bread) 120 How to make pain de campagne [french country bread]](https://www.mydailysourdoughbread.com/wp-content/uploads/2024/04/how-to-make-Pain-de-campagne-4-840x473.jpg)
Table of Contents
- What is Pain de Campagne?
- Ingredients
- Preparation
- First Fermentation
- Shaping
- Second Fermentation
- Baking the Bread
- A Timeless French Bread
- How to Make Pain de Campagne: FAQs
What is Pain de Campagne?
Pain de Campagne, which translates to “country bread” in French, is a rustic, artisanal bread known for its crisp, golden crust and tender, flavorful crumb. Originating from the rural regions of France, this hearty loaf was traditionally made with locally milled flour and natural leavening agents, often baked in communal ovens.
Pain de Campagne has inspired numerous variations, incorporating different types of flour, seeds, nuts, or dried fruit to create unique flavor profiles and textures. Despite regional adaptations, Pain de Campagne remains a beloved French staple, celebrated for its rich history and simple, satisfying taste.
Ingredients
- 3 cups bread flour
- 1 cup whole wheat flour
- 1 cup sourdough starter, active and bubbly
- 1 1/4 cups water (filtered or bottled, at room temperature)
- 1 1/2 tsp salt
Tools
While fancy equipment isn’t necessary, having the right basics will make your bread-making journey a breeze.
- A reliable oven that maintains a stable temperature is crucial.
- You’ll also need trusty mixing bowls, large enough to accommodate your dough as it grows during fermentation.
- A dough scraper, also known as a bench scraper, is a baker’s best friend for dividing, shaping, and moving dough around.
- Other handy tools include a kitchen scale for precise measurements, a sharp knife or razor blade for scoring loaves, a spray bottle for creating steam in your oven, and a cooling rack for your freshly baked bread.
Preparation
To begin your Pain de Campagne journey, gather all the ingredients in a large mixing bowl. Start by combining the bread flour, whole wheat flour, and salt. Create a small well in the center of the dry ingredients and pour in the water and starter. Using a wooden spoon or your hands, mix the ingredients until they come together to form a shaggy, sticky dough.
Once your dough has come together, turn it out onto a lightly floured surface. It’s time to develop the gluten through kneading. Using the heel of your hand, push the dough away from you, then fold it back over itself. Give the dough a quarter turn and repeat the process. Keep kneading for about 10-15 minutes, or until the dough becomes smooth, elastic, and slightly tacky to the touch.
If you’re using a stand mixer, attach the dough hook and knead on medium-low speed for 6-8 minutes. Keep an eye on the dough – it should clear the sides of the bowl but stick to the bottom.
After kneading, shape your dough into a ball and place it in a lightly oiled bowl. Cover the bowl with a clean, damp kitchen towel or plastic wrap and let the dough rise in a warm, draft-free place. This first rise, or bulk fermentation, typically takes about 1-2 hours, or until the dough has doubled in size.
During this stage, the yeast consumes the sugars in the flour, releasing carbon dioxide and developing the bread’s flavor and structure. Be patient and let the dough do its magic!
![How To Make Pain De Campagne (French Country Bread) 121 How to make pain de campagne [french country bread]](https://www.mydailysourdoughbread.com/wp-content/uploads/2024/04/how-to-make-Pain-de-campagne-2-840x473.jpg)
First Fermentation
Provide the right environment for your dough. Aim for a warm, draft-free spot, ideally around 75-80°F (24-27°C). If your kitchen is on the cooler side, you can create a cozy proofing box by placing a bowl of hot water in your oven (turned off) alongside your dough.
The duration of the first rise can vary depending on factors like room temperature and the strength of your yeast. Generally, it takes about 1-2 hours for the dough to double in size. Keep an eye on it, and trust your instincts – when it looks puffy and has grown significantly, it’s ready for the next step.
While not essential, proofing baskets, also called bannetons, can take your Pain de Campagne to the next level. These woven baskets, often made from rattan or wood pulp, support your dough during the final rise and leave beautiful spiral patterns on the crust.
If you’re using a proofing basket, dust it generously with flour to prevent sticking. Gently shape your dough into a ball and place it seam-side up in the basket. If you don’t have a proofing basket, a bowl lined with a clean, floured kitchen towel works just as well.
Remember, patience is key during fermentation. Resist the urge to rush the process, and let your dough develop at its own pace. The reward will be a loaf with unbeatable flavor and texture.
Common Mistakes to Avoid
- While it’s tempting to give your dough extra time to develop flavor, over-fermenting can lead to a sour, overly tangy taste and a slack, difficult-to-shape dough. To avoid this, keep an eye on your dough during the first and second rises, and don’t let it more than double in size.
- On the flip side, under-kneading your dough can also cause problems. If the gluten isn’t fully developed, your bread may turn out dense and heavy, with a tight crumb. Make sure to knead your dough until it’s smooth, elastic, and passes the windowpane test – when you can stretch a small piece of dough thin enough to see light through it without tearing.
- Patience is key when it comes to baking Pain de Campagne. Rushing the fermentation, proofing, or baking stages can lead to subpar results. Trust the process and give your dough the time it needs to develop flavor and structure.
- If you forget to create steam in your oven during the first few minutes of baking, your crust may turn out dull and soft. Always remember to place a metal pan filled with hot water on the bottom rack of your oven, or spray the walls with water before loading your loaves.
Shaping
After your dough has completed its first rise, it’s time to give it some shape.
If you’ve made a larger batch of dough, start by gently dividing it into the desired number of loaves using a bench scraper. For each piece of dough, perform a quick pre-shape by folding the edges into the center, creating a rough ball. Let the pre-shaped dough rest for 10-15 minutes, allowing the gluten to relax.
Now it’s time to give your loaves their final shape. Gently flatten each piece of dough into a rough rectangle. Fold the top third of the dough down to the center, and then fold the bottom third up over the top fold. Rotate the dough 90 degrees and repeat the folding process.
Finally, roll the dough towards you, using your thumbs to create tension on the surface. Pinch the seam closed at the bottom of the loaf.
Once shaped, place your loaves seam-side up in floured bannetons or proofing baskets. If you don’t have a banneton, you can use a bowl lined with a clean, floured kitchen towel.
Cover the bannetons with plastic wrap or a damp kitchen towel and let the dough proof for 30-60 minutes, or until it has puffed up and looks ready to bake.
Second Fermentation
Now they’re ready for their second rise, also known as proofing.
Place your shaped loaves in proofing baskets or bowls lined with clean, floured kitchen towels. The cloth liner will help prevent sticking and give your loaves a beautiful rustic appearance. Cover the baskets loosely with plastic wrap or a damp towel, creating a humid environment that prevents the dough from drying out.
The second fermentation typically takes 30-60 minutes, depending on factors like room temperature and the strength of your yeast. Keep an eye on your loaves – they should look noticeably puffy and have risen by about 50%.
To check if your dough is ready for the oven, gently poke it with your finger. If the indentation slowly springs back, leaving a small visible dent, your loaves are ready to bake. If the dough quickly bounces back, it needs a bit more time.
For best results, aim for a proofing temperature around 75-80°F (24-27°C). If your kitchen is cooler, you can create a makeshift proofing box by placing your covered dough in the oven with a bowl of hot water, which will provide a warm, humid environment.
Baking the Bread
To achieve the perfect crust and crumb, preheat your oven to a scorching 475°F (245°C). This high heat will give your loaves an initial boost, promoting a rapid rise and creating a crisp, caramelized crust.
Place a baking stone or a heavy-duty baking sheet in the oven during preheating. This will provide a hot surface for your loaves, helping them develop a crisp bottom crust.
One of the secrets to a shatteringly crisp crust is steam. Professional bakers often use steam-injected ovens, but you can achieve similar results at home.
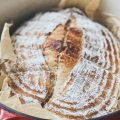
Just before placing your loaves in the oven, slash the top of each one with a sharp knife or razor blade, creating a decorative pattern. This allows the bread to expand during baking without tearing the crust.
Next, create steam in your oven by placing a metal pan on the bottom rack and carefully pouring in a cup of hot water. Alternatively, you can spray the walls of your oven with water using a clean spray bottle.
Quickly place your loaves on the preheated baking stone or sheet, and close the oven door to trap the steam inside.
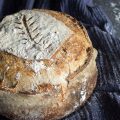
Bake your Pain de Campagne loaves for about 35-45 minutes, or until they’re a deep golden brown and sound hollow when tapped on the bottom.
After the first 15-20 minutes of baking, reduce the oven temperature to 450°F (230°C) to prevent over-browning. If your loaves are coloring too quickly, you can tent them with aluminum foil.
Once your loaves are baked to perfection, remove them from the oven and transfer them to a wire rack to cool. Resist the urge to slice into them right away – letting the bread cool allows the crumb to set and the flavors to develop.
![How To Make Pain De Campagne (French Country Bread) 122 How to make pain de campagne [french country bread]](https://www.mydailysourdoughbread.com/wp-content/uploads/2024/04/how-to-make-Pain-de-campagne-5-473x840.jpg)
A Timeless French Bread
You can create your own delectable loaves at home with my recipe. With a crisp crust and tender crumb, Pain de Campagne is a versatile addition to any meal. Give this classic bread a try and savor the satisfying results!
How to Make Pain de Campagne: FAQs
What is Pain de Campagne made of?
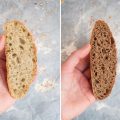
Pain de Campagne is a traditional French country bread made with wheat flour, water, salt, and yeast or sourdough starter. It may also include a small portion of rye flour for added flavor and texture. The bread is characterized by its thick, crispy crust and a slightly chewy, dense crumb with irregular holes.
What is the difference between sourdough and pain de campagne bread?
Sourdough bread is made using a sourdough starter, which is a mixture of flour and water that contains wild yeast and bacteria. Pain de Campagne can be made with either commercial yeast or a sourdough starter. The main difference lies in the flavor profile, with sourdough having a more pronounced tangy taste due to the longer fermentation process.
What is the difference between pain au levain and pain de campagne?
Pain au levain is a French bread made exclusively with a sourdough starter (levain), resulting in a more complex flavor and slightly acidic taste. Pain de Campagne can be made with either commercial yeast or a sourdough starter and often includes a small portion of rye flour, resulting in a milder flavor and denser texture compared to pain au levain.
What to eat with Pain de Campagne?
Pain de Campagne is a versatile bread that pairs well with various accompaniments. It is perfect for making sandwiches with cured meats, cheeses, and vegetables. The bread also complements hearty soups, stews, and salads. It can be enjoyed on its own with butter, olive oil, or your favorite spread. Pain de Campagne is also an excellent choice for making crostini or bruschetta.
![How To Make Pain De Campagne (French Country Bread) 123 How to make pain de campagne [french country bread]](https://www.mydailysourdoughbread.com/wp-content/uploads/2024/04/how-to-make-Pain-de-campagne-2-768x432.jpg)
Pain de Campagne (French Country Bread)
- Yield: 1 loaf 1x
Ingredients
- 3 cups bread flour
- 1 cup whole wheat flour
- 1 cup sourdough starter, active and bubbly
- 1 1/4 cups water (filtered or bottled, at room temperature)
- 1 1/2 tsp salt
Tools
- A reliable oven that maintains a stable temperature
- Mixing bowls large enough for dough fermentation
- Dough scraper (bench scraper)
- Kitchen scale for precise measurements
- Sharp knife or razor blade for scoring loaves
- Spray bottle for oven steam
- Cooling rack
Instructions
- In a large mixing bowl, combine the bread flour, whole wheat flour, and salt.
- Create a well in the center of the dry ingredients and pour in the water and sourdough starter. Use a wooden spoon or your hands to mix until a shaggy, sticky dough forms.
- Turn the dough onto a lightly floured surface. Knead for about 10-15 minutes until the dough is smooth, elastic, and slightly tacky. If using a stand mixer, knead with a dough hook on medium-low speed for 6-8 minutes.
- Shape the dough into a ball and place it in a lightly oiled bowl. Cover with a damp towel or plastic wrap and let it rise in a warm, draft-free place for about 1-2 hours, or until doubled in size.
- After the first rise, gently deflate the dough and shape it. For a rustic look, form a round loaf.
- Place the shaped dough seam-side up in a floured proofing basket or a bowl lined with a floured towel. Cover and let it proof for 30-60 minutes, until puffy and about 50% larger.
- Preheat your oven to 475°F (245°C) with a baking stone or heavy-duty baking sheet inside. Place a metal pan on the bottom rack for steam.
- Just before baking, slash the top of the dough with a sharp knife or razor. Carefully transfer the dough to the preheated stone or baking sheet. Pour a cup of hot water into the metal pan to create steam and quickly close the oven door.
- Bake for 35-45 minutes, or until the bread is a deep golden brown and sounds hollow when tapped. Reduce the oven temperature to 450°F (230°C) after 15-20 minutes to prevent over-browning.
- Remove the bread from the oven and cool on a wire rack for at least an hour before slicing.
Notes
- Avoid over-fermenting; it can make the dough sour and slack. The dough should not more than double in size.
- Under-kneading can lead to dense bread. Ensure the dough is smooth and passes the windowpane test.
- Allow the dough to develop flavor and structure without rushing the fermentation and proofing stages.
- Don’t forget to create steam in your oven; it’s crucial for a crusty exterior.
- Enjoy with butter, use it for sandwiches, pair it with soups, or top it with your favorite spreads. It’s also great for making crostini or bruschetta.
- Category: bread
- Cuisine: French


