Getting that dreamy, perfectly shaped sourdough loaf is all about starting with the right tools. But with so many things out there that are supposed to make baking easier for us, we just end up more confused. For example, and what we’re talking about today, what is a brotform? How is it different from a banneton, or a proofing basket? I’ll also be walking you through using a brotform. Achieve those bakery-worthy loaves right in your own kitchen. Think crisp crusts and delightfully springy insides—yes, please!

Table of Contents
- What is a Brotform?
- Brotform vs Banneton
- Benefits of Using a Brotform for Sourdough
- Preparing New Brotforms for First Use
- Selecting the Optimal Flour
- How To Clean A Brotform
- Storing Your Brotform for Longevity
- Alternatives to Brotforms
- The Brotform Method
- FAQs
What is a Brotform?
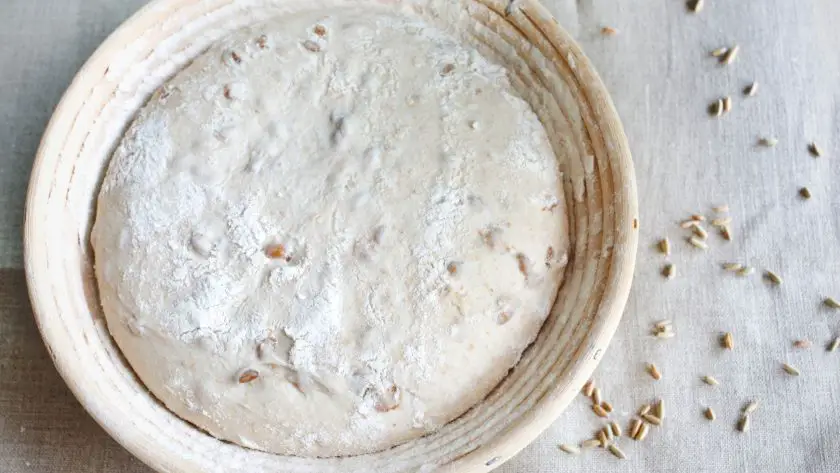
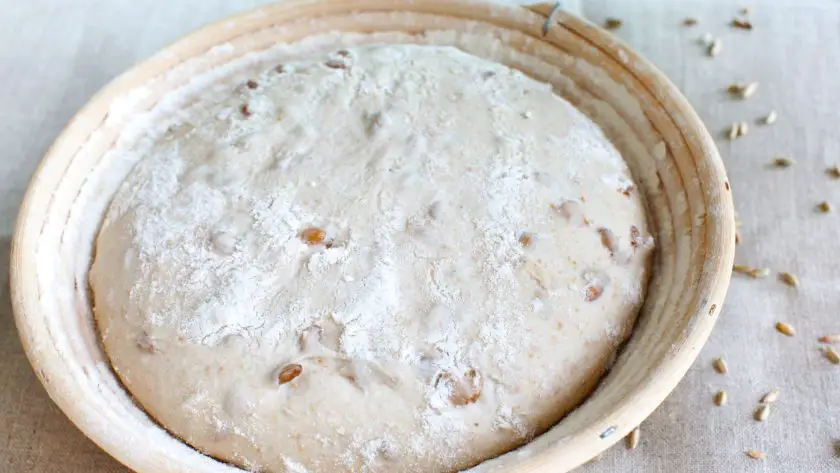
A brotform, also known as a banneton or proofing basket, is an essential tool for shaping artisan sourdough loaves. These basket-shaped molds are specially designed to support the dough as it proofs, allowing it to maintain its shape as the gases expand.
Brotforms come in various materials and shapes to suit different bread styles.
Materials used for Brotforms
Rattan and wood pulp fiber are two of the most common materials used to make brotforms. Rattan brotforms have an open weave that allows the dough to breathe as it proofs. The stiffness of the rattan helps hold the loaf’s shape. Wood pulp fiber brotforms are extremely lightweight and enable easy transfer of the dough to the oven. They can be lined with linen or rice flour to prevent sticking.
Other common brotform materials include plastic, bamboo, willow, and carbon steel. Home bakers also often reuse materials like cloth-lined baskets and colanders as improvised brotforms. The key is to choose a food-safe, breathable material that can hold its shape under the weight of the dough.
Shapes of Brotforms
The most versatile brotform shape is the oval brotform which accommodates various sizes of bread. Oblong, rectangular brotforms are ideal for baguettes and sandwich loaves. Round brotforms work well for round boules or batards. Fluted brotforms help give loaves a professional look with decorative ridges.
For beginners, an oval rattan brotform is a smart choice. The oval shape supports a nice domed boule while the stiffness of rattan makes it easier to transfer dough seam-side up. As your shaping skills improve, you can explore different brotform materials and shapes to achieve your desired look.
The right brotform enables your dough to hold its shape as it proofs, leading to a beautifully risen sourdough loaf. Experiment with different options until you find the best proofing vessel for your baking needs. With practice, you’ll have impressive loaves bursting out of their baskets!
- EXCELLENT CRAFTSMANSHIP: Beautiful handmade using natural rattan, absolutely free from dye and free from chemicals. Made with love and care by a small family business in Vietnam.
- SPLINTER-FREE, SMOOTH AND NON-STICK: Carefully crafted to always expose smooth surface. With sufficient dusting, dough will easily stay in shape as well as slipping out smoothly onto baking surface.
- EASY CLEANING: Use with the provided cloth liner, if desired. Without the liner, your banneton basket still does not need much cleaning. Simply shake the excess flour out after each use, and if dough has stuck to it, wait till it dries, then use a stiff brush to take it off.
- 10 INCH ACCOMMODATING SIZE: At 10 inch, it is the perfect size for baking a medium to large loaf.
- TOP PERFORMANCE GUARANTEE: We guarantee the basket will perform exceedingly well and enable you to bake beautiful breads. If you feel it fell short of your expectation, simply return it for a FULL REFUND.
Prices pulled from the Amazon Product Advertising API on:
Product prices and availability are accurate as of the date/time indicated and are subject to change. Any price and availability information displayed on [relevant Amazon Site(s), as applicable] at the time of purchase will apply to the purchase of this product.
Brotform vs Banneton
For many bakers, you’ve likely come across both “brotform” and “banneton” used to describe proofing baskets. Are they the same thing? Let’s clarify once and for all.
Brotform and banneton can be used interchangeably for proofing baskets used for artisan bread baking. Both terms trace back hundreds of years to European basket-making traditions for bread.
Brotform stems from the German language, translating literally to “bread mould” or “bread shape.” Banneton has French origins, interpreted as “baking basket.” Over time in English, brotform became known for baskets used by professional bakers while home bakers adopted banneton (learn how to use a banneton on my blog!).
Nowadays, there’s no meaningful distinction between brotform vs banneton in practical use. Stiff all-natural baskets woven from rattan, river reed, or wood pulp fibers qualify as both. They serve the same function for pre-shaping loaves and supporting oven springs.
Choose the basket material and shape that suits your loaf goals, whether a round brotform or oblong banneton.
Benefits of Using a Brotform for Sourdough
Sourdough is picky by nature. Without the right tools, it can be tricky to achieve that picture-perfect open crumb and crackly crust. That’s where the trusty brotform comes in. This humble proofing basket may just become your secret sourdough weapon.
Supporting Structure and Shape
- Brotforms are designed to hold the dough’s shape as it proofs. The stiff sides prevent spreading while still allowing for expansion.
- This enables a nice domed shape, open internal structure, and thicker crust.
- The breathable materials allow the dough to proof evenly. Plastic containers can lead to dense spots.
- Bakers can shape dough to fit snugly in the brotform, minimizing handling that could degass the dough (such is the case in batard sourdough shaping).
Promoting Crust Formation
- Getting that gorgeous mahogany sourdough crust relies on moisture management.
- Brotforms wick away excess moisture from the dough’s surface during the proof.
- This dries out the crust so it browns quickly in the oven rather than steaming.
- Flour-dusted linens also help absorb surface moisture for better oven spring.
- The result is a crispier, more blistered crust with a contrasting soft interior.
Ease of Transfer
- Professional bakers value efficiency. Broforms enable easy dough transfer.
- Well-proofed dough seam-side up slides right onto a hot baking stone.
- The brotform shape guarantees the loaf releases evenly for consistent baking.
- Compared to bowls or cloth-lined baskets, brotforms take the hassle out of loading the oven.
With a quality brotform tailored to your loaf size, you can take your sourdough to the next level. A good proof means a good bake. Ditch the makeshift vessels and embrace the brotform to unlock sourdough success!
Preparing New Brotforms for First Use
Before baking your first loaf, it’s crucial to properly season new brotforms. These proofing baskets are typically made from natural fibers like rattan, wood pulp, bamboo, or willow. Without initial conditioning, unseasoned brotforms can leach moisture from dough or even impart a musty flavor.
Proper seasoning ensures your brotform lasts for years of baking while keeping your precious dough healthy. Here’s a simple process to prep new baskets:
Expand Fibers and Condition
Submerge new rattan or wood brotforms in room temperature water for 30 minutes. This expands the plant fibers to prevent excessive absorption later. Pat dry with a lint-free cloth. Next, brush the interior lightly with a tasteless oil like sunflower or grapeseed. This conditions the fibers and enhances nonstick properties.
Remove Dust Before Use
Despite seasoning, bits of natural fiber dust may remain. To avoid a gritty loaf, wash brotforms with mild soap and water before the first proof. Rinse thoroughly.
Line with Flour-Dusted Linen
Cut parchment or liner to fit snugly inside the brotform for mess-free proofing. Lightly dust linen with rice flour which won’t incorporate into the dough. The liner makes transfer easier while allowing ideal moisture release.
With proper prep before use, your new brotform will hold gorgeous loaves for years of baking joy. Seasoning forms that trusty nonstick shell to keep your precious dough where it belongs – inside the basket. Treat your tools right and they’ll treat your bread right in return!
- PACKAGE DETAIL- One package of Walfos proofing basket cloth Liner includes 6 pieces of bread banneton proofing basket cloth liner 10“ , they can fit for many bread baskets and sufficient quantity for satisfying your various baking demands, replacing and sharing.
- MATERIAL- Walfos proofing baskets cloth Liner with smooth surface and nice texture, durable and soft, has no dye or harmful substance, suitable for covering on breadbasket, which allows for an easier clean up on bread proofing basket and a smoother finish on your bread.
- WHERE TO USE- Walfos sourdough proving basket cover works well at proofing and absorbing the moisture from the dough for the crispy round crust, help to make bread, banneton or brotform and more, enjoy the process and bring you more convenience.
- BAKING SUPPLIES- Nice partner with bread proofing basket (not included), just place the kneaded dough into the proofing basket (not included) and then cover the proofing basket cloth liner, once it has sufficiently risen, unmold the loaf and transfer it onto a baking sheet.
- SERVING GUARANTEE- We have quality guarantee to our Proofing Basket Cloth Liner. If you have any questions about our Proofing Basket Cloth Liner, please feel free to contact us. Walfos aims to make sure all our customers are satisfied with our product and brings all our customers a happy purchasing experience with our professional services.Dont hesitate to order safely and securely with Amazon Prime right now!
Prices pulled from the Amazon Product Advertising API on:
Product prices and availability are accurate as of the date/time indicated and are subject to change. Any price and availability information displayed on [relevant Amazon Site(s), as applicable] at the time of purchase will apply to the purchase of this product.
Selecting the Optimal Flour
When prepping brotforms, the flour you choose makes all the difference. Target flours that create a nonstick surface while managing moisture.
Flour Properties
Rice flour contains little gluten so it won’t absorb much liquid or turn gummy. Its fine texture evenly coats the brotform, enabling effortless dough release. Whole wheat flour boasts more gluten to wick moisture from the dough’s surface. This heartier flour creates an excellent nonstick barrier. Semolina made from durum wheat also resists absorbing liquid. Its gritty texture prevents the delicate dough from adhering to brotform sides.
For most loaves, neutral rice flour takes the crown. Whole wheat flour excels for high-hydration doughs that need extra support. Bread beginners will love semolina’s foolproof abilities. With the right flour pick, your precious loaf practically jumps from the brotform fully proofed and ready to bake.
- One, 24 ounce Resealable stand up bag (1.5 pounds)
- Gluten Free; Vegan; Vegetarian; stone ground; Kosher Pareve
- Manufactured in a dedicated gluten free facility; R5-ELISA tested gluten free
- Gluten Free pantry staple
- Stone Ground on slow-turning quartz millstones
Prices pulled from the Amazon Product Advertising API on:
Product prices and availability are accurate as of the date/time indicated and are subject to change. Any price and availability information displayed on [relevant Amazon Site(s), as applicable] at the time of purchase will apply to the purchase of this product.
How To Clean A Brotform
Properly caring for your brotform ensures it lasts for years of baking. After each use, avoid leaving dough scraps or flour residue to prevent mold growth and imparts off-flavors.
Steps
- Clean brotforms while still warm, not hot. Food debris is released more easily this way. Gently brush interior surfaces with a soft bristle brush to dislodge dried bits and excess flour. Avoid abrasive scrubbing which can damage the basket’s weave.
- For stuck debris or dough remnants, briefly soak the basket in warm water to loosen residues before brushing clean. Use mild dish soap and lukewarm water for periodic deep cleaning. Agitate a soapy brush over all interior surfaces, then rinse thoroughly. Harsh detergents strip protective oils from natural fibers.
- After washing, dry the interior and exterior of your brotform with a lint-free cloth. Allow the basket to air dry fully open before storing it upside down to prevent moisture retention. Rice flour or buckwheat hulls inside absorb any residual dampness while helping maintain the shape. Prolonged moisture weakens fibers over time.
Storing Your Brotform for Longevity
Brotforms thrive in a dark, dry, well-ventilated space around room temperature. Exposure to light can cause discoloration or brittleness over time. Meanwhile, excess moisture kickstarts mold growth in the tiny crevices.
Aim for storage conditions similar to your kitchen counter rather than a damp basement or sweltering attic. Ensure the storage area has good airflow – this stops condensation from accumulating inside the banneton.
Position bannetons upside down on a rack to allow air circulation on all surfaces. You can line them with linen to wick moisture but remove any unbaked dough remnants first. Buckwheat hulls also help absorb dampness between uses.
Alternatives to Brotforms
While brotforms excel at supporting dough as it proofs, pne doesn not necessarily need to invest in these specialized tools to achieve great results with their sourdough. Plenty of everyday kitchen items can be substituted when you’re looking to save money or need to improvise.
Repurposing Kitchen Staples
Don’t let a lack of equipment stop your sourdough adventures. With some creativity, you can proof dough beautifully using basic kitchen items you likely already own.
Kitchen Towels create a nest to cradle dough if lined with a layer of rice flour. The terrycloth fabric supports the sides as gases expand. Folding the corners up mimics a brotform shape.
Metal or Plastic Colanders prove great vessels too. Grease and flour the surfaces for easy release after proofing. The perforations enable ideal airflow to prevent dense spots.
Salad Spinners do double duty for proofing when flipped upside down. The open weave structure gives dough room to spread out evenly.
Crafting DIY Proofing Baskets
If you love arts and crafts, fashion your homemade brotform alternatives. These options boast major style points!
Wicker baskets lined with a linen towel allow your loaf to rise in rustic comfort. Choose baskets with enough height and stiffness to contain fully proofed dough.
Ceramic bowls create cute proofing pots when flipped over. Drape a flour sack towel over the rim, greasing and flouring the fabric. The towel takes the shape of the bowl to support your dough.
Metal colanders also become chic hanging proofers with cotton linen secured by clothespins around the outside. The linen cradle keeps dough from sticking while allowing airflow all around for maximum rise potential.

The Brotform Method
So, in summary:
For best results, choose a brotform material like rattan or wood pulp fiber that enables airflow. Prepare new baskets by expanding fibers in water before conditioning with oil. Flour generously before each use with rice or wheat flour to prevent sticking. Line with parchment for easy transfer when baking bread.
Store upside down to prevent moisture buildup and mold growth between bakes. With proper care, a quality brotform yields flawless sourdough loaves for years by supporting shape and promoting even crust formation.
Treat your brotform right, and it’ll help you whip up impeccable sourdough loaves and delicious bread with that perfect shape and crust for years to come.
FAQs
What is the difference between a brotform and a banneton?
A brotform is a straight-sided proofing basket generally used for baking pan loaves of bread. A banneton is a rounded proofing basket often used for baking artisan-style bread to create a circular shape with a patterned crust. Bannetons come in different sizes and materials like wicker and rattan.
Do you need a banneton for sourdough?
While not essential, a banneton can help create the distinctive shape, crust, and crumb associated with artisan sourdough loaves. The ridges allow dough expansion and an appealing pattern on the crust. You can proof sourdough in a bowl, but a banneton gives better results.
Do you put the dough directly in banneton?
No, you should line a banneton with a linen liner or dust it generously with rice flour before placing the dough inside. This prevents the dough from sticking to the basket as it proofs and allows it to be tipped seam-side up onto a baking stone. You can also use parchment paper, but linens or rice flour give the best crust results.


![Soft Sourdough Bread [Easy Recipe + Tips] 6 Soft sourdough bread [easy recipe]](https://www.mydailysourdoughbread.com/wp-content/uploads/2024/02/Soft-Sourdough-Bread-120x120.jpg)

![How To Make Chocolate Sourdough Bread - A Sweet Twist On The Classic 8 How to make chocolate sourdough bread [step by step guide]](https://www.mydailysourdoughbread.com/wp-content/uploads/2024/05/How-to-Make-Chocolate-Sourdough-Bread-4-120x120.jpg)


