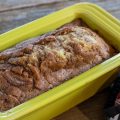
Wondering how to make sourdough beer bread that’s flavorful, moist, and impressive? Say goodbye to dense, dry loaves, but in my recipe that will guide you to success!

Table of Contents
- Ingredients
- Equipment
- Preparing the Dough
- Shaping the Dough
- Second Rise
- Baking Your Bread
- Additions to Sourdough Beer Bread
- Troubleshooting Tips
- Beer-y Good Sourdough!
- How to Make Sourdough Beer Bread: FAQs
Ingredients
- 3 cups bread flour or all-purpose flour
- 1 cup active sourdough starter
- 12 oz beer of your choice
- 1 tsp salt
- 1 tbsp sugar
Equipment
Don’t worry, you likely have most of these in your kitchen already!
Mixing Bowl
First up, grab a large mixing bowl. This will be your bread’s first home, where you’ll combine the ingredients and let the magic happen. Choose a bowl that’s spacious enough to accommodate the dough’s growth during the fermentation process.
Baking Pan
Next, you’ll need a trusty baking pan. While you can use a traditional loaf pan, I recommend using a Dutch oven for the best results. Its heavy lid traps steam, creating a mini steam oven that encourages a crispy, golden crust and a soft, airy interior.
Oven
Of course, you can’t bake bread without an oven! Preheat your oven to the right temperature before popping in your dough. A hot oven is key to getting that perfect rise and crust.
Preparing the Dough
It’s time to get your hands dirty and make some dough! Don’t worry if you’re new to this – with a little practice, you’ll be a sourdough beer bread pro in no time.
Mixing the Ingredients
Start by combining your flour, salt, and sugar in your mixing bowl. Give them a quick stir to ensure they’re evenly distributed. Next, pour in your beer and active sourdough starter. Using a wooden spoon or your hands, mix everything together until a shaggy dough forms.
It might look a bit messy at this stage, but trust the process!
Kneading the Dough
Once your dough has come together, it’s time to get kneading. You can do this by hand on a lightly floured surface or use a stand mixer fitted with a dough hook. If kneading by hand, fold the dough over itself, push it down with the heel of your hand, and give it a quarter turn. Repeat this process for about 5-10 minutes until the dough becomes smooth and elastic.
If using a mixer, knead on medium speed for 5-7 minutes. The dough should pull away from the sides of the bowl and form a smooth ball around the dough hook.
Letting the Dough Rest
After kneading, shape your dough into a ball and place it back in the mixing bowl.
Cover the bowl with a damp towel or plastic wrap and let it rest in a warm, draft-free spot for about an hour. During this time, the dough will relax and become easier to shape.
Congratulations! You’ve successfully prepared your sourdough beer bread dough.
First Rise
After preparing your dough, it’s time for the first rise, also known as bulk fermentation.
Place your dough in a lightly oiled bowl and cover it with a clean, damp kitchen towel or plastic wrap. Let it rest on your kitchen counter at room temperature for about 6-8 hours, or until it has doubled in size.
The Importance of Time and Temperature
The longer you let it ferment, the more pronounced the sourdough tang will be. However, be careful not to overproof your dough, as this can lead to a collapsed loaf. Keep an eye on the dough and adjust the proofing time based on the temperature of your kitchen. In warmer environments, the dough will rise faster, while cooler temperatures will slow down the process.
Dough Development
As the dough rests, the yeast and bacteria in your sourdough starter get to work, adding flavor but also developing the gluten structure, giving your bread its characteristic chewy texture. You’ll know your dough is ready for the next step when it has doubled in size and looks puffy and bubbly.

Shaping the Dough
After the first rise, it’s time to shape your dough into a loaf. Gently punch down the dough to release excess air and transfer it to a lightly floured surface.
Forming the Loaf
Start by forming the dough into a rough rectangle. Fold the top third of the dough down towards the center, then fold the bottom third up to meet the top fold. Pinch the seams to seal.
Next, rotate the dough 90 degrees and repeat the folding process. This helps to create a tight, compact loaf that will hold its shape during baking.
Proofing the Shaped Dough
Once you’ve shaped your dough, place it seam-side down on a baking sheet lined with parchment paper. Cover the loaf with a clean, damp kitchen towel or plastic wrap and let it proof for another 30-60 minutes.
During this final rise, the dough will puff up slightly and become more relaxed. Be careful not to overproof at this stage, as it can lead to a flat, dense loaf.
Ready for the Oven
After the final proof, your loaf is ready for the oven. Brush the top of the loaf with some water or oil to help create a crispy, golden crust. You can also score the top of the bread with a sharp knife or razor blade to allow for expansion during baking.

Second Rise
After shaping your sourdough beer bread, it’s time for the second rise, also known as proofing. This step is crucial for achieving a well-risen loaf with a beautiful texture.
Transferring the Dough
Gently transfer your shaped loaf to a proofing basket or bowl lined with a clean, lint-free kitchen towel. Make sure to flour the towel generously to prevent the dough from sticking.
Creating the Right Environment
Cover the dough with a damp cloth or plastic wrap to prevent it from drying out. Place it in a warm, draft-free spot for the second rise. The ideal proofing temperature is around 75-80°F (24-27°C).
Timing the Second Rise
The duration of the second rise can vary depending on factors like dough temperature and room conditions. Generally, it takes about 1-2 hours for the dough to puff up and become light and airy.
To check if your dough is ready for baking, gently poke it with your finger. If the indentation slowly springs back, it’s good to go. If it collapses, it may be overproofed and require a reshape before baking.
Preparing for Baking
As your dough nears the end of its second rise, preheat your oven to the desired temperature. If using a Dutch oven, place it in the oven during preheating.
When the dough is ready and the oven is hot, carefully transfer the loaf to your baking vessel. Score the top with a sharp knife or razor blade to allow for expansion during baking.
Baking Your Bread
You’ve done the hard work of preparing and proofing your dough, and now it’s time for the most exciting part – baking your sourdough beer bread to golden, crusty perfection!
Setting the Oven Temperature
Preheat your oven to a scorching 450°F (230°C). This high heat is essential for achieving a beautifully risen loaf with a crisp, caramelized crust and a soft, airy interior. If using a baking stone, place it in the oven during preheating to ensure an evenly heated surface for your bread.
Transferring the Dough
Carefully remove your proofed dough from the basket or bowl and gently place it onto a piece of parchment paper. If desired, you can dust the top of the loaf with a little flour for a rustic look. Using a sharp knife or razor blade, make a few swift, confident slashes across the top of the dough. This scoring not only adds visual appeal but also allows the bread to expand during baking without tearing the crust.
Baking Time and Steam
Transfer your scored dough to the preheated oven, either directly onto the baking stone or on a baking sheet. To create steam, which is crucial for a crispy crust and good oven spring, you can either place a few ice cubes on the oven floor or spray the walls of the oven with water using a spray bottle.
Bake your sourdough beer bread for about 35-45 minutes, depending on your oven and the size of your loaf. Keep an eye on it during the last 10-15 minutes to ensure it doesn’t over-brown. You’ll know your bread is done when it has a deep golden-brown crust, sounds hollow when tapped on the bottom, and reaches an internal temperature of about 200-210°F (93-99°C).
Cooling and Slicing
Once your bread is baked to perfection, remove it from the oven and transfer it to a wire rack to cool. Resist the temptation to slice into it right away, as the crumb is still setting up. Allow the loaf to cool for at least 30 minutes to an hour before cutting into it.
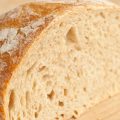
When ready, use a serrated knife to slice your sourdough beer bread, revealing the beautiful, open crumb and releasing the tantalizing aroma of fermented dough and beer.
Serve your bread warm with butter, use it for sandwiches, or simply savor it on its own – the possibilities are endless!

Additions to Sourdough Beer Bread
While our classic sourdough beer bread is already a crowd-pleaser, there’s always room for creativity in the kitchen! Take the flavor and texture to new heights – the possibilities are endless.
Recommended Additions
Nuts and seeds are a fantastic place to start. Chopped walnuts or pecans can add a delightful crunch and subtle nutty flavor to your sourdough beer bread. For a more rustic touch, try incorporating sunflower or pumpkin seeds – they’ll add a pleasant texture and a boost of healthy fats.
If you’re a fan of savory flavors, consider adding herbs like rosemary, thyme, or even dried olives to your dough. These additions work particularly well with heartier beers like stouts or porters. Simply fold them in during the last stretch and fold before shaping your loaf.
For a sweet and tangy twist, dried fruits like cranberries, raisins, or apricots can be a delightful surprise in every slice. Just be sure to plump them up in some water or beer before adding them to your dough to prevent them from drawing out moisture from the bread.
Customizing Your Bread
Perhaps you’re a fan of the classic cheddar and jalapeño combo – simply fold in some shredded sharp cheddar and diced jalapeños for a kick of heat. Or maybe you’re craving a Mediterranean-inspired loaf – mix in some chopped Kalamata olives, sun-dried tomatoes, and crumbled feta for a flavor-packed treat.
The key to success when customizing your bread is to start with small amounts of additions and gradually increase them as you gain confidence. Keep in mind that too many mix-ins can weigh down your dough and affect the rise, so it’s best to keep it balanced.
Troubleshooting Tips
One of the most crucial aspects of baking is accurate measuring. Using too much or too little of an ingredient can throw off the entire recipe. Always use proper measuring tools and level off dry ingredients with a straight edge. Another mistake is not controlling the fermentation process. Ensure your dough is fermenting at the right temperature for the appropriate amount of time to develop the desired flavors and textures.
Baking temperature is another factor that can make or break your bread. An oven that’s too hot can cause the crust to burn before the inside is fully baked, while a low temperature can result in a dense, undercooked loaf. Always preheat your oven and use an oven thermometer to ensure accuracy.
Despite your best efforts, sometimes things don’t go as planned. If your dough isn’t rising properly, it could be due to inactive starter or unfavorable proofing conditions. Try feeding your starter and placing your dough in a warmer spot. If your bread turns out too dense, it may be a result of underproofing or using too much flour. Adjust your proofing time and be mindful of your dough consistency.
Beer-y Good Sourdough!
You absolutely can start making homemade delicious sourdough beer bread. Your efforts will surely not not only yield a tasty homemade loaf but also deepen your appreciation for artisan bread-making.
How to Make Sourdough Beer Bread: FAQs
Can you use sourdough to make beer?
Yes, sourdough starter can be used to make beer. The wild yeast and bacteria in sourdough can ferment the sugars in beer wort, similar to how they ferment flour in bread. This process creates sour beer styles like Berliner Weisse or Lambic. However, using a sourdough starter may produce inconsistent results compared to traditional brewing yeasts.
What beer is good for sourdough bread?
Beer can be used as a liquid ingredient in sourdough bread. Choosing a beer with complementary flavors to your bread is key. Robust, malty beers like stouts or porters work well with whole grain sourdough, while crisp, citrusy beers like witbier suit lighter sourdough loaves. Avoid hop-forward beers, as their bitterness can clash with the bread’s flavor profile.
Why does my sourdough taste like beer?
If your sourdough bread tastes like beer, it could be due to a few reasons:
1. Overfermentation: Extended fermentation can produce alcohol and beer-like flavors.
2. Bacterial imbalance: Certain bacteria can create acetic acid, leading to a beer-like taste.
3. Ingredient crossover: Using beer as a liquid in your sourdough might impart a beer flavor. Adjust your fermentation time and monitor your starter’s health to avoid unwanted flavors.
Can you use sourdough starter for alcohol?
Yes, sourdough starter can be used to make alcohol, as it contains wild yeast and bacteria capable of fermenting sugars into alcohol. You can use sourdough starter to create beer, wine, or even distilled spirits like whiskey. The process involves mixing the starter with a sugary liquid (like beer wort or fruit juice), allowing fermentation, and then proceeding with the desired alcohol-making process.

Sourdough Beer Bread
This recipe combines the tangy complexity of sourdough with the rich undertones of your favorite beer, resulting in a uniquely delicious loaf perfect for any occasion. Enjoy the process and your homemade sourdough beer bread!
- Yield: 1 loaf 1x
Ingredients
Ingredients:
- 3 cups Bread Flour or All-Purpose Flour
- 1 cup Active Sourdough Starter
- 12 oz Beer of Your Choice
- 1 tsp Salt
- 1 tbsp Sugar
Equipment Needed
- Mixing Bowl
- Baking Pan (Dutch oven recommended)
- Oven
Instructions
- In a large mixing bowl, combine flour, salt, and sugar.
- Add beer and sourdough starter, mixing until a shaggy dough forms.
- Knead by hand on a floured surface or with a stand mixer using a dough hook for 5-10 minutes until smooth and elastic.
- Place the kneaded dough in a lightly oiled bowl, cover with a damp towel or plastic wrap.
- Let it rest at room temperature for 6-8 hours or until doubled in size.
- Punch down the dough to release excess air.
- Form into a rough rectangle, fold thirds over each other, and seal the seams.
- Place shaped dough seam-side down on a parchment-lined baking sheet.
- Cover and let proof for 30-60 minutes until puffy.
- Preheat the oven to 450°F (230°C) with a Dutch oven inside if using.
- Before baking, brush the loaf with water or oil and score the top with a sharp knife.
- Bake in the preheated oven for 35-45 minutes until golden-brown and sounds hollow when tapped.
Notes
- Let the bread cool on a wire rack for at least 30 minutes before slicing.
- Monitor the proofing closely, especially in warmer conditions to avoid overproofing.
- Scoring the dough helps in expansion and achieving a beautiful crust.
- Enjoy your bread warm, with butter, or use it for a flavorful sandwich!


![Soft Sourdough Bread [Easy Recipe + Tips] 118 Soft sourdough bread [easy recipe]](https://www.mydailysourdoughbread.com/wp-content/uploads/2024/02/Soft-Sourdough-Bread-120x120.jpg)


