Discovering the fate of your sourdough starter can be a worrisome moment for any avid baker. As a living culture of wild yeast and bacteria, sourdough starters require regular care and attention to maintain their vitality. However, various factors can contribute to a sourdough starter appearing lifeless or unresponsive. So if you’re wondering if your sourdough starter is dead, here are some signs to look out for.

Table of Contents
- 5 Signs That Your Sourdough Has Died
- Why Has My Sourdough Starter Died?
- Will Tap Water Kill My Starter?
- Can You Revive Dead Sourdough Starter?
- What Can I Do With A Dead Starter?
- Can I Take a Break From My Sourdough Starter?
- What If My Sourdough Starter Never Rises?
- Tips If You Plan To Keep Your Starter Long-Term
- Is A Starter Better Frozen or Dried?
- My Sourdough Starter Is Dead
- FAQs
5 Signs That Your Sourdough Has Died
Sourdough starters can be resilient. Sometimes they can appear dormant or inactive but still be revived with proper care and feeding. If you observe multiple signs of a dead starter persistently, it may be necessary to discard it and start fresh.
Here are five signs that may indicate a sourdough starter has died:
No Activity After Feeding
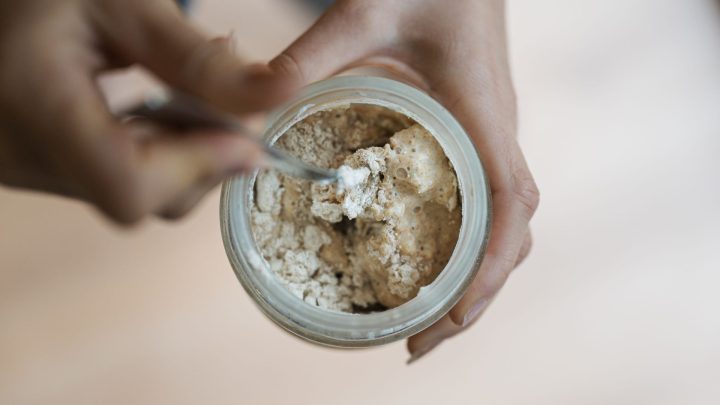
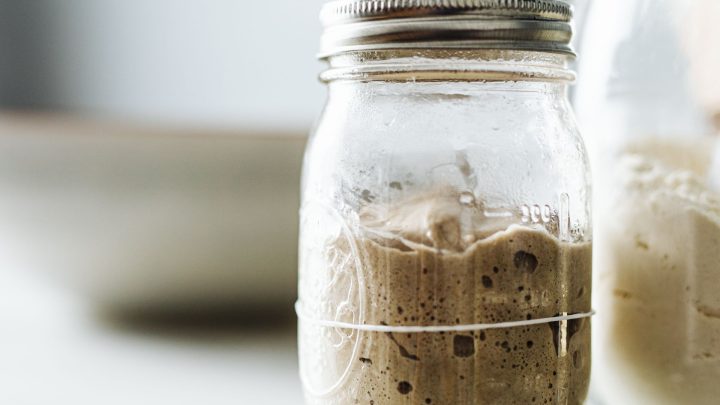
A healthy sourdough starter should show signs of fermentation and activity. Look for bubbles on the surface, a rise in volume after feeding, and a frothy or spongy texture.
If there is no visible activity, it could indicate that the starter has died.
No Aroma
A vibrant sourdough starter usually has a pleasant, slightly tangy smell.
If your starter lacks any aroma or has an off-putting odor like mold or rot, it could be a sign that the yeast and bacteria have died.
No Rise
A functional sourdough starter should have the ability to leaven dough and cause it to rise.
If you consistently see no or minimal rise in your starter after feeding, it suggests that the yeast is not active. The starter may have died.
No Hooch Separation
Hooch is the liquid that sometimes accumulates on top of a neglected sourdough starter. While a small amount of hooch is normal, a complete lack of separation may indicate that the starter has become inactive or died.
Mold Growth
If you notice mold on your sourdough starter, whether it appears as fuzzy spots, discoloration, or an unpleasant smell, it is a clear indication that the starter has spoiled and is no longer viable.
Why Has My Sourdough Starter Died?
Sourdough starters are quite flexible and may appear dormant for a certain period of time, although they are often easily revived with proper care and feeding.
However, if your starter consistently shows multiple signs of inactivity, mold growth, or an unpleasant smell, it may be necessary to consider starting a fresh sourdough starter to ensure successful baking results.
There can be several reasons why a sourdough starter may die or become inactive:
Lack of Feeding
Sourdough starters need regular feeding to provide them with fresh nutrients.
If your starter was left unfed for an extended period, the yeast and bacteria may have depleted their food source, leading to a decline in activity and eventual death.
Inconsistent Feeding Routine
Inconsistency in feeding can also contribute to a sourdough starter’s demise.
Irregular feedings or prolonged gaps between feedings can weaken the microbial population, making it difficult for the starter to sustain its activity and vitality.
Contamination
Introducing unwanted contaminants, such as mold or harmful bacteria, to your sourdough starter can lead to its demise.
Contamination can occur through improper handling, using unclean utensils, or exposure to unsanitary conditions.
Unsuitable Environment
The environment in which the sourdough starter is kept plays a crucial role in its health. Extreme temperatures, excessive exposure to direct sunlight, or drafts can negatively affect the microbial balance and vitality of the starter, potentially leading to its death.
Quality of Ingredients
The quality of the flour and water used in feeding your sourdough starter can impact its overall health. Using chlorinated or heavily treated water, low-quality flour, or flour that lacks sufficient nutrients can hinder the starter’s ability to thrive and may contribute to its demise.

Will Tap Water Kill My Starter?
Tap water, particularly if it contains chlorine or chloramine, can potentially have a negative impact on the growth and activity of your sourdough starter.
Chlorine is commonly added to tap water as a disinfectant, but it can also inhibit the growth of beneficial bacteria and yeast in your starter.
While some sourdough starters can tolerate small amounts of chlorine or chloramine, it’s generally recommended to avoid using tap water directly from the faucet.
However, there are a few ways to make tap water suitable for feeding your sourdough starter:
- Letting it sit: Leaving tap water uncovered for 24 hours allows chlorine to dissipate naturally. This can be a simple and effective method if your tap water only contains chlorine. After the 24-hour period, you can use dechlorinated water for your starter.
- Filtering: Using a water filter that specifically removes chlorine or chloramine can be an effective way to make tap water safe for your sourdough starter. There are various types of filters available, such as activated carbon filters or reverse osmosis systems, which can help eliminate these disinfectants.
- Bottled water: Opting for bottled water that doesn’t contain chlorine or chloramine is another reliable option. Look for still or mineral water that specifically states it is free from these chemicals.
By using dechlorinated tap water, filtered water, or bottled water, you can provide a more favorable environment for your sourdough starter to thrive without potential inhibitory effects caused by chlorine or chloramine.
Can You Revive Dead Sourdough Starter?
Reviving a dead sourdough starter is challenging but not impossible. While there’s no guarantee of success, you can certainly try to revive it before considering it completely dead. Here’s a potential approach:
- Clean and discard: Thoroughly clean the container holding your sourdough starter. Discard any discolored or moldy portions of the starter, ensuring you only keep a small amount of the original starter.
- Start fresh: Begin a feeding routine by adding equal parts (by weight) of flour and water to the remaining starter. Mix well until smooth and consistent.
- Warmth and time: Place the starter in a warm and draft-free environment. A temperature between 75-85°F (24-29°C) is ideal. Allow the starter to ferment for several hours, or even a day, and observe for any signs of activity such as bubbles or slight rise.
- Repeat and adjust: If there are no signs of activity after the initial feeding, repeat the process of discarding a portion and feeding it with fresh flour and water. Maintain this regular feeding schedule every 12-24 hours, adjusting the feeding ratio or using different types of flour if needed.
- Patience and persistence: Be patient and give your starter time to recover. It may take several days or even weeks before you see any signs of life. Continue the feeding routine, closely observing for any signs of fermentation or growth.
What Can I Do With A Dead Starter?
A dead sourdough starter is essentially a starter that has gone bad and is no longer active or alive.
While it may seem useless, there are actually a few things you can do with it:
- Rehydrate and revive the starter by adding equal parts of flour and water, then let it sit and ferment for several days until it becomes active again.
- Use the dead starter to make sourdough discard recipes, such as pancakes, waffles, crackers, or bread that don’t require a strong rise.
- Mix the dead starter with other ingredients, such as flour and water or milk, to create a tangy flavor in baked goods like quick bread, biscuits, muffins, or cakes.
- Compost the dead starter, which can add nutrients to the soil and help your plants grow.
- Use the dead starter as a natural cleaning agent, as the acidity can help remove stains, rust, and grime.
It’s important to note that if your starter is contaminated or has gone bad and smells foul, it’s best to discard it and start fresh to avoid spoiling your baked goods.

Can I Take a Break From My Sourdough Starter?
Yes, you can definitely take a break from maintaining your sourdough starter. Sourdough starters are quite resilient and can be put on hold for a short period of time without significant harm.
Here are a few options:
Refrigerate Your Starter
Place your sourdough starter in the refrigerator. This will slow down its activity and allow you to take a break for up to a week or two.
Before refrigerating, feed the starter as usual, let it ferment for a couple of hours at room temperature, and then transfer it to a clean jar and store it in the refrigerator.
When you’re ready to use it again, take it out, discard a portion, and begin feeding and refreshing it regularly at room temperature.
Freeze Your Starter
If you need a longer break, you can freeze your sourdough starter.
Before freezing, make sure to feed your starter and let it ferment for a few hours. Then transfer a portion of it to a freezer-safe container, leaving room for expansion, and store it in the freezer.
When you want to revive your starter, thaw it in the refrigerator and follow the usual feeding process to reactivate it.
What If My Sourdough Starter Never Rises?
If your sourdough starter consistently fails to rise, despite taking the necessary steps to maintain it, there are a few options to consider.
- First, evaluate the feeding routine and ensure you’re providing regular feedings at the correct ratio of flour to water. Increase the frequency of feedings to once or twice a day and maintain a consistent feeding schedule.
- Check the temperature of the environment where your starter is kept and make sure it falls within the optimal range of 70°F to 85°F (21°C to 29°C).
- Consider using a proofing box or finding a warmer spot to encourage yeast activity. If you’re using chlorinated tap water, switch to filtered or bottled water to avoid potential inhibitory effects on the yeast.
- If all these efforts fail, it might be necessary to start with a fresh batch of starter or seek guidance from experienced bakers who can provide more tailored advice based on your specific situation.
Remember that sourdough can be a finicky process, and it often requires experimentation and adjustments to find what works best for your unique conditions.
Tips If You Plan To Keep Your Starter Long-Term
Here are some tips to help you plan and maintain your sourdough starter for the long term:
- Consistent Feeding Schedule: Establish a regular feeding schedule for your sourdough starter. Feed it at the same time each day or every 12 hours if you prefer a twice-daily feeding routine. Consistency in feeding helps maintain the balance of yeast and bacteria in your starter.
- Adjust Feeding Quantity: Adapt the feeding quantity based on your sourdough bread baking needs and schedule. If you bake infrequently, you can keep a smaller starter and feed it less. For more frequent baking, maintain a larger starter and feed it accordingly. Remember that you can adjust the feeding ratio by increasing or decreasing the amount of flour and water you add.
- Storage Options: Determine the best storage method for your sourdough starter. You can store it at room temperature or in the refrigerator, depending on your baking frequency and schedule. Storing at room temperature requires more frequent feedings, while refrigeration slows down the fermentation and allows for less frequent feedings.
- Backup and Refresh: To ensure the longevity of your starter, periodically create a backup. Take a small portion of your mature starter and keep it separate as a backup in case anything happens to the main batch. Additionally, consider refreshing your starter by discarding a portion and feeding it with fresh flour and water to maintain its vitality.
- Temperature Management: Pay attention to the temperature of the environment where your starter is stored. Yeast activity is sensitive to temperature, and different temperature ranges can affect fermentation speed. Adjust the storage location, use a proofing box, or employ other methods to maintain a consistent and suitable temperature for your starter.
- Reviving Dormant Starter: If you need to take a break from baking or your starter becomes less active, follow a revival process. Take a small portion of the starter, discard the rest, and feed it with fresh flour and water at regular intervals until it becomes active and shows signs of fermentation.
- Documentation: Keep a record of your sourdough starter maintenance. Note the feeding schedule, any adjustments you make, and observations about its behavior. This documentation will help you track patterns, troubleshoot issues, and fine-tune your approach over time.
Is A Starter Better Frozen or Dried?
Both freezing and drying methods can be used to preserve a sourdough starter for extended periods, each with its own advantages. F
Freezing a sourdough starter can effectively halt its activity, allowing it to remain in a dormant state until thawed and revived. This method retains the starter’s original characteristics and requires minimal effort to reactivate.
On the other hand, drying a sourdough starter involves dehydrating it to remove moisture, resulting in a stable, shelf-stable form that can be stored for a longer duration.
Dried starters are lightweight, space-efficient, and can be easily shared or transported. However, rehydration and reactivation of a dried starter require more time and effort compared to frozen starters.
You can find out more about dehydrating sourdough starters on my blog.
Ultimately, the choice between freezing and drying depends on personal preference, storage convenience, and the specific needs of the baker.
My Sourdough Starter Is Dead
Determining whether your sourdough starter is dead can be a challenging task. While there are signs that may indicate its demise, such as a complete lack of activity, foul odors, or mold growth, it’s important to carefully evaluate the situation. Sometimes, sourdough starters can undergo periods of dormancy or appear inactive due to fluctuations in temperature or feeding routines
FAQs
How Do I Know If My Sourdough Starter Is Still Good?
There are several key indicators to look out for. Firstly, your starter should release a pleasant aroma, one that is akin to vinegar or beer. Another sign of a healthy starter is consistent bubbling and active texture. Your starter should rise, double, and bubble within a few hours of feeding. If your starter isn’t rising or doubling in size, then it may have died.
Why Is My Sourdough Starter Not Bubbling?
There may be several reasons as to why your sourdough starter is not bubbling. Firstly, it could be due to the temperature. Sourdough starters require a warm environment for yeast and bacteria activation. Cooler temperatures may slow down the process. Additionally, it could be due to insufficient feeding. Sourdough starters require frequent feeds, consisting of fresh flour and water to maintain activity.
What If My Sourdough Starter Never Rises?
If your sourdough starter never rises, it could be due to several reasons. Firstly, it may not be getting enough food, as sourdough starters need regular feedings of fresh flour and water to maintain their activity. Secondly, it may not be in a warm enough environment, as the fermentation process requires specific temperatures to activate the yeast and bacteria.


![How To Freeze Sourdough Starter [Top Tips For Success] 7 How to freeze sourdough starter [top tips for success]](https://www.mydailysourdoughbread.com/wp-content/uploads/2023/06/storing-starter-in-freezer-120x120.jpg)
![How To Keep Sourdough Starter Warm [Best Tips And Why You Need To] 8 How to keep sourdough starter warm [best tips]](https://www.mydailysourdoughbread.com/wp-content/uploads/2023/07/a-bubbly-starter-on-a-cooling-rack-120x120.jpg)
