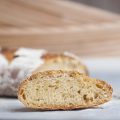
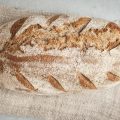
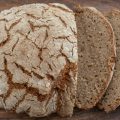
Achieving the perfect open crumb sourdough when baking your bread may require more practice. However, this easy-to-follow open-crumb sourdough bread recipe might make it easier for you to achieve! Simply grab your baking apron and follow the guide below.
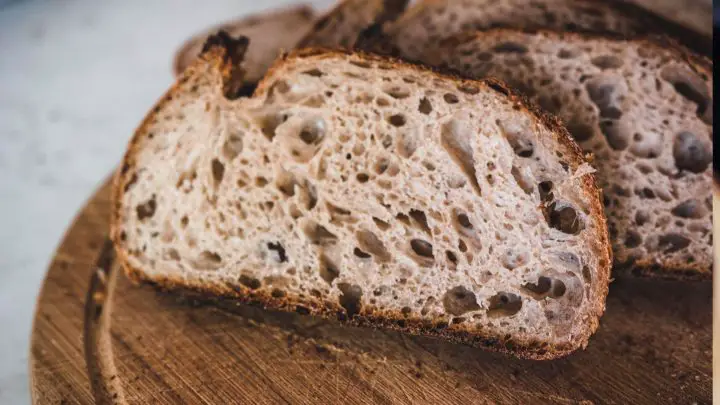
Table of Contents
- What Does Open Crumb Mean?
- What Should Sourdough Crumb Look Like?
- How to Achieve an Open Crumb
- How to Get More Open Crumb For Sourdough?
- The Perfect Sourdough Open Crumb Recipe
- Sourdough Open Crumb
- FAQs
Open Crumb Sourdough Bread Recipe
This open-crumb sourdough recipe is super simple and very rewarding. Follow the steps outlined below to bake the best bread you’ve ever tasted!
- Total Time: 1 day 3 hours 50 minutes
- Yield: 1 loaf, 4 servings 1x
Ingredients
- 350g bread flour
- 90g whole wheat flour
- 350g filtered water
- 90g sourdough starter (100% hydration)
- 9g kosher salt or fine sea salt
- White rice flour
Instructions
Autolyze
- In a large mixing bowl, combine 350g of unbleached bread flour, with 90g of whole wheat flour. Add 350g of filtered water and mix with your hands, until the flour is well combined, with no dry bits in the bowl. Cover with plastic wrap and let the dough rest for an hour or 2. This will help hydrate the different flours and build the dough structure.
- Add 90g of ripe sourdough starter and spread this over the autolyzed mixture. Use the tips of your fingers to spread the starter all over the dough. Fold the edges of the dough into the center, ensuring that the starter is fully incorporated. Use your thumb and forefinger to pinch the dough until the starter is well incorporated. Cover and rest for 30 minutes.
- Sprinkle 9g of salt over the surface of the dough. Then use your fingers to pinch the tiny salt granules into the dough. You shouldn’t feel any salt granules in your dough, so this may take a few minutes depending on the coarseness of your salt. Cover and rest for 15 minutes.
Bulk fermentation
- Perform 6 sets of stretch and folds in the first two hours of bulk fermentation. The first three sets will take place in 15-minute intervals. Cover and rest the dough at 80F between each set. The dough won’t rise much during this process, though it will become stronger. Dip your hands in water to prevent the dough from sticking to your fingers.
- Grab the top part of the dough with both hands, and gently pull the dough, stretching it upwards, then fold over the opposite edge. Rotate the bowl 180 degrees and repeat from the other side. Rotate the bowl 90 degrees and repeat again on both sides. This entire process equals a single stretch and fold set. After the stretch and fold, gently lift the dough and round it nicely in the bowl. If you notice your dough developing quickly, simply reduce the number of stretches and folds to 3 or 4 sets, 30 minutes apart.
- Allow the dough to rest – bulk ferment – covered at 80F for another 1.5 to 2 hours after the final stretch and fold. Keep an eye on the dough. Generally, you should aim to end bulk fermenting once the dough is almost double in size. The total bulk fermentation time will vary depending on the temperature of your kitchen, the dough temperature, and the flour type. Once bulk fermentation is complete, the dough should have expanded, with gas bubbles on the surface and edges of the bowl. The dough should also be rounder. A flat dough will indicate insufficient dough strength.
Pre-shape
- Transfer the dough onto a clean countertop.
- Use a bench knife to gently shape the dough into a round, pulling it towards you on the countertop in a circle to create some tension on the dough’s skin. You’ll notice the dough becoming bouncier as you do this.
- Work quickly and gently, then rest the dough for 15 to 20 minutes or until it has relaxed in time for the final shaping. Pre-shaping gives the dough some extra tension while resting the dough allows the gluten to relax slightly before the final shape.
Final shape
- Dust a 9-inch round or 10-inch oval banneton basket with rice flour.
- Add a light sprinkling of bread flour over the surface of the dough. Use a bench knife to lift and flip the dough onto the countertop. Shape the dough into a round or batard depending on the baking vessel.
- After shaping, gently pick up the shaped dough, and transfer it into a floured banneton, seam side up. Drape a kitchen towel over the banneton and place it into a plastic bag.
- Seal the bag with a clip, and allow the dough to rest at room temperature for 10 minutes.
Final proofing
- Place the covered banneton in the refrigerator and cold retard the dough for 15-16 hours at 38 degrees F. This type of cold fermentation will help develop a prominent flavor and improve the final crust texture.
Preheat the oven
- Preheat your Dutch oven, or combo cooker with the lid on at 500F for at least 1 hour.
- Once the oven and baking instrument have preheated for an hour, remove the banneton from the fridge and uncover the dough.
- Test the dough proofing by flouring a small section of the dough. Gently press your finger into the dough, if the dough springs back slowly with a slight indentation, then the dough is ready to bake. If the dough springs back quickly, it is under-proofed and must be returned to the fridge, covered for another hour. If the dough doesn’t spring back at all, then it is over-proofed, and unfortunately, nothing can be done at that stage.
Transfer and bake
- Place a large piece of parchment paper over the banneton, then flip carefully so that the banneton is upside down. Set it down on your countertop.
- Trim any extra bits of parchment paper, leaving enough to create two handles, so that you can lift and lower the dough into the preheated Dutch oven. Use a bread lame to score the dough, then carefully transfer the bread dough into the oven.
- Bake bread at 500 degrees F for 25 minutes.
- Remove the lid. The sourdough baking process should have enabled the dough to rise and expand, setting the crust beautifully. Reduce the oven temperature to 475 degrees F and continue to bake uncovered for an additional 15-25 minutes until the crust is a wonderful deep golden brown. You might want to rotate the Dutch oven a couple of times during this stage.
- Carefully remove the bread from the oven and transfer it to a cooling rack. Ensure the sourdough bread has cooled completely before slicing. This can take several hours. If you rushed to slice the sourdough bread you’ll end up with a gummier texture.
- Prep Time: 1 day
- Cook Time: 50 mins
- Category: bread
- Cuisine: European
Nutrition
- Calories: 199 kcal
- Fat: 6 g
- Saturated Fat: 1 g
- Carbohydrates: 41 g
- Protein: 44 g
What Does Open Crumb Mean?
When we describe the crumb of sourdough bread we’re talking about the texture of the interior of the bread. You may have heard it as open or closed as well as gummy, wet, soft, or tight.
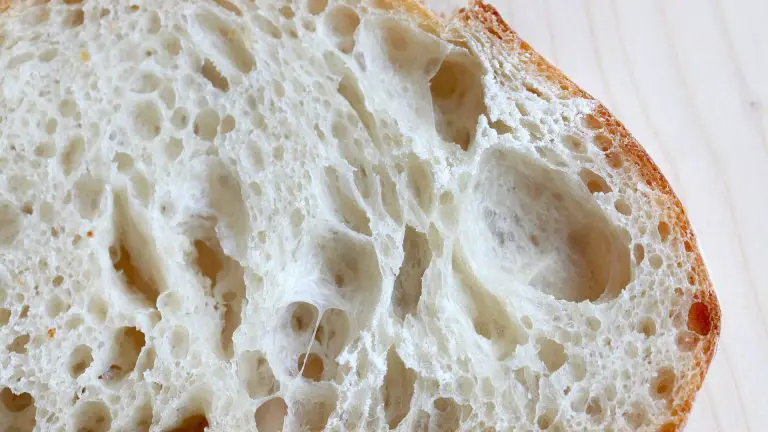
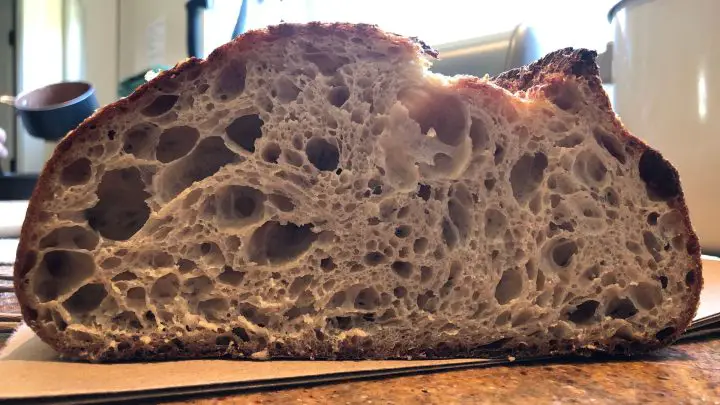
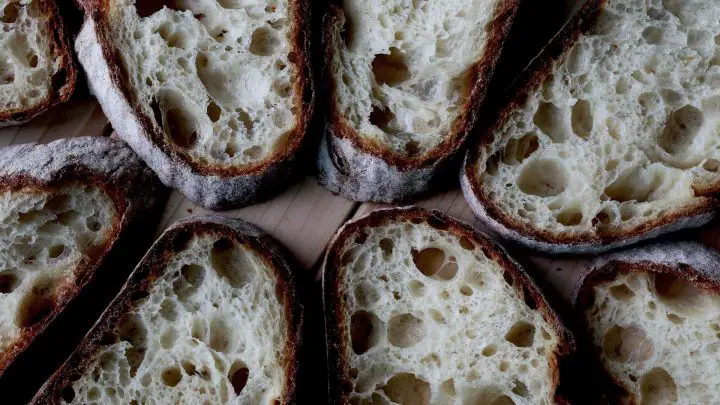
Open-crumb sourdough bread refers to a loaf that has large even holes throughout the interior of the bread.
These holes are the result of accurate and effective fermentation.
What Should Sourdough Crumb Look Like?
When it comes to an open crumb for sourdough bread, there really is no right or wrong way about it. If you’re looking for a perfected open crumb then there are a few things your sourdough will need.
Firstly, a sourdough crumb must be even, meaning that there shouldn’t be any tight areas in the bread or giant tunnels.
The crumb should also be light and airy, instead of wet and gummy.
Finally, the holes inside the sourdough will appear shiny, indicating a flawless gluten development
How to Achieve an Open Crumb
Generally, an open crumb is the most desired outcome when baking sourdough bread. While a closed crumb can also taste delicious, it may indicate that something was wrong with your dough.
For instance, under or over-fermentation, as well as insufficient hydration are all issues that will cause a closed crumb sourdough bread.
On the other hand, an open crumb loaf signifies correct fermentation, hydration, and preparation.
How to Get More Open Crumb For Sourdough?
When it comes to bread baking, perfection is achieved through experimentation. And when you’re trying to achieve that perfect open crumb, you’ll need to break down the sourdough baking process, starting with your sourdough starter.
Strong Starter
An open-crumb sourdough bread requires a strong, and active sourdough starter. As with any sourdough loaf, the strength of the starter is incredibly important.
A weak starter won’t be able to provide adequate fermentation, the gluten will break down before the starter has managed to activate in time.
To avoid this, you must ensure that you’re starter is fed at regular intervals, is bubbly, and at its peak before you use it.
If you prefer to store your sourdough starter in the refrigerator from time to time, then ensure that it has had enough time to warm up on the kitchen counter at room temperature. Do not use a cold starter for any sourdough bread recipe, especially if you want an open crumb.
Choice of Flour For Open Crumb
Your choice of flour is incredibly essential in order to achieve the perfect open-crumb sourdough. Opt for higher protein flours like bread flour, as it produces a higher gluten content and a stronger gluten network.
The gluten network is incredibly important, as it provides the overall structure for your sourdough bread. You’ll notice that whole grains and whole wheat flour will produce a much tighter crumb, and they’ll require the assistance of bread flour to achieve an open crumb.
(By the way, I’ve got a whole wheat sourdough bread recipe!)
Accurate Fermentation
Fermentation is an essential component in achieving a wider crumb for your sourdough bread. You must ensure that your dough is neither under-fermented nor over-fermented as these may create a tighter crumb.
During bulk fermentation, the dough should double in size and should feel light and pillowy to the touch. The lightness is what signifies the airiness, therefore, developing into an open crumb sourdough bread.
Higher Hydration
Higher hydration might mean a stickier dough, but it is essential in achieving an open crumb. However, you won’t need super-high hydration to achieve this, anything above 70% should create a perfect open crumb.
Shaping Sourdough
Shaping is an essential part of producing an open crumb for your sourdough bread. You must be firm, and gentle while handling the dough, ensuring that you aren’t destroying the bubbles that have formed within the dough during bulk fermentation. Albeit, you must be firm with the dough, to achieve sufficient surface tension.
If you fail to shape your sourdough with enough surface tension, the dough will spread out once it’s shaped, resulting in a closed crumb.
Check out these sourdough shapes: batard and boule.
Proofing Sourdough
The final proofing of your sourdough can create a huge difference in the crumb. Proofing can be done at room temperature or in the refrigerator where it is cold-proofed.
Proofing permits the dough to relax in its shaping container, where it will maintain the shape of the container before the bake.
If you plan to proof your dough on the kitchen counter at room temperature, then you need to make sure that the dough doesn’t overproof, as the dough may collapse and result in a close crumb.
Poke Test
To check that your dough has finished proofing, conduct a simple test. The poke test will help you judge whether the dough has proofed or not.
- Under proofed – Press your finger into the dough, and it should spring back quickly filling the indent.
- Over-proofed – Push your finger on the dough, and it should leave a notch that doesn’t fill back up.
The Perfect Sourdough Open Crumb Recipe
This open-crumb sourdough recipe is super simple and very rewarding. Follow the steps outlined below to bake the best bread you’ve ever tasted!
- Type: Bread
- Cuisine: European
- Recipe yield: 1 loaf, 4 servings
- Calories: 199kcal
- Preparation time: 1 day
- Cooking time: 50 minutes
- Cooling time: 3 hours
- Total time: 1 day 3 hours 50 minutes
Open Crumb Sourdough Ingredients
- 350g bread flour
- 90g whole wheat flour
- 350g filtered water
- 90g sourdough starter (100% hydration)
- 9g kosher salt or fine sea salt
- White rice flour
Open Crumb Sourdough Instructions
- Autolyze: In a large mixing bowl, combine 350g of unbleached bread flour, with 90g of whole wheat flour. Add 350g of filtered water and mix with your hands, until the flour is well combined, with no dry bits in the bowl. Cover with plastic wrap and let the dough rest for an hour or 2. This will help hydrate the different flours and build the dough structure.
- Add 90g of ripe sourdough starter and spread this over the autolyzed mixture. Use the tips of your fingers to spread the starter all over the dough. Fold the edges of the dough into the center, ensuring that the starter is fully incorporated. Use your thumb and forefinger to pinch the dough until the starter is well incorporated. Cover and rest for 30 minutes.
- Sprinkle 9g of salt over the surface of the dough. Then use your fingers to pinch the tiny salt granules into the dough. You shouldn’t feel any salt granules in your dough, so this may take a few minutes depending on the coarseness of your salt. Cover and rest for 15 minutes.
- Bulk fermentation: Perform 6 sets of stretch and folds in the first two hours of bulk fermentation. The first three sets will take place in 15-minute intervals. Cover and rest the dough at 80F between each set. The dough won’t rise much during this process, though it will become stronger. Dip your hands in water to prevent the dough from sticking to your fingers.
- Grab the top part of the dough with both hands, and gently pull the dough, stretching it upwards, then fold over the opposite edge. Rotate the bowl 180 degrees and repeat from the other side. Rotate the bowl 90 degrees and repeat again on both sides. This entire process equals a single stretch and fold set. After the stretch and fold, gently lift the dough and round it nicely in the bowl. If you notice your dough developing quickly, simply reduce the number of stretches and folds to 3 or 4 sets, 30 minutes apart.
- Allow the dough to rest – bulk ferment – covered at 80F for another 1.5 to 2 hours after the final stretch and fold. Keep an eye on the dough. Generally, you should aim to end bulk fermenting once the dough is almost double in size. The total bulk fermentation time will vary depending on the temperature of your kitchen, the dough temperature, and the flour type. Once bulk fermentation is complete, the dough should have expanded, with gas bubbles on the surface and edges of the bowl. The dough should also be rounder. A flat dough will indicate insufficient dough strength.
- Pre-shape: Transfer the dough onto a clean countertop. Use a bench knife to gently shape the dough into a round, pulling it towards you on the countertop in a circle to create some tension on the dough’s skin. You’ll notice the dough becoming bouncier as you do this. Work quickly and gently, then rest the dough for 15 to 20 minutes or until it has relaxed in time for the final shaping. Pre-shaping gives the dough some extra tension while resting the dough allows the gluten to relax slightly before the final shape.
- Final shape: Dust a 9-inch round or 10-inch oval banneton basket with rice flour. Add a light sprinkling of bread flour over the surface of the dough. Use a bench knife to lift and flip the dough onto the countertop. Shape the dough into a round or batard depending on the baking vessel. After shaping, gently pick up the shaped dough, and transfer it into a floured banneton, seam side up. Drape a kitchen towel over the banneton and place it into a plastic bag. Seal the bag with a clip, and allow the dough to rest at room temperature for 10 minutes.
- Final proofing: Place the covered banneton in the refrigerator and cold retard the dough for 15-16 hours at 38F. This type of cold fermentation will help develop a prominent flavor and improve the final crust texture.
- Preheat the oven: Preheat your Dutch oven, or combo cooker with the lid on at 500F for at least 1 hour.
- Once the oven and baking instrument have preheated for an hour, remove the banneton from the fridge and uncover the dough. Test the dough proofing by flouring a small section of the dough. Gently press your finger into the dough, if the dough springs back slowly with a slight indentation, then the dough is ready to bake. If the dough springs back quickly, it is under-proofed and must be returned to the fridge, covered for another hour. If the dough doesn’t spring back at all, then it is over-proofed, and unfortunately, nothing can be done at that stage.
- Transfer and bake: Place a large piece of parchment paper over the banneton, then flip carefully so that the banneton is upside down. Set it down on your countertop. Trim any extra bits of parchment paper, leaving enough to create two handles, so that you can lift and lower the dough into the preheated Dutch oven. Use a bread lame to score the dough, then carefully transfer the bread dough into the oven. Bake bread at 500F for 25 minutes.
- Remove the lid. The sourdough baking process should have enabled the dough to rise and expand, setting the crust beautifully. Reduce the oven temperature to 475F and continue to bake uncovered for an additional 15-25 minutes until the crust is a wonderful deep golden brown. You might want to rotate the Dutch oven a couple of times during this stage.
- Carefully remove the bread from the oven and transfer it to a cooling rack. Ensure the sourdough bread has cooled completely before slicing. This can take several hours. If you rushed to slice the sourdough bread you’ll end up with a gummier texture.
Nutrition
- Calories: 199kcal
- Carbohydrates: 41g
- Protein: 44g
- Fat: 6g
- Saturated fat: 1g
Sourdough Open Crumb
While achieving an open crumb might be tricky, once you’ve baked sourdough bread enough times, you’ll get the hang of it in no time!
Here’s another recipe I made with a great open crumb for you to check out: wild garlic sourdough recipe.
And if you need a beginner sourdough recipe, I’ve got that, too!
FAQs
What is an Open Crumb Sourdough?
An open-crumb sourdough refers to a loaf with large, even holes within the bread’s interior.
How do You Make a Sourdough Open Crumb?
To achieve an open crumb sourdough, you must work with a highly hydrated dough. As well as this, you must ensure that your flour has a sufficient protein percentage (11-13%).
Why is Open Crumb Good?
An open crumb is a product of robust fermentation, incredible dough strength, and appropriate dough handling.
Why Doesn’t My Sourdough Have an Open Crumb?
If your sourdough loaf doesn’t have an open crumb, then perhaps your dough was cold. If the dough temperature is too low for the sourdough starter to feed on the flour in the dough, this will result in a dense crumb with very few openings.
You don’t always need an open crumb for delicious sourdough, though, like in my sourdough pull apart finger bread.

