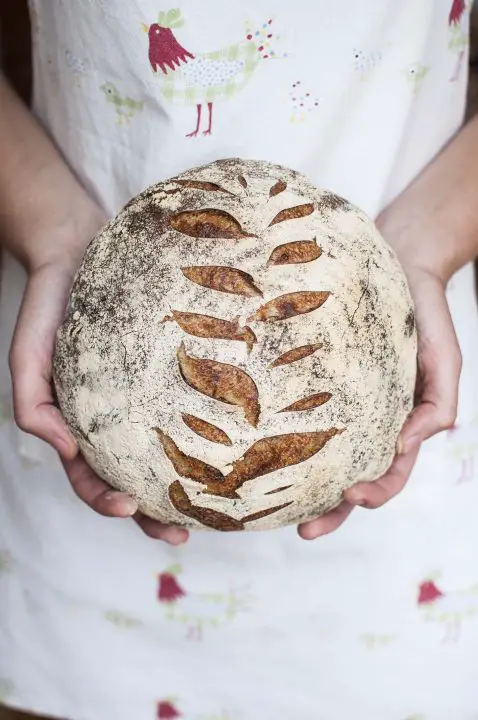
Few months ago I wrote about 6 biggest challenges in sourdough baking a beginner can face. You know, sourdough bricks, moldy starters, etc. In this post I would like to take a step further by explaining how you can get into sourdough baking fearless, well informed, and prepared of all the challenges you might face.
J. W. Goethe once said: “Everything is hard before it is easy.” Well, it doesn’t have to be that way.
Shall we? Let’s dig into 7 simple yet essential keys for successful sourdough baking.

1. Make your sourdough starter work before your start with sourdough baking.
Before mixing a starter into the dough for the first time, make sure it is active, bubbly, and robust. If your starter doesn’t rise after each feeding, neither will the bread you mixed your starter in.
Two important factors effect the activation of the starter in the beginning: flour type and temperature. Whole grain flours ferment faster and starter rises faster at higher temperatures (the optimum temperature in the beginning of the starter establishment is 25-27°C/77-80°F). My favorite flour for making sourdough starter from scratch is whole grain rye flour. Rye flour is rich is sugars and in the amylase enzymes which break down the starches into simple sugars the yeast feed on.
You can download step-by-step tutorial on how to make rye sourdough starter from the scratch, maintainance and troubleshooting tips here. It’s an effective three day and no flour waste process.
2. Get to know the flour you are using.
My first learning reference for sourdough baking was the Chad Roberston’s book Tartine Bread. His basic country loaf requires 75% hydration (that is water to flour ratio, for example 75% hydration means 75 g water to 100 g of flour). Using this hydration, his dough was beautifully strong, elastic and it held shape. 75% hydration for the white flour I use in Slovenia? No go.
I had to fall several times (read as scrub the runny dough from the counter) before it dawned on me that I don’t have to push the water amount to percentages stated in the recipe. Instead, I have to figure out how much water my flour handles, regardless of what the recipe asks for.
The easiest way to test this, especially if you just bought a bag of new flour, is to mix your dough with lower amount of water (let’s say 55-60%) and than leave the dough to rest for an hour. This process is called autolyse (from Greek word meaning self-digestion) and it’s a process of the protein protease starting to break down the proteins in the flour when it’s mixed with water. Broken proteins then start realigning and forming gluten network. If you see that after one hour your dough can absorb more water, simply add more water, otherwise make sure you reduce the water amount next time.
Note that whole grain flours absorb more water than white flours.
So, a hearthy tip from me before you try out one of the recipes on the blog or from any book – get to know your flour first.
3. The amount of water can make a huge difference.
Relating to the previous point, your flour might absorb more or less water than stated in the recipe. 70% hydration in my recipe, but your flour might only handle a 60% hydration or on the other hand 80% hydration.
What you aim for when mixing the flour, water, and sourdough starter is the consistency of the dough that feels right – both stretchy and elastic (the ability of the dough to bounce back). There are exceptions of course, like in focaccia baking. Since it is baked in a tray and shaping is easy, the hydration can be higher than usually.
What makes the dough stretchy and elastic? It’s the gluten. Gluten is a composite of two proteins, glutenin and gliadin. Glutenin is responsible for elasticity and gliadin for stretchability.
Gluten in the flour only represents a potential for the dough to be elastic and stretchy. It’s not until the water is added to the flour that gluten strands are formed. And what makes the flour to absorb different quantities of water? It’s the gluten again. The more the gluten in the flour, the stronger is the flour and the longer fermentation it can handle and vice versa. The tricky part is to know the maximum of the water your flour absorbs.
Too much water in the dough and you can get from elastic dough to runny dough. On the other hand, a little bit more water in the dough and you can get from tight to open crumb. It’s about balancing and the feeling in your hands. What a great learning is to feel the dough between your fingers.
4. Observe the dough, forget the watch.
Couple of months ago I bought myself a new bread book called In search of the perfect loaf. It was written by Samuel Fromartz, a journalist and an enthusiast home bread baker. I was immediately drawn by the descriptive language which makes you feel you are in Paris tasting baguettes with him and also by beautiful thoughts and insights a home baker needs. Like this one:
“Time was their most important tool: the time to let the dough come together gently, the time to let fermentation work its magic, and the fortitude not to be pushed by anything but the demands of the bread itself. “
What does the upper paragraph mean? If I paraphrase one of the other questions in his book, and which I often get asked: How long do you leave the dough to rise? The answer would be: I do it until it’s risen and perfectly fermented. This is why it is important to observe and feel the dough and move to the next step based on how the dough feels, looks and smells, rather on the time and rising times stated in the recipes. Five hours in my kitchen might mean three or seven hours in your kitchen.
How does the perfectly fermented dough look like? If we take a look at the first rise (bulk fermentation), then you are looking for airy, bubbly, strong, and live dough, which of course has also increased in the volume.
” … None of this is easy, but it’s further compunded by the fact that the baker needs to have a solid understanding of what is perhaps the most difficult aspect of bread making – fermentation. If you misjudge this – and fermentation is truly a judgement call – then the defects will be magnified in every other step of the process. “
My advice: Practice and observation. And repeat.
5. It’s easy, just do some planning.
A lot of people get inspired by sourdough baking due to its health benefits and deliciousness. However, when I mention them I sometimes leave my dough to rise 12 hours in the fridge while I sleep or I’m at work or that my dough needs a 5-hour rise, they say to me: ” But Natasa, I don’t have time for this.”
The reality is, that sourdough baking is not an all-day job. It takes as little time to mix and knead the dough and leave it to rise. The rest, it’s the bacteria and yeasts that do their job and we do ours in the meantime :).
Sourdough baking can be easily fitted to our busy daily lives, it just take a little bit of planning and experimenting in terms of sourdough starter quantities and environment temperature. If you have challenges fitting the baking into your schedule, drop me an e-mail and we can have a take a look closely on how to optimise the baking for your needs.
6. Don’t over complicate.
What if I let my starter rise more than 12 hours? What if I left my starter in the fridge for three days, will he die? What if I don’t let the dough to rise for full three hours? What if I miss one stretch and fold, will my bread still be good? What if I knead my dough only for 4 minutes instead of 6? Can I use rye starter instead of whole grain starter?
All those questions in my head. What I’ve come to in the end, is again our ability to apply a judgement call based on our observation, environment and ingredients we use.
7. Master one recipe before moving to another.
It can feel highly overwhelming to keep failing in getting a delicious sourdough bread with crunchy crust and open crumb. Trust me, I’ve been there for a long time.
The most important step is to not give up, because, after all, it is not the recipe you are mastering, but the understanding of the fermentation. When you understand the basic principles of fermentation and you understand and know when the dough is ready for the next step, you’re on a highway to apply this knowing to any kind of recipe and you get creative with no limits.
And this is the beauty of sourdough baking. So why not start with a sourdough bread for beginners recipe?
If you enjoyed this article, please take a second to share it on your favorite social media channel.
And if you have any feedback or questions, please leave a comment below!


![How To Stretch And Fold Sourdough [A Detailed Guide] 5 How to stretch and fold sourdough [a detailed guide]](https://www.mydailysourdoughbread.com/wp-content/uploads/2023/06/How-To-Stretch-And-Fold-Sourdough-120x120.jpg)
