
Last updated on August 17th, 2026
Wholemeal sourdough plays by different rules than your average loaf, and that’s exactly why so many home bakers hit a wall with it. Bran soaks up water like crazy, shreds gluten as you knead, and speeds up fermentation before you’re ready for it.
But once you know what wholemeal dough actually needs—more water, gentler handling, the right flour blend—a light, flavorful loaf is completely within reach. It’s less about fighting the flour and more about working with it. Get these fundamentals down, and that dense, gummy brick becomes a thing of the past.
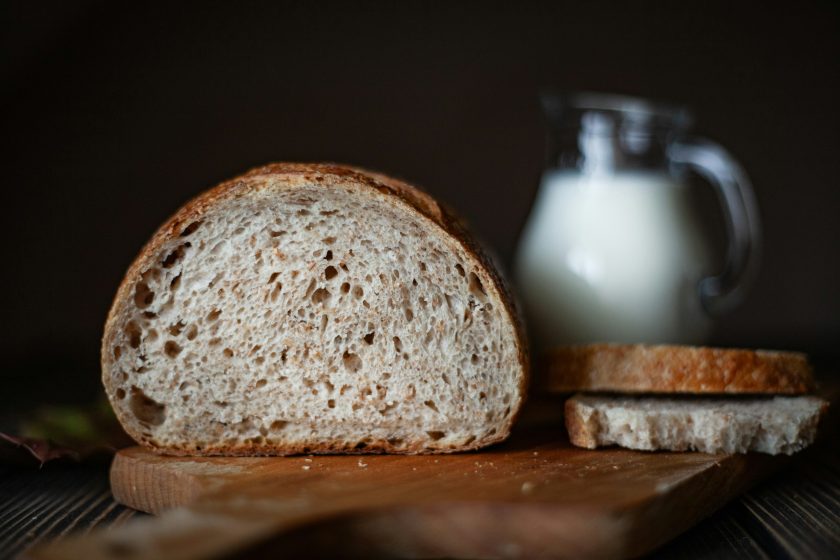
Wholemeal Sourdough: What Makes It Different?
Wholemeal sourdough keeps the whole wheat kernel intact — bran, germ, and endosperm — and gets its rise from a natural sourdough starter rather than commercial yeast. That’s the source of its deeper flavor, extra fiber, and heartier bite compared to a white sourdough loaf. “Wholemeal” and “whole wheat” mean the same thing; it’s simply regional vocabulary, with “wholemeal” common in the UK and Australia and “whole wheat” standard in the US. The catch is that bran and wheat germ, while nutritious, work against gluten. As you knead or fold, sharp bran fragments slice through developing gluten strands, weakening the structure that’s supposed to trap rising gas. Bran also soaks up water like a sponge. Put those two traits together, and you get the defining characteristics of wholemeal sourdough: a naturally denser crumb than an all-white loaf, and a real need to pay closer attention to hydration.
Ingredients
- Wholemeal (whole wheat) flour — 350g
- Bread flour — 150g
- Water — 375g (75% hydration)
- Active sourdough starter — 100g
- Salt — 10g
- Optional seeds (sunflower, pumpkin, oats) — 50g
How to Make Wholemeal Sourdough
- Autolyse: Combine wholemeal flour, bread flour, and water in a large bowl, then rest for 30–60 minutes. This lets the bran fully hydrate and gives gluten a head start.
- Add starter and salt: Fold in your active, bubbly starter and the salt, mixing until fully incorporated with no dry patches.
- Stretch and fold: Over the first two hours of bulk fermentation, do 4–6 gentle stretch-and-fold sets. This builds gluten strength gradually without letting sharp bran fragments tear through the structure.
- Bulk fermentation: Let the dough rise at room temperature until it’s expanded by roughly 50–75%, feels light and airy, and shows bubbles on the surface — typically 4–6 hours, often faster than white dough.
- Shape: Turn the dough onto a floured surface, shape it with confident but gentle tension, and settle it seam-side up into a well-floured banneton.
- Final proof: Proof at room temperature for 1–2 hours, or refrigerate overnight for a slower, more flavorful rise.
- Score: Right before baking, slash the top with a sharp blade or lame to give steam a controlled place to escape.
- Bake: Bake in a preheated Dutch oven, covered first then uncovered, until deep golden brown and hollow-sounding when tapped.
Related: Sourdough vs Whole Wheat: Main Differences
Getting the Hydration Right
Bran acts like a sponge, soaking up far more moisture than the starchy endosperm found in white flour, which is why sticking to a white-flour hydration percentage leaves wholemeal dough stiff and underhydrated. Add water gradually during mixing rather than all at once, and judge your dough by feel — tacky and supple, not dry and stiff, but not soupy either.
Key points:
- Bump hydration 5–10% higher than your usual white-flour recipe
- Increase further as your wholemeal ratio climbs toward 100%
- Add water in small splashes, not all at once
- Aim for tacky and supple, never dry or overly slack
- Build hydration alongside gluten strength, not as a substitute for it
Fermentation and Proofing
- Confirm your starter is active: Before mixing, make sure your starter is bubbly, has roughly doubled since feeding, and passes the float test. A sluggish starter guarantees a sluggish rise.
- Watch bulk fermentation, not the clock: Let the dough rise at room temperature until it’s visibly expanded, slightly domed, and jiggly when nudged. Wholemeal flour’s extra nutrients often speed fermentation compared to white dough, so check earlier than you’d expect.
- Track volume, not just time: Look for roughly 50–75% growth, surface bubbles, and a light, airy feel before moving on to shaping.
- Shape once fermentation looks right: Handle the dough gently to preserve the gas structure you’ve built.
- Choose your final proof method: Proof at room temperature for a couple of hours, or place your shaped loaf in the refrigerator overnight. A cold proof slows fermentation, deepens flavor, and fits neatly into a busy schedule.
- Run the poke test: Press a floured finger gently into the dough. If it springs back quickly, it needs more time. If it springs back slowly and leaves a slight dimple, it’s ready. If it barely springs back at all, it’s overproofed.
- Know the signs of underproofing: Flat loaf, dense and gummy crumb, poor oven spring.
- Know the signs of overproofing: Flat, collapsed shape, torn or overly large holes, pale and weak crust.
Getting this stage right matters more than any other single step — fermentation balance, not just time on the clock, is what determines whether your wholemeal loaf ends up light or leaden.
How to Get a Lighter Wholemeal Loaf
Density is the number one complaint with wholemeal sourdough, but it’s fixable with a few targeted adjustments.
- Increase your bread flour ratio. More gluten-forming protein gives the dough backbone to resist the bran’s disruptive effect.
- Keep your starter in peak condition. An active, well-fed starter produces the gas needed to open up the crumb — a weak starter is one of the most common (and most fixable) causes of density.
- Ease into wholemeal flour. You don’t need to start at 100%. Try 30–50% wholemeal and increase gradually as your technique improves.
- Handle the dough gently. Since bran physically cuts through gluten strands, favor gentle stretch and folds over rough kneading.
- Don’t overproof. Push fermentation too far and the gluten structure, already fighting bran, will collapse, leaving you with a flat, dense result.
- Keep hydration adequate. Underhydrated dough can’t expand properly — bran needs its share of water before gluten can do its job.
- Build gluten gradually. Several light stretch-and-fold sessions beat one aggressive kneading session for wholemeal dough specifically.
Baking the Loaf
- Preheat your Dutch oven: Preheat it inside your oven for 30–45 minutes at your bake temperature. This creates an instant blast of heat that drives strong oven spring.
- Load the dough: Transfer your scored loaf into the hot Dutch oven and immediately cover with the lid.
- Bake covered: Start around 450–500°F with the lid on for about 20 minutes. The trapped steam keeps the dough’s surface flexible so it can expand fully before the crust sets.
- Remove the lid: Take the lid off and continue baking uncovered at a slightly lower temperature until the crust turns deep golden brown.
- Check internal temperature: The loaf is done when it reaches 205–210°F in the center, checked with a digital thermometer.
- Confirm with the tap test: A fully baked loaf sounds hollow when you tap the bottom.
- Cool completely: Rest the loaf on a wire rack for at least an hour before slicing — cutting too soon compresses the crumb and can leave it feeling gummy even when fully baked.
Related: Why Is My Sourdough so Dense? 19 Tips for Perfect Sourdough
Troubleshooting Wholemeal Sourdough
- Dense, gummy crumb: Usually underproofing or slicing before the loaf has fully cooled. Give bulk fermentation more time and let the bread cool completely before cutting.
- Flat or weak rise: Often a weak starter, overproofing, or insufficient gluten development. Confirm your starter is bubbly, doubled, and passes the float test before mixing.
- Sticky, unmanageable dough: Hydration has outpaced your gluten strength. Dial back the water slightly or increase your bread flour ratio.
- Dry, stiff dough: The opposite problem — you need more water. Bran absorbs moisture aggressively, so wholemeal dough needs more hydration than a white-flour recipe.
- Excessive sourness: Shorten fermentation time or ferment at a slightly warmer temperature to soften the tang.
- No oven spring: Check for a cold Dutch oven, insufficient steam, or dough that was under-fermented going into the bake.
- Gummy despite a long bake: Confirm internal temperature hit at least 205°F — underbaking, not just underproofing, can also cause this.
Storage, Serving, and Variations
Once your loaf’s cooled its heels on the rack for an hour or so, the fun part begins. Wrap it in a cloth bread bag or tuck it into a wooden bread box — anything but a plastic bag on the counter, which turns a crackly crust soft and sad in no time. Planning to save some for later? Slice it up first, bag it, and freeze it — future-you gets to pull out exactly what’s needed and send it straight into the toaster, no thawing drama required.
Speaking of toasting, a slice or two under the broiler a day or two in brings that nutty wholemeal flavor roaring back to life. Feeling adventurous? Fold in sunflower seeds, pumpkin seeds, or a handful of rolled oats once your dough’s built some muscle, or start swapping ratios — a little rye here, a touch of spelt there — until you land on your own signature loaf.
Dense Bread? Not Anymore!
Wholemeal sourdough only feels tricky until you understand what makes it behave differently from a regular loaf. Once that clicks, everything else falls into place. A little patience, some attention to detail, and a willingness to trust your instincts go a long way here. You’ve now got a solid grasp of what makes this bread tick, from start to finish. So go put that knowledge to work and bake something you’re genuinely proud of.
FAQs
Can sourdough be wholemeal?
Yes, absolutely. Wholemeal sourdough just means you’re using whole wheat flour (bran, germ, and all) instead of white flour, leavened naturally with a sourdough starter. It behaves a bit differently than a white loaf—thirstier dough, faster fermentation—but the process is the same. With a few tweaks to hydration and handling, you’ll end up with a heartier, more nutritious loaf packed with whole-grain flavor.
Which is healthier, sourdough or wholemeal bread?
It depends on what you’re after. Whole wheat brings more fiber to the table, while sourdough’s fermentation process makes bread easier to digest and can lower its glycemic impact. Honestly, you don’t have to pick one. A wholemeal sourdough loaf combines both benefits, giving you the fiber density of whole grain with the digestive advantages of fermentation.
Can sourdough be 100% whole wheat?
Yes, though it takes some practice. A 100% whole wheat sourdough needs noticeably higher hydration since the bran soaks up so much water, plus gentler handling to protect gluten strength. Many bakers start with a partial blend and work up to fully whole wheat as they get comfortable managing the dough. The payoff is a deeply flavorful, fiber-rich loaf.





