There’s nothing quite like pulling a golden, homemade loaf out of your own oven, and it’s easier than you’d think. The best bread recipe for beginners doesn’t just tell you what to do. It shows you why each step matters, so you can read your dough like a pro instead of just watching the clock.
You’ll get to know what every ingredient does, how to spot when your dough’s ready, and how to troubleshoot with total confidence. All it takes is six pantry staples, a mixing bowl, and a little patience. Your kitchen’s about to smell incredible.
What Makes This the Best Bread Recipe for Beginners?
Here’s the beauty of this beginner bread recipe: you probably already have everything you need. Flour, yeast, salt, water, and a spoonful of sugar or honey. That’s it.
The method is just as easy. You mix, knead, let the dough rise, shape it, let it rise again, and bake. No stand mixer, Dutch oven, or fancy proofing baskets required. Just a mixing bowl, a wooden spoon, a loaf pan, and your oven.
The dough is forgiving, too. Knead a minute too long or let it rise a little past plan, and it’ll still turn out great. Think of it as training wheels for homemade bread. Every step builds skills you’ll use for every loaf after, including sourdough when you’re ready.
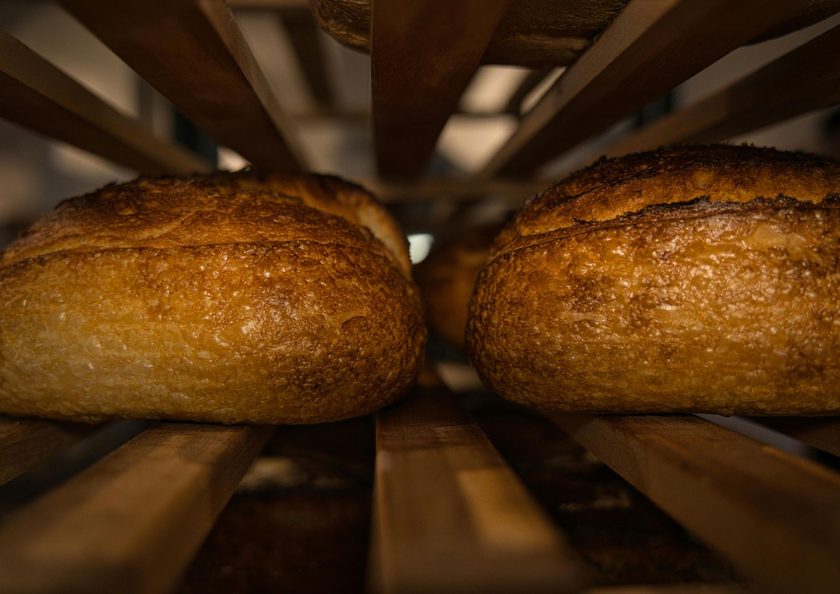
Your first loaf should have a golden crust and a soft, even crumb. It might look a little lopsided, and that’s okay. The real measure of success? Wanting to bake again next weekend.
Ingredients You Need
- 3½ cups (440g) all-purpose or bread flour, plus extra for dusting
- 2¼ teaspoons (1 packet) instant or active dry yeast
- 1½ teaspoons fine sea salt or table salt
- 1 tablespoon sugar or honey
- 1¼ cups (285g) warm water (105–110°F, like a warm bath)
- 2 tablespoons olive oil or melted butter, plus extra for greasing
Related: Sourdough Bread for Beginners: Your Guide From Starter to Loaf
How to Make the Dough
- Mix the dry ingredients. Whisk the flour, salt, and sugar together in a large mixing bowl. Using instant yeast? Add it now, on the opposite side of the bowl from the salt. Using active dry yeast? Stir it into the warm water with the sugar and wait 5–10 minutes until it’s foamy.
- Add the water gradually. Pour in about three-quarters of the water (or yeast mixture) along with the oil, then stir with a wooden spoon. Add the rest a little at a time until no dry flour remains. Flour varies by brand and humidity, so holding some water back lets you adjust as you go.
- Check the consistency. You’re after a shaggy, lumpy, slightly tacky dough, like cottage cheese pressed into a ball. Dry patches? Add a tablespoon of water. Soupy? Add a tablespoon of flour.
- Let it rest. Cover the bowl and walk away for 10 minutes. The flour soaks up the water, and the dough gets noticeably smoother on its own.
Sticky dough is actually a good sign, so don’t bury it in flour. Try these tricks instead:
- Wet your hands. Dough sticks to dry skin, not wet skin.
- Oil your hands lightly with a neutral oil.
- Use a dough scraper to lift and fold instead of your fingers.
- Be patient. Dough gets less sticky as the gluten develops.
Kneading the Dough
Turn the dough out onto a clean work surface with just a light dusting of flour, or better yet, a thin film of oil. It’s honestly therapeutic: ten minutes where your only job is pushing dough around. Knead using this stretch-and-fold motion:
- Press the heel of your hand into the dough and push it away from you.
- Fold the stretched part back over the top.
- Give the dough a quarter turn.
- Repeat, finding a steady push-fold-turn rhythm.
You’re stretching, not punching. Each push lines up the gluten, the stretchy protein network that traps gas and gives your bread its structure. Think of it like combing tangled hair into neat, smooth strands.
How long to knead bread? Plan on 8 to 10 minutes by hand, but let the dough, not the clock, decide when you’re done. Look for these signs:
- Smooth dough: The surface goes from rough and lumpy to smooth and slightly satiny.
- Springy texture: Poke it, and it slowly bounces back.
- The windowpane test: Stretch a small piece thin between your fingers. If light shows through before it tears, you’re done. If it rips right away, knead for two more minutes.
Watch the flour, though. Every sprinkle on the counter gets absorbed, and a dozen “just a little” dustings can turn a tender loaf dense and dry. If the dough sticks, scrape it up with a bench scraper, wipe the counter with a little oil, and keep going. A slightly tacky dough now means a moist, soft crumb later.
First Rise
Lightly oil a clean bowl, add the dough, and turn it once so the top is coated. Cover it with plastic wrap, a damp towel, or a plate. This keeps the surface from drying into a tough skin that fights expansion.
This stage is called bulk fermentation, and it’s where the magic happens. The yeast eats, multiplies, and fills the dough with gas while building flavor. You’re waiting for it to roughly double in size and look puffy, soft, and slightly domed.
Timing depends on your kitchen. Yeast is like a tiny houseplant with opinions. At 75–80°F, dough might double in an hour. At 65°F, it could take two hours or more. Slower isn’t bad, though. A cooler, longer rise often means more flavor, the same principle sourdough bakers swear by.
A few tricks that help:
- Mark the starting height with a piece of tape on the bowl, or use a straight-sided container so progress is easy to see.
- Chilly house? Put the bowl in the oven with just the light on (oven off).
- Hot summer day? Check early so the dough doesn’t overshoot.
- Use the poke test. Press a floured fingertip half an inch in. If it springs back instantly, wait. If it springs back slowly and leaves a slight dent, it’s ready. If it doesn’t spring back at all, shape it right away.
Shape the Loaf
Tip the dough onto a lightly floured surface and gently press it with your fingertips to release the biggest air bubbles. Skip the old “punch it down” advice. You want to even out the gas, not erase the yeast’s hard work.
Press the dough into a rectangle about as wide as your loaf pan is long. Fold the top third down to the center, then the bottom third up over it, like a business letter. Starting from a short end, roll it into a snug log and pinch the seam closed. Move with confidence, but don’t yank. If the surface starts tearing, let it rest for 5 minutes so the gluten can relax.
Next, build surface tension, the secret to a loaf that rises up instead of slumping sideways. Set the log seam-side down and use a dough scraper or cupped hands to drag it gently toward you across an unfloured patch of counter. The friction tightens the outer skin like a drumhead.
Place the dough seam-side down in a greased 9×5-inch loaf pan, pressing it gently into the corners. No pan? Shape a round and bake it on a parchment-lined baking sheet for a more rustic, crustier loaf.
Second Rise and Baking
- Proof again. Cover the loaf pan loosely and let the dough rise for 45–60 minutes, until it crests about an inch above the rim and a gentle poke springs back slowly.
- Preheat the oven. Heat it to 375°F during the last 20–30 minutes of rising. Set an oven thermometer on the middle rack, since many home ovens run 25°F off from the dial.
- Bake. Bake on the middle rack for 30–35 minutes. For a glossier, deeper golden crust, brush the top with melted butter or beaten egg before it goes in.
- Check for doneness. Look for a deep golden-brown crust, a hollow sound when you tap the bottom, and an internal temperature of 190–200°F. The thermometer is the most reliable test. If the top browns too fast, tent it loosely with foil.
- Cool completely. Turn the loaf out onto a cooling rack right away so the bottom doesn’t steam and go soggy. Wait at least an hour before slicing. The bread keeps cooking as it cools, and cutting early leaves you with a gummy center. Use the time to soften some butter. You’ve earned it.
Common Beginner Bread Mistakes
- Dense loaf: Usually caused by too much flour, underkneading, or not enough rise time. Spoon and level your flour (or weigh it), knead until the dough passes the windowpane test, and trust the poke test over the timer.
- Dough won’t rise: Check your yeast first. Dissolve a pinch in warm water with a little sugar. No foam in 10 minutes? Buy a fresh packet. Water that’s too hot kills yeast, while a cold kitchen only slows it down, so move the dough somewhere warmer.
- Dry bread: Extra flour from scooping or heavy dusting is the usual suspect, along with overbaking. Pull the loaf at 190–200°F, and don’t skip the oil or butter.
- Burned crust: Your oven likely runs hot, or the loaf sits too close to the top element. Check with an oven thermometer, bake on the middle rack, and tent with foil for the last 10–15 minutes if needed.
- Underbaked center: A pale, gummy middle means the inside never got hot enough. Use a thermometer, and let the loaf cool fully, since slicing warm bread can make even a perfect bake look raw.
- Overproofing: The dough rises beautifully, then collapses in the oven, leaving a flat or sunken top and a boozy smell. Watch the dough, not the clock, especially on hot days. If you catch it early, gently reshape it and give it a shorter second rise.
Related: Easy Sourdough Bread Recipe for Beginners
Tips for Baking Your First Loaf
- Get a kitchen scale. Weighing flour is the easiest way to get consistent loaves, since a cup can vary by 20% or more depending on how you fill it.
- Read the whole recipe first. Bread takes a few hours, mostly hands-off, so plan it around a lazy weekend morning.
- Keep a bake journal. Jot down room temperature, rise times, and results. Patterns show up fast.
- Store it right. Keep the loaf cut-side down on a board for the first day, then in a zip-top bag for 3–4 days. Skip the fridge, which makes bread go stale faster.
- Freeze extras. Slice, wrap tightly, and freeze for up to 3 months. Toast slices straight from frozen.
- Experiment once you’re comfortable. Swap 1 cup of flour for whole wheat (add a splash of extra water), or knead in herbs, shredded cheese, or seeds.
- Bake again soon. Your second loaf teaches you more than any recipe ever could, while your hands still remember the first.
You’ve Got This, Baker
Great bread doesn’t need fancy gear or years of practice. It just needs a few pantry basics, a little patience, and a willingness to trust your hands. You now know what each ingredient does, what good dough looks and feels like, and how to tell when it’s ready to move on, so you’re not just following a recipe; you’re reading your bread.
When something goes sideways, you’ve got the know-how to figure out why and nail it next time. That’s what turns a nervous first-timer into a confident home baker. So clear off the counter, roll up your sleeves, and get baking. Your kitchen’s about to smell amazing, and you’re going to be proud of what comes out of that oven.
FAQs
What is the easiest bread to make for a beginner?
A basic yeast sandwich loaf is the easiest bread for beginners. It uses six pantry staples (flour, yeast, salt, water, sugar, and oil) and needs nothing fancier than a mixing bowl and a loaf pan. The dough is soft and forgiving, so small slip-ups won’t ruin it. Once you’ve nailed it, you’re ready to try no-knead breads or sourdough.
What is the secret to making good homemade bread?
The real secret is learning to read your dough instead of relying on the clock. Weigh your flour for consistency, knead until the dough passes the windowpane test, and use the poke test to judge each rise. Bake until the center hits 190–200°F, then let it cool fully before slicing. Patience and a light hand with flour make all the difference.
How to make the best bread starter?
A great starter is just flour, water, and time. Mix equal weights of whole wheat or rye flour and lukewarm water, about 50g each, in a clean jar. Cover it loosely and keep it somewhere warm. Every 24 hours, discard about half and feed it fresh flour and water. In 7 to 14 days, it should double within 4 to 8 hours of feeding and smell tangy.
Bread Recipe for Beginners
Here’s the beauty of this beginner bread recipe: you probably already have everything you need. Flour, yeast, salt, water, and a spoonful of sugar or honey. That’s it.
Ingredients
- 3½ cups (440g) all-purpose or bread flour, plus extra for dusting
- 2¼ teaspoons (1 packet) instant or active dry yeast
- 1½ teaspoons fine sea salt or table salt
- 1 tablespoon sugar or honey
- 1¼ cups (285g) warm water (105–110°F, like a warm bath)
- 2 tablespoons olive oil or melted butter, plus extra for greasing
Instructions
- Whisk flour, salt, and sugar; add instant yeast, or proof active dry yeast in warm water until foamy.
- Stir in most of the water and oil, then add the rest gradually until no dry flour remains.
- Aim for a shaggy, slightly tacky dough; cover and rest 10 minutes.
- Knead 8–10 minutes with a push-fold-turn motion, oiling your hands instead of adding flour, until smooth, springy, and windowpane-thin.
- Let it rise in an oiled, covered bowl until doubled, 1–2 hours.
- Gently degas, fold like a letter, roll into a tight log, and place seam-down in a greased loaf pan.
- Proof 45–60 minutes while preheating the oven to 375°F.
- Bake 30–35 minutes to 190–200°F inside, then cool at least an hour before slicing.
Notes
Store it right. Keep the loaf cut-side down on a board for the first day, then in a zip-top bag for 3–4 days. Skip the fridge, which makes bread go stale faster.
- Category: bread
- Method: Baking