
Last updated on October 13th, 2026
There’s something special about pulling a warm, golden loaf out of your oven, and 4 ingredient bread makes it ridiculously easy. All you need is flour, water, yeast, and salt. That’s it. No fancy gear, no complicated techniques, and no sourdough starter to babysit. Just a crackly crust, a soft and chewy crumb, and that amazing fresh-baked smell filling your kitchen.
Up next, you’ll learn what each ingredient does, how to tell when your dough is ready, which swaps work great, and simple fixes for common hiccups. Plus, easy ways to keep your loaf fresh and enjoy every last slice.
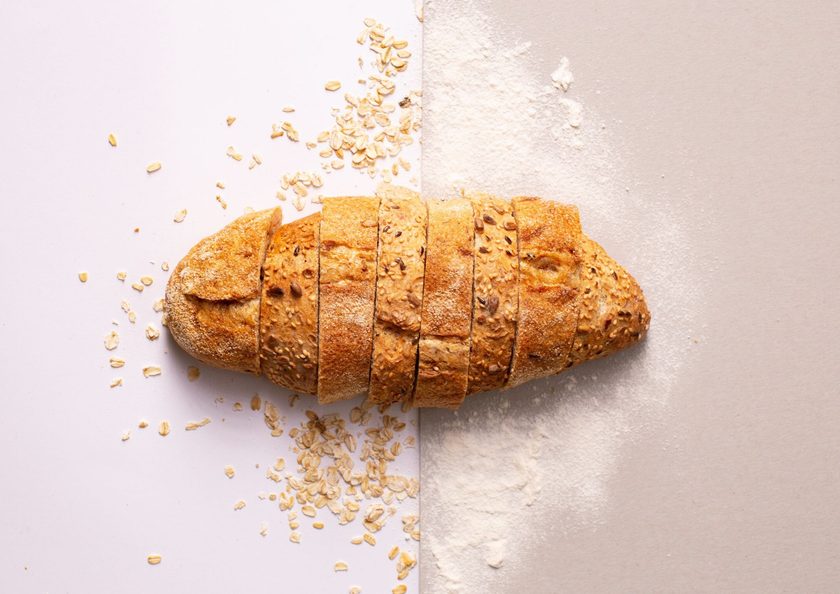
A Simple Bread With Just 4 Ingredients
This 4 ingredient bread uses only flour, water, yeast, and salt. No sugar, eggs, milk, or oil. Yeast doesn’t need sugar to work, since it feeds on the natural sugars in flour, so nothing else is required. If a recipe adds sweeteners or fat, it’s really a different bread.
The result is a golden, crackly crust and an airy, chewy crumb with a clean, wheaty flavor. It’s an easy, simple bread recipe that suits beginners and busy weeknights alike.
Hands-on time is about 20 minutes. Total time runs 3 to 4 hours, most of it spent waiting while the dough rises. You don’t need a stand mixer or any special skills, just a bowl, an oven, and a little patience. A Dutch oven helps you get a bakery-style crust, but a baking sheet works too. Leftovers freeze well, so one loaf can cover a week of toast and sandwiches.
Related: 4-Ingredient Sourdough Discard Recipes
What You Need to Make 4 Ingredient Bread
- Flour: 3 ½ cups (450 g) bread flour (chewier) or all-purpose flour (softer)
- Water: 1 ½ cups (350 g) lukewarm water, about 95–105°F
- Yeast: 2 ¼ teaspoons (7 g, one packet) instant or active dry yeast
- Salt: 1 ½ teaspoons (9 g) fine sea salt or table salt, for flavor and strength
How to Make 4 Ingredient Bread
- Mix the dry ingredients. Whisk the flour, instant yeast, and salt in a large mixing bowl for about 30 seconds so everything is evenly distributed. If you’re using active dry yeast, stir it into the warm water first and wait 5 to 10 minutes until it foams.
- Add the water. Pour in the water and stir with a wooden spoon or your hand until no dry flour remains. The dough will look rough and shaggy, which is normal. Cover the bowl and let it rest for 20 to 30 minutes so the flour fully hydrates.
- Develop the gluten. Choose one method. To knead, turn the dough onto a lightly floured counter and push, fold, and turn it for 8 to 10 minutes until smooth. For stretch-and-folds, wet your hands, lift one side of the dough, stretch it up, and fold it over the center. Rotate the bowl and repeat on all four sides. Do one set every 30 minutes, 3 to 4 times. This method takes longer but is less messy and works well for wetter dough.
- Let it rise. Cover the bowl and leave the dough in a warm spot, ideally around 75°F, until it roughly doubles. This first rise usually takes 1 to 2 hours.
- Shape the loaf. Turn the dough onto a floured counter without punching it down. Fold the edges toward the center to form a ball, flip it seam-side down, and drag it toward you a few times to tighten the surface.
- Proof. Place the dough seam-side up in a floured bowl or banneton, or seam-side down on parchment paper. Cover and let it proof for 30 to 60 minutes. Start preheating the oven and Dutch oven to 450°F during this time.
- Score and bake. Cut one slash about ½ inch deep across the top with a sharp knife or razor blade. Bake until the crust is deep brown, then cool for at least an hour before slicing.
How to Know When the Dough Is Ready
Smooth, Elastic Dough
Use your hands and eyes, not the clock. After kneading or folding, the dough should look smooth and feel springy. To check gluten development, do the windowpane test: stretch a small piece between your fingers. If it thins enough to let light through without tearing, it’s ready. If it tears, knead a few more minutes or do another set of folds.
The First Rise
During the first fermentation, the dough should double in size and look puffy, with bubbles on the surface and sides. Rising it in a straight-sided container and marking the starting level with tape makes this easy to judge.
The Final Proof and the Poke Test
For the second rise, press a floured fingertip about ½ inch into the dough.
- Springs back immediately: Underproofed. Wait 10 to 15 minutes.
- Springs back slowly, leaving a slight dent: Ready to bake.
- Doesn’t spring back: Overproofed. Bake it anyway, but expect a flatter loaf.
The poke test is less reliable with wet dough or in a cold kitchen, so check the dough’s size and look.
How Temperature Changes the Timeline
Warmth speeds up yeast and cold slows it down. At 75°F, the first rise takes 1 to 2 hours. At 65°F, it can take 3 hours or more, while a hot kitchen may finish it in under an hour. In a cold house, rise the dough in the oven with only the light on. For deeper flavor, refrigerate the shaped dough overnight and bake it the next day.
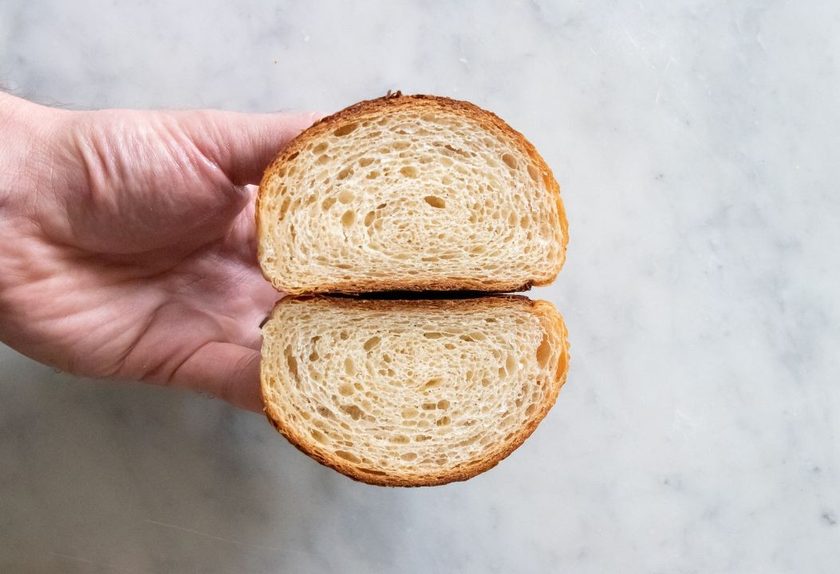
How to Bake 4 Ingredient Bread
A Dutch oven gives the crispiest, most blistered crust. A baking sheet works for oval loaves and needs no special gear.
- Preheat thoroughly. Set the oven to 450°F and heat it for 30 to 45 minutes with your Dutch oven or baking sheet inside. The preheat signal usually sounds before the oven walls are fully hot.
- Set up steam if using a baking sheet. Place an empty metal pan on the bottom rack during preheating. A Dutch oven traps steam on its own, so skip this step if you’re using one.
- Load the dough. Score the dough, then lower it into the Dutch oven using parchment paper as a sling, or slide it onto the baking sheet. For the sheet method, carefully pour 1 cup of hot water into the empty pan and close the door quickly.
- Bake. In a Dutch oven, bake covered for 25 minutes, then uncovered for 15 to 20 minutes. On a baking sheet, bake for 30 to 35 minutes.
- Check for doneness. The crust should be deep golden brown, the bottom should sound hollow when tapped, and the internal temperature should read 200 to 210°F.
- Cool completely. Let the loaf rest on a wire rack for at least an hour. The inside keeps cooking, and slicing early leaves it gummy.
Easy Ingredient Substitutions
- Bread flour and all-purpose flour swap one-for-one by weight. Bread flour (12–14% protein) gives a taller loaf with a chewier crumb. All-purpose flour (10–12% protein) makes a softer, more tender bread that’s great for sandwiches.
- Adjust the water when you change flour. Higher-protein flour absorbs more water. When switching to all-purpose, hold back 2 tablespoons of water and add it only if the dough feels stiff. When switching to bread flour, you may need a splash more.
- Whole wheat flour works in small amounts. Replace up to 25% of the flour for a nuttier flavor, and add extra water since whole wheat absorbs more.
- Don’t swap in self-rising flour. It already contains salt and leavening, which throws off the recipe and adds ingredients you don’t want.
- Active dry and instant yeast are interchangeable in equal amounts. Mix instant yeast into the flour. Dissolve active dry yeast in 105–110°F water for 5 to 10 minutes first, and allow an extra 15 to 30 minutes for the first rise.
- Check the yeast’s expiration date. Old yeast may not rise at all.
- Measure salt by weight when possible. The recipe uses 9 grams. By volume, that’s 1 ½ teaspoons fine sea or table salt, about 2 teaspoons Morton kosher salt, or about 1 tablespoon Diamond Crystal kosher salt.
- Skip coarse finishing salt in the dough. Large crystals may not dissolve evenly.
- Use a scale for reliable swaps. Weighing flour, water, and salt keeps the dough consistent no matter which brand or type you use.
Common Problems With 4 Ingredient Bread
Why Is My Bread Dense?
Usually, the dough was underproofed, the gluten wasn’t developed enough, or there was too much flour.
Fix it: Use the poke test, do the windowpane test after kneading, and weigh your flour or spoon it into the cup and level it.
Why Isn’t My Bread Rising?
The yeast may be expired or damaged by water above 130°F. A cold kitchen slows fermentation.
Fix it: Test yeast in warm water with a pinch of flour. If it doesn’t foam within 10 minutes, replace it. Move the dough somewhere warmer and give it more time.
Sticky Dough That Won’t Cooperate
Some stickiness is normal early on and fades as gluten develops.
Fix it: Wet your hands, use a bench scraper, and add flour one tablespoon at a time only if the dough stays wet after kneading.
Pale or Hard Crust
A pale crust means the oven wasn’t hot enough or the bake was too short. A thick, hard crust means too little steam.
Fix it: Preheat longer, bake until deep brown, and add steam with a Dutch oven or a pan of hot water.
Bread That Collapses
Collapsing during scoring or baking usually means overproofing. The gluten is overstretched and can’t hold its shape.
Fix it: Check the dough earlier in warm weather. If it’s overproofed before baking, reshape it and let it rise again for a shorter time.
How to Store Homemade Bread
- Cool it completely first. Let the loaf sit on a wire rack for 1 to 2 hours. Wrapping warm bread traps steam, which softens the crust and encourages mold.
- Keep it at room temperature for 2 to 3 days. A bread box holds enough humidity to keep the crumb soft without making the crust soggy. A paper bag or clean kitchen towel also works.
- Store it cut-side down. Placing the cut side on a cutting board keeps the inside from drying out.
- Skip the fridge. Cold temperatures make bread go stale faster because the starches recrystallize and harden.
- Freeze it for longer storage. Slice the loaf first, wrap it tightly in plastic wrap or foil, and seal it in an airtight container or freezer bag with the air pressed out. It keeps for up to 3 months.
- Toast frozen slices directly. There’s no need to thaw them first.
- Reheat larger pieces in the oven. Lightly spritz the crust with water and warm it at 350°F for 10 to 15 minutes to restore a crisp crust and soft crumb.
- Refresh day-old bread the same way. A spritz and 5 to 10 minutes at 350°F revive a loaf that’s started to firm up.
Related: 2-Ingredient Bread: An Easy Homemade Bread Recipe
Serving Ideas
- Toast: Toast thick slices until golden and crisp at the edges but tender in the middle. The mild flavor works with both sweet and savory toppings.
- Sandwiches: Slice about ½ inch thick. The sturdy crumb holds up to juicy fillings, and bread flour gives the sturdiest slices. Try grilled cheese with sharp cheddar or a classic BLT.
- Butter and jam: Spread salted butter on a warm slice so it melts into the crumb, then top with strawberry, apricot, or berry jam.
- Eggs and avocado: Top toast with mashed avocado and a fried or poached egg, then finish with lemon juice, flaky salt, and red pepper flakes.
- Soups and stews: Serve thick hunks with tomato soup, beef stew, or chili for dunking. The crust stays firm while the crumb soaks up the broth.
- Garlic toast: Mix softened butter with minced garlic, salt, and chopped parsley. Spread it on thick slices of day-old bread and bake at 400°F for 8 to 10 minutes until golden.
Simple Bread, Big Payoff
Four ingredients, one seriously good loaf. That’s the whole deal. You don’t need fancy gear, a sourdough starter, or years of practice to pull a crusty, golden bread out of your oven. Once you understand what each ingredient does and how to read your dough, you’re in the driver’s seat. Swapping flours or yeasts won’t throw you off, and if a loaf comes out a little wonky, you’ll know why and how to fix it next time. Store it right, and it’ll stay fresh for days or keep in the freezer for months. Best of all, it fits into any meal, any time of day. So go ahead, grab that flour, and get baking. Your kitchen’s about to smell amazing.
FAQs
Is 4 ingredient homemade bread healthy?
It can be a smart choice. With just flour, water, yeast, and salt, it skips the added sugar, oils, and preservatives found in many store-bought loaves. You also control the salt. Made with white flour, it’s mostly carbs with modest fiber, so it’s best enjoyed in balance. For extra fiber and nutrients, swap up to 25% of the flour for whole wheat.
Which bread has only four ingredients?
Classic lean breads use just flour, water, yeast, and salt. That includes rustic country loaves, French baguettes, Italian ciabatta, and many crusty artisan boules. Traditional sourdough goes even simpler, using a flour-and-water starter instead of commercial yeast. If a recipe adds sugar, milk, eggs, or butter, it becomes an enriched bread instead.
4 Ingredient Bread
This 4 ingredient bread uses only flour, water, yeast, and salt. No sugar, eggs, milk, or oil. Yeast doesn’t need sugar to work, since it feeds on the natural sugars in flour, so nothing else is required.
Ingredients
- Flour: 3 ½ cups (450 g) bread flour (chewier) or all-purpose flour (softer)
- Water: 1 ½ cups (350 g) lukewarm water, about 95–105°F
- Yeast: 2 ¼ teaspoons (7 g, one packet) instant or active dry yeast
- Salt: 1 ½ teaspoons (9 g) fine sea salt or table salt, for flavor and strength
Instructions
- Whisk flour, instant yeast, and salt; proof active dry yeast in warm water first.
- Stir in water until shaggy with no dry flour, then cover and rest 20–30 minutes.
- Knead 8–10 minutes or do 3–4 sets of stretch-and-folds, until the dough passes the windowpane test.
- Let rise at about 75°F until doubled and bubbly, 1–2 hours (longer if cooler).
- Shape into a ball without punching it down, then drag it to tighten the surface.
- Proof 30–60 minutes until a poke springs back slowly, while preheating to 450°F for 30–45 minutes.
- Score, then bake in a Dutch oven 25 minutes covered and 15–20 uncovered, or 30–35 minutes on a steamed baking sheet.
- Check for 200–210°F inside, then cool for at least an hour.
Notes
Collapsing during scoring or baking usually means overproofing. The gluten is overstretched and can’t hold its shape.
Fix it: Check the dough earlier in warm weather. If it’s overproofed before baking, reshape it and let it rise again for a shorter time.
- Category: bread
- Method: Baking




![[video] from the seed to the peasant bakery with nicolas supiot](https://www.mydailysourdoughbread.com/wp-content/uploads/2022/11/image-16-120x120.jpeg "[Video – Part 2] Entering Into Peasant Bakery 76")
