Fresh, homemade bread only takes a few simple tools and your own two hands. Your hands can do everything a mixer does, and there’s something pretty satisfying about feeling dough come together under your palms. Once you know how to make bread without a stand mixer, a warm, crusty loaf is just a bowl and a little patience away.
Below, you’ll learn how to mix, knead, and fold dough by hand, spot the signs of a perfect rise, bake to the right internal temperature, and handle the most common hiccups like a pro.
Why You Don’t Need a Stand Mixer to Bake Great Bread
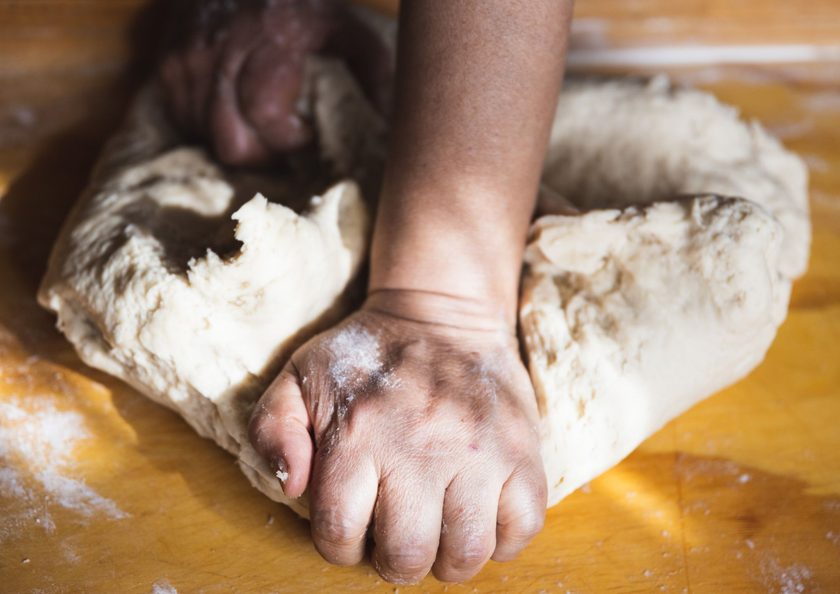
A stand mixer is convenient, but it’s not essential. Bread dough needs flour and water combined, gluten developed, and enough time to rise, and your hands can handle all of that. To make bread without a mixer, you only need a mixing bowl, a wooden spoon, a dough scraper, and your hands.
Making bread by hand comes down to three techniques. Mixing brings the ingredients together into a rough dough. Manual kneading builds strength by pushing and folding the dough on the counter. Stretch-and-fold builds that same strength gradually in the bowl, with very little effort.
Expect about 10 to 15 minutes of active kneading, or a few minutes of folding spread over a couple of hours. Most of the process is waiting while the dough rises, so the hands-on work is shorter than you’d think.
Different doughs need different handling. Stiff, lower-hydration doughs for sandwich bread respond well to kneading. Wet, sticky doughs for rustic loaves, focaccia, or ciabatta are easier to manage with stretch-and-fold. Match the method to the dough, and homemade bread without a stand mixer is easy.
Related: 6 Basic Sourdough Kneading Techniques
What You Need to Make Bread by Hand
The Core Ingredients for Homemade Bread
Basic bread needs four ingredients: flour, water, yeast, and salt. Sugar, honey, butter, or olive oil are optional. A little sugar feeds the yeast and helps the crust brown, while fat gives a softer crumb and keeps bread fresh longer. Without them, you get a leaner, crustier loaf.
Don’t skip the salt. Besides adding flavor, it strengthens gluten and slows fermentation so the dough doesn’t rise too fast.
Choosing Your Flour and Yeast
Bread flour has about 12 to 14% protein, which means more gluten and a chewier, taller loaf. All-purpose flour has around 10 to 12% and gives a slightly softer bread. Both work well for hand kneading.
Instant yeast can be mixed straight into the flour. Active dry yeast is traditionally dissolved in warm water (105 to 110°F) first. Blooming it is a good way to confirm it’s active before you add your flour.
Equipment for Making Bread by Hand
You don’t need any specialized baking equipment. Most kitchens already have everything on this list:
- A large mixing bowl with room for the dough to double.
- A wooden spoon or stiff spatula for the first stir.
- A dough scraper (bench scraper) to lift sticky dough, clean the bowl, and divide dough.
- A kitchen scale. A cup of flour can vary by 30 grams depending on how you scoop it, so weighing gives consistent results.
- A clean work surface, like a countertop or large cutting board.
Mix the Dough by Hand
Mixing bread dough by hand takes only a few minutes. The goal is to hydrate all the flour, not to build strength yet.
- Combine the dry ingredients. Stir the flour, salt, and instant yeast together in a mixing bowl so the yeast and salt are evenly distributed. If you’re using bloomed active dry yeast, add it with the water instead.
- Add the water gradually. Pour in most of the water and hold back a small amount. Flour absorbs different amounts of water depending on the brand and humidity, and it’s easier to add water than to fix an overly wet dough.
- Stir with a wooden spoon. Mix until the dough gets too stiff to stir easily.
- Finish mixing by hand. Use your hand like a claw, squeezing and turning the dough until no dry flour remains. Add the reserved water if dry patches won’t come together.
- Scrape the bowl. Use a dough scraper to pull flour from the sides and bottom into the dough.
- Rest the dough (optional). Cover the bowl and let it sit for 20 to 30 minutes before kneading.
At this point, you’ll have a shaggy dough: lumpy, rough, and sticky. That’s normal. The flour has just been hydrated, and gluten hasn’t developed yet. The dough consistency will improve as you knead or fold.
The optional rest makes a noticeable difference. During this time, the flour fully absorbs the water and gluten begins forming on its own, so the dough becomes smoother and easier to work with. It also shortens your kneading time. When bakers rest only flour and water before adding the other ingredients, it’s called an autolyse.
How to Knead Bread Dough by Hand
Kneading develops gluten, the network of proteins that gives bread its structure and chew. Lightly flour your work surface, turn out the dough, and follow these steps:
- Push. Press the dough away from you with the heel of your hand, stretching it out.
- Fold. Fold the far edge back over toward you.
- Turn. Rotate the dough a quarter turn.
- Repeat. Keep going in a steady rhythm for 10 to 15 minutes. Enriched doughs with butter or eggs may need a little longer.
- Check the gluten. Stretch a small piece between your fingers. If it thins enough to let light through without tearing (the windowpane test), it’s ready. If it tears, knead a few more minutes and test again.
As you knead, the dough will change from lumpy and sticky to smooth and elastic. It should spring back when you press it with a finger. It doesn’t need to be perfect, since gluten keeps developing during the rise.
Practical tips:
- Use your body weight, not just your arms. Stand close to the counter and lean into each push so you don’t tire quickly.
- Avoid adding lots of flour. Stickiness decreases as gluten develops, and extra flour makes bread dry and dense.
- Use a dough scraper to gather dough that sticks to the counter.
- Lightly oil or wet your hands if the dough keeps clinging.
- If the dough resists and tears, cover it and let it rest for 5 minutes. The gluten relaxes, and kneading gets easier.
- Set a timer. Hand kneading often feels longer than it is, and most people stop too early.
Use Stretch-and-Fold Instead of Kneading
How Stretch-and-Fold Works
Very wet doughs, like those for ciabatta, focaccia, or open-crumb boules, are hard to knead because they stick to your hands and counter. Stretch-and-fold builds strength without kneading.
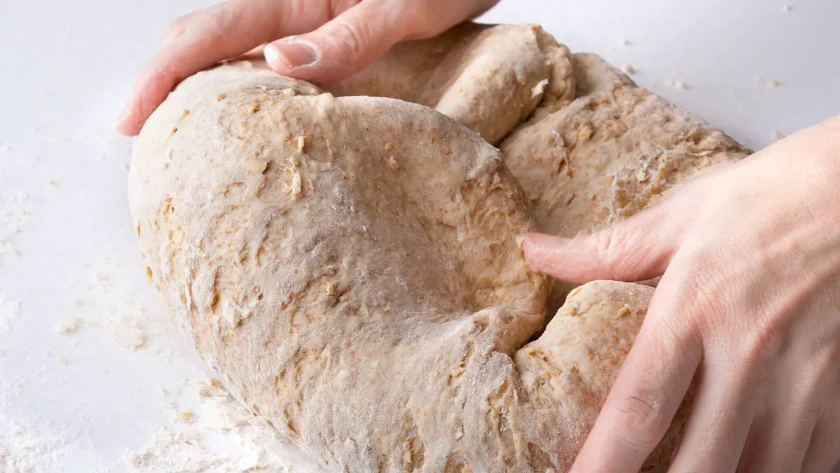
Wet your hand, grab one edge of the dough, stretch it up until you feel resistance, and fold it over the top. Turn the bowl a quarter turn and repeat until you’ve folded all four sides. That’s one set.
A Simple Folding Schedule
- Mix the dough and rest it for 30 minutes.
- Do one set of stretch-and-folds.
- Rest 30 minutes and repeat for 3 to 4 sets total.
- Let the dough finish rising undisturbed.
By the last set, the dough should feel smoother, stronger, and slightly puffy.
Stretch-and-Fold vs. Traditional Kneading
Kneading develops gluten in one intense session. Stretch-and-fold spreads the work over a couple of hours with very little effort. It’s less messy, handles high-hydration dough well, and often produces a more open crumb. The downside is that it takes longer and you need to stay nearby. For stiff sandwich doughs, kneading is faster.
Why Resting Helps Gluten Develop
Gluten keeps forming during each rest as the flour stays hydrated. At the same time, fermentation produces gas that stretches the dough. The folds organize and tighten that structure, so time does much of the work.
Let the Dough Rise
Place the dough in a lightly oiled bowl and cover it with a lid, plastic wrap, or a damp towel to keep the surface from drying out. Leave it somewhere warm, ideally 75 to 80°F, such as an oven with only the light on.
Rise time depends on temperature. In a warm kitchen, most yeasted doughs take 1 to 2 hours. In a cool kitchen, it can take 3 hours or more. You can also refrigerate the dough overnight for a slower rise and more flavor.
Don’t rely only on the “doubled in size” rule. Wet, whole-grain, and enriched doughs often rise less dramatically, and an increase of 50 to 100% is usually enough if the dough shows the right signs.
Signs Your Dough Is Ready
- It’s noticeably larger and domed on top.
- You can see bubbles on the surface or sides.
- It feels light and airy when you jiggle the bowl.
- When you press a floured finger half an inch in, the dent springs back slowly and only partly. If it springs back right away, give it more time.
Shape and Proof the Loaf
Turn the risen dough onto a lightly floured surface and press it gently with your fingertips to release large air pockets. For rustic loaves with an open crumb, handle it lightly to keep more gas.
For a boule, fold the edges into the center, flip the dough seam-side down, and drag it toward you across an unfloured part of the counter with cupped hands. Turn and repeat a few times to tighten the surface.
For a loaf pan, press the dough into a rectangle, roll it up tightly from the short side, pinch the seam closed, and place it seam-side down in a greased loaf pan.
Good surface tension helps the loaf hold its shape and rise upward. The surface should be smooth and taut. If it tears, let the dough rest a few minutes. A bench scraper makes turning sticky dough easier.
Cover the shaped loaf and let it proof for 30 to 60 minutes. Place a boule on parchment paper or in a floured basket. It’s ready when it looks puffy and a gentle poke springs back slowly.
Watch for overproofing: a very slack dough, a dent that doesn’t spring back, or a wrinkled surface. Check early in a warm kitchen.
Bake Bread Without a Stand Mixer
Preheat the oven for at least 30 minutes, or 45 minutes with a Dutch oven or baking stone. Crusty, lean loaves usually bake at 425 to 475°F, while soft sandwich breads in a loaf pan bake at 350 to 375°F.
For a Dutch oven, lower the dough in using parchment paper, score the top, and bake covered for 20 to 30 minutes. Then remove the lid so the crust can brown. Loaf pans go straight onto the middle rack.
Baking time depends on loaf size and recipe. A small sandwich loaf may take 30 to 35 minutes, while a large boule can take 45 minutes or longer. The bread is done when the crust is deep golden brown and an instant-read thermometer shows 200 to 210°F for lean breads or about 190°F for enriched breads.
Tips for baking homemade bread:
- Use an oven thermometer, since many ovens run 25°F hot or cold.
- Bake lean loaves a shade darker than you think. Pale bread is often gummy inside.
- Tap the bottom of the loaf. A hollow sound is a good sign.
- Cool the bread on a cooling rack for at least an hour before slicing so the crumb can set.
Related: How Long To Knead Sourdough + BONUS EASY NO-KNEAD SOURDOUGH RECIPE
Common Problems When Making Bread Without a Mixer
Dough is too sticky
- Keep kneading, since stickiness decreases as gluten develops.
- Let the dough rest 10 minutes so the flour absorbs more water.
- Switch to stretch-and-fold, using wet or oiled hands and a dough scraper.
- Add flour only a tablespoon at a time, and only if needed.
Dough is too dry
- Knead with wet hands or add water a teaspoon at a time.
- Weigh your flour next time, since scooped flour is often packed.
Dough won’t rise
- Check the yeast’s expiration date.
- Test the yeast in warm water with a pinch of sugar. It should foam within 10 minutes.
- Keep water below 120°F, since hotter water can damage yeast.
- Move the dough somewhere warmer and give it more time.
Bread turns out dense
- Knead until the dough passes the windowpane test.
- Avoid adding too much extra flour.
- Let the dough rise fully before baking.
- Cool the loaf completely before slicing.
Loaf spreads instead of rising
- Build more surface tension when shaping.
- Reduce the water slightly next time.
- Bake in a loaf pan or Dutch oven for support.
- Check the final proof earlier to avoid overproofing.
Crust browns too quickly
- Tent the loaf loosely with foil.
- Move it to a lower rack or lower the temperature by 25°F.
- Expect faster browning in doughs with sugar, honey, or milk.
- Check your oven’s accuracy with an oven thermometer.
Your Hands Are All You Need
You don’t need a stand mixer to bake great bread at home. With a few basic ingredients, simple kitchen tools, and your own two hands, you can make loaves that rival anything from a bakery. The secret isn’t fancy equipment. It’s understanding your dough, choosing the right technique for it, and giving it enough time. Pay attention to how your dough looks and feels instead of relying only on the clock, and you’ll get better results with every bake.
And when something doesn’t go as planned, most problems come down to a few common causes with easy fixes. Every loaf teaches you something new, so trust your hands, enjoy the process, and keep baking. Your best bread is still ahead of you.
FAQs – How to Make Bread Without a Stand Mixer
Can you mix bread without a stand mixer?
Yes. Stir flour, salt, and yeast together in a mixing bowl, then add water gradually and mix with a wooden spoon. When the dough gets too stiff to stir, finish by hand, squeezing until no dry flour remains. It’ll look shaggy at first, and that’s normal. A 20 to 30 minute rest afterward makes the dough smoother and easier to knead.
How to make bread by hand?
Mix flour, water, yeast, and salt into a rough dough, then knead it for 10 to 15 minutes or use stretch-and-fold until it’s smooth and elastic. Let it rise in a warm spot until puffy, then shape it into a loaf or boule. After a final proof, bake until golden brown and 200 to 210°F inside. Cool before slicing.
Bread Without a Stand Mixer
A stand mixer is convenient, but it’s not essential. Bread dough needs flour and water combined, gluten developed, and enough time to rise, and your hands can handle all of that.
Ingredients
- 500 g (about 4 cups) bread flour or all-purpose flour, plus a little extra for dusting
- 325 g (about 1⅓ cups) lukewarm water, around 95°F
- 7 g (2¼ teaspoons, or one packet) instant yeast or active dry yeast
- 10 g (about 1¾ teaspoons) fine salt
- 1 tablespoon sugar or honey (optional, for a softer crumb and better browning)
- 2 tablespoons olive oil or softened butter (optional, for a softer loaf that stays fresh longer)
- A little oil for greasing the bowl and loaf pan
Instructions
- Whisk the flour, salt, and yeast together in a large bowl. Add the water (plus sugar and oil, if using) and stir until no dry flour remains.
- Cover and let the dough rest for 20 minutes.
- Knead on a lightly floured surface for 10 to 15 minutes, until smooth and elastic.
- Place the dough in an oiled bowl, cover, and let it rise in a warm spot for 1 to 2 hours, until puffy.
- Gently degas the dough and shape it into a loaf or boule.
- Cover and proof for 30 to 60 minutes. Meanwhile, preheat the oven to 375°F for a loaf pan or 450°F for a Dutch oven.
- Bake for 30 to 45 minutes, until golden brown and 200 to 210°F inside.
- Cool for at least 1 hour before slicing.
Notes
Use an oven thermometer, since many ovens run 25°F hot or cold.
Bake lean loaves a shade darker than you think. Pale bread is often gummy inside.
- Category: bread
- Method: Baking
![Can you freeze sourdough bread [top ways! ]](https://www.mydailysourdoughbread.com/wp-content/uploads/2023/06/can-sourdough-bread-be-frozen-120x120.jpg "Can You Freeze Sourdough Bread? Yes, And Here'S How 87")