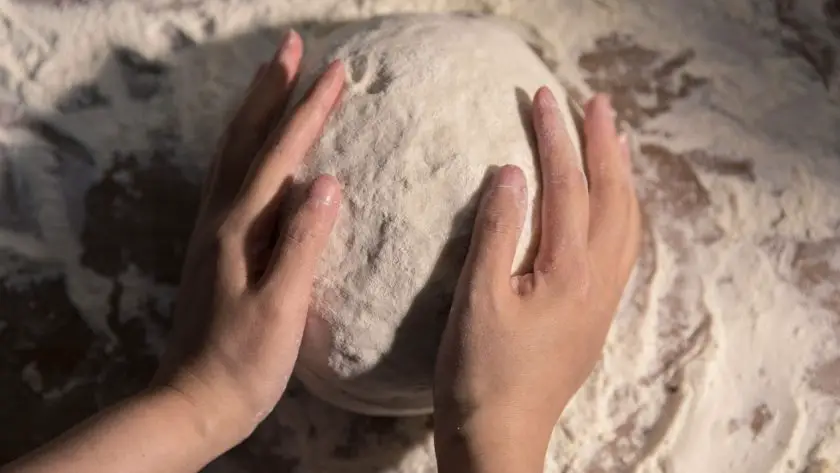
Getting that perfect rise and crumb in your bread starts with proper sourdough kneading techniques. Kneading develops gluten, incorporates air, and distributes ingredients evenly for optimal flavor and texture. However, aggressive kneading can damage the dough. This article reveals the keys to gentle yet effective sourdough kneading. You’ll learn how to know when the dough is kneaded just right, as well as techniques like stretch-and-folds and slap-and-folds that build gluten strength without overworking the dough. With these tips, you’ll turn out beautiful loaves with big oven spring and an airy crumb every time.

Table of Contents
- Understanding the Science of Sourdough Kneading
- 1. Basic Fold Technique in Sourdough Kneading
- 2. The French Fold Technique
- 3. The Claw Method for Sourdough Kneading
- 4. Utilizing a Dough Scraper for Effective Kneading
- 5. Embracing the No-Knead Method for Sourdough
- 6. One-Handed Kneading: A Unique Approach
- Hands-On Success: Ways to Knead Sourdough
- Sourdough Kneading Techniques: FAQs
Understanding the Science of Sourdough Kneading
Kneading is a vital process in sourdough breadmaking that serves several scientific purposes. On a molecular level, kneading activates gluten development. Gluten refers to the protein molecules found in wheat flour that are able to link together and form elastic strands when manipulated by moisture and motion. Kneading stretches and aligns these gluten molecules, allowing them to bond and create a network. This gluten matrix is what gives dough its chewy texture and allows it to trap the gas produced during fermentation. Without adequate gluten development through kneading, sourdough loaves will lack rise and structure.
Kneading also incorporates air into the dough through the stretching and folding process. Tiny air pockets get distributed throughout the dough, creating bubbles that will expand during proofing as the yeast produces carbon dioxide gas. Proper kneading results in a smooth, elastic dough with thousands of small air vacuoles capable of rising.
In addition, kneading kickstarts the fermentation process. The agitation activates the yeasts and bacteria within the sourdough starter, prompting them to feed on the starches and sugars present in the dough. This digestion process produces acids, alcohols, and carbon dioxide as byproducts. The bacteria specifically produce lactic and acetic acids which give sourdough its tangy flavor. Meanwhile, the yeasts generate carbon dioxide bubbles that cause the dough to rise. Kneading distributes the starter evenly, allowing fermentation to occur consistently throughout the dough.
So in summary, kneading enables:
- Gluten development for dough structure and rise capacity
- Air incorporation for added lift and open crumb
- Fermentation activation for optimal yeast and bacteria activity
By understanding the science behind kneading, bakers can better grasp this essential technique in crafting loaves with superior rise, complex flavor, and ideal crumb texture. A little knowledge goes a long way in transitioning from sourdough novice to artisan expert.
1. Basic Fold Technique in Sourdough Kneading
The basic fold is one of the most fundamental yet effective sourdough kneading techniques used by beginner bakers when working with sourdough dough. This straightforward method helps create dough structure through a process of gentle stretching and folding.
Why Fold Dough During Kneading
Folding stretches and redistributes the dough, aligning the gluten strands and allowing them to bond. This builds strength into the dough, enabling it to trap gas produced by the sourdough culture and rise properly during proofing. Failing to fold and stretch sourdough dough can result in a dense and misshapen loaf.
When to Perform Folds
It’s best to start folding the dough after an initial 10-15 minutes of mixing once some gluten development has occurred. Folding too early when the dough is still shaggy can cause the gluten strands to tear rather than align.
Step-By-Step Basic Fold Method
Here is how to perform the basic fold technique:
- Once the dough has been initially mixed, allow it to rest for 10-15 minutes. This allows the gluten to relax and reduces tearing when folding.
- Lightly flour the work surface and turn out the dough. With floured hands, take the far edge of the dough and stretch it up and over the center of the mass.
- Repeat this process for the other 3 sides, gently stretching and folding the dough over itself.
- Flip over the dough mass and fold the 4 sides again. This completes one set of folds.
- Perform another set of folds in the same manner, working your way around each side of the dough.
- Return the dough to the bowl to rest and repeat the folding process every 30-60 minutes during the first 2 hours of bulk fermentation.
Regular basic folds during the initial mixing and kneading stage helps create a smooth dough with a strong, resilient gluten network. While simple, sourdough pros swear by this technique for building dough structure and stability. Beginners can feel confident using the basic fold method knowing they are setting their dough up for rising success.
2. The French Fold Technique
The French Fold is a time-honored kneading technique used by artisan bakers across France. This intensive folding method helps create an open crumb structure and light texture in sourdough loaves. By mastering the French Fold, home bakers can achieve bakery-quality loaves with superior rise and crumb.
Incorporating Air with Repeated Folds
The hallmark of the French Fold lies in its repetitive process of folding the dough over itself. With each set of folds, a pocket of air gets incorporated into the dough. This adds loft and rise capacity. Unlike regular kneading, the French Fold does not develop gluten through extensive stretching. The focus remains on trapping air to create an airier interior crumb.
Hand Folding Over the Dough
To execute the French Fold, first turn out the rested dough onto a clean work surface dusted with flour. Using your hands, reach under the far end of the dough and stretch it up and over itself towards you. Press this folded section down with your fingers to seal in the air pocket. Rotate the dough mass 90 degrees and repeat this fold over the new far end of the dough.
Continue rotating and folding the dough until you have gone fully around the circumference. This completes one set of French Folds. Perform 2-3 sets during the first 1-2 hours of bulk fermentation. The number of sets depends on the size and stiffness of the dough.
Creating Loft and Rise
As you systematically fold the dough over itself, you’ll notice it slowly relaxing and becoming more extensible. Gluten development takes a backseat to air incorporation, which creates loaf loft. The French Fold technique generates a light and airy interior crumb able to rise tall.
3. The Claw Method for Sourdough Kneading
The Claw kneading method is an effective hand technique that develops dough strength and texture. By mimicking the clawing action of a cat, bakers can mix and strengthen sourdough dough for optimal rise. This intensive technique is especially useful after bulk fermentation when the dough is relaxed.
Executing the Clawing Action
To perform the Claw knead, start with dough that has rested after bulk fermentation. The dough should be smooth and elastic but still soft. Lightly flour a work surface and your hands. Grab one edge of the dough with your fingers clawed inward and lift upward. Stretch the dough up and outward before folding it back over itself using a claw motion.
Repeat this claw stretch and fold on all sections of the dough, working systematically around the circumference. The clawed fingers help grip and lift the dough for maximum stretch and fold. Continue clawing and turning the dough until it forms a tight mass. This aligning and folding strengthens the gluten network.
Achieving the Right Dough Texture
The vigorous pulling and folding action develops the dough quickly. Within 5-10 minutes, you’ll notice the dough becoming more cohesive and less sticky. The distinctive claw kneading slaps and tightens the dough, expelling gas pockets. This contributes to the desired texture and strength.
Aim for a smooth, elastic dough that easily passes the “windowpane test” after claw kneading. The dough should feel firm and not overly loose or sticky when complete. Proper claw kneading transforms relaxed dough into a structured mass ready for shaping.
Hand Kneading Without Overworking
It’s important not to over-claw and tighten the dough excessively. This can overwork the gluten, leading to a dense crumb texture. Work through the claw kneading process methodically without obsessing over perfecting the dough.
4. Utilizing a Dough Scraper for Effective Kneading
A dough scraper, also called a bench scraper, is a versatile baking tool that can greatly aid sourdough preparation and kneading. Scrapers with a stainless steel blade and convenient handle allow bakers to cleanly lift, turn, and portion dough. Beyond just cutting dough, scrapers serve multiple functions that lead to enhanced gluten development and properly kneaded loaves.
Effortless Dough Handling
Scrapers make handling wet, sticky dough a breeze. The solid metal easily slides under dough to lift and fold it during kneading. This prevents excessive sticking to hands and work surfaces. Scrapers also enable easy turning and manipulating of dough during bulk fermentation folds. The seamless dough handling benefits dough strength.
Efficient Surface Cleaning
Scrapers excel at cleaning dough residue off kneading surfaces. A few quick swipes easily remove dough stuck on counter tops or boards, keeping the workspace spotless. This makes kneading tidier and more efficient compared to constantly re-flouring messy surfaces. Clean working surfaces are essential for gluten development.
Precise Dough Division
The straight edge of a scraper lets bakers cleanly cut and portion dough pieces of equal sizes. This ensures loaf uniformity and even baking. Scrapers also cut dough cleanly for preshaping without deflating or degassing the dough. Even division and preshape handling is key for an evenly risen final bake.
While initially thought of as just a cutting tool, scrapers prove useful throughout the entire sourdough process. They minimize sticking issues, limit mess, and enable precise dough handling. Scrapers are affordable must-have accessories that simplify sourdough kneading techniques for beginners. Even experts agree scrapers are invaluable for crafting well-developed loaves perfect for slicing. With practice, bakers can master utilizing a scraper’s abilities for kneading success.
5. Embracing the No-Knead Method for Sourdough
The no-knead method has revolutionized artisan bread baking, proving you can craft bakery-quality loaves at home without laborious kneading. This technique relies on an extended fermentation period to develop the gluten while keeping handling to a minimum. For sourdough, the no-knead approach creates great flavor and rise with way less work.
(Speaking of not needing to knead, have you checked out my no knead sourdough bread recipe?)
Allowing Time to Do the Work
The crux of no-knead baking lies in letting time take the place of kneading. An overnight rest allows the enzymes in the flour to break down starches into simple sugars that feed the yeast and bacteria. The extended fermentation also enables thorough gluten development and gas bubble formation without needing to punch down and re-knead the dough multiple times.
Minimal Dough Handling
With the no-knead method, the dough gets mixed just enough to incorporate ingredients and then takes an undisturbed rest. There is no intensive stretching and folding required during this rest period. The dough simply sits patiently on the counter or in the fridge. This hands-off time allows the sourdough culture to produce acids and carbon dioxide to leaven the bread.
Easy Shaping and Baking
When the bulk fermentation finishes, the dough gets a quick shape and into the oven. Shaping is effortless since the dough is pillowy soft and relaxed after its rest. The dough easily reshapes itself during the oven spring for a great rise. With no-knead, you skip all the exertion of kneading and enjoy better flavor development.
The no-knead approach simplifies sourdough baking down to its essentials. Let time and temperature do the work while you do the tasting. By embracing this laidback method, anyone can become an artisan bread baker overnight.
The Rubaud Method: An Advanced Kneading Technique
The Rubaud Method is an advanced hand kneading technique used by professional artisan bakers to create superior gluten development and dough homogenization. This specialized kneading style was pioneered by renowned French baker Professor Raymond Rubaud. His meticulous research revealed that gently stretching and folding dough in a systematic manner optimizes the gluten network for maximum rise potential and ideal crumb texture.
Achieving Optimal Gluten Development
The hallmark of the Rubaud Method lies in its gentle yet thorough stretching and folding process. Instead of aggressively kneading, the dough is handled with care to align gluten strands without damaging them. The dough is folded repeatedly in the same direction to strengthen gluten bonds. This creates a smooth, elastic dough with a strong network able to capture gas bubbles produced during fermentation. Superior gluten development is vital for crusty artisan loaves with impressive oven spring.
Homogenizing the Dough
In addition to aligning gluten, the Rubaud Method evenly distributes ingredients throughout the dough for proper homogenization. The thorough stretching ensures any pockets of dry flour or dense dough are worked through. This creates a uniform dough consistency ideal for even fermentation and rise. No section of the dough will be under-developed. The result is consistent aeration and lift.
Mastering the Technique
While advanced, home bakers can master the Rubaud Method with practice. Work slowly and methodically, handling the dough with care. Be patient during the stretching and systematic folding process. Proper execution of this specialized kneading technique allows home bakers to achieve bakery-quality sourdough loaves. Don’t be intimidated by the intricacy – with a bit of time and effort, you’ll be rewarded with superior rise, crumb, and oven spring that mirrors artisan perfection.
6. One-Handed Kneading: A Unique Approach
Kneading dough is often seen as a two-handed task, but bakers around the world have adopted the unique technique of one-handed kneading with great success. This method provides excellent dough manipulation and control using just one hand. For those seeking an alternative approach to developing their sourdough dough, the one-handed kneading technique is worth exploring.
Gaining Better Dough Feel
Kneading with one hand keeps your other hand free to get a real “feel” for the dough. You can continuously test the dough’s texture and make slight adjustments as needed. Having a free hand also enables tossing flour or spraying water to hydrate and strengthen the dough on the fly. This hands-on connection during kneading allows you to know exactly when the gluten has developed to the right stage.
Efficient Stretching and Folding
The one-handed method focuses kneading efforts on key stretching and folding motions rather than aimless pushing or pounding. Curling your hand over the top of the dough and pulling down elongates the gluten strands. Quick folds seal in air pockets evenly across the dough mass. Targeted single-handed manipulation achieves superior dough development in less time.
Reduced Sticking and Mess
With just one hand in the dough, there’s less surface area to accumulate messy dough. This keeps your work area and hands cleaner. The dough itself also sticks less when handled with a single hand versus two. The skin of your palm naturally slides across the dough, reducing friction and adherence when kneading. For those who battle dough sticking when kneading, the one-handed approach can help.
While unconventional, one-handed kneading offers unique benefits for sourdough enthusiasts seeking more control and efficiency. Try out this hand kneading technique and experience the sensory joy of dough craftsmanship. You may find this solo hand method becomes your go-to for kneading.
Hands-On Success: Ways to Knead Sourdough
After exploring the diverse sourdough kneading techniques, it’s clear this process is both a science and an art. Scientifically, we know the kneading motion aligns proteins and incorporates air to create lift. But the human touch separates adequate kneading from mastery.
An artisan baker intrinsically senses when the dough has reached that sweet spot of perfect elasticity. Their skilled hands execute time-tested kneading methods handed down for centuries. Yet even armed with this knowledge, remember that the journey to flawless sourdough is a lifelong craft requiring patience and practice.
Sourdough Kneading Techniques: FAQs
How long should sourdough be kneaded?
When kneading sourdough by hand, aim for 10-15 minutes of active kneading time. This allows enough time for the gluten to develop without overworking the dough. Use the windowpane test: when you can stretch a small piece of dough into a thin, translucent sheet without it tearing, your sourdough is ready for bulk fermentation. Kneading for too long can damage the dough structure.
What is the best kneading technique for sourdough?
The stretch-and-fold method is considered the best technique for kneading sourdough. After an initial mix, perform a series of ‘stretch and folds’ every 30 minutes during the first 2 hours of bulk fermentation. This gently develops gluten without overworking the dough. The slap and fold technique also works well. Avoid excessive punching down or aggressive kneading, which can damage the delicate dough structure. Gentle kneading produces the best rise and crumb texture.
How do you know if sourdough is over kneaded?
Signs of over-kneading sourdough include a dried out, sticky dough; resistance when stretching; and visible tears or holes in the dough’s surface. An over-kneaded dough will be dense and lack rise when baked. The gluten strands have been damaged from too much mechanical mixing. Prevent over-kneading by kneading just until the dough passes the windowpane test, then allow gentle stretches during bulk fermentation. The dough should feel smooth and elastic when properly kneaded.


