A bubbly, lively sourdough starter is the foundation for baking perfect artisan loaves. But starters can easily falter, turning sluggish or sour and yielding subpar bread. Don’t despair if your sourdough sidekick seems under the weather – with a bit of troubleshooting, you can nurse it back to robust health. This article will explore the most common issues that plague starters, from improper flour choices to inconsistent fermentation temperatures. You’ll gain insider tips to rescue struggling cultures and maintain the ideal environment for fermentation. Follow our guidance to prevent problems with sourdough starter before they arise and get your next loaf rising high once more.
Table of Contents
- Incorrect Flour Type
- Water Quality Issues
- Improper Feeding Routines
- Inconsistent Temperature
- Understanding Hydration Levels
- Over-Acidification
- Storage and Long-Term Care
- Common Myths and Misconceptions
- Sourdough Starter Troubles? Now You Can Fix Them!
- Common Problems With Sourdough Starter: FAQs
Incorrect Flour Type
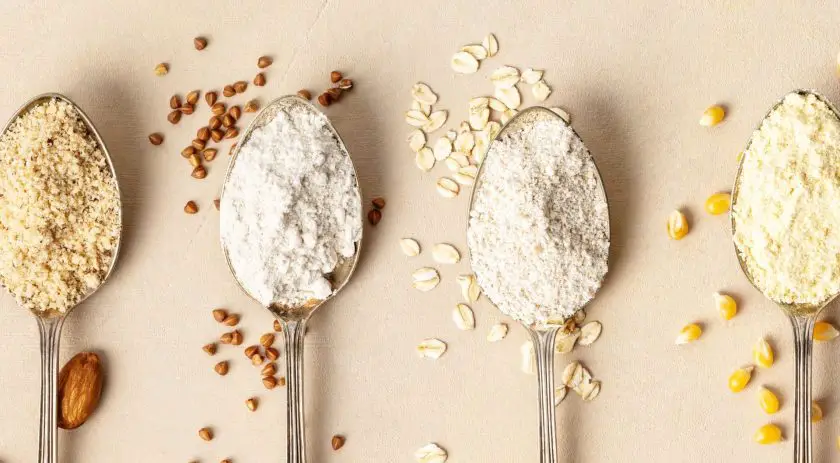
The type of flour used can have a significant impact on the health and viability of a sourdough starter. Not all flours are created equal when it comes to cultivating a robust sourdough culture. Understanding the differences between flours enables bakers to make informed choices that lead to a lively, productive starter.
Whole Grain Flours
Whole grain flours like whole wheat, rye, and spelt contain the bran and germ of the grain and thus have higher nutrition and more flavor compared to refined flours. However, the bran cuts gluten strands leading to a weaker gluten structure. This can make whole grain sourdoughs trickier to work with. The higher fiber content also makes it harder for the yeast and bacteria to digest. So while tempting to use for nutrition, 100% whole grain flours don’t provide the best food for sourdough cultures.
When using whole grains, limit them to 30% or less of the total flour content. For example, a blend of 70% bread flour and 30% whole wheat flour gives you the nutritional benefits of whole wheat while still providing enough gluten strength for the starter. The bread flour acts like a scaffolding supporting the weaker whole grain flour.
All-Purpose Flour
All-purpose flour, made from a blend of soft and hard wheats, is a refined flour with the bran and germ removed. This results in a lower nutritional value but higher gluten content compared to whole wheat flours. The moderately high gluten strength makes AP flour a good choice for maintaining sourdough starters.
However, because AP flour lacks the nutrients and acids present in whole grains, sourdoughs made exclusively with all-purpose can be more prone to less acid production and contamination. Try blending in some whole grain flours to provide food for the yeasts and bacteria. An 80% AP flour and 20% whole wheat flour starter is a good starting point.
Rye Flour
Rye flour contains a pentosan gum that gives it greater water absorption capacity compared to wheat flour. This extra moisture helps ramp up microbial activity. The lower gluten content of rye can be challenging but adding a bit to a wheat-based starter gives it a boost of acidity and enzymatic activity. Limit rye flour to no more than 30% of the total flour weight.
Experiment with different flour combinations to find the perfect balance of microbial food, acidity, and structure for your ideal sourdough starter. Pay close attention to how the starter responds and adjust the flour ratios accordingly.
Water Quality Issues
The quality of the water used to feed and maintain a sourdough starter can have a significant impact on the health and activity of the culture. Hard tap water with high mineral content or water contaminated with chlorine can cause issues that lead to a struggling starter. Understanding how water composition affects fermentation enables bakers to make adjustments for optimal starter performance.
Effects of Chlorine
Municipal tap water is often treated with chlorine, a disinfectant chemical added to make the water safe to drink. However, even small amounts of chlorine can inhibit yeast growth and weaken sourdough cultures over time. The free chlorine reacts with and damages the cell walls of the yeasts and bacteria in the starter.
Consider using non-chlorinated water like bottled spring water or filtered water for feeding and refreshing your starter. Letting heavily chlorinated tap water sit out uncovered for 24 hours before using allows some of the chlorine to dissipate. If tap water must be used, adding a pinch of yeast nutrient or a bit of orange juice can help counteract the antimicrobial action of chlorine.
Mineral Content
Water high in mineral content like calcium, magnesium, and iron can impact the rise of sourdough by interfering with gluten development. These dissolved mineral ions bind to gluten strands, preventing them from forming the strong interconnected network needed to trap fermentation gases.
Hard tap water can be softened by using a water filter. Or if using hard water, counteract the effects by increasing the dough hydration to allow more water absorption, and give the dough additional stretches and folds during bulk fermentation to further strengthen the gluten.
Ideal Water Composition
Ideally, the water used for sourdough starters should have a neutral pH around 7 and low levels of minerals like calcium and magnesium. Non-chlorinated spring water is a good option, as is filtered tap water or distilled water. Avoid alkaline water with a pH over 7 which can inhibit fermentation.
Test your tap water’s pH and mineral content. Make adjustments as needed through filtering, mineral additions, or pH regulators. Paying attention to water quality makes it easier to maintain a healthy, active sourdough starter.
Improper Feeding Routines
Maintaining a healthy, active sourdough starter requires finding the sweet spot when it comes to feeding frequency and the ratio of flour to water. It’s easy to make mistakes in these areas that can lead to a struggling starter. Understanding optimal feeding routines will help ensure your starter stays vigorous.
Finding the Right Feeding Schedule
Determining the ideal feeding frequency for your starter depends on factors like temperature and starter activity. In cooler temperatures, metabolism slows so the starter needs less frequent feedings. When warm and active, sourdough cultures need more regular feedings to flourish.
As a general guideline, aim to feed a starter once every 24 hours at room temperature. If your starter rises and falls between feedings, showing obvious fermentation activity, this is a good feeding cadence. If it barely changes after 24 hours, increase frequency to twice daily. Monitor the rise and fall to find the optimal schedule.
Overfeeding can be just as problematic as underfeeding. Adding too much fresh flour before the starter fully metabolizes a meal stresses the yeast. Signs of overfeeding include a thin, watery starter that separates. Cut back on feedings to let it fully ferment before the next meal.
Dialing in the Flour-Water Ratio
The ideal ratio of flour to water varies based on factors like starter age, temperature, and flour absorbency. Aim for a consistently thick, scoopable texture, adjusting the ratios as needed. As you gain experience with your starter, you’ll intuitively learn how much water it needs.
A good starting point is a 1:1 ratio using equal parts flour and water by weight. If your starter gets too thick, gradually increase the hydration to loosen it up. Avoid going over 100% hydration as excess water makes starters more prone to contamination. Err on the dry side, adding just enough water for a dough-like consistency your starter can ferment.
Consistency is Key
Establishing a consistent feeding routine tuned to your individual starter is crucial. Resist the urge to sporadically feed extra meals or skip feedings altogether. Dramatic fluctuations throw off fermentation and can weaken cultures.
Keep a starter maintenance log to track activity and dial in an optimal schedule. Once you find that sweet spot for your starter stick to it, only tweaking amounts and timing based on direct observations. Consistent, attentive care leads to a robust and reliable sourdough starter.
Inconsistent Temperature
Temperature is a crucial factor regulating the activity of sourdough starter cultures. Fluctuations in ambient temperature can lead to inconsistent and unreliable starter behavior if not properly controlled. As an experienced sourdough baker, it’s important to understand how to manage temperature for optimal starter health.
Impact of Temperature on Yeast and Bacteria
The yeast and bacteria in sourdough starters thrive best within certain temperature ranges. The ideal is between 75-85°F. Colder temperatures cause fermentation to slow. While starters can survive down to freezing, metabolism drops off significantly below 60°F. On the flip side, high heat above 90°F starts inhibiting the microbial activity.
Starters are living organisms that must be fed regularly. When kitchen temperatures drop, the critters don’t need to eat as much or as often. But if you continue feeding at warmer weather frequencies, the starter can become sluggish and overly acidic.
Creating a Warm Environment
To keep your starter perky in cold weather, look for warm spots in your home. Set the starter on top of the fridge where the motor generates gentle heat. Place it near a heating vent or radiator. Use the oven with just the light on for warmth (make sure to remove starter before preheating!).
You can also try the time-tested trick of storing starter in a box with a light bulb. The enclosure traps rising warmth while allowing ventilation. Just monitor temps and adjust wattage to avoid overheating.
Adapting Feeding Schedules
During winter, cut back on feedings to match the slower fermentation rate. In peak summer, increase frequency to keep up with accelerated microbial munching.
Take notes over time to learn your starter’s ideal feeding cadence at different temps. When in doubt, check for signs of activity like bubbles and rise. Feed when it falls, going longer between meals in cool temps. Keeping your starter at a stable temperature and tuned feeding schedule prevents inconsistency.
So be sure to control for temperature, adjusting the environment and feeds accordingly. With the right adjustments, your sourdough sidekick will perform like a champ no matter the weather!
- This room thermometer hygrometer helps measuring the temperature and humidity level in real time. And show the reading continuously in seconds on the large screen with cute icons.
- Simple to get an accurate reading. Turn on and wait for 3~5 minutes for it to calibrate automatically. After calibration, the reading will fluctuate instantaneously due to your room air conditions.
- It features durable kickstand and magnet, allowing position where it should be. Suit for baby nursery, living room, bedroom, outdoor balcony, garage, sauna, bathroom, warehouse, vehicle, refrigerator, guitar case, basement, vacuum-seal jar, cigar humidor, jewelry safe, gun safe, egg incubator, reptile terrarium, tortoise house, aquarium, hermit crab habitat, snake tank, crawl pet terrarium...etc
- The hydrometer humidity meter comes with CR2032 button battery, long last for over 1 year. You can easily turn it off when no using it to save battery life.
- Package includes 2 pcs monitors, you can put 1 monitor in each room. Large digit letters and screen allows seeing from over 10 feet away. You will be proud to use this great product for years to co
Prices pulled from the Amazon Product Advertising API on:
Product prices and availability are accurate as of the date/time indicated and are subject to change. Any price and availability information displayed on [relevant Amazon Site(s), as applicable] at the time of purchase will apply to the purchase of this product.
Understanding Hydration Levels
The hydration level, or percentage of water in a sourdough starter, is a crucial factor affecting the health and activity of the culture. Finding the ideal hydration sweet spot takes experimentation, but understanding the impacts of water content helps bakers adjust starters for optimal fermentation.
Achieving the Right Hydration Ratio
Hydration percentage is calculated by dividing the weight of the water by the total weight of the flour and water. A 100% hydration starter has equal weights of flour and water. Higher percentages mean wetter, more fluid starters. Lower hydration equals thicker, drier starters.
Typical hydration ratios for sourdough fall between 100-125%. High-hydration starters around 125% tend to ferment faster but can be messier to work with. Dropping closer to 100% makes a thicker, more manageable consistency. Starters kept below 100% hydration often ferment poorly and lack fluidity.
The ideal hydration level depends on factors like flour absorbency and fermentation temperature. Finding your starter’s sweet spot takes adjusting the percentage up or down to achieve a consistency that is loose and scoopable but not runny. Observe how your starter reacts over multiple feedings to dial in the perfect ratio.
Impacts of Hydration on Fermentation
Hydration level significantly affects the microbial activity and gas production of sourdough cultures. Wetter starters around 125% hydration contain more available water for the yeast and bacteria to metabolize sugars and thrive. This ramps up fermentation, creating a more lively, bubbly rise.
But drier 100% hydration starters have a thicker consistency that can help trap gas bubbles, allowing for a greater rise despite the slower fermentation rate. Lower hydration percentages also make it easier to spot signs of activity in the starter like bubbles and rise.
Ultimately, the ideal hydration promotes fast, vigorous fermentation while still yielding a starter with enough structure to capture gas and allow a noticeable rise after feeding. Tracking activity at different percentages helps determine the sweet spot.
Adjusting to Find Balance
Getting the hydration right is crucial for starter health. Watch for signs of issues like separation, excessive tang, or minimal rise and tweak the flour-water ratio accordingly. For wet, separating starters, gradually lower hydration by reducing the water. To loosen up a dry, sluggish starter, add a bit more water over several feedings.
Finding balance between too wet and too dry brings out optimal microbial activity. Pay close attention to how your starter responds and adjust the percentages until discovering the ideal hydration sweet spot. With the right consistency, your sourdough sidekick will bubble away happily!
Contamination and Unpleasant Odors
Maintaining proper hygiene and detecting contamination (such as sourdough starter mold) early is crucial for keeping sourdough starters healthy. Unfortunately, sometimes undesirable molds or bacteria find their way into cultures leading to off smells and flavors. But with vigilance and quick action, most contamination issues can be resolved.
Spotting Early Signs of Contamination
The first signs of contamination are subtle changes in the starter’s appearance and aroma. Look for new colors like black, blue, red, or pink which can indicate mold growth. Excessive liquid separating on the top points to overgrowth of bacteria like lactobacillus. An extremely sharp, rancid, or rotten smell means unhealthy bacteria may have taken hold.
Familiarize yourself with your starter’s normal smell and activity. Any deviations could signal a problem needing intervention. Trust your senses – if something seems off, it likely is. Don’t ignore changes hoping they’ll fix themselves. Addressing contamination early maximizes the chances of recovery.
Preventing Cross-Contamination in the Kitchen
Many contamination issues arise from improper sanitation. Avoid introducing unwanted microbes by keeping your kitchen clean when baking. Wash hands, utensils, and containers thoroughly with hot soapy water. Don’t use the same implements for starter and raw doughs. Replace worn utensils that can harbor bacteria in crevices.
Take care not to expose starters to airborne contaminants like mold spores. Keep lids sealed when not baking. Transfer starters to clean jars periodically. Follow strict protocols when adding fruit, juices or other starter additions to prevent introduction of unhealthy yeast and bacteria.
Recovering from Minor Contamination
If caught early, minor contamination can often be reversed. First, confirm it visually and through smell. Then thoroughly clean the starter jar with very hot water and replace any utensils that contacted the culture.
Discard all but a tablespoon of the starter and begin rebuilding with fresh flour and water. Feed 2-3 times daily, checking carefully for return of off smells or colors. With diligent refreshing, you can often rehabilitate mildly contaminated starters. But if issues persist, it may be time to start over.
Staying alert to signs of contamination and maintaining pristine kitchen hygiene are the best defenses against sourdough distress. But even if problems with sourdough starter arise, quick intervention can get starters back on the right fermentation track.
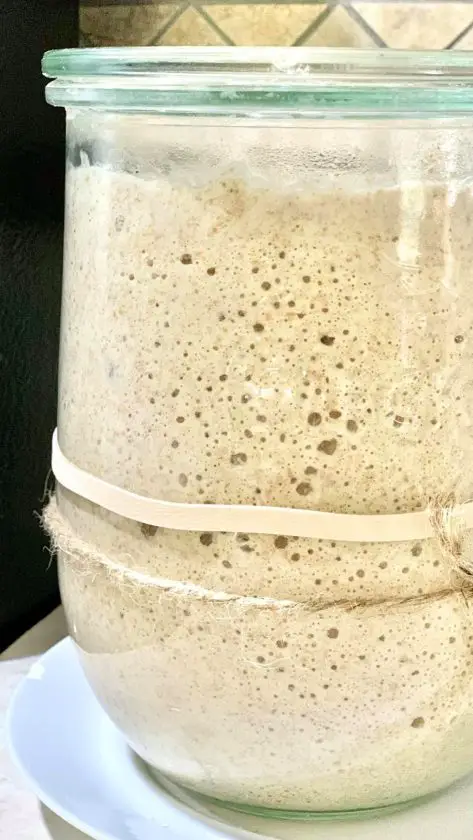
Over-Acidification
Achieving the ideal balance of acidity is crucial for a healthy, active sourdough starter. But sometimes overzealous fermentation can lead to an overly acidic culture, resulting in a sour taste and other issues. Understanding the causes of over-acidification and methods to bring starter pH back into balance helps bakers maintain robust starters.
Causes of Excess Acidity
Several factors can cause sourdough starters to become too tart and acidic over time:
Infrequent Feedings
Allowing a starter to go too long between feedings means the yeast and bacteria produce more acids than the culture can handle. Stick to a regular feeding schedule to prevent over-acidification.
Warm Temperatures
Heat accelerates fermentation and acid production. During summer, you may need to increase feeding frequency to keep acidity in check.
High Hydration
Wet starters with a higher percentage of water ferment rapidly, which can drive down pH. Try reducing hydration to slow acidification.
Overly Active Cultures
Vigorous starters with huge rises and falls quickly acidify. Cut back on the amount of mature starter left after feedings to limit acid buildup.
Correcting High Acidity
Luckily, over-acidification can usually be reversed with a few simple techniques:
Discard More
When feeding, reduce the amount of old starter retained to lower the acidity concentration. Discard at least 80% and refresh with fresh flour and water.
Switch Up Flours
Substitute mild wheat-based flours for a portion of the rye or whole grains to dilute acidity. White bread flour is a good option.
Increase Feedings
Feed small amounts more frequently to prevent the starter from fully fermenting between meals. This limits acid production.
Adjust Hydration
Decrease water and increase flour slightly when feeding to reduce water content and slow fermentation.
With attentive feeds and flour adjustments, you can bring your starter’s tangy pH back to the sweet spot. Trust your senses and tweak acidity gradually for the perfect fermented flavor.
Storage and Long-Term Care
Every sourdough baker inevitably faces the dilemma of what to do with their precious starter when not baking daily. Proper storage is key for keeping sourdough cultures alive during downtimes. With the right techniques, you can stash your sourdough in the fridge or freezer for weeks and revive it whenever a baking craving strikes.
Refrigerator Storage
The easiest way to store a starter short-term is right in your fridge. This slows fermentation to a near halt, allowing the culture to keep for 5-7 days without needing a feed.
Transfer your fed starter to a clean jar, allow it to rise a bit at room temp, then pop it in the fridge. Over time it will separate and form a dark liquid on top – don’t worry, this is normal! To revive, pour off the hooch, mix the starter to recombine, and feed it 1-2 times at room temp before using.
Keep starters for up to 3 weeks in the fridge by pouring off hooch and stirring every 1-2 weeks. Add a small feed if it seems sluggish to perk it up. The chilly fridge is great for short breaks of a week or two.
Dried Starter Storage
For long-term storage of many months, drying out sourdough cultures into a dormant state works beautifully. Dried starters take up little space and can be easily rehydrated when ready to bake.
To dry out a starter, stir in some flour until a very thick, scoopable consistency. Dollop spoonfuls onto a parchment-lined tray and allow to dry completely at room temp over 2-3 days. The pieces will harden to an almost brittle state. Store in an airtight container in the fridge or freezer.
When ready to use, take out a piece of dried starter and reactivate it in flour and water. Feed it over 24-48 hours to bring back to life. Dried starter can easily last 6 months in the fridge or a year in the freezer.
Maintaining a Healthy Culture
No matter how you store it, discard at least half of your old starter before feeding to keep acidity in check. Avoid extended storage times over a month, as starters can weaken. Take your refreshed starter through a couple rises at room temp to ensure it’s lively before baking.
With smart strategies for stowing and reviving, you can keep your precious sourdough culture alive through busy times and long breaks. Take advantage of the fridge and freezer to enjoy homemade bread whenever the craving hits!
Common Myths and Misconceptions
When it comes to caring for sourdough starters, many myths and misconceptions abound. As a passionate sourdough baker, it’s important to separate fact from fiction to keep your starter healthy and happy. Let’s debunk some common sourdough myths!
Feeding Starters Every Day
A common myth is that sourdough starters need to be fed daily without fail. In fact, the feeding frequency can vary based on factors like temperature and activity level. Cooler starters may only need feeds every 48-72 hours whereas very active starters can be fed twice daily. The key is observing the rise and fall cycle and only feeding once it begins to fall. Don’t overload starters with excess food by sticking to a rigid schedule.
Using Tap Water
Some claim tap water should never be used for starters due to chlorine content. But a pinch of yeast nutrient or vitamin C powder can help neutralize chlorine. Or just let tap water sit out uncovered overnight before using. The minerals in hard water can be an issue but can be mitigated by increasing dough hydration and kneading well. With precautions, tap water can definitely be used for starters.
100% Hydration is Best
Many assert that the best hydration level for starters is 100% meaning equal weights of flour and water. However, starters can thrive at hydrations from 80-125% depending on factors like flour type, temperature, and age of the starter. Aim for a scoopable, dough-like consistency that allows for noticeable rise. Don’t blindly adhere to any single hydration level as the sweet spot varies.
Rye Starters Are Superior
While rye flour contains sugars and pentosans that boost microbial activity, rye gluten is weak. Using 100% rye will likely result in a starter that can’t hold its structure. Maintaining a wheat-based starter and adding up to 30% rye works better. And you can still achieve great rise with a predominantly white flour starter. Don’t assume rye is inherently superior.
Starters Should Never Smell Bad
It’s a myth that sourdough starters should never have any off odors. In reality, as lactic acid bacteria build up, starters can go through lulls with increased acidity and more vinegary smells. Unless the aroma is truly putrid, it’s likely just a temporary phase. Let it work through the slump with a couple extra feedings before deciding your starter has turned bad.
With knowledge and experience, we can identify the fiction from the fact when it comes to sourdough care. Trust your observations, stay adaptable, and keep an open mind. Your starter will let you know what it needs to thrive!
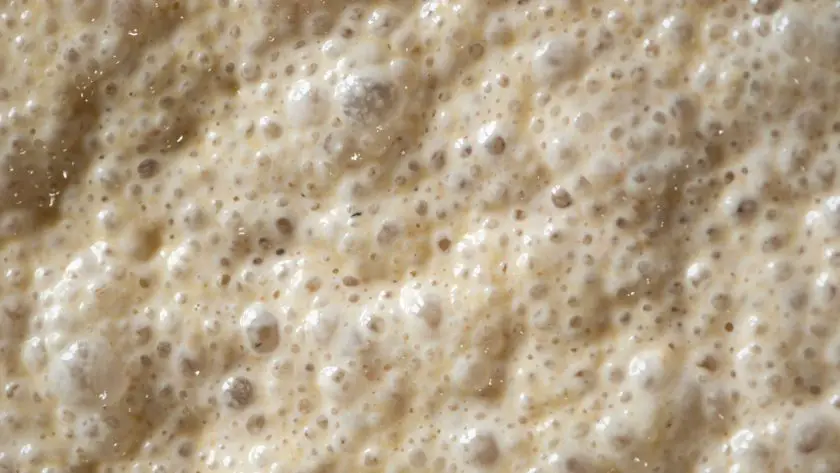
Sourdough Starter Troubles? Now You Can Fix Them!
While caring for a starter may seem intimidating at first, understanding it is the key to success.
May your starter thrive and provide daily joy as you continue on your delicious journey into the magical world of sourdough baking! With an attentive approach and passion for the process, you are sure to find success and satisfaction in nurturing your very own sourdough sidekick.
Common Problems With Sourdough Starter: FAQs
How do I know if my sourdough starter is bad?
Signs of a bad starter include mold growth, putrid odors, excessive liquid separation, minimal rise and fall after feeding, very thick texture, or overly acidic flavor. Trust your senses – if the starter smells rancid or shows new colors, intervention is needed. Discard all but a bit of starter and begin rebuilding the culture with fresh flour and water to reverse minor contamination issues.
What can ruin a sourdough starter?
Many factors can disrupt sourdough starter health. Improper hydration, inconsistent temperatures, chlorinated water, and cross-contamination are common issues. Overfeeding, underfeeding, and dramatic pH changes also damage starters. Using low-quality or solely whole grain flours provides insufficient food. With attentive care and quick intervention at the first signs of trouble, most starter setbacks can be reversed. Avoid starter ruiners through diligent maintenance.
Why is my sourdough starter bubbling but not rising?
When a starter shows bubbles but minimal rise, the yeast populations are lagging. This could be due to over-acidity, temperature fluctuation, chlorinated water, or lack of food. Try feeding with non-chlorinated water at a consistent warm temp, using a mixture of white and whole wheat flours. Discard most of the old starter to reduce acidity. With optimal conditions, the yeast activity should rebound.


![What To Do With Leftover Sourdough Bread [15 Best Ideas] 10 What to do with leftover sourdough bread [15 best ideas]](https://www.mydailysourdoughbread.com/wp-content/uploads/2023/06/leftover-sourdough-120x120.jpg)

