Making delicious sourdough bread from scratch seems like an impossible feat for many beginners. Between culturing a starter, kneading techniques, and baking, it can feel daunting knowing where to start. Can one master sourdough bread baking? With the right guidance on the key sourdough steps – from an active starter culture to proofing and beyond – new bakers can unlock the satisfying art and science of crafting wholesome homemade loaves. This beginner’s guide breaks down the entire process, from ingredients to solving common issues, PLUS tips to help you bake up the perfect artisan sourdough. Forget dense store-bought bread, and let this starter-to-loaf handbook give you the knowledge to make your own nourishing, delicious sourdough loaves.
Table of Contents
- What to Know as a Beginner Sourdough Baker
- Basic Ingredients of Sourdough Bread
- Things to Watch Out For Before Starting
- Creating Your Own Sourdough Starter
- Mixing and Kneading Sourdough Dough
- First Fermentation
- Shaping and Second Fermentation
- Baking Your Sourdough Bread
- Common Sourdough Problems and Fixes
- Sourdough Bread Benefits
- Begin Your Sourdough Bread Journey Today!
- FAQs for Beginner’s Sourdough Bread
What to Know as a Beginner Sourdough Baker
Making sourdough bread can seem daunting for beginners, but familiarizing yourself with the basics sets you up for sourdough success. With a little background knowledge and the right techniques, you’ll be baking beautiful loaves from any sourdough recipe in no time.
What is Sourdough Bread?
Sourdough bread is a special kind of bread that’s made using a mix of flour and water left to gather natural yeasts and good bacteria from the air. This mix, called a “starter,” helps the bread rise and gives it a unique, slightly tangy taste that’s different from regular bread made with store-bought yeast.
The process of making sourdough takes a bit longer, but it’s worth it because it creates a bread that’s not only yummy but also easier on the tummy for some folks. Plus, it’s got this great, crunchy crust and a nice chewy middle that bread lovers really enjoy.
Sourdough Process Overview
Sourdough starts with a starter, which is a mixture of flour and water that captures wild yeast and bacteria from the air. Feeding the starter regularly allows the yeast and bacteria to produce lactic acid and carbon dioxide, giving sourdough its tangy flavor and rise.
Once your starter is active, you’ll mix part of it with flour and water to make a dough. After kneading and proofing the dough to develop gluten, it’s ready for shaping and the final rise. The long fermentation gives sourdough bread its characteristic open crumb and complex flavor. With just a few core steps, you can learn the basics of the sourdough process.
Importance of Patience and Precision
When starting out with sourdough, two key things to remember are patience and precision. Because sourdough relies on natural fermentation, having patience is crucial. You can’t rush the timings when building your starter, proofing the dough, or waiting for it to rise. Being precise with measurements, temperatures, and timing also ensures your sourdough comes out right.
Maintaining Your Starter
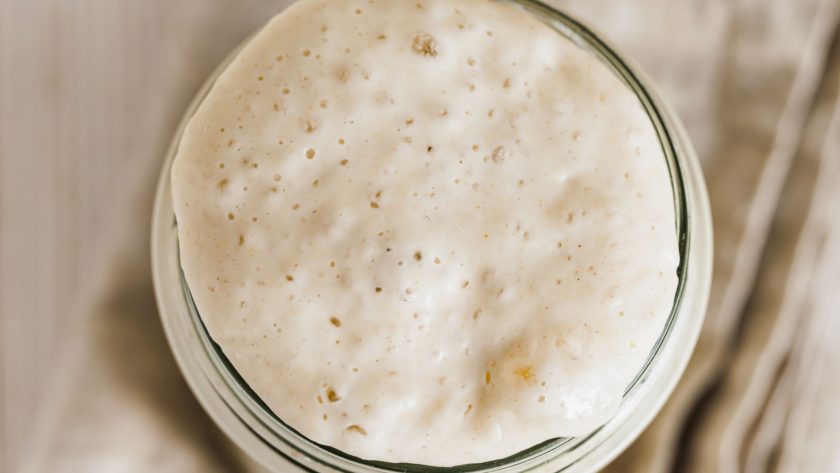
A healthy starter is essential for tasty sourdough. Starters need regular feedings with flour and water to keep the yeast active. Feed at least once a week if storing in the fridge or daily if left at room temperature. Look for bubbles and a sour aroma as signs your starter is robust. If it develops a layer of liquid (hooch) on top between feedings, stir it back in.
Staying on top of starter maintenance takes some work, but it’s vital for sourdough success.
Understanding the Fermentation Process
Fermentation is what gives sourdough its distinctive flavor and texture. After mixing the dough, bulk fermentation allows the yeast, bacteria, and enzymes in the starter to produce gases and acids. Watch for the dough to increase in size and develop bubbles underneath. Shaping and final proofing let the shaped loaves ferment further and rise. Judging when the dough is properly fermented takes practice but pays off in the final loaf.
Additional Tips for Beginners
- Use quality bread flour with higher protein content. This allows better gluten development and dough rise.
- Craft your dough with care. Gentle handling prevents deflating gas pockets.
- Score loaves before baking with 1⁄4 inch deep cuts. This encourages even rising. (Read more in my blog post on how to score sourdough bread)
- Use a digital thermometer and scale for accuracy with temperatures and weights.
- Bake in a preheated Dutch oven or on a baking stone to aid crust formation.
Be patient, precise, and above all, have fun! Approach it step-by-step and soon you’ll be pulling a fresh homemade loaf of sourdough bread from the oven.
Basic Ingredients of Sourdough Bread
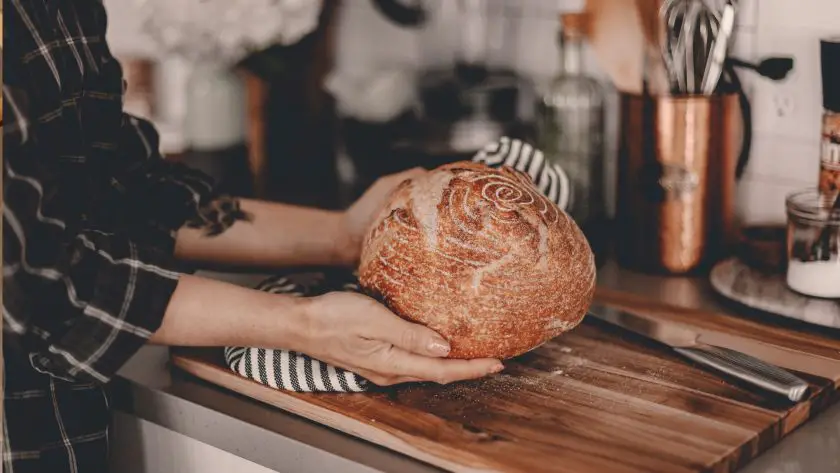
While sourdough bread only requires a few basic ingredients, choosing the right flour, water, and other elements makes a big difference in the final loaf. Understanding how each ingredient functions will help you bake tasty artisan bread.
Flour Types
Flour provides structure and food for the yeast in sourdough. Bread flour with 12-14% protein content gives the best rise and chewy crumb. The gluten strands develop well during kneading. Whole grain flours add depth of flavor and nutrients but may need extra water. Mixing flours like rye or whole wheat with bread flour creates a hearty loaf.
You can of course use all-purpose flour, but note that it doesn’t have enough protein compared to the suggested flours to use.
The Role of Water
Water hydrates the flour proteins to form gluten and allows the dough to be workable. The amount of water impacts dough consistency. Higher water content makes a wetter, more open crumb while less water produces a denser texture. Water temperature also matters. Warm water (80-90°F) aids yeast activity for faster rises.
Tap water is fine, but filtered water prevents off tastes.
Importance of Salt
While only a small amount is used, salt is essential for flavor development and managing the yeast. It strengthens gluten, allowing gas bubbles to expand without bursting. Too much salt slows fermentation; too little makes overly active yeast with big holes in the crumb.
I suggest to use fine sea salt or kosher salt at 1.5-2% of flour weight.
Optional Additions
Extras like herbs, olives, or nuts can enhance flavor. Soak dried fruit to plump before adding to the dough. Hearty additions like whole grains or seeds require a soaker to soften before mixing. Limit additions to 30% of total flour weight so the gluten can still develop.
Managing the Yeast
Sourdough’s wild yeast needs special care. Establish a starter with mature yeast and bacteria before baking. Feed and maintain the starter properly to balance yeast activity. Use active starter at its peak, avoiding old starter. Manage dough temperature and rise times to allow fermentation without over-proofing. Sourdough’s yeast requires more time and finesse than commercial yeast.
Choosing Ingredients Wisely
- Use fresh, high-quality ingredients where possible. Old flours or stale additions create off tastes.
- Weigh dry ingredients rather than using cup measures for accuracy.
- Learn your flours. Different brands absorb water differently, so the moisture level may need adjusting.
- Store opened flours in the freezer to prevent them from going rancid.
Delicious homemade sourdough bread depends on the simplicity and quality of ingredients. Pay attention as you experiment to see how adjustments impact the final loaf.
Things to Watch Out For Before Starting
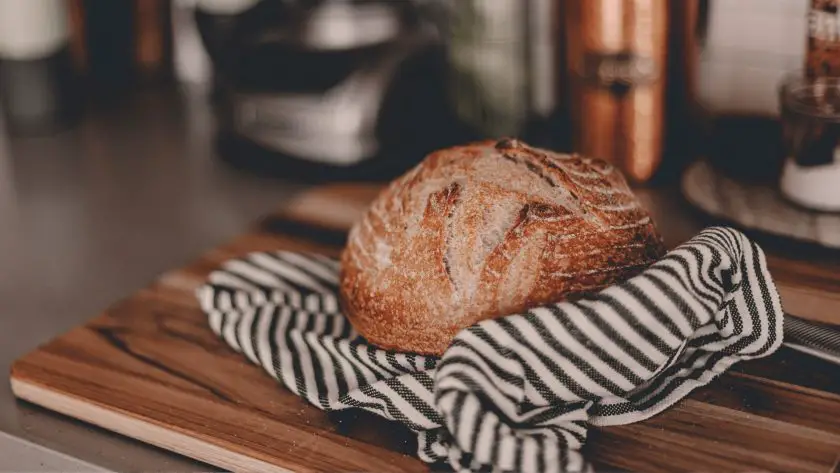
When baking sourdough, there are a few common issues that can trip up beginners. Being aware of these potential pitfalls means you can take steps to avoid them on your sourdough journey. With careful attention to ingredients, environment, and timing, you’ll be on the path to success.
Managing Kitchen Temperature
Sourdough needs warm conditions to ferment and rise properly. Dough responds slowly in a cold kitchen. On the flip side, overly hot conditions cause the yeast to work too quickly. Ideal fermentation temperature is 78-82°F. Consider proofing in an oven with the light on. In winter, you may need a space heater. Don’t proof dough in drafty areas.
Overhandling the Dough
It’s easy to deflate the bread dough when shaping it. Excessive kneading or rough handling damages the gas bubble structure. Work gingerly when folding and shaping. Let the dough rest between steps so the gluten can relax. With practice, you’ll develop a gentle touch.
Not Degassing Properly
Failing to punch down dough adequately after the bulk rise can mean dense bread with too many big air pockets. Fold the dough a few times to press out large bubbles. Aim to keep some smaller bubbles for lightness. Remember to handle the dough gently when degassing.
Rushing the Process
Have patience at every stage. Yeast needs time to work, and dough needs time to proof fully. Don’t cut bulk fermentation or proofing times short. However, don’t go overly long either. Learn the ideal timing for your kitchen temperature. Test dough for readiness instead of relying solely on time.
Tips for Avoiding Pitfalls
- Use an instant-read thermometer to monitor dough and kitchen temperature.
- Weigh ingredients for consistency versus using cup measures.
- Scale back water slightly until you know how a new flour absorbs hydration.
- Proof in a warm, draft-free spot like inside a microwave or oven.
- Shape dough gently without over-handling it. Let it relax between folds.
- Watch for dough to double in size, test for jiggle, and check for air bubbles.
Don’t get discouraged by the occasional flop – every baker encounters pitfalls as part of the learning process.
Creating Your Own Sourdough Starter
A sourdough starter is the foundation for great sourdough bread. Making your own starter at home allows you to control the ingredients and process. With a simple mixture of flour and water and some feeding schedules, you’ll have a bubbling starter in no time.
Ingredients for Starter
- All-purpose or bread flour
- Filtered or bottled water
- Container to store starter
Step-by-Step Starter Guide
- Mix 1/2 cup flour and 1/2 cup lukewarm water in your container. Stir until well combined.
- Loosely cover and let sit at room temperature for 24 hours. Bubbles may start forming.
- After 24 hours, discard half the starter and add 1/2 cup flour and 1/2 cup water. Mix well.
- Repeat discarding half and feeding every 24 hours for 5-7 days. Activity should increase each day.
- By days 5-7, it should double in size after feeding. Allow it to peak then fall before feeding again.
- Continue feeding 1-2 times per day to maintain an active starter for baking.
If you need a more detailed schedule and procedure, I made a thorough guide in my blog for How to Make Sourdough Starter like a pro.
Signs of a Healthy Starter
- Doubling in size within 4-8 hours of feeding
- Presence of bubbles throughout
- Sour aroma – slightly tangy but not rancid
- Able to float in water after peaking
- Fresh, yeasty flavor when tasted
Tips for a Robust Starter
- Avoid using bleached flour, tap water with heavy chlorination, or metal containers, as these can inhibit fermentation. Glass jars or plastic containers work well.
- Use organic flour without preservatives or additives
- Feed with lukewarm filtered water around 80°F
- Always use clean utensils and containers
- Stir well when mixing in new flour and water
- Allow peaks and valleys between feedings to build strength
Keep your starter fed, and your starter will provide the basis for naturally leavened homemade bread again and again.
Mixing and Kneading Sourdough Dough
Properly mixing and kneading are important steps in sourdough bread making. These techniques blend ingredients, hydrate the dough, and develop gluten for rise and structure.
At this stage of creating bread dough for sourdough bread baking, combine your active sourdough starter with flour, water, and salt.
Mixing by Hand vs Stand Mixer
Mixing by hand uses a bowl and spoon or spatula. Stir the flour, water, starter, and salt until combined into a shaggy dough. A stand mixer with a dough hook efficiently mixes dough in 3-5 minutes. But hand mixing lets you feel dough consistency and make adjustments.
Achieving the Right Dough Texture
The properly mixed dough should be tacky but not overly sticky. All ingredients are incorporated with no dry spots. With kneading, it will become smooth and elastic.
If too dry, sprinkle in water; if too wet, add flour. The ideal texture forms a ball and pulls away cleanly from the bowl.
Kneading by Hand
Knead dough on a lightly floured surface for 10-15 minutes. Stretch dough away from you, then fold back on itself. Push into the dough with the heels of your hands. Rotate and repeat. Form it into a ball periodically. It will become smooth and elastic when kneaded sufficiently.
Kneading With a Stand Mixer
Attach the dough hook and mix on low speed for 5-8 minutes. Stop to scrape down sides as needed. The dough should form a compact ball and pull away from the bowl sides when ready.
Resist over-mixing which can damage gluten strands.
Signs of Proper Kneading
- Smooth, elastic texture
- Passes the windowpane test – stretches thin without tearing
- Holds shape when formed into a ball
- Surface is soft, not sticky or dry
Tips for Great Kneading
- Keep dough hydrated – sprinkle water or flour as needed
- Work slowly to prevent overheating dough
- Knead just until dough is smooth and bounces back when poked
- Add any extras like herbs after kneading to avoid damaging gluten
- Rest dough for 20-30 minutes before the next rise
With practice, you’ll learn to gauge dough’s readiness through touch. Take your time and enjoy this soothing, hands-on process.
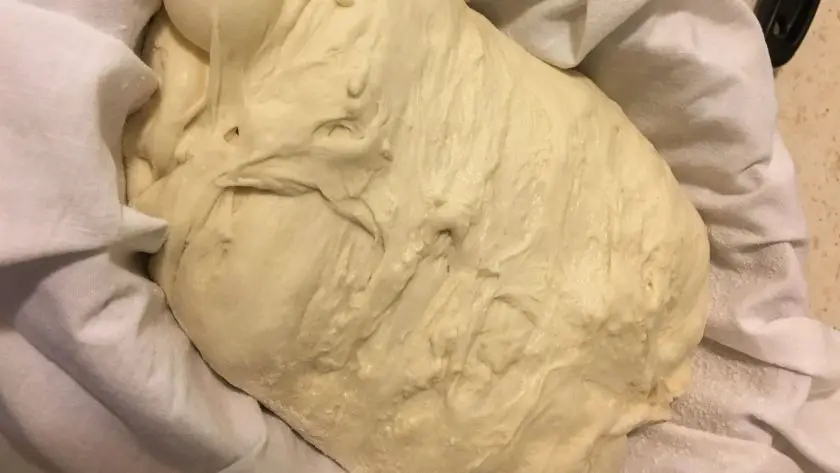
First Fermentation
After kneading, the next key step is allowing the dough to ferment and rise.
This first fermentation, also called bulk fermentation, enables the yeast to produce gas and flavor. Proper timing and temperature control results in well-risen dough before shaping.
Duration of Bulk Fermentation
Bulk fermentation generally takes 3-5 hours. The ideal time depends on the starter’s vigor and kitchen temperature. In a warm kitchen, fermentation may only take 2-3 hours. In cooler conditions, allow 4-5 hours or more. Watch the dough rather than relying solely on time.
Ideal Temperature for Fermentation
The best temperature for bulk fermentation is around 78-82°F. Warm conditions accelerate yeast activity while cooler temps slow it down. To maintain the right temperature, proof the dough in an oven with the light on or use a space heater or heating pad if needed.
Signs Dough is Ready After Bulk Fermentation
- Roughly doubled in size
- Surface shows small bubbles
- Dough jiggles when shaken and feels airy
- Passes the “float test” when placed in water
- Slight sour aroma
- Loses tackiness and feels lighter
Monitoring the Process
Check dough periodically during bulk fermentation. Look for a steady rise, bubbles, and light feel. If it rises then collapses, the yeast peaked too soon. If not rising sufficiently, give it more time in warm conditions. Adapt timing as needed in future bakes.
Handling Risen Dough
Once adequately fermented, the dough must be gently “punched down” to press out large air pockets before shaping. Do this by folding the dough inwards repeatedly. Handle the dough with care to avoid deflating all the rise.
Benefits of Proper Bulk Fermentation
- Allows yeast and bacteria to produce gases and acids for rise and flavor.
- Generates an open crumb structure with irregular holes.
- Creates complex, tangy sourdough flavor.
- Makes dough easier to handle when shaping.
With practice, you’ll learn how your starter behaves and be able to perfect the first fermentation for superior taste and texture.
Shaping and Second Fermentation
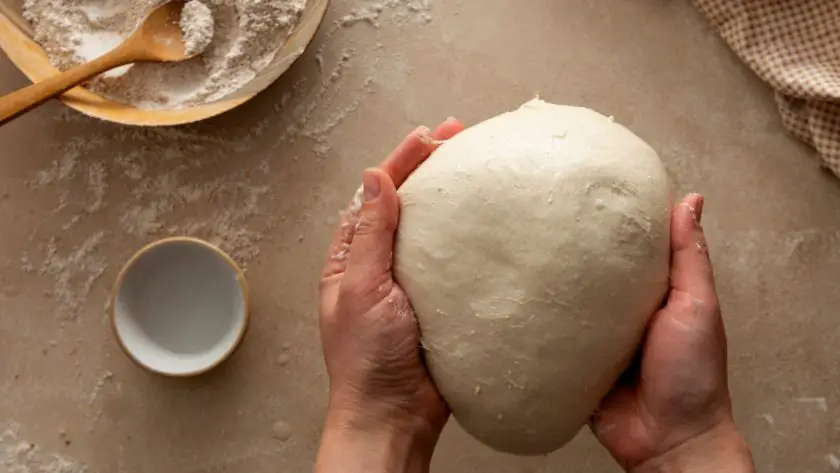
After the dough has risen sufficiently during bulk fermentation, the next steps are shaping it and allowing a second fermentation. Careful shaping creates the loaf’s final form.
The second proof lets the shaped dough relax and rise again before baking.
Shaping Methods
There are several techniques for shaping sourdough dough:
- Boule – Pull edges of dough into center bottom; flip over and form into a round ball.
- Bâtard – Flatten dough into a rectangle; fold sides to the middle then roll tight.
- Rolls – Form dough into small balls about 2-3 inches wide.
- Braided loaf – Divide into three pieces, roll into ropes, and braid together.
For beginners though, I recommend starting with a round sourdough boule. You’re going to want to handle your dough gently, especially at first. Other shapes might be overwhelming to figure out, and you might find yourself behind your baking schedule!
Preparing for Final Proof
After shaping, seam side down, place dough in a floured banneton or cloth lined bowl to proof. Lightly flour the top and cover with plastic wrap. For a boule, use a bowl; for a batard use a long oval basket.
Second Fermentation Duration
The second fermentation usually takes 1-2 hours at room temperature. In cooler conditions, allow up to 3 hours. Test dough periodically by gently poking – it should slowly spring back when ready.
Scoring Dough Before Baking
Use a lame or sharp knife to score the top 1⁄4 inch deep before baking. Scoring releases tension and allows the bread to rise evenly. Make designs like a square, asterisk, or leaf pattern. Score batards down the center.
Benefits of Second Fermentation
- Allows yeast more time to produce gas and flavor
- Lets dough relax after shaping so it doesn’t retract
- Creates an even finer, silkier crumb texture
- Contributes to a thicker, crisper crust
Monitoring Proofing Progress
Check dough occasionally while proofing. Though dough rest is important, too much can be bad. Look for dough to puff up slightly and jiggle slowly when poked. Don’t let it over proof or it may collapse. Score and bake as soon as dough is ready.
Preventing Deflation After Shaping
- Proof seam side down to prevent openings at seams
- Cover dough loosely so plastic doesn’t stick
- Work gently when transferring dough to prevent degassing
With practice shaping and proofing, you’ll achieve an artfully formed and evenly risen sourdough loaf.
Baking Your Sourdough Bread
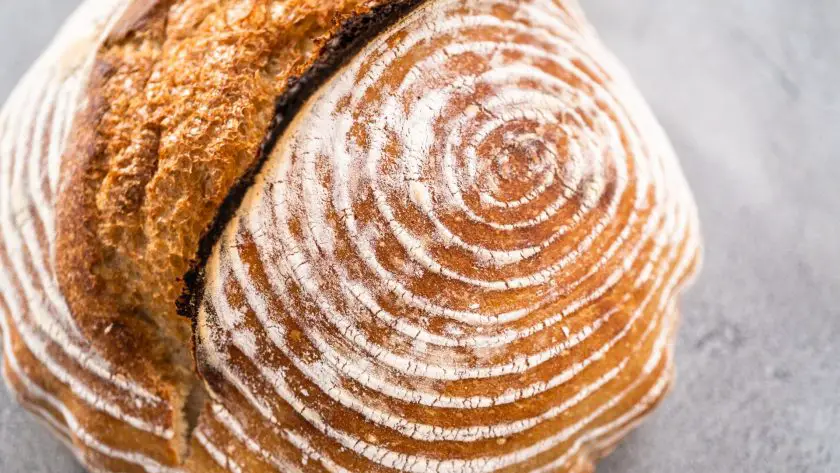
With your dough fully proofed, it’s finally time to bake your masterpiece. Use the right oven setup and techniques to transform your loaf from a pale dough ball into a golden brown crusty loaf. Baking encourages final rise, sets the crumb, and creates a crackly crust.
Preparing the Oven
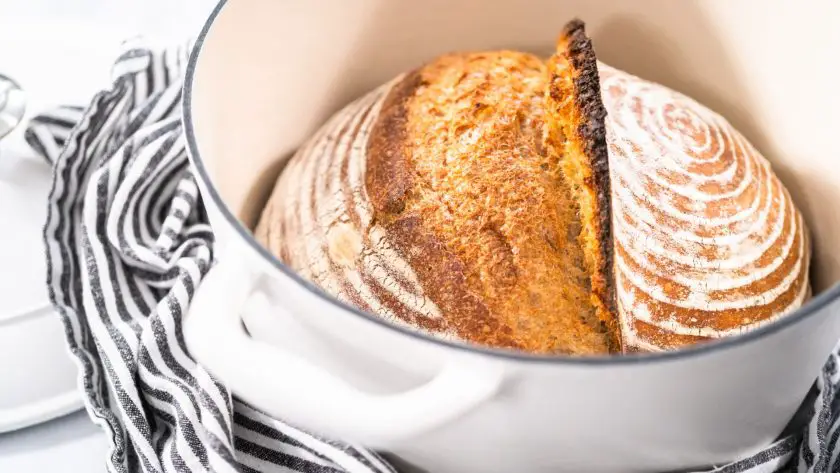
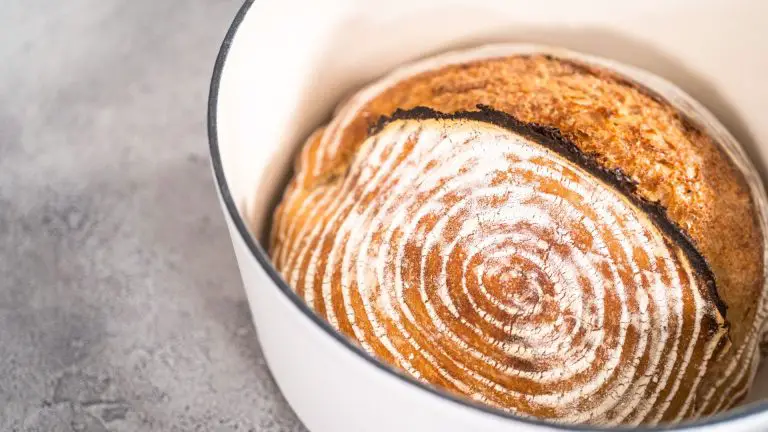
Sourdough bread bakes best at a high temperature – between 450-500°F. Place a cast iron Dutch oven or clay baker with lid in the cold oven. Preheat for at least 30 minutes so it gets ripping hot. The retained heat will create steam to help the bread rise and set the crust.
Steam for Oven Spring
Right before loading dough, pour 1 cup of ice cubes into the preheated pot/dish. This creates steam which allows the bread to rise rapidly. Quick steam is essential for maximum “oven spring”.
Scoring Before Baking Sourdough
Score 1⁄4 inch deep cuts across the top of dough just before baking sourdough bread. This encourages the bread to rise evenly and prevents splits. Various designs like leaf or square patterns add artistry.
Bake Sourdough Bread
- Place dough seam side up in the preheated pot. Cover and bake for 20-30 minutes.
- Remove lid and bake bread uncovered for 15-25 more minutes until deep brown.
- Check internal temperature – it should register 208-210°F when done.
- Cool on a wire rack before slicing to allow moisture to redistribute.
Tips for Perfect Oven Spring
- Ensure your Dutch oven is piping hot before loading dough
- Work swiftly to score and load right after adding steam
- Tightly seal pot with lid during covered baking
- Rotate loaf halfway through for even browning
With a well-risen dough and the right baking techniques, your sourdough will bloom beautifully in the oven and emerge with the perfect crusty chew.
Common Sourdough Problems and Fixes
When baking sourdough, issues can pop up that lead to less than ideal results. Don’t fret! Many common sourdough problems have simple solutions. With some tweaking of ingredients, environment, and techniques, your sourdough woes can easily be remedied.
Inactive Starter
If your starter isn’t rising or is taking longer than usual, the yeast may need a boost. Try discarding all but a tablespoon of it, then feeding with warm filtered water and rye or whole wheat flour which have more nutrients for yeast. Store at room temperature out of drafts.
Dough Not Rising
Dough needs adequate fermentation time in a warm environment to rise properly. Allow at least 4-8 hours for fermentation and proof in an oven with the light on. Check that your yeast is active by testing your starter. Kneading strengthens gluten – overmixing can prevent rise.
Dense, Heavy Crumb
A dense crumb lacking large irregular holes can be caused by multiple issues. Consider insufficient kneading, poor gluten development, under proofing, inactive starter, and excessive degassing. Be gentle when handling risen dough to preserve air pockets.
Too Much Oven Spring
If your loaf rises rapidly in the oven and then collapses, the dough was likely overproofed. Reduce proofing time, watch for dough to double in size, and check for readiness before baking. Score deeper to allow for extra oven spring as well.
Flat Loaf
A flat loaf can happen when dough lacks strength to rise properly. Try using bread flour instead of AP flour, knead thoroughly to develop gluten, and proof fully before scoring and baking. If your starter is old, make a new active one.
Dense Loaf with Large Air Pockets
Large holes surrounded by dense bread can occur when dough isn’t degased adequately after the first rise. Gently fold and press dough multiple times to evenly distribute air pockets before the final proof.
Sourdough Bread Benefits
Beyond a tasty artisan loaf, sourdough offers several health and nutritional benefits over other breads. From its high nutrient bioavailability to unique flavor compounds, sourdough provides positives for gut health, nutrition, and enjoyment.
Tips for Healthy Sourdough
- Choose whole grain versions for extra fiber and nutrients
- Opt for sourdough with minimal additives
- Pair with protein sources like eggs or avocado to balance the carb load
- Limit portion sizes to 1-2 slices per meal
Begin Your Sourdough Bread Journey Today!
Sourdough baking may seem intimidating at first, but can become a rewarding and delicious hobby once you understand the basic principles.
Mastering your starter, learning proper kneading and fermentation techniques, and applying the right baking methods will lead to artisanal loaves. Some trial and error is normal, so don’t worry.
With a few core ingredients and the right environmental conditions, anyone can craft wholesome, homemade and easy sourdough bread. Beyond just the satisfaction of the process, you’ll be rewarded with a nutritious and flavorful loaf far superior to store-bought bread.
As you continue to experiment and refine your skills, remember to enjoy the journey. Sourdough baking is a practice that rewards attention and care. Let the tips in this guide set you up for success, then put your creativity to work. The possibilities are endless when it comes to mastering sourdough in your own kitchen!
Ready for more delicious bread? Check out more sourdough bread recipes on the blog!
FAQs for Beginner’s Sourdough Bread
What is the secret to a good sourdough starter?
The secret to a good sourdough starter lies in the balance of flour, water, and time. By mixing equal parts of flour and water, and allowing it to ferment in a warm, consistent environment, you cultivate natural yeasts and beneficial bacteria. Regular feeding and patience are key, as a well-developed starter can take about a week to mature, leading to richer flavors and better bread texture.
Is it hard to make sourdough bread?
Making sourdough bread isn’t necessarily hard, but it requires patience and attention to detail. While it takes time to master the subtleties of texture and flavor, even beginners can enjoy the journey. The effort pays off with delicious, homemade bread that’s both rewarding and a delight to share.
What are the pros and cons of sourdough bread?
Pros of sourdough bread include its unique tangy flavor and improved digestibility, as the fermentation process breaks down gluten. It also boasts a longer shelf life and is often more nutritious, with increased availability of vitamins and a lower glycemic index. However, the cons include a time-consuming preparation process, requiring a commitment to maintain the starter, and the potential for inconsistent results, especially for beginners.
Sourdough Bread Recipe for Beginners
Here is the step-by-step sourdough bread recipe that’s beginner-friendly!
- Total Time: 5-6 days
- Yield: 1 loaf 1x
Ingredients
- 500g bread flour
- 350g water
- 10g salt
- 100g active sourdough starter
Tools
- Mixing bowl
- Wooden spoon
- Kitchen scale
- Plastic wrap
- Proofing basket or bowl
- Baking sheet
- Dutch oven or baking dish with lid
Instructions
- Make your sourdough starter several days in advance. Mix 100g flour and 100g water, let sit covered at room temperature for 24 hours, then begin discarding and feeding 100g each flour and water regularly.
- Mix together 500g bread flour, 350g water, 10g salt, and 100g of your active starter until ingredients are incorporated and a shaggy dough forms. Cover and let rest 30 minutes.
- On a floured surface, knead the dough for 10-15 minutes until smooth and elastic. Form into a ball.
- Place dough in a lightly oiled bowl, cover with plastic wrap, and let proof at room temperature for 3-5 hours.
- Punch down the risen dough and shape into a round boule. Place seam side up in a proofing basket or bowl lined with a floured cloth. Cover and proof 1-2 hours more.
- Preheat the oven and Dutch oven at 450°F. Score the top of the loaf and carefully place into the hot Dutch oven. Cover and bake 20 minutes.
- Remove lid and bake sourdough bread uncovered 15-25 minutes more until deep brown crust forms. Check internal temperature reaches 208°F.
- Cool on a wire rack before slicing. Enjoy your fresh sourdough bread!
Notes
- Use an instant-read thermometer to monitor dough and kitchen temperature.
- Weigh ingredients for consistency versus using cup measures.
- Scale back water slightly until you know how a new flour absorbs hydration.
- Proof in a warm, draft-free spot like inside a microwave or oven.
- Shape dough gently without over-handling it. Let it relax between folds.
- Watch for dough to double in size, test for jiggle, and check for air bubbles.
- Prep Time: 1 hour
- Cook Time: 25 minutes
- Category: bread
Nutrition
- Serving Size: 1 slice
- Calories: 150 g
- Sugar: 0 g
- Sodium: 148 mg
- Fat: 1 g
- Saturated Fat: 0 g
- Carbohydrates: 30 g
- Fiber: 1 g
- Protein: 5 g
- Cholesterol: 0 g

