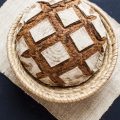
If you’re looking for the ultimate guide to perfect sourdough bread, then you have come to the right place. Keep reading. I hope this (lengthy) step-by-step guide makes you curious and motivated to make your own sourdough bread. Don’t be scared about how long this post is – the amount of your presence in making sourdough bread is shorter than the time you needed to read this post.
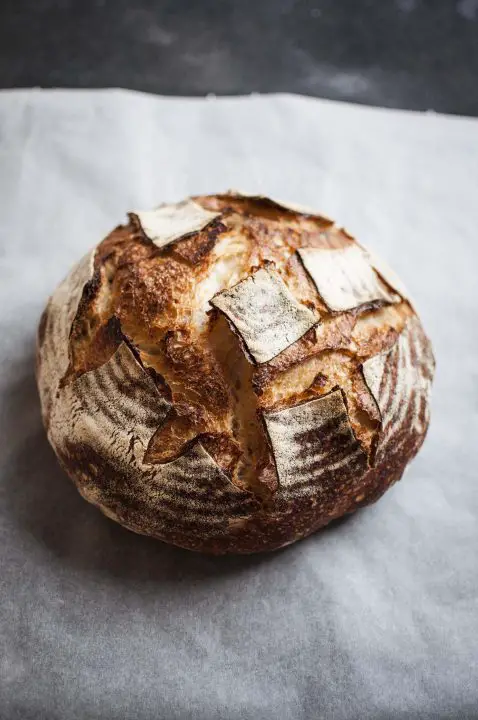
Table of Contents
- Guide to Perfect Sourdough Bread
- Preparing Making the Perfect Beginner Sourdough Recipe
- Making the Perfect Beginner Sourdough Recipe
- FAQs
Perfect Sourdough Bread
Ingredients
Sourdough starter
- 75 g white wheat flour
- 75 g water
- 1 tablespoon of mother sourdough starter
Dough
- 400 g of white wheat flour
- 290 g water at 30°C/86°F (72.5 % hydration of the dough)
- 8 g salt
- 150 g sourdough starter
Tools
- a bowl for mixing the dough
- dough spatula or bench knife for handling and cutting the dough
- digital scale to measure the ingredients
- bread rising basket (banneton)
- dutch oven for baking (or baking stone)
- blade or sharp knife for scoring the dough
Instructions
STARTER
- First, you will need an active and healthy mother sourdough starter.
- In the evening, mix 75 g of white wheat flour (bread flour) with 75 g of water and 1 tablespoon of your mother sourdough starter. You can use a smaller jar or a smaller bowl, whatever you prefer, however, if you use a glass jar, you will be able to see the starter’s activity better. In the morning, the volume of the starter should be doubled and there should be bubbles at the side and at the top.
DOUGH
- In the evening, also mix the dough, – but only flour (400 g) and water (280 g – leave 10 g for the morning when you will mix in the salt).
- In the morning, mix your starter into the dough and knead the dough well for couple of minutes. Next, leave it to rest for one hour before putting in the salt.
- After 1 hour has passed, add the salt and the remaining 10 g of water. Also, depending on the consistency of the dough, now it’s the time to add more water to the dough.
- Next, leave the dough for the bulk fermentation. In this period, the dough should get stronger, puffed, and airy and should also increase in the volume (appr. by 30-40%).
- During the bulk fermentation, you can also perform a series of stretch and fold (3-5 times in intevals of 30-45 minutes). This will help the dough to gain strength. To perform stretch and fold, grab the dough at one side, pull it up and fold it over itself. Repeat on four sides of the dough.
- At the end of the bulk fermentation the dough should feel puffed, strong and greasy to the touch and should have nice pleasant sweet smell. Undeveloped dough in the bulk fermentation could be one of the reasons for underproofed bread.
PRESHAPING, SHAPING and FINAL RISE
- Once the bulk fermentation is finished, take the dough to unfloured surface. Lightly dust it with flour, then take your bench knife or spatula and flip the dough upside down, so the floured side in on the bench now (or if you prefer – dust the bench and simply turn the dough out of the bowl).
- Using the bench knife, flip the dough over itself and use hand moves the shape it into round shape.
- If the dough was correctly fermented, then you will see small (or big) bubbles on the surface of the dough. Leave the dough to rest and relax for 10-15 minutes, the shaping will be easier then.
- In the meantime, prepare the rising basket. Cover it with a kitchen cloth and lightly dust it with flour (left photo below). Observe how the dough relaxes and spreads in ten minutes (right photo below).
- After ten minutes have passed, take your bench knife or spatula and carefully turn the dough upside down. Start shaping the bread by pulling the bottom part of the dough and folding it onto itself (right photo below).
- Next, pull the left and right side and fold them over as well. You can also continue folding left and right side to the top of the dough and folding in the next step gets easier.
- Fold the upper part of the dough towards the bottom, then use your hands or bench knife to roll the dough to create the tension on the surface (right photo below).
- Flip the dough into the rising basket smooth side down. Dust it with flour and then cover it with the rest of the cloth. Put the rising basket into the plastic bag to prevent the dough from drying out while rising. This step is especially important when your let your dough rise in the fridge.
- My dough needed 3 hours at the room temperature and 1 hour in the fridge to rise fully (right photo below). The reason I put the dough in the fridge is the fact that it is much easier to score the dough if it has been left in the fridge for some time.
- To check if the dough is ready to be put in the oven, gently press the dough and observe the reaction of the indent. If it fills up very quickly, then it’s not ready. The dough is ready, when the indent comes back slowly and when the volume is also increased.
BAKING
- At least 30 minutes before the dough is ready to be put in the oven, heat the oven along with the dough oven to the highest temperature.
- When it’s heated, transfer the dough into the Dutch oven. The easiest way to do it is to put a piece of parchment paper and the cutting board over the rising basket and then simply flip it.
- Score the dough using a blade, scissors or sharp knife. Cover the Dutch oven with a lid and transfer the Dutch oven to the oven. Bake for 20 minutes at 240°C (464°F), then take the lid off (right photo below) and bake for another 20-25 minutes (or until golden brown) at 230°C (464°F).
- When the bread is baked, take it out of the dutch oven and leave it on the cooling rack to cool down before cutting.
Notes
- ALTERNATIVE: I sometimes skip the long overnight autolysis and instead I mix the dough in the morning and leave it in autolyse for an hour or hour and half. The best way is to experiment and to find out what suits your flour best.
Before making some of my sourdough bread recipes (that I’m sure you’ll love), we’ll go back to the start.
I’m not going to lie – my first sourdough bread was a brick. It was in 2011, when I started my sourdough bread-baking journey. I got myself Chad Robertson‘s book Tartine Bread and a Dutch oven in the hope to get that perfect crunchy crust and tender, soft crumb.
First, it took me a while to make a sourdough starter (I blame winter for this), and the dough was anything but rising. My transition to sourdough bread was due to health issues, so I thought it would be a great choice to stick to whole-grain flour to make my first sourdough bread. Let’s say this wasn’t the smartest idea. Looking back, all I was missing to make good-looking and tasty sourdough bread were tools, some essential tips and awareness about the dough.
Today I know I need to first know the flours I’m using and to feel the dough in order to know when to move to the next step.
Let’s go!
Guide to Perfect Sourdough Bread
Before we dive into the detailed instructions, I would like to invite you to the three-part background series of tips, tricks, and secrets of sourdough baking. If I had had this advice when I started, I would be one happy baker.
Part 1: Six biggest challenges when starting sourdough baking and how to overcome them
Part 2: 7 essential keys to sourdough baking
Part 3: Do you recognize 3 early warning signs of underproofed bread?
Preparing Making the Perfect Beginner Sourdough Recipe
TOOLS
Basically, you will need:
- a bowl for mixing the dough
- dough spatula or (and) bench knife for handling and cutting the dough
- digital scale to measure the ingredients
- bread rising basket (banneton) – I used 20 cm (8″) wide basket
- Dutch oven for baking (or baking stone)
- blade or sharp knife for scoring the dough
If you don’t have all the tools at home, there is plenty of space for improvisation. Check also my article at Food52 about 10 essential tools for sourdough baking at home.
BAKING SCHEDULE
The starter for this bread was prepared in the evening and left to rise overnight. Just after preparing the starter, I also mixed the flour and water and left it for autolyze until the next morning when I added sourdough starter and left it to rest for another hour. After one hour of rest, I added salt and left the dough to bulk ferment for three hours to build the strength of the dough. After the bulk fermentation, the bread was preshaped, left to rest on the bench for 15 minutes, shaped and put into rising basket. It was left to rise for three hours at the room temperature (summer) and then baked in a Dutch oven – 20 minutes with the steam and 25 minutes without steam.
As you will see below, I didn’t write down the exact time of the steps, only the time needed in my case. There is a lot of variables that effect the time of rising (like amount of starter in the dough, types of flours used), temperature of the ingredients and environment being the most important ones.
See the alternative for this baking schedule at the end of the post.
FLOUR SELECTION and HYDRATION LEVEL
For this bread, I chose white wheat flour, type 500. In Slovenia, the flours are not equipped with information on the protein level of the flour, but only with type of flour, depending on the amount of bran contained. The most similar to the one I used would be bread flour in US.
Hydration level is the amount of water in the dough in regards to the total amount of the flour. If you have 1000 g of flour and 700 g of water, that’s 70% hydration.
Important note: due to the different flours used, the hydration level stated in the recipe might not apply to your flour. This is why it is very important to know how much water your flour can handle. It might handle less or more – act accordingly. What you aim for when mixing the flour, water, and sourdough starter is the consistency of the dough that feels right – both stretchy and elastic (the ability of the dough to bounce back). Too much water in the dough and you can get from elastic dough to runny dough. On the other hand, a little bit more water in the dough and you can get from tight to open crumb. It’s about balancing and the feeling in your hands.
Making the Perfect Beginner Sourdough Recipe
INGREDIENTS
Sourdough starter
- 75 g white wheat flour
- 75 g water
- 1 tablespoon of mother sourdough starter
Dough
- 400 g of white wheat flour
- 290 g water at 30°C/86°F (72.5 % hydration of the dough)
- 8 g salt
- 150 g sourdough starter from above
STARTER
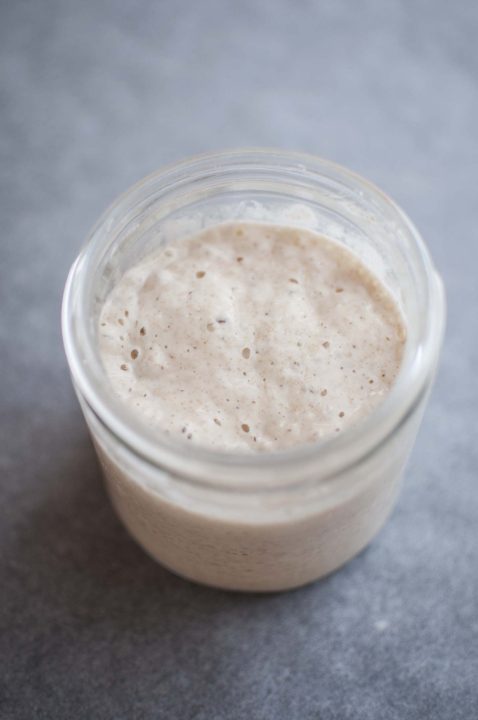
- First, you will need an active and healthy mother sourdough starter.
- In the evening, mix 75 g of white wheat flour (bread flour) with 75 g of water and 1 tablespoon of your mother sourdough starter. You can use a smaller jar or a smaller bowl, whatever you prefer, however, if you use a glass jar, you will be able to see the starter’s activity better. In the morning, the volume of the starter should be doubled and there should be bubbles at the side and at the top.
DOUGH
- In the evening, also mix the dough, – but only flour (400 g) and water (280 g – leave 10 g for the morning when you will mix in the salt). Why? Mixing flour with water will make the dough undergo the autolysis. ALTERNATIVE: I sometimes skip the long overnight autolysis and instead I mix the dough in the morning and leave it in autolyse for an hour or hour and half. The best way is to experiment and to find out what suits your flour best. Autolysis (from Greek word meaning self-digestion) is a process of the protein protease starting to break down the proteins in the flour when it’s mixed with water. Broken proteins then start realigning and forming gluten network.
- When adding water to the flour, keep in mind, that the dough will relax during the night, so it’s better to start with less water and add it more in the morning if the dough feels dry.
- The photo below shows the dough in the morning. We can see it’s relaxed and that the gluten strands are developed.

- In the morning, mix your starter into the dough and knead the dough well for couple of minutes. Next, leave it to rest for one hour before putting in the salt.
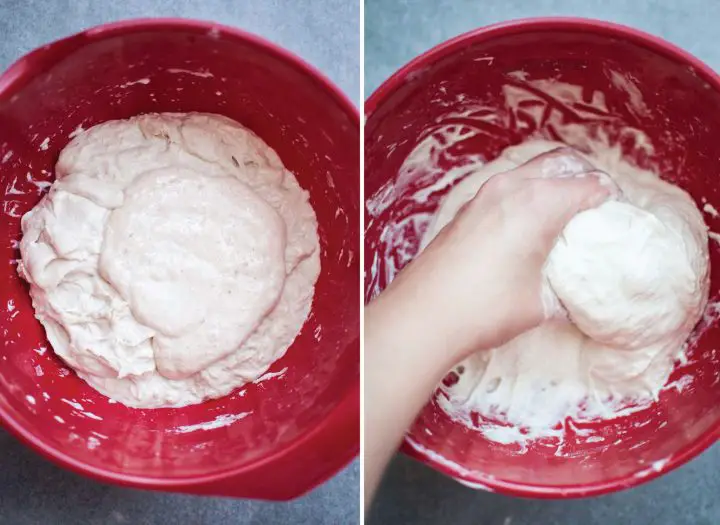
- After one hour has passed, add the salt and the remaining 10 g of water. Also, depending on the consistency of the dough, now it’s the time to add more water to the dough.
- Next, leave the dough for the bulk fermentation. In this period, the dough should get stronger, puffed, and airy and should also increase in the volume (appr. by 30-40%).
- During the bulk fermentation, you can also perform a series of stretch and fold (3-5 times in intevals of 30-45 minutes). This will help the dough to gain strength. To perform stretch and fold, grab the dough at one side, pull it up and fold it over itself. Repeat on four sides of the dough.
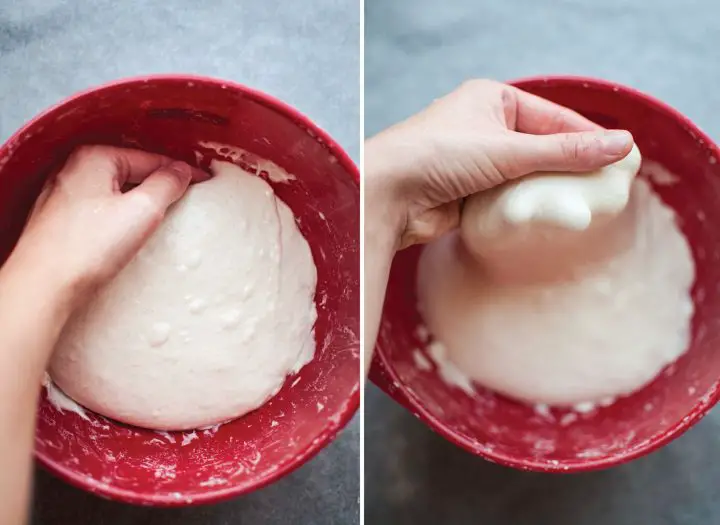
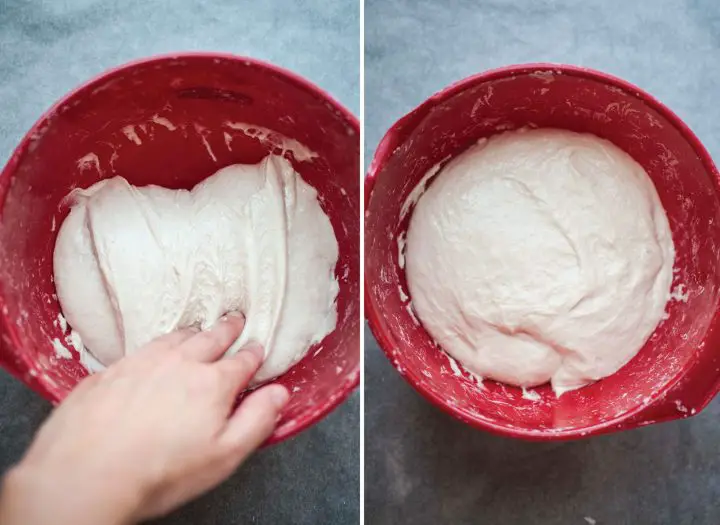
- At the end of the bulk fermentation the dough should feel puffed, strong and greasy to the touch and should have nice pleasant sweet smell. Undeveloped dough in the bulk fermentation could be one of the reasons for underproofed bread.
PRESHAPING, SHAPING and FINAL RISE
- Once the bulk fermentation is finished, take the dough to unfloured surface. Lightly dust it with flour, then take your bench knife or spatula and flip the dough upside down, so the floured side in on the bench now (or if you prefer – dust the bench and simply turn the dough out of the bowl).
- Using the bench knife, flip the dough over itself and use hand moves the shape it into round shape.
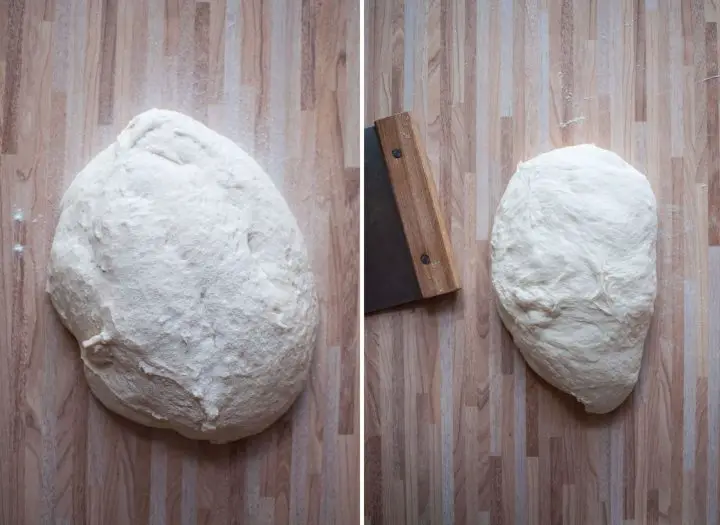
- If the dough was correctly fermented, then you will see small (or big) bubbles on the surface of the dough. Leave the dough to rest and relax for 10-15 minutes, the shaping will be easier then.

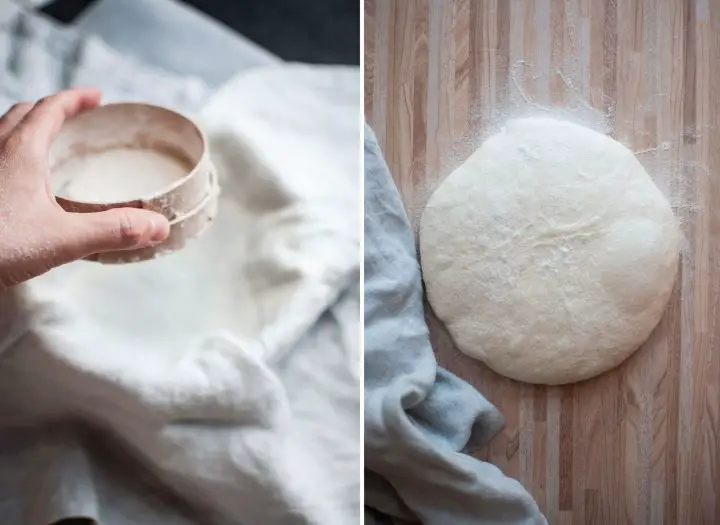
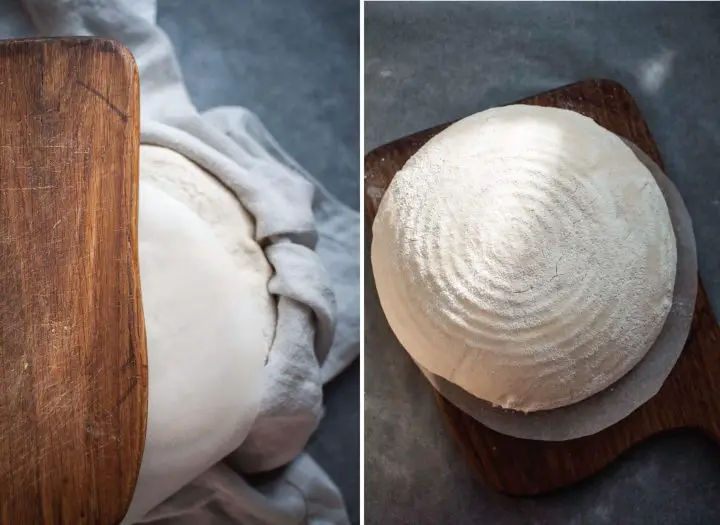
- In the meantime, prepare the rising basket. Cover it with a kitchen cloth and lightly dust it with flour (left photo below). Observe how the dough relaxes and spreads in ten minutes (right photo below).
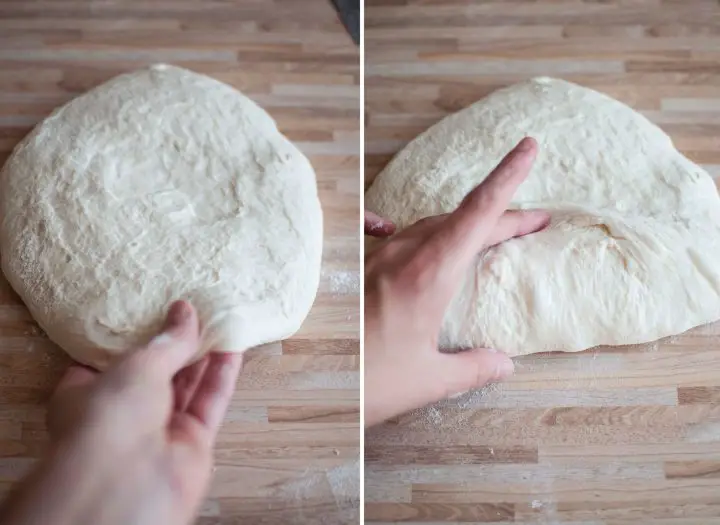
- After ten minutes have passed, take your bench knife or spatula and carefully turn the dough upside down. Start shaping the bread by pulling the bottom part of the dough and folding it onto itself (right photo below).
- Next, pull the left and right side and fold them over as well. You can also continue folding left and right side to the top of the dough and folding in the next step gets easier.
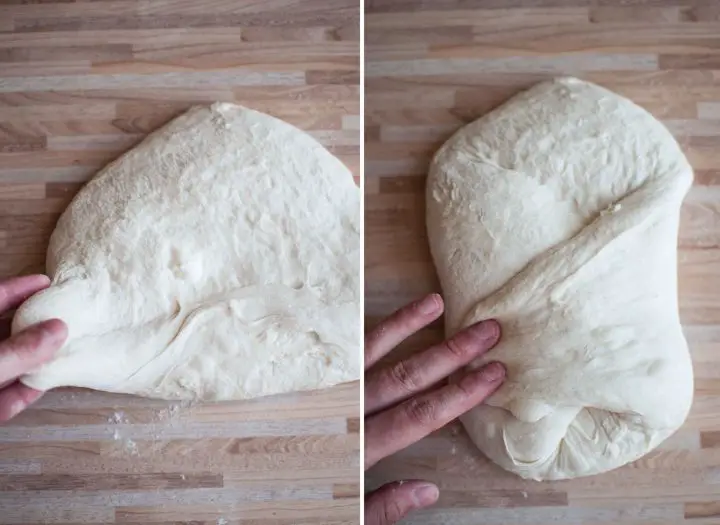
- Fold the upper part of the dough towards the bottom, then use your hands or bench knife to roll the dough to create the tension on the surface (right photo below).

- Flip the dough into the rising basket smooth side down. Dust it with flour and then cover it with the rest of the cloth. Put the rising basket into the plastic bag to prevent the dough from drying out while rising. This step is especially important when your let your dough rise in the fridge.
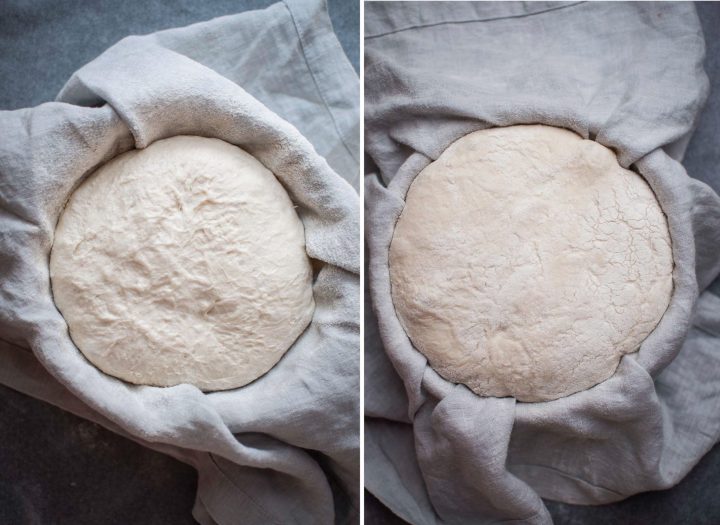
- My dough needed 3 hours at the room temperature and 1 hour in the fridge to rise fully (right photo below). The reason I put the dough in the fridge is the fact that it is much easier to score the dough if it has been left in the fridge for some time.
- To check if the dough is ready to be put in the oven, gently press the dough and observe the reaction of the indent. If it fills up very quickly, then it’s not ready. The dough is ready, when the indent comes back slowly and when the volume is also increased.
BAKING
- At least 30 minutes before the dough is ready to be put in the oven, heat the oven along with the dough oven to the highest temperature.
- When it’s heated, transfer the dough into the Dutch oven. The easiest way to do it is to put a piece of parchment paper and the cutting board over the rising basket and then simply flip it.
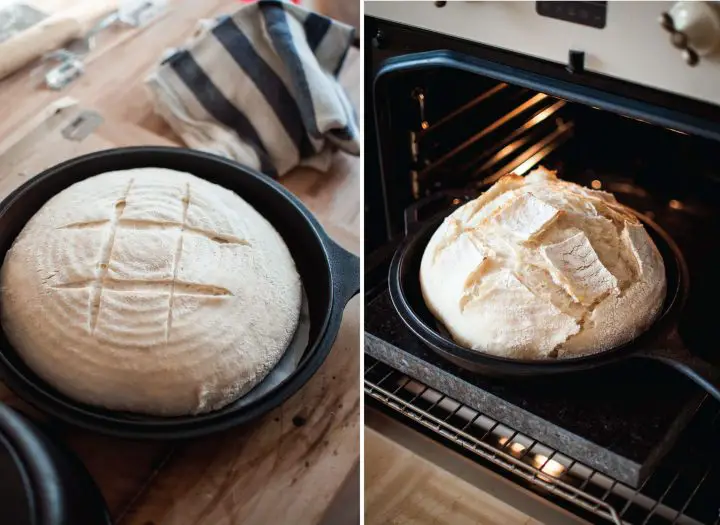
- Score the dough using a blade, scissors or sharp knife. Cover the Dutch oven with a lid and transfer the Dutch oven to the oven. Bake for 20 minutes at 240°C (464°F), then take the lid off (right photo below) and bake for another 20-25 minutes (or until golden brown) at 230°C (464°F).
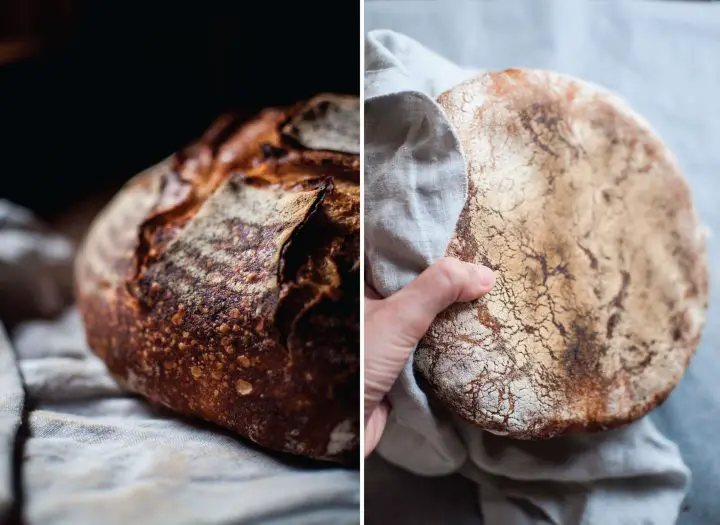
- When the bread is baked, take it out of the Dutch oven and leave it on the cooling rack to cool down before cutting. If the dough was properly fermented, the crust should be thick, crunchy, and brown and the bottom of the bread should be properly baked. Holding the bread in the hands should feel light. The crumb should be open and tender.

I often make this bread in a way that I leave it to rise overnight. I prepare the dough in the late afternoon and shape it just before going to sleep. In the morning, the dough is well risen and ready to be baked. With this schedule you might reduce the amount of starter in the dough to slow down the fermentation.
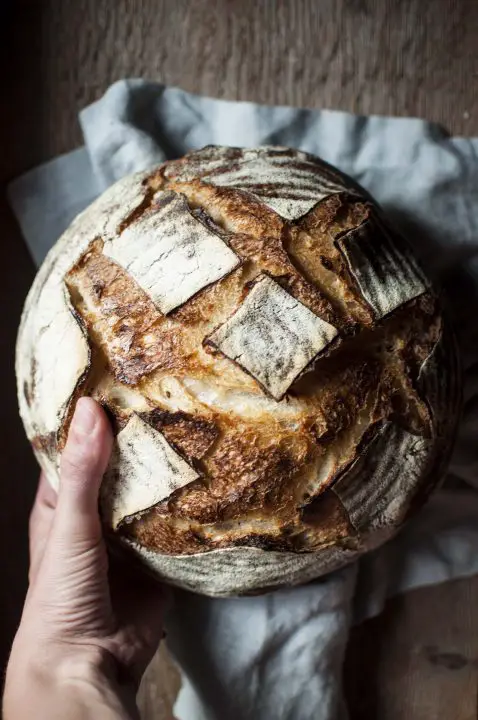
Ready to bake your beautiful sourdough bread?
I’m looking forward seeing your delicious sourdough bread, let me know how it goes in the comment below!
FAQs
What are three top tips when making sourdough starter?
Here are three top tips to help you make a successful sourdough starter: use the right flour (you want to use a high-quality, unbleached flour with a high protein content, such as bread flour or whole wheat flour (I’ve got a whole wheat sourdough recipe). Avoid using all-purpose flour or bleached flour), maintain the right temperature (sourdough starter thrives in a warm, stable environment, ideally between 70-85°F (21-29°C), and feed your starter (feed regularly, usually once or twice a day, for at least a week before it’s ready to use). Be patient with it!
Is it cheaper to make your own sourdough?
Sourdough bread baking in your home can be a cost-effective and rewarding way to enjoy fresh, delicious bread at home. However, it’s important to weigh the cost of ingredients, equipment, and time against the convenience of buying bread from a bakery. Bake sourdough bread at home today!


