Prepping your sourdough starter so that its ready for your sourdough bread recipe can be a bit of a challenge in itself. You have to take care of your starter and feed it at regular intervals to ensure that it is healthy before it’s ready to bake with. This requires some patience. Understanding the best oven baking sourdough temperature can be a little tricky, so let’s take a look at some of the tips and tricks to make it easier for you.
Table of Contents
- What is Sourdough Bread?
- How to Bake Sourdough Bread
- Baking Sourdough Temperature Method
- Baking Sourdough Temperature – The Bottom Line
- Baking Sourdough Temperature FAQs
What is Sourdough Bread?
Sourdough is a type of bread that is created through a natural fermentation process.
This process involves bacteria and wild yeasts (no commercial yeast) that exist in the environment around you, such as the air, baker’s hands, or within the grain. Typically, these bacteria are responsible for producing organic acids like lactic acid and acetic acid. These contribute to the flavors, texture and storage quality of the bread. The wild yeasts happen to produce carbon dioxide gas during fermentation, which essentially help the dough rise when baking.
Often you’ll hear certain types of terminology used when baking sourdough bread.
These include:
- Starter
- Levain
- Autolyse
- Bulk Fermentation
- Proof
- Final Dough Temperature
Starter
A starter is a combination of flour and water that you allow to ferment naturally. You’ll feed the starter at regular intervals to keep the bacteria active and healthy, waiting till it becomes fully ripe before using any of it to make bread. Once you’re ready to bake, you’ll need a small amount of starter to create a levain.
Levain
A levain is created by combining a small tendril of ripe starter with flour and water – with sugar as an optional element – and allow it to ferment before mixing it into a dough. The levain acts as a vehicle for incorporating yeast and bacteria into the dough, not like the starter which exists on its own.
See my post on Levain vs Starter: What’s the Difference for more insight.
To prepare a levain, remove the starter from the refrigerator 3 to 12 hours before you plan to start making the dough. Feed it with 100 grams each of flour and water. After that leave it on the countertop.
When using the levain for baking, keep some of it in its container and feed it again before refrigerating it.
Autolyze
Some sourdough baking recipes follow a step called autolyze, which occurs at the beginning of bread baking. It is a step that requires the combination of flour and water.
The objective of autolyze is to begin enzymatic activity in the dough, to help pull out sugars from the flour. Moreover, it helps increase extensibility, which is essentially the doughs ability to stretch without ripping. Increased extensibility is a very good thing, as it allows the dough to expand, and fill with carbon dioxide gasses resulting in a light and airy loaf, instead of dense sourdough.
Bulk Fermentation
The dough’s initial rise is called bulk fermentation. Following the addition of salt, flour and levain into the dough, you can put this mixture into a bowl or container, cover and allow it to rest. The dough will experience a vital fermentation process during this step. Bacteria and yeast begin to generate organic acids, alcohols, and leaven the dough, which will transform into flavours, and rise in your final bread.
Additionally, bulk fermentation might be the time when you might give your dough an additional stretch and fold.
Proof
The proof is the dough’s final or second rise and takes place after the dough has been shaped. You can proof at a cold temperature in the refrigerator overnight, as during this time the dough will continue to ferment, further strengthening it.
You can also overproof sourdough bread, so watch out!
Final Dough Temperature
The final dough temperature (FDT) is the temperature of the dough immediately after combining all of the ingredients together. Each component (i.e. levain, flour, water and surrounding environment) naturally has its own temperature. While most of this is out of our hands, we can quite simply adjust the water temperature, enabling us to alter the final dough temperature of the entire dough to meet the requirements of the recipe.
Let’s take a look at an example of what our water temperature should be in order to meet an FDT 78°F.
| Ingredient | Measured Temperature |
| Levain | 75°F |
| Flour | 70°F |
| Room Temperature | 75°F |
Essentially, we need to warm our water to 92°F, so our final dough temperature will be 78°F.
How to Bake Sourdough Bread
We know that the beginning of sourdough breads is through the magical starter, that contributes to the wonderful sour flavors in the bread.
Before the starter however, there are a few tools required for baking artisan style bread. This includes:
- Dutch oven, preferably one that can withstand 500°F in the oven and has a lid
- Large mixing bowl to mix your dough
- Two medium kitchen bowls for proofing dough
- Two kitchen towels or a tea towel to line the proofing bowls
- Sharp knife to cut and shape the dough
- Plastic bowl scraper
- Kitchen scale
- Instant read thermometer
- White rice flour for dusting the proofing bowl
- Blade to score sourdough bread
- Fine grain sea salt
- Parchment paper
- Pizza peel
- Oven mitts
Temperature
The temperature of the dough determines the amount of fermentation activity you’ll discover. Lower temperatures mean less activity, therefore it’ll take longer, while higher temperatures mean more activity meaning that things will take less time.
Finding the ideal temperature will ensure the correct consistency in your bread baking, and that you’ll achieve the results you desire.
Flour
For this sourdough bread recipe you can use bread flour, whole wheat flour, or rye flour.
Essentially bread flour has a higher protein percentage compared to all-purpose flour, which helps bring strength to the dough, ensuring minimum mixing and kneading. It also happens to make things easier for baking your first sourdough loaf.
For more info on best flours for sourdough to use, click through to my post!
Baking Sourdough Temperature Method
Let’s take a look at the process of creating sourdough before we actually get to baking bread.
- Levain
- Autolyse
- Mix
- Bulk Fermentation
- Shape and Proof
- Baking Sourdough
Levain
Remember the levain is a small tendril off of your continuously maintained sourdough starter, and is comprised of bacteria and yeasts. The preferment is made before mixing the dough, allowing time to ferment, then mixed into the dough to begin sourdough fermentation.
Here’s what you’ll need to begin with:
| Weight | Ingredient | Percentage |
| 38g | Ripe Sourdough Starter | 50% |
| 38g | Whole Wheat Flour | 50% |
| 38g | Bread Flour | 50% |
| 76g | Water | 100% |
Combine the ingredients in the table in a clean jar and leave it at room temperature for 5 to 6 hours. Keep a close eye on the progression of your levain during this period. Once it’s ready it will expand, and become bubbly on top, and on the sides, releasing a sour scent.
Autolyse
The desired dough temperature for this dough is 78°F. You should aim for your dough to achieve this temperature towards the end of mixing.
Choose between warming or cooling the water so that the temperature of the dough meets the final dough temperature for this recipe. Place the flour and water in a large bowl, using wet hands to mix until there are no dry fragments of flour left. At this point the dough will be shaggy and loose, so use a bowl scraper to scrape down the sides of the bowl, to keep all the dough in one area. Cover the bowl, and place it near the levain for 1 hour.
Mix
Use your instant read thermometer to take the temperature of the dough to check if it meets the appropriate FDT. If it is higher, use cold water, and if its lower use warm water.
Add salt, water and levain atop the dough and use wet hands to pinch the ingredients together. Move the dough into a container or bowl ready for bulk fermentation.
Take the temperature of your dough to find out the final dough temperature. If its below 78 degrees, then use warmer water in future, and if its below 78 degrees use cooler water. Now cover the dough.
Bulk Fermentation
At 74-76°F surrounding temperature, bulk fermentation should proceed for about 4 hours. During this period it’s important to perform a series of stretches and folds, preferably 3 sets, with each one occurring after every 30 minutes.
Each set of folds and stretches comprises of 4 folds, with one each to the north, south, east and west sides. Wet your hands with some water and lift one side of the dough with two hands. Stretch the dough up high so that you can fold it completely. Let the dough sit for 30 minutes covered in between each set.
After the third set of stretch and folds, allow the dough to rest for the remaining bulk fermentation. During this period, fermentation continues, and you’ll notice the dough rise, the dough will strengthen and develop flavour.
At the end of bulk fermentation, you dough should have risen between 20-50%. It will have bubbled along the sides and top of the dough, creating an almost domed shape, where it sits in the bowl. If you can’t see these signs, then leave it for another 15 minutes in bulk fermentation and check once again.
Shape and Proof
Once bulk fermentation is complete its time to shape and proof the loaves. Lightly flour your work surface and turn your dough on to it. You can make two large loaves or four small loaves. Once you’ve decided how many loaves you wish to make, divide the dough into smaller rounds. Stretch and fold until you achieve a nice rounded dough.
To prepare the bread doughs for the final proof, sprinkle some proofing baskets with rice flour. Place your loaves, seam side up in the baskets. The rice flour will act as a barrier to gluten formation, and prevent the dough from sticking to the basket.
To proof let them sit, covered at room temperature for 3 to 4 hours then transfer to the refrigerator for 12 to 15 hours.
To judge whether proofing is complete, press on the dough with your finger tip. If the dough springs back instantly it requires more proofing time.
Baking Sourdough
Place an oven rack at the lowest part of the oven with no rack above it. Place your Dutch oven or cast iron pot on the oven rack, and preheat the oven to 450 degrees for at least 30 minutes. For this method of Dutch oven baking, rub some olive oil on the bottom of the pot.
Once your oven has preheated, remove one of the proofing baskets from the fridge, uncover it and place a piece of parchment paper over the basket. Place a baking sheet atop the parchment paper and use both hands to flip it over. Gently remove the basket and your dough should rest perfectly on the parchment.
For the first loaf use a very sharp knife, score the dough at a 90 degree angle. Ensuring that you’re wearing oven mitts, pull out the Dutch oven from your oven, and place it on a heat safe rack or stove top. Slide the dough into the Dutch oven, and place it back into the preheated oven, and put the lid on top. A sealed environment helps to trap moisture, preventing steam from escaping from the dough, which encourages a good rise and a crunchy shiny crust.
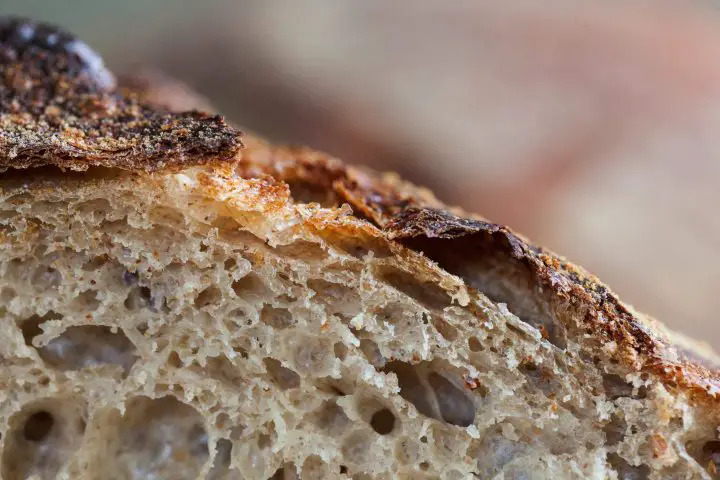
Bake for 20 minutes. Then remove the lid from your Dutch oven, close the oven door and bake for another 30 minutes. Once done, the loaf should have an internal temperature of 208 degrees F, and crust should be a deep golden brown.
Baking Sourdough Temperature – The Bottom Line
The temperature at which you bake your sourdough bread relies on the methods of preparation beforehand. Ensuring that the temperature of the dough is kept consistent and ready for the next step till its time to bake!
Baking Sourdough Temperature FAQs
Can I Bake Sourdough at 230 Degrees?
To bake sourdough bread, preheat the oven to 250 degrees with a pizza stone inside. Once the bread goes into the oven, lower the temperature to 230 degrees.
Can You Bake Sourdough Bread at a Lower Temperature?
Sourdough bread is best baked at high temperatures, as lower temperatures can cause the bread to rise poorly, with a heavy texture.
Can You Bake Sourdough Bread at 400 Degrees?
Place the loaf on the oven rack, reduce the temperature to 400 degrees F and bake for 23 minutes. Remove the Dutch oven, carefully remove the bread and set the bread on to the oven rack, bake for an additional 23 minutes.




![How To Stretch And Fold Sourdough [A Detailed Guide] 9 How to stretch and fold sourdough [a detailed guide]](https://www.mydailysourdoughbread.com/wp-content/uploads/2023/06/How-To-Stretch-And-Fold-Sourdough-120x120.jpg)

Hi. I love your post. I am wondering about something. My sourdough recipe makes 2 loaves. They aren’t very big. Can I use the same recipe and just make one large loaf instead of 2 smaller ones? I think the recipe is for two one pound loaves. How would I bake a large one?
Thank you. Best wishes to you.