
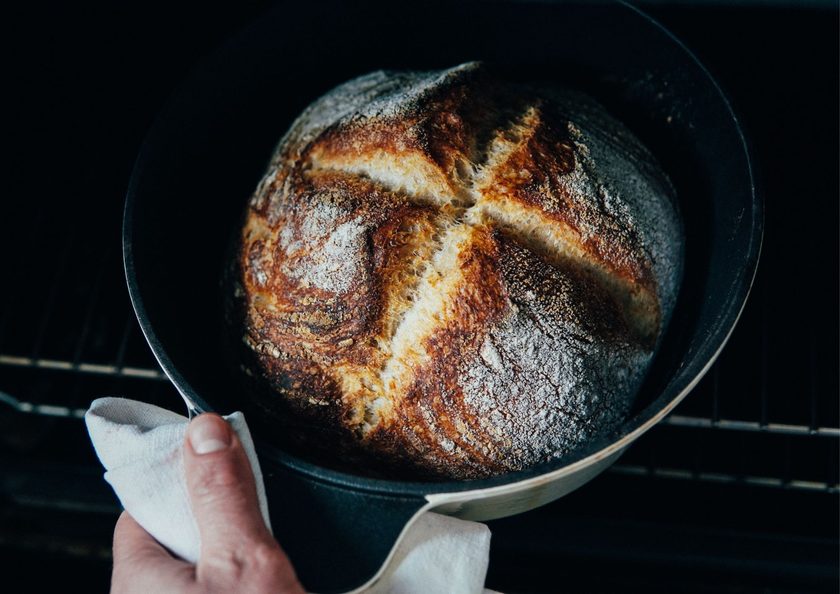
Picture pulling a crackly, golden loaf out of your oven, with an airy, chewy center, and barely lifting a finger to get there. That’s the magic of learning how to make bread without kneading. All it takes is four pantry staples, a heavy pot, and a little patience while time does the hard work for you.
Below, you’ll find the simple science behind it, a step-by-step method from mixing to baking, easy ways to tell when your loaf is done, and quick fixes for common hiccups. Ready to fill your kitchen with that fresh-baked smell? Let’s get baking.
Why No-Knead Bread Works
Kneading builds gluten, the protein network that gives bread its structure and chew. When flour and water combine, two proteins, glutenin and gliadin, bond to form gluten. Kneading speeds this up mechanically, but time can do the same job. Over a 12- to 18-hour rest, enzymes in the flour break down and reorganize those proteins, and the gluten network develops on its own. Baker Jim Lahey of Sullivan Street Bakery popularized this no-knead bread method in 2006.
Hydration is the other key. No-knead dough is wetter than most bread dough, and the extra water lets gluten proteins move freely and bond without help.
Fermentation adds strength. As yeast feeds on the flour, it releases carbon dioxide that gently stretches the dough, while acids from fermentation tighten the gluten and deepen the flavor. A few optional stretch-and-folds during the rise can add structure, but your bread will still turn out well without them.
Ingredients and Equipment
- 3 cups (400 g) bread flour or all-purpose flour
- 1⅓ cups (300 g) room-temperature water
- 1¼ teaspoons (8 g) fine salt
- ¼ teaspoon (1 g) instant yeast or active dry yeast
You’ll also need a 5- to 7-quart Dutch oven, a large mixing bowl, a wooden spoon, and a dough scraper.
Related: How to Make Cottage Cheese Flatbread (No Kneading, No Rising)
Mix the Dough
Mixing no-knead dough takes about a minute. You’re not building strength here, just hydrating the flour.
- Whisk the dry ingredients. In a large mixing bowl, whisk together the flour, salt, and yeast so the yeast and salt are evenly distributed.
- Add the water. Pour in the room-temperature water all at once. Avoid hot water, which can damage the yeast.
- Stir until no dry flour remains. Use a wooden spoon or your hand to mix for 30 to 60 seconds. Scrape the sides and bottom of the bowl to catch any dry pockets. Stop as soon as everything is combined.
- Check the consistency. The dough should look shaggy, rough, and sticky, closer to thick oatmeal than a smooth ball. This is correct. The high hydration is what lets gluten develop without kneading.
- Don’t add extra flour. More flour lowers hydration and leads to a denser loaf. If the dough sticks to your hands, wet them instead.
- Cover the bowl. Use plastic wrap, a reusable bowl cover, or a plate to keep the surface from drying out and forming a skin.
If you weigh your ingredients instead of using measuring cups, you’ll get the same dough consistency every time, which makes the rest of the process far more predictable.
Let the Dough Rise
The first rise, called bulk fermentation, is where the dough builds strength and flavor. Here’s how to handle it.
- Leave the covered bowl at room temperature. Aim for 70 to 75°F, away from drafts and direct sunlight. An oven with only the light on works well, but leave a note so no one preheats it.
- Let the yeast work. As yeast feeds on the sugars in the flour, it releases carbon dioxide and alcohol. The gas gets trapped in the gluten network and inflates the dough, while the byproducts of fermentation develop flavor.
- Wait 12 to 18 hours. Temperature controls the timing. A 78°F kitchen may finish in 8 to 10 hours, while a 65°F kitchen can take 20 hours or more. Judge readiness by the dough, not the clock.
- Check for readiness. The dough should roughly double in size, with bubbles across the surface and slightly domed edges. It should jiggle when you shake the bowl and smell pleasantly yeasty.
- Use the fridge for flexibility (optional). After 2 to 3 hours at room temperature, you can refrigerate the covered dough for up to 3 days. Cold slows yeast activity, which gives you a flexible schedule and a more complex, slightly tangy flavor. Let it sit at room temperature for about an hour before shaping.
Shape the Dough Without Kneading
Shaping turns your fermented dough into a loaf that holds its form in the oven. The goal is to build surface tension while keeping as many gas bubbles as possible.
- Lightly flour your work surface. Use just enough flour to stop sticking. Too much can create streaks of raw flour inside the loaf. Dust the top of the dough as well.
- Ease the dough out of the bowl. Run a dough scraper around the edges and let the dough slide out in one piece. Avoid pulling or tearing it.
- Handle it gently. The bubbles formed during bulk fermentation give the bread its open crumb. Don’t punch the dough down or press it flat.
- Fold it into a package. Gently stretch one edge outward and fold it to the center. Repeat on all four sides, then flip the dough so the seam faces down.
- Build surface tension. Cup your hands around the dough and drag it a few inches toward you on an unfloured section of the counter. Repeat two or three times until the surface feels taut. This tight outer layer helps the loaf rise up rather than spread out.
- Place it on parchment paper. Set the shaped dough seam-side down on a sheet of parchment. You’ll use the paper to lower the dough into the hot Dutch oven.
- For extra support, use a bowl. Set the parchment and dough in a medium bowl or banneton so it keeps its round shape while it proofs.
Let It Rest Again
After shaping, the dough needs a final proof before baking. Bulk fermentation was the long first rise that built flavor and strength. The final proof is a shorter rest that lets the dough relax after handling and re-inflate in its new shape.
Cover the shaped dough loosely with a towel or upside-down bowl and let it rest at room temperature for 1 to 2 hours. If the dough came straight from the fridge, it may need closer to 2 hours. Start preheating your oven and Dutch oven about 30 minutes into the proof.
The dough is ready when it has grown by about 50% and looks puffy. Use the poke test to confirm. Press a floured fingertip about half an inch into the dough:
- If it springs back immediately, it needs more time.
- If it springs back slowly and leaves a small dent, it’s ready to bake.
- If the dent stays or the dough sinks, it’s overproofed.
Overproofed dough has weakened gluten and can collapse or spread in the oven. Check it often, especially in a warm kitchen. If it does overproof, gently reshape it, let it rest for 20 to 30 minutes, and bake.
Bake the Bread
A hot Dutch oven and a two-stage bake give no-knead bread a crisp crust and a fully baked center.
- Preheat the oven and pot. Place the Dutch oven, lid on, in the oven and preheat to 450 to 475°F for 30 to 45 minutes. The hot pot drives oven spring, the rapid rise during the first minutes of baking.
- Score the dough (optional). Use a sharp knife or razor blade to cut a slash about ½ inch deep across the top. This lets the loaf expand in a controlled spot instead of splitting at random.
- Transfer the dough. Remove the pot with oven mitts and take off the lid. Lift the dough by the parchment paper and lower it into the pot. Keep your arms clear of the hot edges.
- Bake covered for 30 minutes. The lid traps moisture from the dough and creates steam. Steam keeps the surface soft so the loaf can rise fully before the crust sets, and it helps the starches on the surface turn glossy and crisp later.
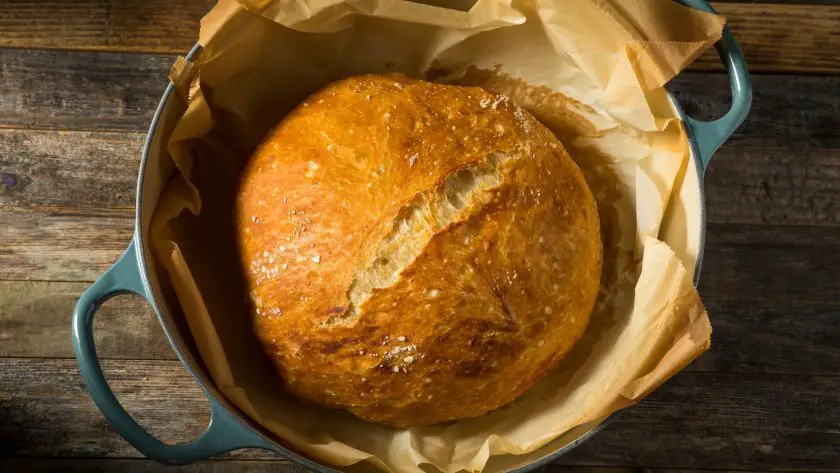
- Bake uncovered for 15 to 20 minutes. Remove the lid so the moisture can escape. The crust will dry out, crisp up, and turn deep golden brown. Total no-knead bread baking time is usually 45 to 50 minutes.
- Remove the loaf. Lift it out by the parchment and move it to a cooling rack.
If you don’t have a Dutch oven, bake the loaf on a preheated baking stone or heavy sheet pan. Place a metal pan on the lower rack and pour in 1 cup of hot water as you load the bread to create steam. Check your oven’s actual temperature with an oven thermometer, since many ovens run hotter or cooler than their setting.
How to Know When the Bread Is Done
No-knead bread can look finished on the outside before the center is fully baked. Check these signs before you take it out of the oven.
- Deep golden-brown crust. The crust should be a rich golden brown to chestnut color across the top and sides. This color comes from the Maillard reaction and adds flavor. A pale crust usually means the bread needs more time. If you’re unsure, bake it 5 minutes longer.
- Hollow sound. Tip the loaf out with an oven mitt and tap the bottom with your knuckles. A finished loaf sounds hollow. A dull thud means moisture is still trapped inside. This test is useful but not always reliable on its own.
- Internal temperature of 200 to 210°F. An instant-read thermometer is the most accurate test. Insert it into the center of the loaf through the bottom or side. If it reads below 200°F, return the bread to the oven for 5 to 10 minutes and check again.
- Firm, crisp crust. Press the side of the loaf gently. It should feel firm and crackly, not soft or spongy.
Once the bread is done, place it on a cooling rack so air can circulate underneath and the bottom crust stays crisp. Let it cool for at least 1 hour before slicing. The inside keeps cooking and setting as it cools, and cutting it too early releases steam and leaves the crumb gummy.
Related: 6 Easy Bread Recipes That Won’t Leave You Kneading Help
Common No-Knead Bread Problems
Dough too sticky
No-knead dough is meant to be wet, but if it’s unmanageable, you may have measured the flour short by volume. Weigh your ingredients, try bread flour, or reduce the water by 1 to 2 tablespoons. Wet your hands when handling it.
Bread too dense
Dense bread usually comes from underproofed dough, too much flour, deflating the dough during shaping, or slicing before the loaf cools. Give fermentation more time in a cool kitchen and handle the dough gently. Bread flour’s higher protein content can also give the gluten more strength.
Bread spreads instead of rising
This points to overproofing, weak gluten, or too little surface tension. Overproofed dough loses its ability to hold gas. Shorten the final proof, shape the dough more tightly, and proof it in a parchment-lined bowl for support.
Pale or soft crust
Your oven or Dutch oven likely wasn’t hot enough, or the uncovered bake was too short. Preheat fully, check your oven with a thermometer, and bake uncovered longer. Store the loaf cut-side down on a board, not in a plastic bag.
Dough does not rise
Test your yeast by stirring a pinch into warm water with a little sugar. If it doesn’t foam in 10 minutes, replace it. A kitchen below 68°F, water above 130°F, or too much salt can also stall the rise.
Let Time Do the Work
Here’s the beauty of no-knead bread: you don’t need strong arms, fancy gear, or years of practice to pull a crusty, golden loaf out of your oven. Time, water, and a little yeast do the hard work for you, building flavor and structure while you go about your day. All you really need is a handful of pantry staples, a heavy pot, and some patience.
Your first loaf might not be picture-perfect, but most hiccups come down to timing or temperature, and they’re easy to fix next time. Once you’ve tasted that crackly crust and soft, airy middle, you’ll wonder why you ever bothered kneading. So go ahead, mix up a batch tonight and let the dough do its thing.
FAQs – How to Make Bread Without Kneading
What is the fastest way to make no-knead bread?
The fastest route is a same-day version. Bump the instant yeast up to about 1½ teaspoons, use warm water around 110°F, and let the dough rise in a warm spot for 2 to 3 hours until doubled. Then shape, proof for about 30 minutes, and bake as usual. You’ll lose some of the deep flavor a long rise gives, but you’ll have fresh bread by dinner.
What happens if I don’t knead bread dough?
If you skip kneading on a typical dough, you’ll usually get a dense, tight loaf, because the gluten doesn’t have enough strength to trap gas. No-knead recipes solve this with a wetter dough and a long rise, which let the gluten develop on its own. So skipping kneading works great, as long as you give the dough enough water and time to make up for it.
Do all breads need kneading?
Not at all. Quick breads like banana bread, cornbread, and Irish soda bread rise with baking soda or baking powder, so they skip kneading entirely. Many yeast breads don’t need it either. No-knead loaves, focaccia, and plenty of sourdough recipes rely on time and gentle folds instead. Kneading is just one way to build gluten, not a rule every loaf has to follow.
Bread Without Kneading (Just 4 Ingredients)
Baker Jim Lahey of Sullivan Street Bakery popularized this no-knead bread method in 2006.
Ingredients
- 3 cups (400 g) bread flour or all-purpose flour
- 1⅓ cups (300 g) room-temperature water
- 1¼ teaspoons (8 g) fine salt
- ¼ teaspoon (1 g) instant yeast or active dry yeast
Instructions
- Whisk flour, salt, and yeast, then stir in room-temperature water until no dry flour remains.
- Expect a shaggy, sticky dough; wet your hands rather than adding flour, then cover the bowl.
- Let it rise at 70–75°F for 12–18 hours, until doubled, bubbly, and jiggly. Optionally refrigerate up to 3 days.
- Ease the dough onto a lightly floured surface without punching it down.
- Fold the edges to the center, flip seam-down, and drag it to build surface tension. Set it on parchment.
- Proof 1–2 hours until puffy and a poke springs back slowly.
- Preheat a covered Dutch oven to 450–475°F, score the loaf, and lower it in by the parchment.
- Bake 30 minutes covered, then 15–20 uncovered until deep golden.
Notes
No-knead dough is meant to be wet, but if it’s unmanageable, you may have measured the flour short by volume. Weigh your ingredients, try bread flour, or reduce the water by 1 to 2 tablespoons. Wet your hands when handling it.
- Category: bread
- Method: Baking
Related Articles:
 7 essential keys for successful sourdough baking
 Natural Bread Coloring: A Homebaker’s Guide
 Do you recognize the 3 early warning signs of underproofed bread?
 Six biggest challenges when starting sourdough baking and how to overcome them
 Beginner Sourdough Recipe: Step-by-Step Guide to Perfect Sourdough Bread
