If you love baking sourdough and want to shake things up, Kamut flour sourdough is a seriously delicious place to start. This ancient grain brings a sunny golden crumb, a rich, buttery flavor, and a mellow tang that makes every slice feel like a treat. It’s easier to bake than you might think, too.
Below, you’ll find what makes Kamut so special, the perfect flour blend, simple ingredients, and an easy step-by-step method. You’ll also pick up handy tricks for working with the dough, spotting when it’s ready, and keeping your golden loaf fresh for days.
Why Use Kamut Flour for Sourdough?
Sourdough’s tang can be bold, and Kamut softens it. The grain’s natural sweetness and buttery depth round off sharp acidity, giving you a loaf that tastes complex without making you pucker. It’s like adding cream to strong coffee: still bold, just smoother.
Kamut is rich in wheat protein, but its gluten is softer than bread flour’s, so on its own it can bake up dense. Blending it with bread flour gives you Kamut’s flavor plus the structure needed for a good rise.
Here’s what Kamut brings to your sourdough:
- A buttery, nutty, mildly sweet flavor
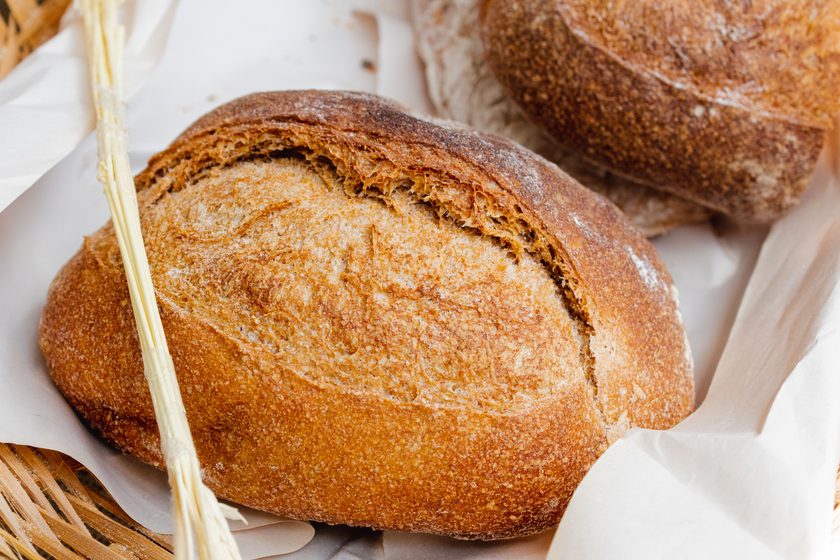
- A golden crumb that looks almost like brioche
- A moist, tender texture that stays soft longer
- A gentler tang that wins over even the pickiest sourdough skeptics
For most home bakers, a 50/50 split with bread flour hits the sweet spot, giving you plenty of flavor without sacrificing lift.
Ingredients
- 250g whole grain Kamut flour
- 250g bread flour
- 340g filtered water, plus 20g reserved
- 100g active sourdough starter
- 10g fine sea salt
How to Make Kamut Flour Sourdough Bread
Sourdough runs on patience more than effort. Most of these steps are hands-off, so plan to start in the morning and bake the next day.
- Autolyse. Mix the Kamut flour, bread flour, and 340g of water until no dry bits remain. Cover and rest 45–60 minutes so the flour fully hydrates.
- Add the starter. Spread the starter over the dough, then pinch and fold it in with wet hands for 2–3 minutes. Rest 30 minutes.
- Add the salt. Sprinkle in the salt with as much of the reserved 20g of water as the dough needs. Pinch and fold until it’s fully absorbed.
- Stretch and fold. Over the next 2 hours, do 4 sets of stretch and folds, 30 minutes apart. Grab one side of the dough, stretch it up, fold it over, and turn the bowl a quarter turn. Repeat until you’ve gone all the way around.
- Bulk ferment. Leave the dough covered at 75–78°F until it’s risen 50–75%, about 4–5 hours from when you added the starter. Watch the dough, not the clock.
- Pre-shape. Turn the dough onto a lightly floured counter, round it loosely with a dough scraper, and rest it uncovered for 20–30 minutes.
- Shape. Fold the dough into a tight round or oval and drag it toward you a few times to build surface tension. Place it seam-side up in a banneton dusted with rice flour.
- Cold proof. Cover and refrigerate for 10–16 hours to deepen the flavor and firm up the dough for scoring.
- Preheat. Heat your Dutch oven, lid on, at 500°F for 45–60 minutes.
- Score and bake. Flip the cold dough onto parchment, score it with a lame or razor blade, and lower it into the pot. Cover, drop the heat to 450°F, and bake 20 minutes. Uncover and bake another 20–25 minutes, until the crust is deep amber and the inside reads 205–210°F.
- Cool. Let the loaf rest at least 1–2 hours before slicing, or the crumb will turn gummy.
Related: Herb Sourdough: Easy Rustic Bread You Can Make with Whatever Herbs You’ve Got
How to Handle Kamut Sourdough Dough
Kamut gluten behaves like a hammock rather than a trampoline: it stretches beautifully but doesn’t spring back with much force. Expect a dough that’s sticky, extensible, and a little slack, then handle it like this:
- Judge hydration after the rest. Kamut absorbs water slowly, so the dough may feel stiff right after mixing and much looser an hour later. Only add the reserved water once it’s had time to soak.
- Aim for soft and tacky. The dough should feel supple, not soupy or clay-like. If it tears during folds, add a splash more water next time; if it spreads like batter, use less.
- Use water, not flour. Wet your hands before every set of folds so the sticky dough slides right off. Extra flour throws off hydration and can leave raw streaks.
- Keep folds to a minimum. Kamut’s gluten develops faster than bread flour’s and breaks down if overworked. Stop at four sets of folds and skip kneading entirely.
- Let a dough scraper do the work. Use it to lift, turn, and tuck the dough during shaping instead of stretching it with your hands.
- Shape firmly but gently. Build enough surface tension to hold the loaf’s shape, but don’t tug until the skin tears. Think of tucking a child into bed: snug, without waking them.
How to Tell When Kamut Sourdough Is Ready to Bake
The clock’s only a guide. The dough tells you when it’s ready. Bulk fermentation is done when you see:
- 50–75% expansion. A straight-sided container marked with tape at the starting level takes the guesswork out.
- A domed top where the dough meets the sides of the container.
- Bubbles on the surface and along the sides, from tiny pinpricks to a few larger ones.
- A jiggle. Ready dough wobbles like set Jell-O when you gently shake the container.
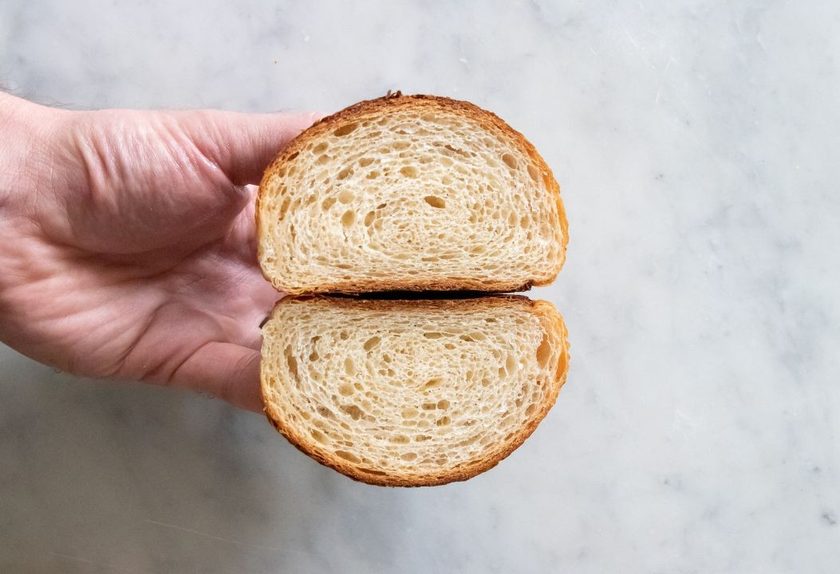
- An airy, pillowy feel when you tip it out.
Whole grain Kamut gives your sourdough starter plenty to feed on, so fermentation can move faster than you’re used to. Add Kamut’s softer gluten, and overproofed dough turns slack and sticky in a hurry. When in doubt, end bulk fermentation a little early. A slightly underproofed loaf still bakes into good bread, but an overproofed one is hard to rescue.
After the overnight cold proof, check the final proof with the poke test. Flour a fingertip and press it about half an inch into the dough:
- Springs back immediately? It needs more time. Leave it at room temperature for 30–60 minutes and test again.
- Springs back slowly, leaving a small dent? It’s ready to bake.
- Dent stays put? It’s overproofed. Bake it right away anyway. It’ll be flatter but still tasty.
Cold dough springs back more slowly than warm dough, so a fridge-cold loaf that recovers gradually is usually right on target.
Temperature affects all of this. Dough at 70°F might need 6–7 hours of bulk fermentation, while dough at 80°F can be done in under 4. A strong, recently fed starter speeds things up, and a tired one slows them down. Jot down your room temperature and timing each time you bake, and you’ll learn your kitchen’s rhythm fast.
Tips for Better Kamut Flour Sourdough
A few small adjustments make a big difference with Kamut:
- Start with less Kamut. For your first loaf, try 30% Kamut and 70% bread flour, then work up to 50% and beyond as the dough becomes familiar.
- Adjust hydration by feel. Every bag absorbs water differently. Start at 68% and change by 10g per bake: more if the dough tears, less if it spreads.
- Keep fermentation steady. Aim for 75–78°F. In a cold kitchen, use the oven with just the light on; in a warm one, mix with cooler water.
- Build real surface tension. Kamut won’t hold its shape on its own, so a few confident drags across the counter during shaping keep the loaf standing tall.
- Trap steam. A preheated Dutch oven holds in moisture so the loaf can expand fully. Drop an ice cube beside the parchment before closing the lid for extra oven spring and a glossier crust.
- Fold in cooked berries. Add about 100g of cooked, cooled Kamut berries during the last stretch and fold for chewy pops of texture.
- Add a little honey. Mixing 15–20g in with the salt boosts the grain’s natural sweetness and deepens the crust color.
- Roll it in seeds. Mist the shaped loaf and roll it in sesame or sunflower seeds before it goes into the banneton. The toasty crunch goes beautifully with Kamut’s nutty flavor.
- Score with confidence. Cold dough straight from the fridge scores cleanly. One quick, decisive slash about ¼ inch deep gives the loaf room to bloom.
Related: Easy Sourdough Blueberry Bread
How to Store Kamut Sourdough Bread
For the first 2–3 days, keep Kamut sourdough on the counter. Once it’s cut, stand it cut-side down on a board so the crust protects the crumb. A linen bread bag or bread box is even better, letting the loaf breathe so the crust stays crisp while the inside stays soft. Plastic bags keep bread softer but turn the crust leathery.
Skip the fridge. Cold temperatures make bread go stale faster than it would on your counter.
Slice only what you’re about to eat, using a serrated knife and a gentle sawing motion. A whole loaf stays fresh far longer than a pre-sliced one.
If you won’t finish it within a few days, freeze it while it’s fresh. Slice it first, separate the slices with parchment, and seal them in a freezer bag or airtight container with the air pressed out. It’ll keep for up to 3 months.
Frozen slices go straight into the toaster, no thawing needed. To revive a stale whole or half loaf, run it quickly under the tap and warm it in a 350°F oven for 10–15 minutes. The water turns to steam, softening the crumb and re-crisping the crust, like a second first bake.
Go for the Gold
Kamut flour is a simple swap that seriously levels up your sourdough. It brings a gorgeous golden color, a rich, buttery flavor, and a softer tang that makes every loaf feel a little more special. Sure, this ancient grain plays by its own rules, but once you get to know it, it’s surprisingly easy to work with. Pair it with a sturdier flour, go easy on the dough, and let it tell you when it’s ready instead of rushing things.
Do that, and you’ll get a loaf that looks amazing and tastes even better. Store it right, and it’ll stay fresh longer, too. So grab a bag, wake up your starter, and see what all the fuss is about.
FAQs
Is Kamut good for sourdough bread?
Yes, it’s fantastic for sourdough. Kamut brings a buttery, nutty flavor and a golden crumb, and its natural sweetness mellows sourdough’s tang. It also gives your starter plenty to feed on, so fermentation stays lively. Its gluten is softer than bread flour’s, so blending the two gives you the best rise, but even on its own, Kamut makes a moist, tender, flavorful loaf.
How do you use Kamut flour in sourdough bread?
Start by swapping 30–50% of your bread flour for Kamut, then increase it as you get comfortable. Give the dough a 45–60 minute rest after mixing so the flour can fully hydrate, and add extra water only once it’s soaked. Handle it gently with wet hands, keep folds to a minimum, and watch for a 50–75% rise instead of a full doubling.
Can Kamut flour replace bread flour?
Yes, though the results will be a little different. Kamut’s gluten is stretchier and less springy than bread flour’s, so a 100% Kamut loaf bakes up denser and more tender, with less rise. For a full swap, lower the hydration to about 65% and handle the dough gently. For a lighter, taller loaf, replace up to 70–80% and keep some bread flour in the mix.
Kamut Flour Sourdough
Sourdough’s tang can be bold, and Kamut softens it. The grain’s natural sweetness and buttery depth round off sharp acidity, giving you a loaf that tastes complex without making you pucker.
Ingredients
- 250g whole grain Kamut flour
- 250g bread flour
- 340g filtered water, plus 20g reserved
- 100g active sourdough starter
- 10g fine sea salt
Instructions
- Autolyse: Mix both flours with 340 g water. Rest, covered, 45–60 minutes.
- Add starter: Pinch and fold in starter with wet hands 2–3 minutes. Rest 30 minutes.
- Add salt: Pinch in salt and up to 20 g water.
- Stretch and fold: Do 4 sets, 30 minutes apart.
- Bulk ferment: Leave covered at 75–78°F until risen 50–75%, 4–5 hours.
- Pre-shape: Round loosely; rest uncovered 20–30 minutes.
- Shape: Form a tight round or oval. Place seam-side up in a rice-floured banneton.
- Cold proof: Cover and refrigerate 10–16 hours.
- Preheat: Heat a lidded Dutch oven at 500°F for 45–60 minutes.
- Score and bake: Score; bake covered at 450°F for 20 minutes, then uncovered 20–25 minutes, until 205–210°F inside.
- Cool: Rest 1–2 hours before slicing.
Notes
Start with less Kamut. For your first loaf, try 30% Kamut and 70% bread flour, then work up to 50% and beyond as the dough becomes familiar.