
Fresh blueberries in tangy sourdough? Yeah, it’s as amazing as it sounds. Sourdough blueberry bread isn’t just tasty—that long fermentation actually breaks down up to 90% of phytates, making it way easier on your gut. The trick is knowing exactly when to fold in those berries and nailing that overnight cold proof that takes everything to the next level. I’m breaking down how to keep your dough from getting too wet, build that gluten network strong enough to hold all that fruit, and score a bakery-worthy loaf with jammy blueberry pockets in every slice. Trust me, once you nail this, there’s no going back.
Why Use Sourdough for Blueberry Bread
Here’s what gets me excited about sourdough—it’s actually easier on your digestive system than regular bread. When you’re working with a long fermentation process, lactic acid bacteria do serious heavy lifting before the bread even hits your stomach. Sourdough fermentation can reduce phytate levels by up to 90%, meaning your body can access more minerals from the wheat flour. The organic acids created during fermentation improve protein digestibility by around 16-18%.
The flavor complexity you get from 12-hour bulk fermentation can’t be replicated in quick yeasted dough. Lactic acid bacteria produce organic acids that create this beautifully tangy backdrop, and when you fold fresh blueberries into that? Pure magic. Studies show sourdough bread lowers glycemic response significantly compared to baker’s yeast bread, meaning more stable energy levels. Long fermentation also breaks down gluten proteins through enzymatic activity, creating bread that’s friendlier to folks with mild sensitivities.
Ingredients
- Bread flour (500g) – high protein content around 12.5%
- Water (350g)
- Active sourdough starter (100g)
- Salt (10g)
- Fresh blueberries (150g)
Preparing the Dough
- Autolyse: Mix flour and water together and let rest for 30-60 minutes. During this rest, enzymes called protease and amylase get activated, making the dough more extensible and kickstarting gluten development. Your dough transforms from shaggy to smooth without any work from you.
- Add starter and salt: After autolyse, spread your active sourdough starter on top and dimple it in with your fingers. Add salt and mix until incorporated. Protease breaks down some protein bonds, which increases the dough’s stretchiness.
- First rest: Cover and let the dough rest for 30 minutes before beginning stretch and folds.
- Stretch and folds: Each fold has a significant impact on dough strength by stretching the gluten network. Wet your hands, grab one side of the dough, stretch it up and fold it over itself. Rotate the bowl 90 degrees and repeat for all four sides—that’s one set.
- Continue folding: Rest 30-45 minutes between sets. As the dough gets stronger, you’ll feel more resistance when stretching. Perform 4-6 sets over the course of bulk fermentation.
- Bulk fermentation: Let the dough rise until it increases by 50-75% in volume. The dough should be smooth, strong, and bubbly. Give your bowl a gentle shake—if it jiggles, it’s well-aerated and ready. This typically takes 4-8 hours, depending on your kitchen temperature.
Related: Lemon Blueberry Sourdough Bread
Incorporating Blueberries
Don’t add blueberries at the start—that’ll give you purple dough and crushed berries. Add fresh blueberries when the dough starts getting some consistency, usually after your second or third stretch and fold. For frozen berries, add thawed frozen blueberries during a lamination step late in bulk fermentation.
Those anthocyanins—powerful antioxidants that give blueberries their characteristic blue-purple color—can turn your dough lavender if you’re not careful. Rinsing fresh berries in cool water until it runs clear prevents color bleeding, though purple swirls can add rustic character.
When adding berries, stretch your dough into a large rectangle on a clean surface. Scatter blueberries evenly across the surface, then fold the dough in thirds like a letter. This distributes fruit without overworking the dough. Keep some berries back—adding a final handful during shaping creates beautiful pockets that burst during baking. A strong gluten network is essential when adding fresh fruit, as it needs to support the extra weight and manage moisture changes. Be gentle during incorporation—you’re folding, not smooshing.
Shaping and Proofing
- Pre-shape: When bulk fermentation is done, turn the dough onto a lightly floured surface. Fold the dough into a rough round and let it rest for 20-40 minutes—this bench rest lets the gluten relax. Use a bench scraper to pull the dough against the counter to increase surface tension.
- Prepare banneton: Dust your banneton liberally with rice flour (it’s less likely to stick than wheat flour). If you don’t have a banneton, use a bowl lined with a heavily floured tea towel. These baskets help high-hydration dough maintain its shape and rise upward instead of spreading outward.
- Final shape: After the bench rest, shape your dough into a tight boule by folding the sides into the center, then creating tension on the surface. Place shaped dough seam-side up into the basket—the smooth side will be on the bottom, and those pretty spiral lines from the basket will transfer to your finished loaf.
- Cold proof: Cover your banneton and refrigerate for 12-48 hours. This long, cold proof creates a lighter, more open crumb and develops complex flavors. Cold dough is easier to score and transfer into your Dutch oven—it holds its shape better.
Baking Instructions
- Preheat Dutch oven: Preheat your Dutch oven inside your oven at 450-500°F for 45 minutes to an hour. That hot pot creates the steam environment that gives you oven spring and a crackling crust.
- Score the dough: Remove the dough straight from the fridge. There’s no need to let it come to room temperature first—baking it cold gives better results. Turn it out onto parchment paper and score confidently with a sharp blade or lame. Create one deep slash for expansion.
- Transfer to Dutch oven: Carefully lift the parchment paper with the dough and lower it into the preheated Dutch oven. Use the parchment as a sling for safe handling.
- Initial bake: Bake covered at 450-500°F for 20-30 minutes. The tight-fitting lid traps moisture released from the dough, allowing it to expand fully before the crust sets.
- Finish baking: Remove the lid and lower the temperature to 400-475°F for the final 15-25 minutes. Because blueberries add moisture, your loaf might need slightly longer to bake. Check internal temperature with a thermometer—you’re looking for 208-210°F in the center. Stick it in a few spots to avoid measuring a blueberry pocket instead of bread.
- Cool completely: Listen for the crackle when you pull your loaf from the oven. Let it cool completely for at least one hour before slicing, giving the crumb time to set properly.
Related: Sourdough Blueberry Pancakes Made Better With Sourdough Starter
Storage and Serving
Fruit-enriched sourdough won’t last as long as plain sourdough because extra moisture and sugars from blueberries create conditions where microorganisms can grow. In a warm kitchen, finish the loaf within 2-3 days to avoid mold. Store bread cut-side down on a cutting board, or wrap loosely in a clean tea towel. Avoid plastic bags for the first day—they trap moisture and make the crust soft.
For longer storage, slice it, wrap individual pieces in plastic wrap to prevent freezer burn, and stash in a freezer bag—toast slices straight from frozen whenever a craving hits. The texture stays good for up to 2 months.
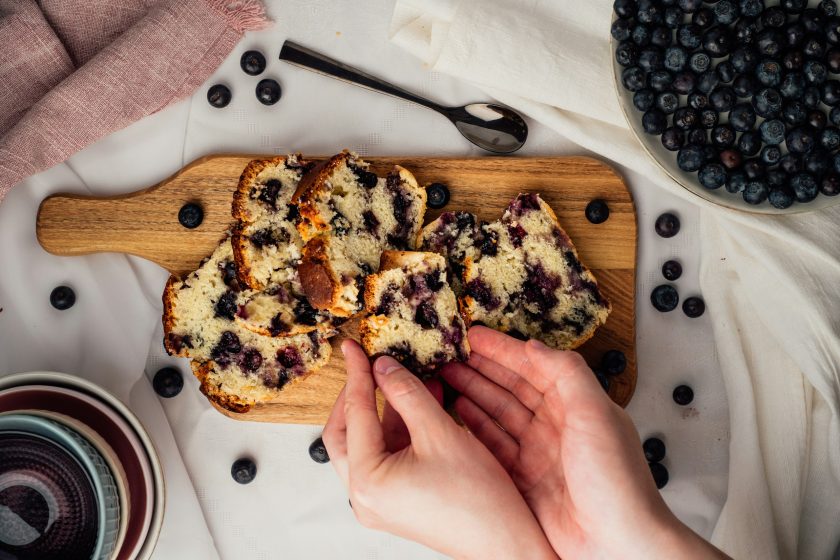
Fresh blueberry sourdough is incredible toasted with butter, cream cheese, and honey, or as mind-blowing French toast. The crumb should be soft and pillowy with pockets of jammy blueberries throughout—perfect for breakfast or afternoon snacks. The subtle sourdough tang balances the sweetness of berries beautifully.
Time to Bake Your Best Loaf Yet
You’ve got everything you need to nail this sourdough blueberry bread. From understanding how that long fermentation breaks down phytates and boosts digestibility, to nailing the timing on folding in those juicy berries—it all comes together for one incredible loaf. The patience pays off with complex flavors you can’t rush and a gut-friendly bread that regular yeast can’t touch. Watch your dough during bulk fermentation, feel that gluten strength building with each fold, and trust the cold proof to develop those deep flavors. When you pull that golden loaf from your Dutch oven and hear it crackle, you’ll know it was worth it. Now grab your starter and some fresh blueberries—let’s make some magic happen.
Print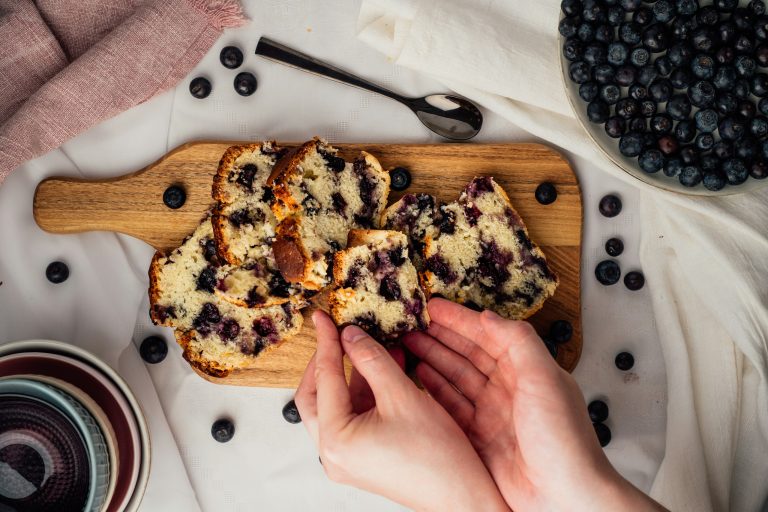
Sourdough Blueberry Bread
Here’s what gets me excited about sourdough—it’s actually easier on your digestive system than regular bread. When you’re working with a long fermentation process, lactic acid bacteria do serious heavy lifting before the bread even hits your stomach.
Ingredients
- Bread flour (500g) – high protein content around 12.5%
- Water (350g)
- Active sourdough starter (100g)
- Salt (10g)
- Fresh blueberries (150g)
Instructions
- Mix flour and water; autolyse 30-60 minutes until smooth.
- Add active starter and salt; mix thoroughly and rest 30 minutes.
- Perform stretch and folds: wet hands, stretch the dough sides over itself, rotating the bowl. Complete 4-6 sets with 30-45 minute rests between.
- Add rinsed fresh blueberries after the second or third fold to prevent purple dough.
- Bulk ferment 4-8 hours until the dough increases 50-75% and jiggles when shaken.
- Pre-shape into a rough round; bench rest 20-40 minutes.
- Final shape into a tight boule; place seam-up in rice-floured banneton.
- Cold proof in refrigerator 12-48 hours.
- Preheat the Dutch oven at 450-500°F for 45 minutes.
- Score cold dough; bake covered 20-30 minutes, then uncovered 15-25 minutes at a lower temperature until 208-210°F internally.
Notes
In a warm kitchen, finish the loaf within 2-3 days to avoid mold. Store bread cut-side down on a cutting board, or wrap loosely in a clean tea towel. Avoid plastic bags for the first day—they trap moisture and make the crust soft.





