
Last updated on August 12th, 2026
Herb sourdough is one of those bakes that makes your whole kitchen smell incredible. Rosemary and thyme folded into a naturally leavened dough turn a classic loaf into something a whole lot more exciting, without adding much extra work. The right ratios, herb pairings, and a bit of good technique are all it takes to land a fragrant, golden crust with a crumb that’s soft and open inside. From picking the best herbs to nailing the bake, everything needed to pull off a killer herb sourdough loaf is covered here, step by step.
Ingredients
- 500g bread flour
- 350g water
- 100g active sourdough starter
- 10g sea salt
- 2 tbsp fresh rosemary, chopped
- 1 tbsp fresh thyme leaves
Equipment
You’ll need a banneton basket to hold your dough’s shape during proofing and give it that classic spiral pattern. A Dutch oven creates the steam needed for a golden, blistered crust. A bench scraper makes handling sticky dough easier, and a lame lets you score the dough cleanly before baking, which controls how it expands in the oven. A kitchen scale ensures accurate measurements, which matters for consistent results.
Related: Savory And Easy Herb and Cheese Sourdough Babka
Step-by-Step Herb Sourdough Recipe
- Autolyse: Combine flour and water in a bowl and let it rest for 30–60 minutes. This allows the flour to fully hydrate, making the dough easier to work with. Tip: Skip the salt and starter at this stage — adding them too early can slow down hydration.
- Mix in starter and salt: Add your active sourdough starter and sea salt, then mix until fully incorporated. Tip: Squeeze and fold the dough with wet hands rather than a spoon; it incorporates faster and keeps the dough from sticking to your fingers.
- Add the herbs: Fold in your chopped rosemary and thyme until evenly distributed through the dough. Tip: Pat fresh herbs dry before adding them so you don’t throw off your hydration level.
- Bulk fermentation: Let the dough rise at room temperature for 4–6 hours. This is when most of the flavor develops. Tip: A slightly warmer spot, like near (but not on) a preheating oven, can speed up a sluggish rise.
- Stretch and folds: During the first 2 hours of bulk fermentation, perform 3–4 rounds of stretch and folds, spaced about 30 minutes apart. Gently pull the dough up and over itself to build strength. Tip: Wet your hands before each round so the dough doesn’t tear or stick.
- Shape: Once the dough looks visibly puffy and has grown by about 50%, turn it out and shape it into a tight round or oval, tucking the seams underneath. Tip: Let the dough rest for 10 minutes after turning it out; it relaxes the gluten and makes shaping easier.
- Proof in the banneton: Place the shaped dough seam-side up in a floured banneton basket. Tip: Use rice flour instead of regular flour to dust the basket — it resists moisture better and prevents sticking.
- Cold proof: Refrigerate the dough overnight (8–12 hours). This slows fermentation, deepens flavor, and firms up the dough for easier scoring. Tip: Don’t skip this step, even if you’re short on time — a firmer, colder dough scores far more cleanly.
- Preheat: About 45 minutes before baking, preheat your oven with the Dutch oven inside to 475°F (245°C). Tip: A fully preheated Dutch oven is key to good oven spring, so don’t rush this step.
- Score: Turn the dough out onto parchment paper and score the top with a lame in your preferred pattern. Tip: Score at a slight angle rather than straight down for a more dramatic, ear-like rise.
- Bake covered: Carefully place the dough (with parchment) into the hot Dutch oven, cover with the lid, and bake for 20 minutes. Tip: Use the parchment as a sling to lower the dough in safely and avoid burns.
- Bake uncovered: Remove the lid and bake for another 20–25 minutes, until the crust is deep golden brown. Tip: If the crust is browning too fast, tent it loosely with foil for the last few minutes.
- Cool: Let the loaf cool on a wire rack for at least an hour before slicing, so the crumb finishes setting. Tip: As tempting as it is, cutting too early releases steam and can leave the inside gummy.
Best Herb Combinations
- Rosemary garlic: 2 tbsp chopped fresh rosemary + 3 cloves minced garlic — bold, savory, and great alongside soup
- Thyme parmesan: 1 tbsp fresh thyme leaves + 1/2 cup grated parmesan — nutty and rich, tastes indulgent
- Dill cheddar: 2 tbsp chopped fresh dill + 3/4 cup shredded sharp cheddar — sharp and tangy, excellent toasted
- Italian herb blend: 1 tbsp dried oregano + 1 tbsp chopped fresh basil + 1 tbsp chopped fresh rosemary — aromatic and reminiscent of pizzeria bread
- Sage butter: 4 tbsp softened butter + 1 tbsp finely chopped sage, brushed on after baking for a rich finish
Related: Yummy And Easy Sourdough Cheddar Biscuits Recipe
Common Mistakes
Using too many herbs is one of the most common errors. Herbs can interfere with gluten development if added in excess, which weakens the dough’s structure and results in a denser, tighter loaf. Stick to one or two herbs, and measure them rather than eyeballing the amount.
Under-fermentation is another frequent issue. If the dough hasn’t risen enough during bulk fermentation, the crumb will be tight and gummy rather than open and airy. This often happens when the kitchen is too cold, or the starter wasn’t fully active before mixing. Make sure your starter passes the float test before using it, and give the dough extra time in a warmer spot if needed.
Over-proofing causes the opposite problem. If the dough ferments too long, it loses structure and can’t hold its shape, resulting in a flat loaf that spreads out instead of rising. Watch for visual cues like a 50% increase in size rather than relying on the clock alone.
A dense loaf can also result from insufficient stretch and folds, which are essential for building gluten strength without traditional kneading. Skipping these steps, or doing too few rounds, leaves the dough without the strength it needs to trap gas and rise properly.
Finally, a burnt crust is a common issue, especially with added ingredients like cheese or a generous amount of herbs, which can caramelize quickly on the surface. If your oven runs hot, check the loaf a few minutes early and consider removing the Dutch oven lid a little later in the bake to control browning.

Serving Ideas
Herb sourdough works well in a variety of dishes thanks to its savory flavor and sturdy crumb. It holds up to wet ingredients without getting soggy, making it a versatile addition to almost any meal.
- Soups and stews: Tear off a warm slice and use it to soak up broth, or serve alongside a hearty stew for dipping.
- Sandwiches: Slice and toast it as a base for sandwiches; it’s sturdy enough to hold fillings without falling apart.
- Bruschetta: Cube or slice the loaf, toast it, and top with tomatoes, olive oil, and fresh basil for a quick appetizer.
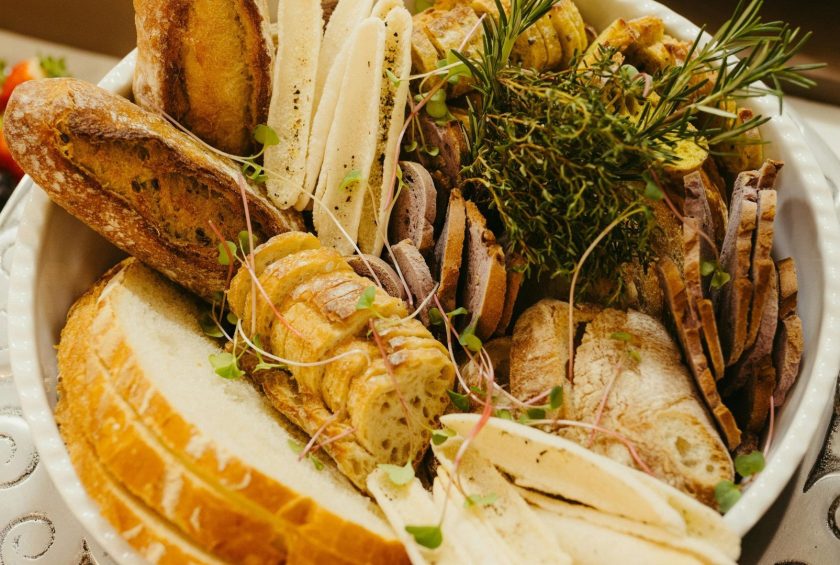
- Cheese boards: Cut into thick slices or wedges and serve alongside cheese, cured meats, and olives.
- Toast: Simply toasted with butter, the herbs come through clearly enough that it doesn’t need much else.
- Grilled cheese: Use it as the bread for a grilled cheese sandwich; the herbs pair especially well with sharp cheddar or parmesan.
Storage
Proper storage keeps herb sourdough tasting fresh and preserves its crust for as long as possible. At room temperature, the loaf stays good for about two to three days when stored correctly. Avoid sealing it in plastic, which traps moisture and softens the crust — a paper bag or a clean kitchen towel works much better for maintaining texture.
For longer storage, freezing is the best option. Slice the loaf before freezing so you can pull out individual pieces as needed, rather than thawing the entire loaf at once. Wrap the slices tightly to prevent freezer burn, and use them within about three months for the best flavor and texture.
When you’re ready to eat a frozen slice, reheating in the oven or toaster brings the crust back to life and warms the crumb through. Avoid microwaving, which tends to make the bread chewy rather than crisp.
- Store at room temperature for up to 3 days, cut-side down
- Wrap in a paper bag or kitchen towel, not plastic
- Slice before freezing for easy single-serving portions
- Freeze for up to 3 months, wrapped tightly
- Reheat in the oven or toaster, not the microwave
Ready, Set, Bake
And that’s really all there is to it. Herb sourdough proves that a handful of simple ingredients — flour, water, salt, starter, and a couple of good herbs — can turn into something seriously impressive. The technique is what makes the magic happen: autolyse, bulk fermentation, stretch and folds, and a solid cold proof all work together to build that flavor and structure you’re after.
A hot Dutch oven and a confident score give you the crackly, golden crust everyone’s chasing. Pick a herb combo that excites you, watch out for the classic mistakes like over-proofing or going overboard on herbs, and store your loaf right so it stays fresh. You’ve got everything you need now. Time to get your hands in the dough and bake something great.
FAQs – Herb Sourdough
What herbs are good in sourdough bread?
Rosemary, thyme, sage, and oregano are top picks for sourdough since they hold up well to long fermentation and baking. Rosemary brings a bold, piney flavor, thyme is subtle and slightly lemony, sage adds warmth, and oregano leans savory. Basil and dill work great too, especially paired with cheese for extra flavor.
When to add herbs to sourdough?
Add herbs after mixing in your starter and salt, right before bulk fermentation begins. Folding them in at this stage lets them distribute evenly without interfering with early gluten development. Adding herbs too early, during autolyse, can slow hydration, while adding them too late makes even distribution tricky.
Herb Sourdough Recipe
Rosemary and thyme folded into a naturally leavened dough turn a classic loaf into something a whole lot more exciting, without adding much extra work.
Ingredients
- 500g bread flour
- 350g water
- 100g active sourdough starter
- 10g sea salt
- 2 tbsp fresh rosemary, chopped
- 1 tbsp fresh thyme leaves
Instructions
- Autolyse: Mix flour and water; rest 30–60 minutes to hydrate.
- Mix in starter and salt: Add starter and sea salt; mix well.
- Add the herbs: Fold in chopped rosemary and thyme evenly.
- Bulk fermentation: Rise at room temperature for 4–6 hours.
- Stretch and folds: Do 3–4 rounds, 30 minutes apart, in the first 2 hours.
- Shape: Once puffy and grown by 50%, shape into a tight round.
- Proof in the banneton: Place seam-side up in a floured banneton.
- Cold proof: Refrigerate overnight, 8–12 hours.
- Preheat: Heat oven with Dutch oven inside to 475°F (245°C).
- Score: Turn out onto parchment and score the top.
- Bake covered: Bake in the Dutch oven, lid on, for 20 minutes.
- Bake uncovered: Remove lid, bake 20–25 minutes until deep golden.
- Cool: Rest on a wire rack for at least an hour before slicing.
Notes
- Store at room temperature for up to 3 days, cut-side down
- Wrap in a paper bag or kitchen towel, not plastic
- Slice before freezing for easy single-serving portions
- Freeze for up to 3 months, wrapped tightly
- Reheat in the oven or toaster, not the microwave



![[video] from the seed to the peasant bakery with nicolas supiot](https://www.mydailysourdoughbread.com/wp-content/uploads/2022/11/image-16-120x120.jpeg "[Video – Part 2] Entering Into Peasant Bakery 111")
