
Last updated on August 12th, 2026
Meet your new favorite bread: olive sourdough. This loaf combines a tangy, well-fermented starter with briny Kalamata or Castelvetrano olives for a really satisfying bite. You get a chewy, open crumb and a crisp crust, plus a rich, salty flavor that plain sourdough doesn’t have. Below, you’ll find everything needed to make it—ingredients, equipment, step-by-step instructions, and helpful tips. Whether it’s your first time making sourdough or your fiftieth loaf, this recipe shows you exactly how to get a great result at home.
Why You’ll Love This Recipe
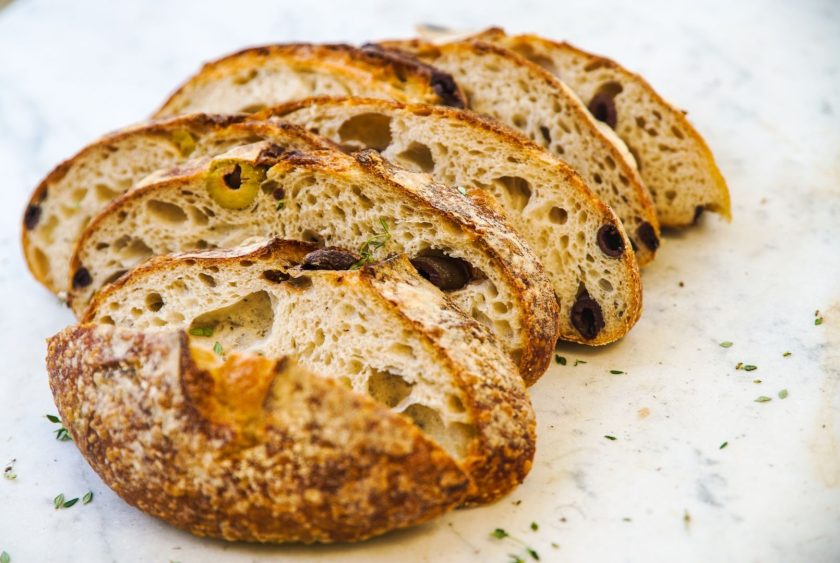
Olive sourdough is all about balance. The natural tang from fermentation meets the salty richness of the olives, and neither one overpowers the other. You get a chewy crumb with an open, airy structure — those irregular holes that show the fermentation did its job — wrapped in a crispy crust. Every bite delivers pockets of briny olive against a backdrop of tangy, well-developed bread flavor.
It’s not the fastest recipe out there, since sourdough always takes time. But that time is exactly what builds the deep, artisan flavor and texture you can’t get from a quick yeast bread.
Ingredients
- 500g bread flour
- 350g water (70% hydration)
- 100g active sourdough starter
- 10g sea salt
- 150g Kalamata or Castelvetrano olives, chopped
Equipment
- Dutch Oven — Traps steam around the loaf, giving you that crackly, blistered crust.
- Banneton — Supports the dough’s shape during the final rise and leaves ridges on the crust. A flour-lined bowl works as a substitute.
- Bench Scraper — Makes handling sticky, hydrated dough much easier during folding and shaping.
- Lame — Gives clean, deliberate scoring so the loaf expands where you want it to instead of tearing randomly.
- Kitchen Scale — Sourdough relies on precise flour-to-water ratios, so weighing ingredients matters more here than in most baking.
Related: How to Use a Banneton: Learning Proofing Basics
Step-by-Step Recipe
- In a large mixing bowl, combine the bread flour and water using your hands or a sturdy spatula. Mix just until no dry patches of flour remain — the dough will look rough and shaggy, and that’s fine. Cover the bowl with a damp towel or plastic wrap to keep the surface from drying out, then let it sit undisturbed.
- Allow the dough to autolyse for 30-60 minutes. This resting period lets the flour fully absorb the water and gives gluten a head start on developing without you lifting a finger. The dough will feel noticeably smoother and more elastic by the time this step is done.
- Add your active, bubbly starter along with the salt directly on top of the dough. Using wet hands, pinch and fold repeatedly until both are completely incorporated with no dry streaks or clumps left behind. This is the official start of bulk fermentation, so it’s worth jotting down the time.
- Let the dough rise at room temperature for roughly 4-6 hours. The exact timing depends heavily on your kitchen’s temperature — a warm spot around 75-78°F will move things along faster, while a cooler kitchen may need closer to 6-8 hours. Watch the dough itself rather than the clock; it should look noticeably puffier and larger.
- During one of your earlier stretch and fold sessions, gently work in the chopped olives, distributing them as evenly as you can throughout the dough. Timing matters here — adding them too soon or folding too roughly can crush the olives, releasing extra moisture and discoloring the dough.
- Roughly every 30-45 minutes during bulk fermentation, perform a set of stretch and folds. Wet one hand, reach under one side of the dough, pull it upward, and fold it back over itself. Turn the bowl and repeat on all four sides. Aim for 3-4 total rounds spaced through fermentation — this is what builds dough strength in place of traditional kneading.
- Once the dough looks visibly larger, feels light and jiggly when the bowl is nudged, and shows a few small bubbles on the surface, it’s ready for shaping. Gently turn it out onto a lightly floured countertop.
- Using your bench scraper, shape the dough into a tight round or oval, dragging it against the counter to build tension across the surface. That tension is essential — it’s what keeps the loaf holding its shape instead of spreading flat once it hits the oven.
- Transfer the shaped dough seam-side up into a well-floured banneton, then place it in the fridge for an overnight cold proof, ideally 8-12 hours. This slow, cold rise develops deeper tang and firms the dough, making it far easier to score cleanly the next day.
- The following day, set your Dutch oven inside your regular oven and preheat everything to at least 450°F, giving it a full 30-45 minutes to heat thoroughly before baking.
- Turn the cold dough out of the banneton onto a sheet of parchment paper, then score the top firmly and confidently with your lame in one decisive motion.
- Carefully lower the dough and parchment into the hot Dutch oven, cover with the lid, and bake for 20 minutes so the trapped steam can work its magic on the crust.
- Remove the lid and continue baking uncovered for another 20-25 minutes, until the crust deepens to a rich golden brown and sounds hollow when tapped.
- Move the finished loaf to a wire rack and let it cool fully, at least 1-2 hours, before slicing into it.
Tips for Success
- Don’t overmix the olives — a few gentle folds are all it takes. Overworking them bruises the olives and muddies the dough.
- Pat your olives dry before adding them. Excess moisture or oil throws off your hydration and can make the dough overly slack.
- Watch fermentation timing, not the clock — a warm kitchen speeds things up, a cold one slows it down. Judge readiness by how the dough looks and feels.
- Score with confidence — a quick, decisive slash gives a cleaner bloom than a hesitant, shallow cut.
- Use a scale, not cups — precise measurements matter more in sourdough than in most other baking.
- Check your starter before you start — it should be bubbly, doubled in size, and pass the float test.
- Chop olives evenly, so they distribute throughout the dough instead of clumping in one area.
- Don’t skip the cold proof — it deepens flavor and makes the dough much easier to score.
Related: Sourdough Olive Bread Recipe for Olive Lovers
Variations
- Rosemary Olive — Fold in a tablespoon of fresh chopped rosemary along with the olives for a fragrant, herby twist.
- Garlic Olive — Mash in roasted garlic cloves for a mellow, caramelized sweetness that complements the briny olives.
- Cheese Olive — Add cubed parmesan for pockets of nutty, salty richness. Expect a slightly stickier dough, since cheese adds moisture.
- Whole Wheat Olive — Substitute about 25% of the bread flour with whole wheat for a nuttier, heartier loaf without losing too much of the open crumb.
- Jalapeño Olive — Add diced fresh or pickled jalapeños for a spicy kick that cuts through the richness of the olives.
Storage & Freezing
- Store the loaf at room temperature, cut-side down on the counter or in a paper bag, for up to 3 days.
- Avoid plastic bags for storage — they trap moisture and soften the crust, losing the crackly texture you worked for.
- For longer storage, slice the entire loaf before freezing so you can grab individual pieces without thawing the whole thing.
- Freeze slices flat in a freezer bag, pressing out excess air to prevent freezer burn.
- Frozen slices keep well for up to 3 months.
- To refresh, pop slices directly into a toaster or a hot oven for a few minutes.
- Reheating in the oven brings back the crisp crust even after freezing, better than a microwave, which tends to leave the bread soft and chewy instead of crusty.
- Let a fully frozen loaf thaw at room temperature for a few hours before reheating whole, if you’re not slicing it first.
- Avoid refreezing thawed bread, as repeated freezing and thawing affects texture and speeds up staling.
That’s a Wrap—Now Go Bake!
You’ve got everything you need to make a great olive sourdough loaf. It comes down to balancing tangy fermented dough with salty olives, so neither one takes over. Keep your starter active, fold in the olives at the right time, and you’ll end up with a chewy, open crumb and a crisp crust.
Small details like using a Dutch oven, doing a cold proof, and scoring with confidence make a real difference in the final result. Once you’ve got the basics down, feel free to try different variations and make the recipe your own. This is a skill that gets better with practice, one loaf at a time. So flour up and get baking!
FAQs – Olive Sourdough Bread
Is olive sourdough good?
Yes, olive sourdough is a great choice if you like bold flavors. The tangy sourdough base pairs well with salty, briny olives, creating a chewy, flavorful loaf with a crisp crust. It works well on its own, with olive oil, or alongside soups and pasta dishes. Many bakers find it more interesting than plain sourdough thanks to the added texture and taste from the olives.
Can I add olives to my sourdough?
Yes, you can easily add olives to your sourdough. Chop them and pat them dry before folding them in during an early stretch and fold, so they don’t get crushed. Kalamata or Castelvetrano olives both work well. Just be careful not to overmix, and avoid adding them too early in the process to prevent discoloring the dough.
Olive Sourdough Bread
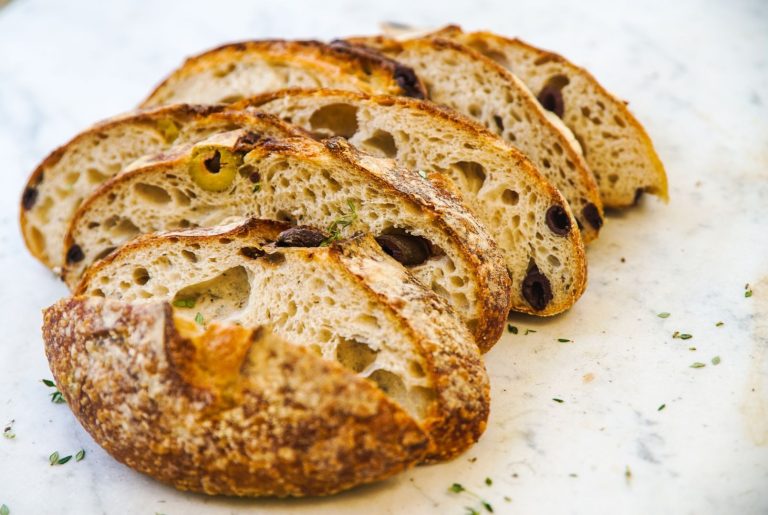
Olive sourdough is all about balance. The natural tang from fermentation meets the salty richness of the olives, and neither one overpowers the other.
Ingredients
- 500g bread flour
- 350g water (70% hydration)
- 100g active sourdough starter
- 10g sea salt
- 150g Kalamata or Castelvetrano olives, chopped
Instructions
- Mix: Combine flour and water until no dry patches remain, cover, and let sit.
- Autolyse: Rest 30–60 minutes so the flour hydrates and gluten starts developing.
- Add starter and salt: Fold in with wet hands until fully incorporated — this starts bulk fermentation.
- Bulk fermentation: Rise at room temperature 4–6 hours, until noticeably puffier and larger.
- Fold in olives: During an early stretch and fold, gently work in the chopped olives without crushing them.
- Stretch and folds: Every 30–45 minutes, do 3–4 rounds, pulling and folding the dough over itself on all sides.
- Turn out: Once light, jiggly, and bubbly on top, turn onto a floured counter.
- Shape: Form a tight round or oval, building tension with a bench scraper.
- Cold proof: Place seam-side up in a floured banneton and refrigerate 8–12 hours.
- Preheat: Heat the Dutch oven inside your oven to 450°F for 30–45 minutes.
- Score: Turn dough onto parchment and score confidently.
- Bake covered: Bake 20 minutes with the lid on.
- Bake uncovered: Bake 20–25 minutes more until deep golden and hollow-sounding.
- Cool: Rest on a wire rack 1–2 hours before slicing.
Notes
Don’t overmix the olives — a few gentle folds are all it takes. Overworking them bruises the olives and muddies the dough.





