
Last updated on August 16th, 2026
Your dough doubled perfectly last week. This week it’s sluggish after five hours, even though nothing about the recipe changed — just the kitchen’s temperature. That’s the tricky part of sourdough: small temperature swings quietly throw off timing. A sourdough DoughBed fixes that by keeping dough at a steady 75-82°F, so fermentation stays predictable no matter what’s happening in the kitchen.
Ahead, you’ll find exactly what a DoughBed is, how it works, and why that consistency makes handling and shaping so much easier. By the end, you’ll know how to use one properly and get consistently great results.
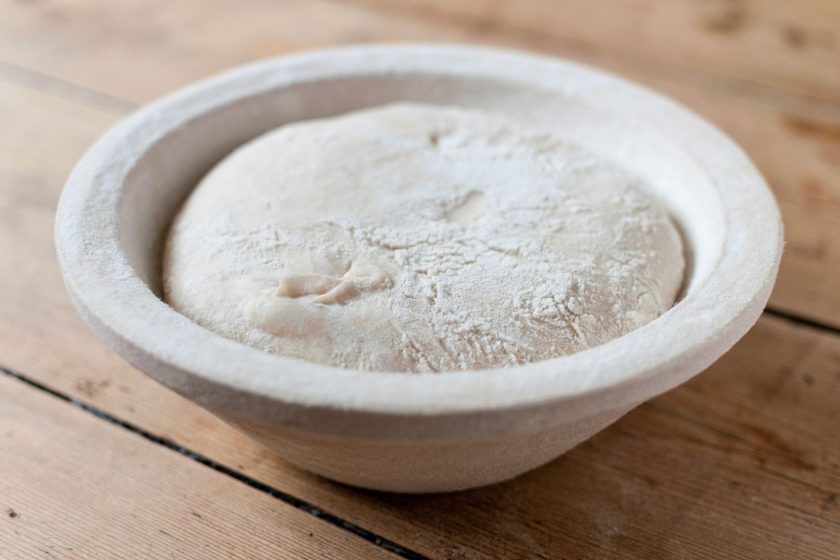
What Is a Sourdough DoughBed?
A DoughBed is a dough-proofing tool made up of a wide glass bowl, a cork lid, and a low-wattage warming mat. Together, they maintain dough at a steady 75-82°F throughout bulk fermentation.
Kitchen temperatures change throughout the day, and that directly affects how fast sourdough ferments. A DoughBed removes that variable by keeping the temperature constant, which makes fermentation time consistent from one bake to the next. It eliminates the guesswork of judging dough readiness by feel or memory, and removes the need to search for a warm spot in the house for proofing.
It’s built for home bakers who want consistent proofing results, particularly those in cooler climates or kitchens that experience noticeable temperature swings throughout the day.
How a DoughBed Works
The cork lid on a DoughBed helps retain humidity around the dough, which prevents a dry skin from forming on the surface during fermentation. This keeps the dough soft and workable by the time it’s ready to shape.
The bowl’s wide, shallow shape spreads the dough’s surface area out rather than concentrating it in a narrow container. This allows heat to distribute more evenly through the dough, supporting consistent gluten development and fermentation across the entire mass rather than in isolated pockets.
Related: The Perfect Sourdough Bread Bowl: Simple and Easy
The Nerdy Bit: Why Temperature Actually Matters
Sourdough fermentation depends on two microorganisms: wild yeast, which produces the carbon dioxide that makes dough rise, and lactic acid bacteria, which produce the acids responsible for sourdough’s tang. Both respond to temperature, but not in identical ways.
Yeast activity increases as temperatures rise into the mid-70s to low-80s°F, which is why dough in a cold kitchen takes longer to double in size. Lactic acid bacteria also become more active in this range, and their balance of lactic versus acetic acid production shifts with temperature and hydration, affecting the final flavor of the bread.
Enzyme activity matters too. Amylase enzymes break starches down into sugars that yeast can use for fuel, and this process speeds up as dough gets warmer.
The 75-82°F range a DoughBed maintains supports active, predictable fermentation without overheating the dough before its gluten structure has fully developed.
Key points:
- Warmer dough speeds up yeast activity and rise time
- Lactic acid bacteria shift acid production based on temperature
- Amylase enzymes break down starches faster in warmer conditions
- 75-82°F balances fermentation speed with proper gluten development
Benefits of Using a DoughBed
Using a DoughBed offers several practical advantages for sourdough bakers:
- Easier handling: The wide, open bowl gives you room to work around wet, high-hydration dough with your hands or a bowl scraper, without wedging it into a corner.
- Less sticking: Dough fermented at a consistent, warm temperature develops gluten strength more predictably than dough fermented in a cold kitchen. Stronger gluten holds the dough together, reducing stickiness as you shape it.
- Better shaping: Evenly fermented dough — neither underproofed and stiff nor overproofed and slack — is easier to shape and holds tension better once formed.
- Cleaner workflow: Mixing, bulk fermentation, and transfer to the banneton all happen in the same bowl, cutting down on the number of dishes and the amount of mess compared to using separate containers for each stage.
How to Use a DoughBed
Using a DoughBed follows a straightforward sequence, from mixing through the final proof:
- Mix your dough ingredients directly in the glass bowl, which removes the need for a separate mixing bowl.
- Plug in the warming mat, place the bowl on top of it, and cover the bowl with the cork lid.
- Let the dough go through bulk fermentation. Check in roughly every 30 minutes for a set of stretch-and-folds, watching for the dough to become puffy and jiggly rather than relying only on a timer.
- Once bulk fermentation is complete, turn the dough out onto a lightly floured surface using a bench scraper.
- Let the dough rest, uncovered, for 20 to 30 minutes. This bench rest relaxes the gluten, which makes shaping easier and reduces tearing.
- Shape the dough and place it into a banneton for its final proof.
- For the final proof, keep the banneton near the DoughBed’s warmth if your kitchen runs cold, or move it to the refrigerator for a slower, overnight proof that can add extra flavor.
- Once the final proof is done, the dough is ready to bake, whether in a Dutch oven or on a baking stone.
Each step builds on consistent conditions from the start, so the dough arrives at shaping and baking in a more predictable state than dough proofed at fluctuating room temperature.
DoughBed vs Traditional Work Surfaces
Marble and Stainless Steel
These surfaces stay cool, which works well for laminated doughs like croissants but works against sourdough during bulk fermentation. A bowl of dough placed on marble or stainless steel often loses heat to the surface itself.
Wood Countertops
Wood is a more neutral surface than stone or steel — it doesn’t actively pull heat from the dough — but it also doesn’t add any warmth. Fermentation speed still depends entirely on the kitchen’s ambient temperature.
Silicone Mats
A silicone mat can add a thin layer of insulation under a bowl, but this is a passive effect. It won’t raise dough temperature into the 75-82°F range on its own, especially in a cold kitchen. A DoughBed’s warming mat actively maintains that temperature instead of only reducing heat loss.
Cleaning and Maintenance
Keeping a DoughBed in good condition is simple with a few routine steps:
- Clean the glass bowl with hot soapy water or run it through the dishwasher, just as you’d clean any mixing bowl.
- Remove the plastic liner from the cork lid before cleaning, so you’re rinsing the liner rather than scrubbing dried dough directly into the cork.
- Dry every piece fully before storing it, especially the cork lid — cork that stays damp too long can develop odors or mildew.
- Air-dry components on a rack after washing rather than stacking them away wet.
- Wipe the warming mat with a damp cloth only. It’s an electrical component and should never be submerged in water or washed in a dishwasher.
- Store the mat inside the bowl between uses. The full setup is compact enough to fit in a standard cupboard.
Related: Sourdough Starter Maintenance: How to Feed and Maintain Your Starter
Common Mistakes
Too much flour: Adding extra flour whenever dough feels tacky during mixing or shaping throws off the hydration ratio and can result in a denser crumb than intended. It’s better to follow the fermentation schedule than to reach for more flour every time the dough feels sticky.
Incorrect hydration expectations: A DoughBed manages temperature, not hydration. It won’t turn a stiff, under-hydrated dough into a supple one. If the dough is difficult to work with, check the water-to-flour ratio before assuming the tool will correct it.
Wrong cleaning methods: The warming mat is an electrical component, so submerging it in water or running it through the dishwasher can damage it and shorten its lifespan. A damp cloth wipe-down is sufficient for regular cleaning.
Temperature: The Secret Ingredient You’ve Been Missing
Here’s the truth about sourdough: it’s not really about skill; it’s about temperature. A DoughBed nails that by keeping your dough at a steady 75-82°F with a glass bowl, cork lid, and warming mat working together. No more guessing when your dough’s ready, no more hunting for a warm spot in the house, no more inconsistent bakes because your kitchen ran cold overnight. The wide bowl keeps things heating evenly, the cork lid stops the dough from drying out, and every stage from mixing to final proof happens with way less trial and error. It won’t fix bad hydration or sloppy technique, but it takes the one wildcard out of the equation. Consistent temp means consistent bread, every single time.
FAQs on Sourdough DoughBed
Is the DoughBed worth it?
If unpredictable proofing has been messing with your bakes, yes — it’s worth it. A DoughBed keeps dough at a steady 75-82°F, so fermentation timing stops being a guessing game. It also makes handling and shaping easier since dough ferments more evenly. It won’t fix hydration issues or bad technique, but for anyone dealing with a cold or fluctuating kitchen, it solves a real problem.
What temperature should a DoughBed be?
A DoughBed should stay between 75-82°F during bulk fermentation. That range keeps yeast and lactic acid bacteria active enough for a predictable rise, without overheating the dough before its gluten structure has developed. This is the temperature the DoughBed’s warming mat is designed to maintain automatically, so you don’t have to monitor or adjust it yourself.




![[video] from the seed to the peasant bakery with nicolas supiot](https://www.mydailysourdoughbread.com/wp-content/uploads/2022/11/image-16-120x120.jpeg "[Video – Part 2] Entering Into Peasant Bakery 7")
