So, sourdough. It’s like the cool grandparent of the bread world. Been around forever, but suddenly everyone’s rediscovering how awesome it is. And let me tell you, once you get the hang of it, you’ll be wondering why you ever settled for store-bought bread.
Now, I know what you’re thinking. “Ancient recipe? Sounds complicated.” But here’s the secret – it’s all about that hydration, baby! Get that water-to-flour ratio right, and you’ll be churning out Instagram-worthy loaves faster than you can say “lactobacillus.” Understanding hydration is your ticket to sourdough success. Let’s break down this hydration business and get you on the fast track to sourdough stardom.

Table of Contents
- What is Sourdough Hydration?
- Tools and Equipment for Managing Hydration
- How to Calculate Hydration
- Hydration Levels of Sourdough Starter
- How Lower Hydration Levels Affect Sourdough
- How Higher Hydration Levels Affect Sourdough
- What’s the Best Sourdough Hydration Level?
- Sourdough Hydration Levels Chart
- Hydration Levels and Types of Flour
- Adjusting Hydration for Different Recipes
- Troubleshooting Hydration Levels
- Sourdough Hydration Process
- FAQs
What is Sourdough Hydration?
Essentially, when we’re discussing the level of hydration in your sourdough, we’re talking about the measure of the weight of water in the dough, in association with the weight of the flour in the dough.
This can then be expressed as a percentage, i.e. 78% hydration. The higher the hydration level of sourdough, the clingier and wetter it becomes.
Therefore, if you have an 80% hydration starter then your bread will be less sticky than if you used a 50% hydration starter (which translates into more water).
Tools and Equipment for Managing Hydration
- A good kitchen scale is essential for achieving precise hydration levels. Look for one that measures in grams and can handle up to 5kg. Digital scales are ideal, providing precise readings down to the decimal point. When aiming for hydration levels between 65% and 75%, precise measurements are critical.
- Glass or stainless steel mixing bowls are excellent choices – they’re easy to clean and won’t react with your dough. For higher hydration doughs, like 80% ciabatta, a container with high sides can be beneficial. It will contain your wet dough and make folding easier.
- A good dough scraper is an invaluable tool. Plastic scrapers are ideal for removing every bit of dough from your mixing bowl, while metal ones are great for dividing dough and cleaning your work surface. When working with high-hydration dough that tends to stick, this tool becomes particularly useful.
- While not essential, a stand mixer can be very helpful for higher hydration doughs. Kneading a 75% hydration dough by hand can be physically demanding. A good mixer with a dough hook can handle the kneading process, allowing you to focus on perfecting your shaping technique.
These tools are designed to simplify your sourdough process, not complicate it. Start with the basics – a scale, a bowl, and a scraper – and you’ll be well-equipped to manage hydration levels. As you become more comfortable with wetter doughs, you can gradually add more specialized equipment to your collection.
How to Calculate Hydration
To calculate hydration, you need to know a few things:
- The weight of your flour and water (the two main ingredients)
- The amount of water you’re using in your dough recipe
- The number that represents how moist your dough should be (this is called the “hydration” percentage)
For example, if you have 350 g of water and 500 g of flour, then your hydration level would be 70%, which is a pretty high hydration level for your dough. This is because we divide the 350 g of water by our 500 g of flour, then multiply by 100 to achieve our desired hydration percentage.
Hydration Levels of Sourdough Starter
Many prefer to keep their sourdough starter at 100% hydration. This means they use equal amounts of flour and water to feed their starter.
However, this isn’t always the case. Some bakers may choose to alternate between lower and higher levels of hydration.
And here’s why:
Lower Hydration Sourdough Level
Some bakers acquire a thicker or stiffer starter achieving a low hydration dough. A stiffer starter would mean that your sourdough starter has been fed more flour than water, so it is easier to handle. Most stiff starter are kept at 50% hydration.
The wild yeasts and bacteria feed through the sugars and starches at a slower level, meaning that it can go much longer without feeding. This is great if you’re not always available to feed your starter often.
On the other hand, there will be more acetic production in a stiff starter. Your sourdough bread will emerge plenty more sour.
Higher Hydration Sourdough Level
Pushing your hydration levels for your sourdough starter to 100% ensures an easy mixing for your dough. Most high hydration starters aim for 125% hydration.
Since the flour absorbs so rapidly, the sourdough starter is quick and easier to feed. This will also mean that your starter will have to be fed often. A wetter starter would mean that the live bacteria are chomping their way through the sugars and starches at a higher level.
Higher hydration starters will produce a more mild tasting loaf, since they’re a product of lactic acid growth.
How Lower Hydration Levels Affect Sourdough
When you’re attempting to bake with dough, your hydration level is a key factor in determining how the dough will behave. The higher the hydration level, the more liquid your dough will be; lower hydration levels of water mean stiffer doughs that are easier to handle and work with.
It’s important to note that this does not necessarily mean better-tasting bread; it just makes for different results when comparing a wetter versus drier texture.
If your hydration level is too low (i.e., you have more flour than water), then here are some things to expect:
- You’ll struggle to incorporate all of your ingredients into one cohesive mass – a problem if you’re trying to add whole grains or seeds such as oats or sunflower seeds into the mix. This means it’ll take longer for all these ingredients to fully combine into what looks like an even mixture at first glance. And longer yet if there are large chunks of grain still visible after kneading has been completed
- Your gluten development will also be slower. There isn’t enough moisture present for adequate absorption by proteins found within the wheat flour itself (which allows them time enough before being exposed airy bubbles created during rising agents). This means less rise in your dough and less rise means dense bread. (I wrote a blog post specifically about getting sourdough to rise more, if you want more details)
How Higher Hydration Levels Affect Sourdough
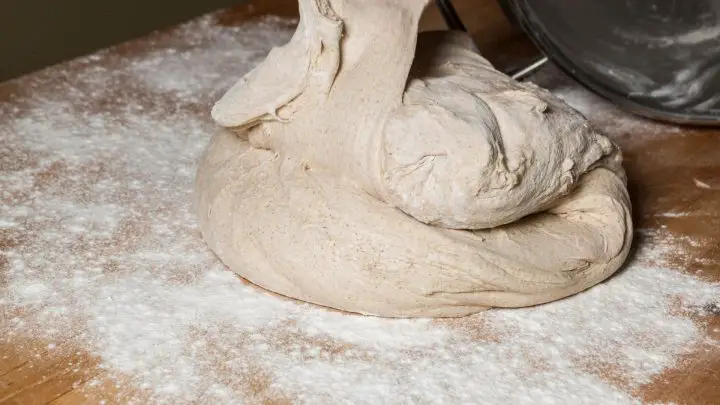
When working with higher hydration levels, you will notice that the dough is more slack and soft. This means that the ingredients will easily be incorporated as the dough will be wetter. A looser texture also makes it harder to handle since it’s so sticky, since you’ll be working with a wetter dough.
When making sourdough bread with a high hydration level, there’s no need for kneading. The extra hydration allows the yeast and bacteria to roam easily making it better for fermentation and development of gluten.
The other benefit of having less gluten (as well as less sugar) is that your sourdough loaf won’t rise as much in your oven due to lack of gas bubbles being emitted by these factors when using lower level hydration instead.
What’s the Best Sourdough Hydration Level?
Many question, what the best level of sourdough hydration can be in sourdough recipes, and this can be answered in many ways.
For example, if you like dense, chewy bread with a thick crust then you will want to use a lower amount of water. We know that the higher the hydration level is, the harder it becomes to handle and shape your dough. However, if you achieve an open crumb along with a thin crust, then this could be something worth experimenting with.
The level of hydration used in sourdough baking will depend on what kind of loaf you are hoping to achieve, as well as the amount of flour you plan to use.
If it’s going to be used to make sandwiches then perhaps you should try using less water so that your fillings don’t leak out too much. Using sandwich bread as an example, this can be made with lower hydration doughs, making it easier to handle the bread for baking, and allowing the flavors to stick to the dough during the bread-making process, completing your bake with incredible flavors that allow it to make the perfect level of hydration for sandwiches.
To determine the exact level you’re hoping for, would rely on the type of sourdough loaf you’re making. If you happen to achieve a higher hydration level and struggle with forming a shape you could result in overworking yourself and the dough, when attempting to shape the dough, so that it’s ready for your oven. But, once you achieve that incredible open crumb, paired with a thinner crust then this might be the high hydration dough results you were looking for!
Sourdough Hydration Levels Chart
To give you an idea of the kind of texture different hydration levels can give, here’s a range of bread products and what kind of hydration levels they usually range between:
| Hydration Level | Affect on Dough | Affect on Bread | Types of Bread at this Hydration |
| 50% – 60% | Firm not sticky dough | Tight crumb, firm texture, tall rising loaf | Bagels, pretzels |
| 60% – 70% | Slightly sticky dough | Medium crumb, soft texture | Sandwich bread, challah, French bread, sourdough |
| 70% or more | Loose, wet dough | Open crumb | Ciabatta, focaccia, whole grain, sourdough, Artisan |
Hydration Levels and Types of Flour
The type of flour you use during the sourdough process, will impact the level of hydration you’re hoping to achieve.
For instance, whole grain flour absorbs more water, so the more you have in your dough, the higher the hydration level.
If you’re planning to switch to whole wheat entirely, from your normal white flour, then you should aim to add 10 to 15% higher hydration, ensuring extra absorbency. Additionally, individual flours vary in levels of absorbency. These variations are evident for the same type of flour, but different brands, which is why it is wiser to experiment beforehand.
Nevertheless, the hydration level you decide to stick with will depend on your preference in dealing with wetter dough, and how much of an open crumb you like. To begin with, you should go for a hydration level that is around 67%. This will produce a decent crumb, without too much difficulty when pre-shaping your dough. Therefore, allowing you to adjust the hydration level by 1 or 2% at a time whenever you bake.
Adjusting Hydration for Different Recipes
Tweaking Hydration for Whole Grain Flour
Whole grain flour absorbs significantly more water than refined flour. Generally, increase your hydration by about 5-10% when using 100% whole grain flour. For example, if your white flour recipe uses 70% hydration, aim for 75-80% with whole grains.
It’s important to add water gradually. Begin by incorporating about half the additional water you estimate you’ll need, then slowly add more as you mix. The ideal dough consistency should be tacky but not overly sticky – it should feel slightly clingy to your hands but release easily.
Dialing It Back for Enriched Doughs
For enriched sourdough recipes like brioche or challah, you’ll need to reduce the hydration. Ingredients such as butter, eggs, or milk contribute their own moisture, so less water is required.
Start by decreasing your hydration by about 5-10% from your standard recipe. If your typical sourdough uses 75% hydration, aim for 65-70% in an enriched dough. It’s always preferable to start with less liquid and adjust as needed, rather than trying to correct an overly wet dough.
Adapting to Different Bread Types
Different bread styles require varying hydration levels. For instance, a crusty baguette typically needs a high hydration, around 75-80%. A sandwich loaf that needs to maintain its shape works better with 65-70% hydration.
When adapting a recipe, consider your desired end result. For a bread with large, open holes in the crumb, increase the hydration. For a tighter, more uniform texture, keep the hydration lower.
Troubleshooting Hydration Levels
The Sticky Situation: Over-Hydrated Dough
You know that feeling when your dough seems to have a mind of its own, clinging to everything in sight? That’s a telltale sign of over-hydration. It’s like trying to wrangle a wet noodle – frustrating and messy.
To fix this sticky situation:
- Gradually add small amounts of flour during your stretch and folds
- Let the dough rest longer between folds to allow for better absorption
- Use a bench scraper for easier handling
Remember, it’s always easier to add water than to take it away. Start with less and work your way up.
The Brick Dilemma: Under-Hydrated Dough
On the flip side, if your bread comes out dense and heavy as a brick, you might be dealing with under-hydration. It’s like trying to sculpt with Play-Doh that’s been left out overnight – stiff and uncooperative.
Here’s how to breathe life back into dry dough:
- Gradually add water during mixing, giving it time to incorporate
- Extend your autolyse period to allow for better flour hydration
- Consider using the bassinage method, adding a portion of water later in the process
Troubleshooting Tips for Hydration Perfection
Achieving the right hydration is part science, part art. Here are some pro tips to help you nail it:
- Know your flour: Different flours absorb water differently. Whole grain flours typically need more water than white flours.
- Consider your environment: Humidity affects hydration. You might need to adjust your recipe based on the weather.
- Be patient: Sometimes, what seems like a hydration issue is just a matter of not giving the dough enough time to develop.
- Keep a baking journal: Note down your hydration percentages, flour types, and results. It’s like creating your own sourdough roadmap.
Sourdough Hydration Process
In this article, we covered everything you need to know about hydration levels in sourdough. We discussed how they are calculated and what they mean for your bread. We also provided information on how low hydration levels affect your dough as well as high hydration levels.
Hydration is an important part of sourdough baking. It affects the taste, texture, and shelf life of your bread.
We hope that this article will help you decide on how much water should go into your next batch!
FAQs
What is a good hydration for sourdough bread?
A good hydration for sourdough bread typically ranges from 65% to 80%. Lower hydration (65-70%) produces denser loaves with a tighter crumb, while higher hydration (75-80%) results in more open crumb and softer texture. Beginners may find it easier to work with lower hydration doughs. Experiment to find your preferred consistency.
Is sourdough starter 100% hydration?
Not necessarily. While many bakers maintain a 100% hydration starter (equal parts flour and water by weight), starters can have various hydration levels. Some prefer stiffer starters (50-60% hydration) or looser ones (up to 125% hydration). The hydration affects fermentation speed and flavor development. Adjust based on your baking needs and preferences.
How do I know if my sourdough is hydrated?
You can tell if your sourdough is properly hydrated by its texture and behavior:
– The dough should be slightly tacky but not overly sticky
– It should hold its shape when formed, not spreading excessively
– During stretching, it should feel elastic and smooth
– After bulk fermentation, it should have visible bubbles and feel puffy If unsure, calculate the hydration percentage using the recipe’s flour and water weights.
How to fix over hydrated sourdough?
To fix over hydrated sourdough:
– Add small amounts of flour gradually, kneading until desired consistency is reached
– Let the dough rest for 15-30 minutes to absorb the added flour
– Perform stretch and folds to strengthen the dough structure
– If still too wet, consider turning it into focaccia or ciabatta
– For future bakes, reduce water content or increase flour in your recipe

![Batard Sourdough Shaping [Your Ultimate Guide] 4 Batard sourdough shaping [the ultimate guide]](https://www.mydailysourdoughbread.com/wp-content/uploads/2022/12/CD-blog-images-2023-01-05T184157.343-120x120.jpg)


![How To Cold Proof Sourdough [Your Easy Guide] 7 How to cold proof sourdough [your easy guide]](https://www.mydailysourdoughbread.com/wp-content/uploads/2023/01/blog-images-40-120x120.jpg)
