In the world of artisanal baking, spelt sourdough bread stands out as a nutritious and flavorful choice. Whether you’re a seasoned baker or new to the craft, understanding the complexities of creating the perfect spelt sourdough loaf is both challenging and rewarding. Many struggle with getting the texture and taste just right, often facing setbacks like dense loaves or inconsistent fermentation. My post today guides you through the process, offering a step-by-step guide from nurturing your starter to achieving a beautifully risen, aromatic loaf. Packed with expert tips and a foolproof recipe, you’ll discover the secrets to mastering spelt sourdough, transforming your baking skills and delighting your taste buds.
Table of Contents
- What Makes Spelt Sourdough Special
- Why Choose Spelt Flour?
- What Does Spelt Do for Sourdough?
- What to Know Before Making Sourdough Spelt Bread
- Making Your Spelt Sourdough Starter
- Mixing and Kneading the Dough
- First Rise and Shaping
- Baking Your Spelt Sourdough Bread
- Tips for the Best Spelt Sourdough
- Common Mistakes and Solutions When Making Spelt Sourdough
- Serving and Storage
- Pairing Suggestions for Spelt Sourdough
- Is Spelt Sourdough Healthy?
- Is Spelt Sourdough Bread Gluten Free?
- Is Spelt Sourdough Bread Low FODMAP?
- Baking Sourdough: The Spelt Sourdough Journey
- FAQs
What Makes Spelt Sourdough Special
Spelt sourdough stands out for its hearty texture, complex flavor, and improved digestibility over regular wheat bread. The mellow nuttiness of spelt pairs beautifully with tangy sourdough notes too.
Unique Taste Profile
Spelt lends a wonderfully nutty, earthy quality to sourdough bread. As an ancient grain, spelt has more flavor complexity than modern varieties which have been bred for higher yields and gluten content.
During fermentation, the nutty spelt flavor mingles with the sourness produced by the starter culture. This creates taste interest, with each bite offering sweet, tangy, and nutty notes in harmony.
The floral aroma of spelt also comes through after baking. So you get a rustic artisan loaf with incredible smell appeal in addition to its great taste.
Improved Digestibility
Spelt is easier to break down for many people. The long ferment of sourdough also helps pre-digest the proteins and carbs in spelt flour before you eat it.
This combination allows more folks to enjoy wheat-based bread, even those with sensitivities.
Satisfying, Sturdy Crumb
Unlike lighter wheat loaves, spelt sourdough offers a hearty, wholesome quality. The texture withstands slicing and toasting without falling apart too.
Spelt’s lower protein content can’t form as strong a gluten network. So rather than an airy interior you get a pleasantly dense and chewy crumb. It’s just sturdy enough to hold up to spreads without getting overly tough.
This hearty yet tender nature makes spelt sourdough work for sandwiches and accompaniments as well as enjoying it plain. The nutritious ancient grain also lends a rustic, artisanal flair.
Why Choose Spelt Flour?
Spelt is an ancient grain that offers various health advantages over modern wheat.
Nutrient Density
Spelt packs more nutrients than refined flour. One cup of whole spelt flour contains over 10 grams of protein. It also provides minerals like magnesium, zinc, and B vitamins. Additionally, spelt is high in fiber—a half cup serving boasts 8 grams. This promotes healthy digestion and supports weight management.
The whole grain goodness doesn’t stop there. Spelt offers carbohydrates in the form of complex starches, meaning they digest slowly to provide long-lasting energy.
Supports Gut Health
The resilient proteins and fiber in spelt flour feed good gut bacteria. Additionally, spelt doesn’t contain fructans, a compound that can irritate digestion. This makes spelt easier to break down than modern wheats for many people.
Versatility in Baking
While spelt has a distinct nutty flavor, it can be used in both sweet and savory applications. The slightly coarse texture and mellow taste complement baked goods like breads, muffins, waffles, pasta, and more. Spelt absorbs liquids well, creating moist, dense products.
What Does Spelt Do for Sourdough?
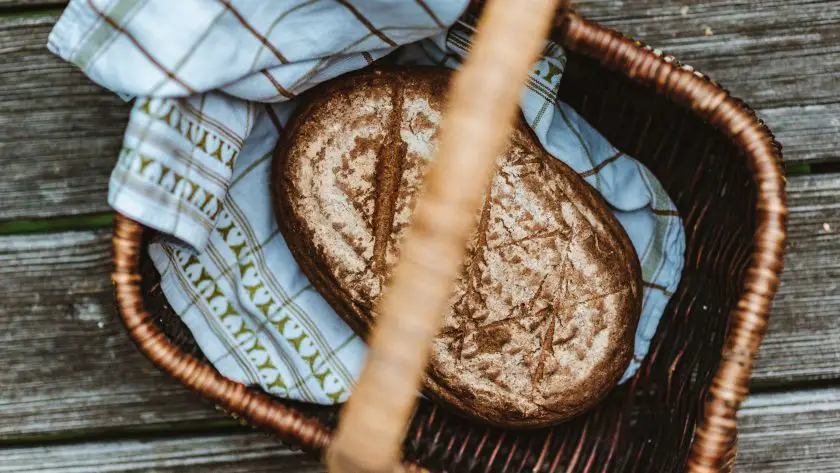
Spelt brings its nutritional benefits to sourdough while also influencing flavor and texture. The result is a loaf with more complex flavors and a chewier crumb.
Enhances Flavor
The nutty essence of spelt shines through in a sourdough loaf. As the bread ferments and bakes, nutty notes combine with tangy sourdough tones to create a more complex, interesting flavor. Think earthy, malty, even floral notes coming through.
Allows for Better Fermentation
Since spelt has less gluten than regular bread flour, it ferments more readily. The sourdough microbes can digest the starches and proteins faster. This allows them to produce more acidity, resulting in a tangier sourdough loaf.
Creates a Heartier Texture
The mellow flavor and dense crumb of spelt suit the hearty nature of sourdough. Because spelt doesn’t form as strong of a gluten network, the bread takes on a pleasantly chewy texture rather than being too springy.
Spelt absorbs a lot of water too, keeping the crumb soft and moist. While spelt mutes the rise slightly, it makes up for it with a satisfying chew and rich, nuanced flavor only enhanced by sourdough fermentation.
What to Know Before Making Sourdough Spelt Bread
When preparing to bake homemade spelt sourdough bread, a few key tips will help you master this wholesome artisan loaf. Paying attention to these little details goes a long way towards a gorgeous, wholesome spelt sourdough loaf!
Select Quality Ingredients
Quality spelt and rye flours form the flavor base for the bread. Look for stone ground whole grain varieties. Match this with non-chlorinated water and mature, active starter for best fermentation.
Sea salt and honey add complementary notes too. Using filtered water removes excess minerals and chlorine which can inhibit yeast growth. And incorporating 20% rye flour helps produce more acids during fermentation.
For Using Spelt in Other Baking
For the best results, substitute spelt for about half the wheat flour called for in a recipe. Adjust liquids as needed since spelt absorbs more moisture. Expect baked goods to brown faster with a spelt addition too.
Dial-In Your Baking Environment
Fermenting the dough at around 75°F is ideal. This warmer temperature helps the wild yeasts thrive. You can easily maintain this using an oven with the light on or a proofing box.
Similarly, allowing the dough to rise in a draft-free spot helps ensure even fermentation. Find a cozy corner of your kitchen for the bulk rise.
Gather Essential Equipment
Having a digital kitchen scale allows accurately measuring flour and water by weight rather than volume. This removes variability in outcomes.
A stand mixer with dough hook attachment makes kneading wet, sturdy bread dough effortless too. And parchment paper streamlines transferring the loaf to a preheated Dutch oven for that nice crusty bake.
Work Clean and Carefully
Thoroughly washing hands and equipment prevents introducing bad bacteria. And resisting the urge to excessively flour your work surface keeps the dough from drying out.
Finally, closely follow the fermentation times in your recipe rather than cutting corners. This allows the yeasts and bacteria time to produce those desirable sour flavors.
Making Your Spelt Sourdough Starter
Crafting a spelt sourdough starter sets the foundation for tasty artisan loaves. Having a lively spelt sourdough starter allows crafting nutritious artisan bread anytime. This hands-on process connects you with generations of bakers too!
Ingredients & Supplies
You just need whole grain spelt and rye flours, non-chlorinated water, and a clean jar to get started. Using a digital kitchen scale allows carefully measuring ingredients too. And have a wood spoon, plastic scraper, and cheesecloth on hand.
Combine the Flour & Water
Start by whisking 50g spelt flour, 50g rye flour, and 100g filtered water in your jar. This 1:1:2 ratio allows the yeasts and bacteria to thrive.
Mix just until combined then cover the jar with the cheesecloth and set aside.
Feed It & Allow Fermentation
Storing the starter around 75°F prompts fermentation. After 24 hours, discard half then add another 50g each flour and 100g water. Repeat this process of “feeding” daily for 5-7 days.
You’ll notice bubbles and a sour aroma as wild yeasts and bacteria grow. The starter peaks when doubles in size 8-12 hours after feeding.
Identify Readiness
A mature spelt starter should have a pleasantly tangy smell and double in size consistently after feedings. When a spoonful floats in room temperature water, it’s ready to leaven bread!
Now you can maintain your culture by storing in the fridge, or bake that first gorgeous loaf. Remember to feed with the 1:1:2 ratio of flour and water by weight to keep it vigorous.
Mixing and Kneading the Dough
To get that perfect chewy-yet-tender texture in your spelt sourdough bread, it’s all about getting the gluten development just right. Let me share some personal tips
. Trust me, it makes all the difference!
Measure Precisely
Weigh out flours and water using a digital kitchen scale for accuracy. You can calculate baker’s percentages to scale recipes up or down too.
Combine the spelt, rye, and bread flours before integrating the liquids. This allows gauging hydration needs as you mix.
Mix Thoroughly
Use a stand mixer fitted with the dough hook to integrate ingredients efficiently. Mix on low speed for 2 minutes, then medium speed for 6 minutes to fully hydrate the dough.
Scrape down bowl sides periodically so all the flour hydrates and no dry pockets remain. The dough will start coming together in a ragged mass.
Knead Gently
Turn out the shaggy dough onto a lightly floured surface. Knead just until smooth and uniform, about 5 minutes.
Resist adding excess flour which would dry out the dough. Simply lift and fold the mass to encourage gluten development without overworking the dough.
Perform Stretch and Fold
After a 20 minute bench rest, perform your first set of stretch and folds. Gently pull the dough mass on all 4 sides then letter fold back in. Repeat two more times at 20 minute intervals.
This aligns and strengthens gluten without degassing beneficial air pockets.
Handle the wet spelt dough gently and it will reward you with a gorgeous open crumb and rich flavor!
First Rise and Shaping
Giving the dough enough time to ferment is key to bringing out its flavors, and handling it gently when shaping helps maintain its structure. Here are some handy tips to guide you through the first rise and shaping process of your spelt sourdough bread.
Control the Temperature
Maintain the dough around 75-78°F during the first rise. This warmer temperature helps the yeast produce acids for tangy flavor.
You can easily regulate temperature by placing the covered bowl in a warm oven or proofing box. Just keep the dough draft-free.
Identify Full Proof
Over 4-6 hours, the dough will double in size. Gently poke the surface, and it will slowly fill in rather than deflating. Soft bubbles under the surface indicate full proof too.
If needed, you can refrigerate overnight then return to room temperature before shaping. This extends fermentation for more complex flavor.
Gently Shape the Loaf
Turn out the smooth, pillowy dough onto a lightly floured surface. Shape into a round by folding edges toward the center.
Then gently form an oblong loaf by rolling back and forth while allowing the ends to taper. The goal is tension without degassing.
Allow Final Proof
Place the taut but puffy loaf seam-side down in a floured banana-shaped proofing basket or towel-lined bowl. Cover and proof until increased about 30% in size, 1-2 hours.
Baking Your Spelt Sourdough Bread
A hot oven and steam create the crusty crust and moist interior that make spelt sourdough irresistible. Follow these simple baking tips for the perfect artisan loaf.
Preheat Your Vessel
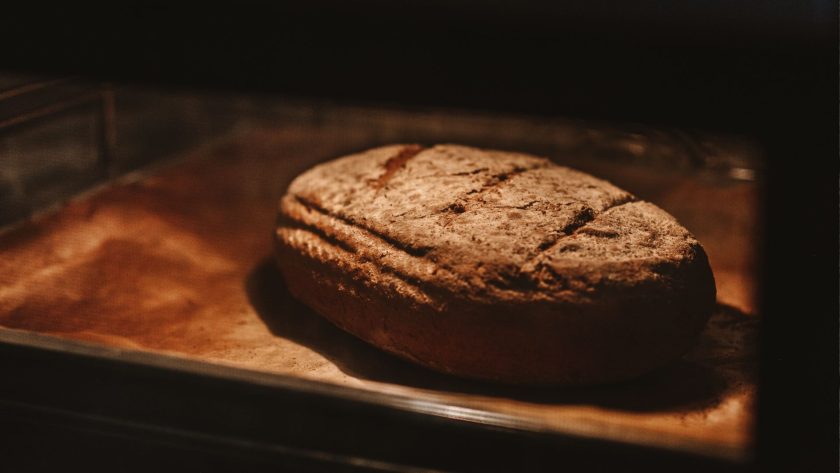
Place your Dutch oven or combo cooker in the oven and preheat to 450°F for at least 30 minutes. This rips heat ensures a nice oven spring.
You can bake directly on a stone too, though the vessel helps trap steam. Just make sure it’s hot before carefully transferring the dough.
Score Decoratively
Right before baking, gently flip the proofed loaf onto parchment paper. Use a lame or sharp knife to slice a design into the top about 1⁄4” deep.
Try a square pattern, diagonal lines, or a signature score like a leaf or wheat shaft. This releases tension and expands the dramatic oven spring.
Steam for a Crisp Crust
Transfer the dough seam-side up into the hot vessel. Pour 1 cup of water into the pot bottom and quickly close to trap steam.
After 15 minutes, remove the lid so the crust can darken beautifully. The steam gelatinizes starches for a crackly crust contrasting the soft interior.
Bake Until Deep Brown
Allow the bread to bake for 30-40 more minutes until the deeply caramelized crust reaches your desired darkness. The internal temperature should register 210°F.
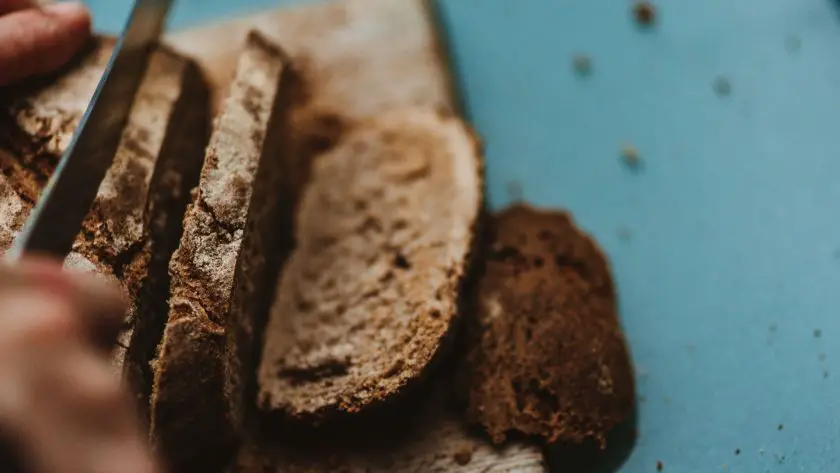
Cool completely on a wire rack before slicing to allow the crust to crisp and flavors to develop.
Now take a bite and enjoy your wholesome homemade spelt sourdough!
Tips for the Best Spelt Sourdough
Crafting an incredible spelt sourdough loaf rests on understanding the unique properties of this ancient grain. Follow these pro tips for handling the dough and managing fermentation.
Hydrate the Flour Thoroughly
Spelt has a tougher bran coat than modern wheat, so it requires more water to properly hydrate. Use an autolyse rest after mixing the flour and 90% of the water called for.
This rests the dough and allows the flour to fully absorb moisture before adding starter, salt, and finishing water. The extra hydration gives a nice rise and tender crumb.
Gently Encourage Gluten
While you need some gluten development for structure, over-mixing spelt deflates the dough. Fold in enrichments like extra seeds or nuts after just partially kneading the shaggy dough.
Perform a series of gentle stretch and folds during the bulk fermentation instead of continued kneading. This gently aligns proteins without overworking the dough.
Control Temperature Carefully
The warmer temperature needed for sourdough fermentation dries out dough faster. Cover loaf pans and proofing baskets to prevent crust formation.
Monitoring dough temperature and adjusting proofing time helps balance flavor development with moisture retention too.
Maximize Baked Moistness
A longer bake at a slightly lower temperature thoroughly sets the crumb while keeping the interior moist. And avoiding over-proofing prevents loaf collapse.
So mastering moisture management allows enjoying both the hearty nutritional quality of spelt along with a wonderfully chewy, flavorsome loaf.
Common Mistakes and Solutions When Making Spelt Sourdough
Here’s a rundown of some typical mishaps and practical tips on how to avoid or correct them to make the best spelt loaves ever.
Dry, Dense Loaf
If your spelt sourdough turns out as a dry, dense brick rather than a nice light loaf, lack of moisture is likely the culprit.
Make sure to fully hydrate the flour and avoid adding too much extra during shaping and handling. Covering proofing dough prevents a skin forming too.
Poor Oven Spring
Getting little rise out of the oven could owe to underproofing or not enough steam.
Allow the shaped dough to grow 30-50% during the final proof before scoring and baking. And create plenty of initial steam in the oven by pouring hot water into a preheated Dutch oven before quickly closing.
Tunneling or Holes
Large air pockets tunneling through the interior or bottom indicate the gluten network didn’t develop properly.
Make sure to knead just until the dough becomes smooth and passes the windowpane test. And perform a series of stretch and folds during the first rise.
Dense, Gummy Crumb
If your spelt loaf resists rising and bakes up dense with a sticky texture, overproofing is the likely culprit. Punch down fully proofed dough and allow it to relax for a few minutes before shaping if needed. And bake as soon as the final proof finishes to prevent collapse.
Paying attention to fermentation times and moisture levels goes a long way toward a light, airy spelt sourdough crumb! Let your dough relax once in a while too.
Serving and Storage
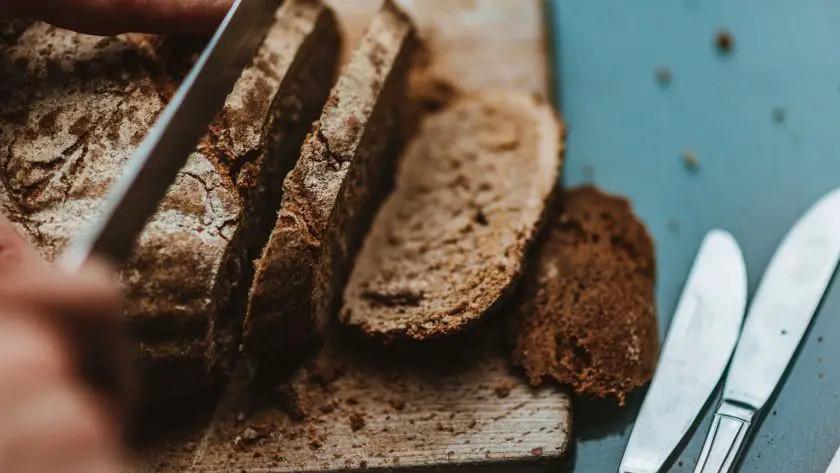
Enjoy your wholesome homemade spelt sourdough to the fullest by using proper bread storage and serving techniques. A few simple tips help preserve freshness and showcase the bread’s fantastic texture.
Let It Cool Completely
Before slicing into a freshly baked loaf, allow it to cool completely on a wire rack, about 1-2 hours. This prevents gumminess and allows the flavors to develop fully. Resist tapping on the crust to check doneness since it continues to set as it cools.
Store in Paper or Breadbox
For short term storage of a few days, keep cut sourdough in a paper bag or breadbox at room temperature to prevent premature staling while trapping moisture. The paper wicks away condensation that makes the crust soggy.
Freeze It
For longer freezing, wrap tightly in plastic wrap then foil to prevent freezer burn. Thaw wrapped bread overnight at room temperature or a few hours in the oven at 300°F. Enjoy within a month for best quality.
Pairing Suggestions for Spelt Sourdough
The nutty, earthy flavor and hearty texture of spelt sourdough pairs beautifully with a variety of foods and drinks. With all of these combinations, spelt sourdough’s fantastic texture and complex rustic taste shines!
Savory Fillings & Toppings
The chewy crumb stands up well to flavorful fillings for sandwiches or bruschetta-style toasts. Try roasted vegetables, goat cheese, basil pesto, herbed ricotta, smoked trout, or grilled chicken.
Thicker spreads like olive tapenade, fig jam, and nut butter also contrast nicely with the hearty toasted bread.
Cheeses & Charcuterie
Sample spelt sourdough with aged gouda, pecorino, or provolone for a pleasurable textural interplay. The clean tanginess allows the spelt’s tones to shine too.
Pair with Italian meats like prosciutto, salami, or soppressata. The bold flavors marry beautifully.
Breakfast & Brunch
Toast thick slices to serve alongside poached or scrambled eggs and smoked salmon or bacon. The char adds nice roasty dimension.
For other sourdough recipes, such as sourdough French toast or sourdough bread pudding, lightly stale spelt sourdough adds characteristic flavor.
To Complement
An unoaked California Chardonnay has enough bright acidity to balance the bread’s rich nuttiness. Or serve with an aromatic Pinot Gris or dry Riesling. Hoppy wheat beers also make an excellent pairing.
Is Spelt Sourdough Healthy?
We already know that sourdough is healthy, in moderation and compared to other bread. But how about sourdough made with spelt?
Spelt sourdough bread is not only tasty but also highly nutritious and easy to digest. It’s rich in protein, fiber, B vitamins, zinc, magnesium, and antioxidants. The long fermentation process enhances the bioavailability of nutrients, including cancer-fighting lignans. Spelt’s lower fructan content and softer gluten make it suitable for those with wheat sensitivities.
All these make spelt sourdough a wholesome choice for the whole family.
Is Spelt Sourdough Bread Gluten Free?
Spelt sourdough contains gluten, as spelt is an ancient grain related to wheat, but it might be more digestible for some people with sensitivities. Its gluten structure is weaker, making it easier to digest. Many find they tolerate spelt sourdough better than regular wheat bread due to its softer gluten and the fermentation process, which pre-digests proteins. For those with gluten sensitivities, it’s advised to try spelt sourdough as part of an elimination diet to test tolerance.
However, for a strict gluten-free diet, grains like millet or sorghum are recommended alternatives.
For more about sourdough bread and gluten, I’ve written a dedicated blog post through the link.
Is Spelt Sourdough Bread Low FODMAP?
Spelt sourdough bread is generally not considered low FODMAP. For individuals following a strict low FODMAP diet, especially during the elimination phase, it’s generally recommended to avoid spelt sourdough and opt for bread made from low FODMAP flours like oat or sourdough bread made from traditional wheat that has undergone a long fermentation process.
It’s always advisable to consult with a healthcare provider or a dietitian for personalized dietary advice.
Baking Sourdough: The Spelt Sourdough Journey
Spelt sourdough bread offers a tasty, nutritious, and often well-tolerated alternative to regular wheat bread. This ancient grain contains plenty of protein, fiber, vitamins, and minerals to support good health. Its mellow flavor pairs perfectly with the tangy sourness of a long-fermented dough too.
With some time and care invested upfront in the levain build and dough fermentation, a gorgeous spelt sourdough loaf bursting with rustic artisan charm is within your reach. So delve in and rediscover this hearty ancient grain in a fantastic gluten-free-style loaf!
FAQs
Is Spelt sourdough bread good for you?
Yes, spelt sourdough bread is very healthy. It’s high in protein, fiber, B vitamins, and minerals like zinc and magnesium. The fermentation process also makes the nutrients easier to absorb. Additionally, spelt’s softer gluten makes the bread easier to digest than regular wheat for many people, allowing those with sensitivities to potentially tolerate it better. Overall, sourdough spelt bread is a nutritious choice.
What is the difference between sourdough and sourdough Spelt bread?
The main difference is the type of flour used. Sourdough bread is typically made from regular wheat flour. Sourdough spelt bread uses spelt flour, an ancient grain related to wheat. While spelt contains gluten, it has a softer gluten structure compared to modern wheat. This makes spelt easier to digest for some folks with gluten sensitivities. Spelt also has a nuttier, more complex flavor. So while both use a sourdough starter for leavening, sourdough bread made with spelt offers greater nutrition and often better tolerance while having a distinct hearty taste.
Does spelt flour make a good sourdough starter?
Yes, spelt flour works very well for making sourdough starter. Its lower gluten content allows the wild yeasts and bacteria to break down starches more readily compared to normal bread flour. This leads to a nice tangy, active culture perfect for leavening tasty spelt sourdough loaves. The nutty flavor of spelt also carries through beautifully into the bread.
Can I Use Spelt Flour in My Sourdough Starter?
Yes, absolutely! In fact, spelt flour is one of the easiest flours you could use to start a sourdough starter with, and it should be ready within a few days for baking!
Easy Spelt Sourdough Bread Recipe
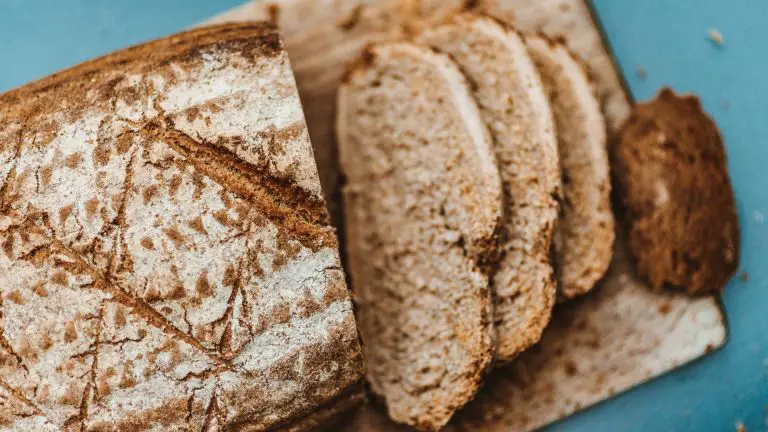
This delicious homemade spelt sourdough bread makes the perfect breakfast treat.
- Total Time: 11 hrs
- Yield: 1 loaf 1x
Ingredients
- 65g active sourdough starter
- 315g filtered water
- 10g honey or maple syrup
- 240g bread flour
- 200g whole grain spelt flour
- 9g fine sea salt
Instructions
- In a large mixing bowl, whisk sourdough starter, filtered water, and honey. Add the flour and mix with a spatula, then use your hands to really work the ingredients together. You can use a stand mixer and dough hook for this recipe if you want an easier mix. After a good mix, you should have a rough sticky dough, without any lumps of dry flour. Sprinkle the top of the dough with salt, cover it with a damp towel, and let this rest or autolyze for 1 hour.
- Squeeze and knead the dough with your hands for 2 minutes to help build the gluten. Next, perform your first set of stretches and folds. Let the dough rest for 30 minutes covered.
- Stretch and fold your dough three more times, allowing your dough to rest between each set for 30 minutes.
- Then cover the dough with a damp towel and let it rise until it has almost doubled in size, with tiny bubbles spread throughout the dough. If you’re unsure whether your dough is ready, simply give the bowl a shake, and if the top of the dough jiggles slightly, then that’s your cue!
- Now for shaping. Gently place your dough onto a lightly floured surface, and shape the dough into a round. Let this rest, covered, for 15 minutes.
- To shape the dough, gently pull the dough towards you, stretch each side of the dough out, and fold it towards the middle. Fold each side into the middle, and gently maneuver the dough towards you until you’ve formed a smooth round.
- Place the dough into a banneton, then cover it with a plastic bag, and let it cold-proof in the refrigerator overnight. Alternatively, you can let the dough rise on the kitchen countertop until it has almost doubled in size.
- Preheat your oven, along with your Dutch oven to 475 degrees Fahrenheit. Once the oven has preheated, remove the dough from the refrigerator, and cover it with a piece of parchment paper larger than the banneton. Place a cutting board atop the parchment paper and flip the banneton so that the dough is now on the parchment paper. Lift the banneton off and sprinkle some flour on top of and score the dough with a sharp knife.
- Gently lift the parchment and bread into the Dutch oven, with the lid on.
- Reduce the heat to 450 degrees F, and slide the Dutch oven to the middle. Bake covered for 25 minutes, then remove the cover and reduce the heat to 435F; bake for another 20 minutes. Remove the loaf once it has developed a wonderful golden brown crust.
- Let this cool for one hour before cutting.
- Prep Time: 10 hrs 15 mins
- Cook Time: 45 mins
- Category: bread
- Cuisine: American
Nutrition
- Serving Size: 1 slice
- Calories: 178 kcal
- Fat: 1 g
- Carbohydrates: 36 g
- Protein: 8 g

