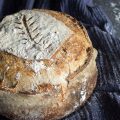
Rye bread is a staple in Danish cuisine, and you may have encountered it and thought, “Can I make this?”. Did you know that it can be a struggle to recreate this classic bread at home, because you can end up with dense, dry loaves that lack the characteristic taste and texture? But that said, I’ll guide you today on how to make Danish rye bread. It’s really not that hard, actually, and you might end up loving it so much you’ll make it everyday!
![How To Make Danish Rye Bread [An Easy Recipe] 110 How to make danish rye bread [the easiest recipe]](https://www.mydailysourdoughbread.com/wp-content/uploads/2024/04/How-to-Make-Danish-Rye-Bread-The-Easiest-Recipe-4-840x473.jpg)
Table of Contents
- What is Danish Rye Bread?
- Ingredients
- Preparation
- Baking
- Post-Baking Tips
- Mistakes and How to Avoid Them!
- Serving Suggestions
- Make Authentic Danish Rugbrød at Home
- How to Make Danish Rye Bread: FAQs
What is Danish Rye Bread?
Danish rye bread, known as rugbrød, has been a part of the Danish diet for centuries, and it continues to be a favorite among locals and food enthusiasts alike.
What makes Danish rye bread so special? For starters, it’s made with whole grain rye, which gives it a distinctive dark color and a robust, slightly tangy taste. The bread undergoes a slow sourdough fermentation process, which not only enhances its flavor but also improves its digestibility and nutritional value.
While rye bread is enjoyed in many parts of the world, Danish rye bread stands out due to its specific preparation methods and ingredients. Unlike some other rye breads that may include a mix of wheat and rye flours, traditional Danish rugbrød is made almost entirely with whole grain rye. This results in a denser, more compact loaf that is perfect for open-faced sandwiches, known as smørrebrød.
Ingredients
To make this authentic Danish bread, you’ll need:
- 2 1/2 cups whole grain rye flour, preferably organic
- 1 cup mature sourdough starter
- 1 1/2 cups water
- 1 tsp salt
Some optional add-ins:
- 1/4 cup sunflower seeds
- 1/4 cup flaxseeds
- 1/4 cup pumpkin seeds
- 1/4 cup cracked rye or wheat grains
Remember, the quality of your ingredients will greatly impact the flavor and texture of your final loaf. Choose the best whole grain rye flour you can find, and make sure your sourdough starter is active and bubbly before beginning the bread-making process.
Feel free to adjust the quantities of the optional seeds and grains to suit your taste preferences, or omit them altogether for a simpler loaf.
What Else Do You Need?
You don’t need a professional kitchen setup, but these tools might make your bread-making experience a breeze.
- First and foremost, you’ll need a sturdy mixing bowl to combine your ingredients.
- A large wooden spoon or a dough whisk will come in handy for stirring the dense rye dough.
- You’ll also want to have measuring cups and spoons on hand to ensure you’re using the correct amounts of each ingredient.
- To shape your Danish rye bread, you’ll need a loaf pan. Choose a pan that’s the right size for your recipe – typically, a 9×5 inch loaf pan works well. If you want to get fancy, you can opt for a traditional Danish rye bread pan, which is longer and narrower than a standard loaf pan.
- Of course, you can’t bake bread without an oven! Make sure your oven is properly calibrated and can maintain a consistent temperature. A baking stone or a cast iron pan placed in the bottom of the oven can help create a steamy environment, which is essential for achieving a crispy crust on your rye bread.
- STONE GROUND DARK RYE FLOUR made from 100% whole grain rye berries. All of the grain components, together with all of its great nutrition, are kept and retained in the stone milling processes.
Prices pulled from the Amazon Product Advertising API on:
Product prices and availability are accurate as of the date/time indicated and are subject to change. Any price and availability information displayed on [relevant Amazon Site(s), as applicable] at the time of purchase will apply to the purchase of this product.
Preparation
Start by combining your ingredients in a large mixing bowl. Use a wooden spoon or your hands to mix everything together until a shaggy, sticky dough forms. Don’t worry if it seems a bit messy at first – that’s totally normal!
Next, it’s time to get your hands dirty. Turn the dough out onto a clean work surface and start kneading. Use the heel of your hand to push the dough away from you, then fold it back over itself. Give it a quarter turn and repeat. Keep kneading for about 5-10 minutes, or until the dough feels smooth and elastic.
Here’s a pro tip: if the dough feels too sticky to handle, wet your hands with a little water. This will help prevent the dough from sticking to your fingers and make the kneading process a breeze.
Once your dough is nice and smooth, shape it into a ball and place it back in the mixing bowl. Cover the bowl with a clean kitchen towel or plastic wrap and let the dough rest for about 30 minutes. This resting period allows the gluten to relax, making the dough easier to shape later on.
Baking
Preheat your oven to 475°F (245°C) and place a baking tray filled with water on the bottom rack. This creates steam, which helps develop a beautiful, crispy crust on your loaf.
Gently transfer your shaped dough onto a greased or lined baking sheet. Using a sharp knife or razor blade, make a few diagonal slashes across the top of the loaf. This allows the bread to expand during baking without cracking or tearing.
Pop your loaf into the hot oven and bake for about 45-55 minutes. Keep an eye on it – you’ll know it’s done when the crust is dark brown and sounds hollow when tapped on the bottom.
For an extra crispy crust, try this pro tip: about 5 minutes before your bread is done baking, remove the tray of water from the oven. This allows any remaining moisture to evaporate, resulting in a delightfully crunchy exterior.
Once your Danish rye bread is baked, remove it from the oven and let it cool completely on a wire rack before slicing. Trust me, the wait is worth it – cutting into a hot loaf can result in a gummy texture.
Post-Baking Tips
Cooling
Once your bread emerges from the oven, it’s tempting to dive right in and start slicing. But hold your horses! Let your loaf cool completely on a wire rack. If you cut into it too soon, you risk ending up with a gummy, undercooked center. Patience is key here, folks.
Slicing
When your bread has cooled and you’re ready to slice, reach for a sharp, serrated bread knife. This will help you get clean, even slices without squishing your beautiful loaf. For the best results, place your bread on a cutting board and use a gentle sawing motion to slice. Aim for slices that are about 1/2 inch thick – perfect for piling high with your favorite toppings.
Storing
If you’re lucky enough to have leftover Danish rye bread (and let’s be real, that’s a big if), you’ll want to store it properly to keep it fresh. Wrap your loaf tightly in plastic wrap or aluminum foil, or place it in an airtight container. It should keep at room temperature for 3-4 days, or you can freeze it for up to 3 months.
When you’re ready to enjoy a slice, simply thaw it at room temperature or pop it in the toaster for a quick reheat.
![How To Make Danish Rye Bread [An Easy Recipe] 112 How to make danish rye bread [the easiest recipe]](https://www.mydailysourdoughbread.com/wp-content/uploads/2024/04/How-to-Make-Danish-Rye-Bread-The-Easiest-Recipe-2-840x473.jpg)
Mistakes and How to Avoid Them!
When you start making any bread, it’s easy to make a few mistakes. But don’t worry – with these fixes, you can bake a yummy loaf in no time.
Texture Problems
One of the most annoying things is when your rye bread turns out too dense, gummy, or dry. This usually happens when you use too much or too little water in your dough. The trick is to find the right balance – a dough that’s moist but not too sticky.
If your dough feels dry, add a little water at a time until it feels right. If it’s too wet, add a bit more rye flour until you get the perfect texture.
Sourdough Starter Troubles
Your sourdough starter is super important for making Danish rye bread. If it’s not bubbly and active, your bread won’t rise the way it should. Make sure you feed your starter often (at least once a week) and let it double in size before you use it in your dough. If your starter looks tired or smells weird, try feeding it with some fresh flour and water to perk it up.
Overbaking
Rye bread can go from just right to dry and crumbly really fast. To avoid this, keep a close eye on your loaf during the last 10-15 minutes of baking. If it’s getting too brown, cover it with foil so it doesn’t burn. And remember – it’s better to underbake your rye bread a little than to overbake it. You can always put it back in the oven for a couple more minutes if you need to.
Serving Suggestions
Toppings
Traditionally, this hearty bread is served with a generous smear of creamy butter and topped with smoked salmon for a classic Nordic flavor combo. But don’t be afraid to mix things up and try some modern twists.
Breakfast, Lunch, and Dinner Ideas
Danish rye bread is incredibly versatile and can be enjoyed at any meal.
For breakfast, try topping a slice with mashed avocado, a poached egg, and a sprinkle of everything bagel seasoning. At lunchtime, pile on some turkey, Swiss cheese, and tangy Dijon mustard for a satisfying sandwich. And for dinner, use your rye bread as a base for an open-faced meatball sub – just add marinara sauce and melted mozzarella.
Snack Time
When the midday munchies hit, reach for a slice of Danish rye bread. Spread on some hummus and top with sliced cucumbers and cherry tomatoes for a healthy snack that’ll keep you going until dinner. Or, satisfy your sweet tooth by topping a slice with almond butter, sliced bananas, and a drizzle of honey.
Make Authentic Danish Rugbrød at Home
Rugbrød is most certainly a wonderful bread you can now make at home. Embrace the process, learn from any mistakes, and let your creativity shine through with various pairings! Soon, you’ll master baking rugbrød and become a true aficionado of this hearty, delicious bread.
How to Make Danish Rye Bread: FAQs
What is Rugbrød made of?
Rugbrød, a traditional Danish rye bread, is made primarily from rye flour, which gives it a dense texture and distinctive flavor. Other ingredients include water, salt, and sourdough starter for leavening. Some recipes may also include small amounts of wheat flour, seeds (like sunflower or pumpkin), or cracked rye for added texture and flavor.
What is Danish bread made of?
Danish bread, also known as Rugbrød, is a type of rye bread that is a staple in Danish cuisine. It is made from a combination of rye flour, water, salt, and sourdough starter. The bread is characterized by its dense texture, dark color, and slightly sour taste. Some variations may include small amounts of wheat flour or added seeds for texture and flavor.
What do you eat with Rugbrød?
Rugbrød is a versatile bread that pairs well with a variety of toppings. Some popular options include:
Butter and cheese
Cured meats, such as ham, salami, or liver pâté
Smoked fish, like salmon or herring
Pickled vegetables, such as cucumbers or beets
Jam or honey for a sweet touch Rugbrød is often served as open-faced sandwiches, known as smørrebrød.
![How To Make Danish Rye Bread [An Easy Recipe] 113 How to make danish rye bread [the easiest recipe]](https://www.mydailysourdoughbread.com/wp-content/uploads/2024/04/How-to-Make-Danish-Rye-Bread-The-Easiest-Recipe-3-768x432.jpg)
Rugbrød (Danish Rye Bread)
Enjoy making this authentic Danish rye bread and experimenting with different toppings and uses!
- Yield: 1 loaf 1x
Ingredients
- 2 1/2 cups whole grain rye flour, preferably organic
- 1 cup mature sourdough starter
- 1 1/2 cups water
- 1 tsp salt
Optional
- 1/4 cup sunflower seeds
- 1/4 cup flaxseeds
- 1/4 cup pumpkin seeds
- 1/4 cup cracked rye or wheat grains
Tools
- Sturdy mixing bowl
- Large wooden spoon or dough whisk
- Measuring cups and spoons
- 9x5 inch loaf pan (or a traditional Danish rye bread pan)
- Oven
Instructions
- In a large mixing bowl, mix the rye flour, sourdough starter, water, salt, and any optional add-ins until a shaggy, sticky dough forms.
- Turn the dough onto a clean surface and knead for 5-10 minutes until smooth and elastic. Wet your hands if the dough is too sticky.
- Shape the dough into a ball and return it to the bowl. Cover and let rest for 30 minutes.
- Heat your oven to 475°F (245°C). Place a tray of water on the bottom rack to create steam.
- Place the dough in a greased loaf pan. Slash the top a few times diagonally with a sharp knife.
- Put the loaf in the oven and bake for 45-55 minutes until the crust is dark brown and the loaf sounds hollow when tapped.
- Remove the bread from the oven and cool completely on a wire rack.
Notes
- Let the loaf cool completely before slicing to avoid a gummy texture.
- Use a sharp serrated knife for even slices.
- Wrap the loaf in plastic or foil, or store in an airtight container.
- Keep at room temperature for up to 4 days or freeze for up to 3 months
- Top with avocado, poached egg, and bagel seasoning.
- Make a sandwich with turkey, Swiss cheese, and mustard.
- Use as a base for an open-faced meatball sub with marinara and mozzarella.
- Spread with hummus and top with cucumbers and tomatoes.
- Cuisine: Danish

![How To Make Danish Rye Bread [An Easy Recipe] 111 Rye flour 2lb / 32oz, dark rye flour for bread, pumpernickel flour, rye bread flour, rye flour for baking, 100% whole rye flour, non-gmo.](https://m.media-amazon.com/images/I/51nhD1vLQiL._SL500_.jpg)
