Last updated on September 14th, 2026
Making your first loaf can feel like a gamble. You’ve fed a starter for weeks, followed a recipe to the letter, and still ended up with a flat, dense brick instead of the crusty, open-crumb loaf you pictured. Here’s the good news: most first-loaf hiccups come down to a handful of fixable moments: an underripe starter, quick fermentation, or dough that needs a little more shaping love. What’s ahead walks through every one of those moments, from mixing to baking, so you know exactly what to look for at each step. Just a real shot at a loaf worth being proud of.
What You Need to Make Your First Loaf
- Active sourdough starter – 100g (provides the wild yeast and bacteria for rise and flavor)
- Bread flour – 500g (higher protein content builds stronger gluten structure)
- Water – 350g (hydrates the flour and activates fermentation)
- Salt – 10g (controls fermentation speed and adds flavor)
Substitution tip: all-purpose flour works if you don’t have bread flour on hand; expect a slightly less chewy, slightly flatter loaf
Essential Baking Equipment for Beginners
You don’t need a fully stocked kitchen to bake your first loaf—just a handful of tools that each play a specific role.
- Mixing bowl – for combining and holding your dough during bulk fermentation
- Bench scraper – helps you handle sticky dough and shape it without adding excess flour
- Banneton (or a bowl lined with a floured kitchen towel) – supports the dough’s shape during proofing
- Dutch oven – traps steam during baking for a crisp, golden crust
- Substitution tip: no Dutch oven? A baking stone with a metal bowl or roasting pan flipped over the dough gets you a similar result
Related: What Equipment Do I Actually Need to Start Making Sourdough?
Start With an Active Starter
Before you mix a single ingredient, your starter needs to prove it’s ready to work. Here’s how to check:
- Feed your starter and let it sit for 4 to 12 hours, depending on your kitchen’s temperature.
- Watch for it to rise well above where it started—doubling in size is a strong sign.
- Check for bubbles throughout the starter, both on the surface and along the sides of the jar.
- Smell it—you’re looking for a pleasantly tangy aroma, similar to yogurt with a hint of fruit.
- Skip relying on the float test alone. Some perfectly ripe starters sink, and an over-fermented one can still float, so trust the visual and aroma signs first.
- If your starter passes these checks, it’s active and ready for mixing.
Mix the Dough
Mixing sourdough dough is refreshingly low-tech—no stand mixer required, just your hands and a bowl.
- Combine flour, water, and starter first; add salt a few minutes later or right away, depending on your recipe
- Mix just until no dry flour remains—the dough should look shaggy, not smooth
- Hydration refers to the ratio of water to flour; aim for 65% to 72% for your first loaf, since lower hydration is easier to handle
- If your recipe includes an autolyse or fermentolyse, rest the mixture for 20 to 60 minutes before adding salt to jump-start gluten development
- Don’t chase a “perfect” texture on your first try—shaggy, slightly sticky dough that holds together is exactly where you should be
Build Strength With Stretch and Folds
Instead of traditional kneading, sourdough bakers build strength through stretch and folds. Grab one side of the dough, stretch it upward, and fold it over itself. Rotate the bowl a quarter turn and repeat three more times to complete one round.
If your dough feels delicate or particularly wet, coil folds work as a gentler alternative. Lift the middle of the dough and let the ends fold underneath by gravity instead of stretching.
Plan on 3 to 4 rounds of folds spaced about 30 minutes apart during bulk fermentation, rather than handling the dough constantly. Between each round, the dough gets smoother, puffier, and more elastic as gluten develops and strengthens.
Know When Bulk Fermentation Is Done
Timers offer a helpful guideline, but the dough itself is your best indicator that bulk fermentation is complete. Here’s what to look for:
- Visible rise: the dough has grown 30% to 75% in volume, depending on your recipe
- Bubbles: you’ll spot them on the surface and along the edges of the bowl
- Domed surface: the top looks rounded and airy rather than flat
- Jiggle: gently shake the bowl—the dough should jiggle like a lightly set custard, not sit stiff
- Room temperature matters: a warm kitchen might finish fermentation in about 4 hours, while a cooler one could take 8 or more
Shape Your First Loaf
Shaping is where your dough transforms from a soft mass into a loaf with real structure. Once bulk fermentation wraps up, follow these steps to shape a boule or batard:
- Turn the dough gently onto a lightly floured surface using your bench scraper, taking care not to deflate it.
- Pre-shape the dough into a loose round by folding the edges toward the center.
- Let the dough rest, uncovered, for 20 to 30 minutes. This bench rest relaxes the gluten and makes final shaping much easier.
- For a boule, fold the edges of the dough toward the center again, then flip it seam-side down.
- Drag the dough slightly against the counter using your bench scraper to build surface tension—the tight outer “skin” that helps the loaf hold its shape and rise upward instead of spreading out.
- For a batard, follow the same folding process but shape the dough lengthwise into an oval instead of a round.
- Use as little flour as possible during shaping. Too much flour keeps the dough from gripping the counter, which is exactly what creates tension.
- Check that the surface looks smooth and taut before moving on—a few small creases are fine, but the dough shouldn’t look loose or slack.
- Transfer the shaped loaf seam-side up into your floured banneton, tucking any loose edges in as needed.
- Cover the banneton loosely with a towel or plastic wrap before moving on to the proofing stage.
Getting the tension right takes a few tries, and that’s completely normal—shaping is one of the skills that improves the most with repetition.

Proof the Dough
Proofing is the final rise before baking, and getting it right makes a real difference in how your loaf turns out. Follow these steps to proof your shaped dough with confidence:
- Choose your proofing method: room-temperature or overnight in the refrigerator.
- For a room-temperature proof, let the dough sit covered for roughly 1 to 3 hours if you plan to bake the same day.
- For an overnight refrigerator proof, refrigerate the covered dough for 8 to 14 hours. This slows fermentation, deepens flavor, and fits neatly into a busy schedule.
- Check the dough periodically rather than walking away completely, especially during a room-temperature proof, since timing varies with kitchen temperature.
- Once you think it’s close, perform the finger-poke test: press a finger gently into the dough and watch how it responds.
- If the dough springs back immediately, it needs more time—this indicates it’s underproofed.
- If it barely springs back at all, it may be overproofed and at risk of collapsing during baking.
- Look for a slow, partial spring-back, which signals the dough is properly proofed and ready to bake.
- If using a refrigerator proof, you can bake the dough straight from the fridge—no need to bring it to room temperature first.
- Once proofing is complete, move directly to preheating your oven and preparing to score and bake.
Underproofed dough tends to bake up dense with a tight crumb, while overproofed dough can lose structure and collapse in the oven, so taking a moment to check before baking pays off.
Related: How to Fix Overproofed Sourdough (Tips to the Rescue!)
Score and Bake
Baking is where all your prep work finally comes together. Follow these steps to get a crisp crust and a well-risen loaf:
- Preheat your Dutch oven, lid on, at 450–500°F for at least 30 minutes before baking.
- Once your dough is proofed, turn it out of the banneton onto a sheet of parchment paper.
- Score the top of the dough with a bread lame or sharp knife, cutting about half an inch deep.
- Give steam a controlled place to escape by scoring in one confident, deliberate motion rather than several shallow cuts.
- Carefully lower the dough, using the parchment paper as a sling, into the preheated Dutch oven.
- Cover the Dutch oven with its lid and bake for about 20 minutes.
- Remove the lid after 20 minutes to let the crust develop color and crispness.
- Continue baking uncovered for another 20 to 25 minutes, until the crust turns deep golden brown.
- Remove the loaf from the Dutch oven and let it cool on a wire rack for at least an hour before slicing.
- Resist cutting into it early—slicing too soon lets steam escape before the crumb finishes setting, leaving a gummy texture.
What to Expect From Your First Loaf
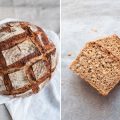
Your first sourdough loaf probably won’t look like the ones on Instagram, and that’s completely normal. A dense crumb, a flatter shape, or a pale crust are all common outcomes while you’re still learning to read your starter and dough. None of these mean you failed—they just mean you’ve got a few dials to adjust next time.
Here’s what to look for if you want to gauge whether your loaf turned out well:
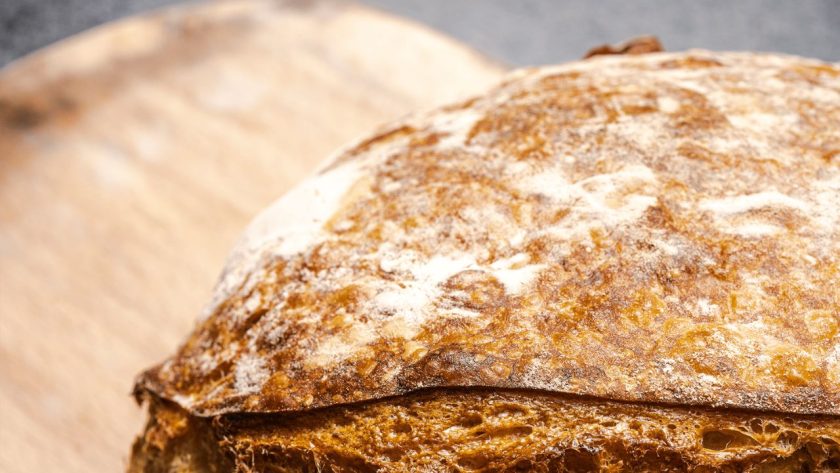
- A deep golden-brown crust with a slight sheen
- Visible oven spring, where the scored cut has opened up and expanded
- A crumb with a mix of irregular holes rather than one uniform texture throughout
- A hollow sound when you tap the bottom of the loaf
- A pleasant, mild tang when you taste it
- A crust that shatters slightly rather than feeling tough or leathery
Slice into your loaf and take a look. Large, irregular holes next to tighter, denser patches usually point to uneven shaping or folding. An overall dense crumb often means the dough needed more time in bulk fermentation, or your starter wasn’t quite as active as it needed to be. A pale crust suggests your oven wasn’t hot enough or you skipped enough steam time. Don’t judge your first loaf on looks alone—cut a slice, spread on some butter, and taste it. Chances are it’s better than you think.
Your First Loaf Is Just the Beginning
You’ve got the know-how now, so go bake that loaf already. You know what a happy starter looks like, how to handle dough without babying it, and how to tell when it’s actually ready instead of guessing. Baking your first sourdough isn’t about nailing it perfectly; it’s about getting your hands in the dough and learning as you go.
Maybe your crust comes out a little pale or your crumb’s denser than you pictured. That’s fine. That’s normal, actually. Every home baker’s first loaf looks a little rough around the edges, and that’s part of the charm. So flour your counter, trust your starter, and get that oven cranking. You’ve got everything you need. Now go make some bread.
FAQs – Making Your First Loaf of Sourdough
How do I make my first loaf of bread?
Feed your starter until it’s bubbly and active, then mix flour, water, starter, and salt into a shaggy dough. Build strength with a few rounds of stretch and folds, let it bulk ferment until puffy, then shape it into a boule or batard. Proof the dough, score it, and bake it in a hot Dutch oven until deep golden brown. (62 words)
Is it cheaper to make my own bread or buy it?
Homemade sourdough usually comes out cheaper per loaf, especially once your starter’s established, since you’re only paying for flour, water, and salt. Factor in oven energy and your time, and the savings shrink a bit, but you’re getting a higher-quality, preservative-free loaf for less than most artisan bakery prices. Plus, that starter keeps paying off loaf after loaf. (60 words)