
You love bread, but flour’s been benched—gluten issue, carb cut, or just curiosity. Store-bought flourless loaves can be gummy or fall apart the second you slice them, which gets old fast when all you want is something solid for toast or a sandwich. That’s where this flourless bread recipe comes in. With the right seeds, a little psyllium husk, and a method that actually works, you’ll bake a loaf that’s sturdy, flavorful, and genuinely satisfying. No gimmicks, no guesswork—just real bread, flour or not, ready for whatever you’re craving.
What Is Flourless Bread?
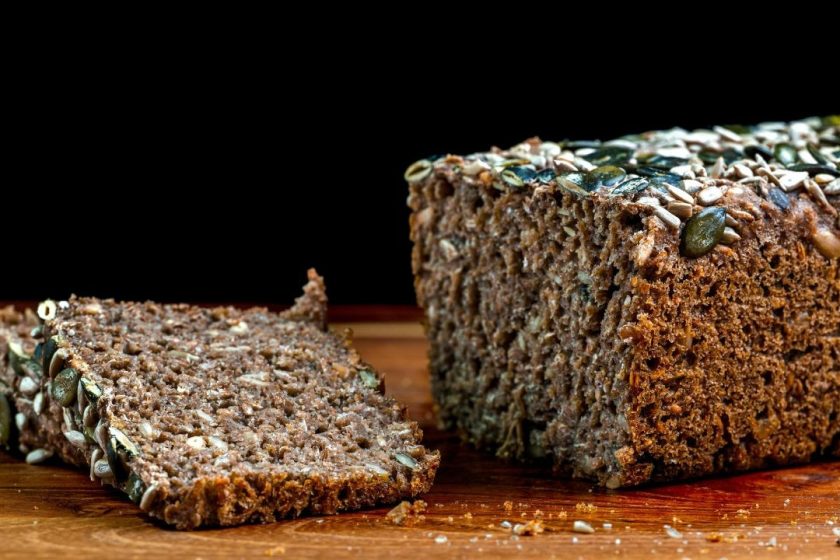
Flourless bread skips the flour bag entirely—no wheat, no oats, no rice flour, nothing ground into a powder. Instead, it relies on whole seeds, nuts, eggs, and a binder to hold everything together, kind of like building with bricks instead of pouring concrete. Each seed stays whole, giving the loaf texture and structure without a single scoop of flour ever touching the bowl. That makes it a completely different animal from conventional bread, which depends on flour’s gluten network to trap air and rise into a soft, airy crumb.
Here’s where people get tripped up: flourless doesn’t automatically mean gluten-free. If a recipe swaps wheat flour for something like spelt or barley flour, it’s flour-free from wheat but still loaded with gluten. True flourless bread that’s also gluten-free needs every ingredient—seeds, binders, add-ins—to be certified gluten-free. Think of it like a Venn diagram: flourless and gluten-free overlap a lot, but they’re not the same circle.
Grain-free bread built from seeds and nuts isn’t a consolation prize for people avoiding wheat—it’s genuinely delicious on its own merits. The nutty flavor and dense, satisfying bite make it a standout for breakfast toast or a sturdy sandwich base, no compromise required.
Ingredients
This loaf comes together with pantry seeds and a few binders:
- 1 cup sunflower seeds
- 1/2 cup pumpkin seeds
- 1/4 cup flax seeds
- 1/4 cup chia seeds
- 3 tbsp psyllium husk
- 4 large eggs
- 1 tsp baking powder
- 1 tsp salt
- 1 cup water or olive oil
Related: Hearty Pumpkin Seed Sourdough Recipe
How to Make Flourless Bread
- Line a loaf pan with parchment paper, letting the edges overhang the sides—this makes lifting the sticky, dense loaf out later effortless instead of a wrestling match.
- In a large mixing bowl, combine the seeds, psyllium husk, baking powder, and salt, and stir until evenly distributed. This matters more than it seems, since uneven distribution means some slices end up seed-heavy and others sparse.
- In a separate bowl, whisk the eggs and liquid together, then pour the wet mixture over the dry ingredients. Stir until every seed is coated. The batter will look thick and a little strange at this stage, and that’s exactly right.
- Let the batter rest on the counter for 10 to 15 minutes. This resting period lets the psyllium husk and chia seeds fully hydrate and turn gel-like, which is what gives the finished loaf its structure. Skipping this step is the number one reason loaves fall apart later.
- Scrape the hydrated batter into your prepared loaf pan and use a spatula to smooth and firmly press down the top, packing it in so there aren’t any air pockets left behind.
- Slide the pan into a preheated 350°F oven and bake for 45 minutes to an hour, depending on your loaf size and oven. Every oven runs a little differently, so treat the time as a guideline rather than gospel—start checking around the 45-minute mark.
- Pull the loaf once it’s firm to the touch, set in the center, and deepened in color on top. If you’re unsure, a quick skewer or thermometer check settles it for good.
- Let the loaf rest in the pan for about 10 minutes before moving it anywhere—this gives it a chance to firm up before you handle it.
How to Tell When It’s Done
A few reliable signs tell you when your loaf has finished baking, no guesswork required:
- Firm surface: Press the top lightly—it should feel firm and spring back, not squishy or wobbly.
- Set center: Give the pan a gentle shake. A done loaf won’t jiggle in the middle.
- Deepened color: The top should look dry and slightly darker than when it went in, almost like it’s tanned a shade or two.
- Clean skewer: Stick a skewer into the center. It should come out clean or with just a few dry crumbs clinging to it—wet or gloopy means it needs more time.
- Internal temperature: For certainty over guesswork, use an instant-read thermometer inserted into the center. Most flourless loaves are done around 200°F internally.
- Cooling rack test: Once out of the oven, set the loaf on a cooling rack. A properly baked loaf holds its shape immediately instead of sinking or flattening.
If your loaf checks every box above but you’re still unsure, it’s always safer to give it a few extra minutes in the oven. An underbaked flourless loaf is far harder to fix after the fact than one that spent a little longer baking.

Cooling and Slicing
Don’t rush the cooldown. Let the loaf rest in the pan for about 10 minutes after it comes out of the oven—this gives it a chance to firm up before you handle it. Rushing this step is like frosting a cake while it’s still hot; you’ll just make a mess of things.
From there, transfer the loaf to a cooling rack so air can circulate underneath and around it. This keeps the bottom from turning soggy, which is a real risk with dense, moisture-heavy flourless bread that doesn’t breathe the way conventional loaves do.
Here’s the step people skip and instantly regret: flourless bread needs to cool completely, often an hour or more, before you slice into it. The crumb is still setting internally as it cools, and cutting too early leaves you with a gummy, crumbly mess instead of clean slices. Once it’s fully cool, reach for a serrated knife. Its sawing motion glides through the seeds and dense crumb far better than a straight blade, giving you neat, even slices instead of torn, crumbly ones.
How to Store Flourless Bread
Flourless bread holds up well since its dense, seed-packed structure resists staling faster than most conventional loaves. A few storage tips keep it tasting fresh:
- Room temperature: Store in an airtight container on the counter for up to two or three days. Make sure the loaf is fully cooled before sealing it, or trapped steam will soften the crust.
- Refrigerator: For up to a week of freshness, keep the loaf in the refrigerator. The seedy structure holds together nicely even after several days chilled.
- Freezer: Slice the whole loaf before freezing, then layer parchment between slices so they don’t fuse into one solid block. This way you can grab exactly what you need.
- Reheating: Pop a frozen slice straight into the toaster—no thawing required. It comes out warm and ready in just a couple of minutes.
- Avoid plastic wrap alone: Wrapping directly in plastic without an airtight container can trap moisture against the crust, making it go soft or slightly damp faster than it should.
With the right storage method, a single loaf can realistically stretch across a week or more without ever going stale or dry.
Easy Variations
Go Savory With Herbs
Fold in chopped rosemary, thyme, or your favorite dried herb blend for a loaf that pairs beautifully with soup, salad, or a cheese board. Rosemary especially gives the bread an almost restaurant-quality aroma while it bakes, and a light sprinkle of flaky salt on top afterward takes it even further.
Add Crunch With Extra Seeds and Nuts
Stir in sesame seeds or chopped walnuts for extra texture and a nutty depth of flavor. Sprinkling sesame seeds on top before baking also gives the crust a nice visual pop and a toasty crunch that plays well against the soft interior.
Play With Spice
A pinch of smoked paprika, cumin, or even an everything-bagel seasoning blend turns this humble loaf into something worth eating on its own, no toppings required. Spices are a low-effort way to completely change the personality of the bread without touching the base recipe.
Shrink It Down
Divide the batter into a muffin tin or mini loaf pans for individual portions—perfect for grab-and-go breakfasts or portion control without slicing into a full loaf.
Sweeten It Up
For a dessert-leaning version, mix in a touch of honey or maple syrup along with cinnamon and a handful of chopped dried fruit. It turns the same base recipe into something closer to a hearty breakfast bread.
Related: 5 Chewy Bread Recipes You Can Make at Home
Common Problems and Fixes
Bread falls apart when sliced: This almost always comes down to binding. Make sure you’re using enough psyllium husk or chia seeds, and don’t shortcut the hydration time before baking.
Center stays wet or gummy: This usually means the loaf needed more oven time, or it was sliced before cooling completely. Give it extra bake time and let it cool fully before cutting.
Loaf turns out too dense: A little density is normal for flourless bread, but if it’s practically a doorstop, check that your baking powder is fresh and measured correctly.
Bread crumbles instead of slicing cleanly: This points to insufficient hydration or cutting in too soon. Let the batter rest before baking, and let the finished loaf cool fully first.
Seeds make the loaf too dry: If the bread tastes more like a cracker than bread, add a touch more liquid next time to balance out how much moisture the seeds soak up.
Serving Ideas
Flourless bread earns a spot at every meal, not just breakfast:
- Toast with eggs: Top a warm slice with a fried or poached egg for a protein-packed start to the day.
- Avocado toast: The dense, seedy crumb holds up to mashed avocado without turning soggy.
- Sandwiches: Its sturdy texture handles deli meat, cheese, and veggies without falling apart under the weight.
- Nut butter and fruit: Spread on almond or peanut butter and top with banana for a quick, satisfying snack.
- Soup and salad side: A warm slice alongside a bowl of soup or a fresh salad rounds out the meal and soaks up every bit of broth or dressing.
Bread, Reinvented
Turns out you don’t need flour to bake something this good. Flourless bread swaps in seeds, eggs, and a little psyllium husk magic to create a loaf that’s hearty, flavorful, and totally its own thing. It’s simple, forgiving, and way more versatile than you’d expect—dress it up with herbs and spices, or keep it classic and let the seeds shine. Store it however works for you, and it’ll stay fresh for weeks. Even if something goes a little wonky along the way, you now know how to fix it. Whether it’s piled high for a sandwich or topped with avocado, this loaf earns its spot on your table. Flour who? You’ve officially got this.
FAQs – Flourless Bread Recipe
Can I make bread with no flour?
Yes, absolutely. Flourless bread swaps flour for seeds like sunflower, pumpkin, flax, and chia, held together with eggs and psyllium husk. The seeds provide structure while the psyllium husk acts as a binder, mimicking what gluten does in traditional bread. The result is a dense, hearty loaf that slices cleanly and toasts beautifully.
What is the best substitute for flour in bread?
Psyllium husk paired with a mix of seeds is the best substitute for flour in bread. Psyllium husk swells into a gel that binds everything together, while seeds like flax and chia add moisture-absorbing structure. Together, they replicate the elasticity gluten normally provides, giving you a loaf that holds its shape and slices without crumbling.
How is flourless bread made?
Flourless bread comes together by mixing seeds, psyllium husk, and salt, then adding eggs and liquid. The batter rests briefly so the psyllium husk and chia seeds can hydrate and bind everything. It’s then baked until firm and fully set, and cooled completely before slicing for clean, sturdy pieces.
Flourless Bread
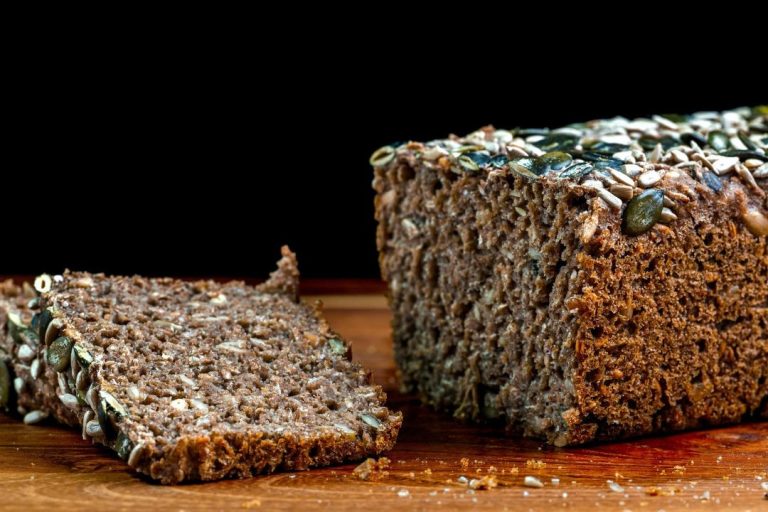
With the right seeds, a little psyllium husk, and a method that actually works, you’ll bake a loaf that’s sturdy, flavorful, and genuinely satisfying.
Ingredients
- 1 cup sunflower seeds
- 1/2 cup pumpkin seeds
- 1/4 cup flax seeds
- 1/4 cup chia seeds
- 3 tbsp psyllium husk
- 4 large eggs
- 1 tsp baking powder
- 1 tsp salt
- 1 cup water or olive oil
Instructions
- Line a loaf pan with parchment paper, letting the edges overhang for easy lifting later.
- Combine the seeds, psyllium husk, baking powder, and salt in a large bowl, stirring until evenly distributed.
- Whisk the eggs and liquid together, then pour over the dry ingredients. Stir until every seed is coated.
- Let the batter rest for 10 to 15 minutes so the psyllium husk and chia seeds hydrate and bind—don’t skip this step.
- Scrape the batter into your pan and press the top firmly to eliminate air pockets.
- Bake at 350°F for 45 minutes to an hour, checking around the 45-minute mark.
- Pull the loaf once it’s firm, set in the center, and deepened in color on top.
- Let it rest in the pan for 10 minutes before moving it.
Notes
For a dessert-leaning version, mix in a touch of honey or maple syrup along with cinnamon and a handful of chopped dried fruit. It turns the same base recipe into something closer to a hearty breakfast bread.





