
Last updated on October 28th, 2025
Learning how to freeze sourdough bread is one of the smartest moves any home baker can make. That perfect loaf you just pulled from the oven—crust crackling, that intoxicating tang filling your kitchen—deserves better than turning stale in a few days. Freezing sourdough bread works exceptionally well, and when done properly, it can taste just like freshly baked bread. The natural fermentation process creates a complex gluten structure that holds up beautifully to freezing. Those wild yeast and lactic acid bacteria have already worked their magic before baking, leaving behind a sturdy framework that weathers the deep freeze remarkably well. Recent research even suggests that freezing bread might offer unexpected health perks, like potentially lowering its glycemic index when toasted afterward.
Why Freeze Sourdough Bread
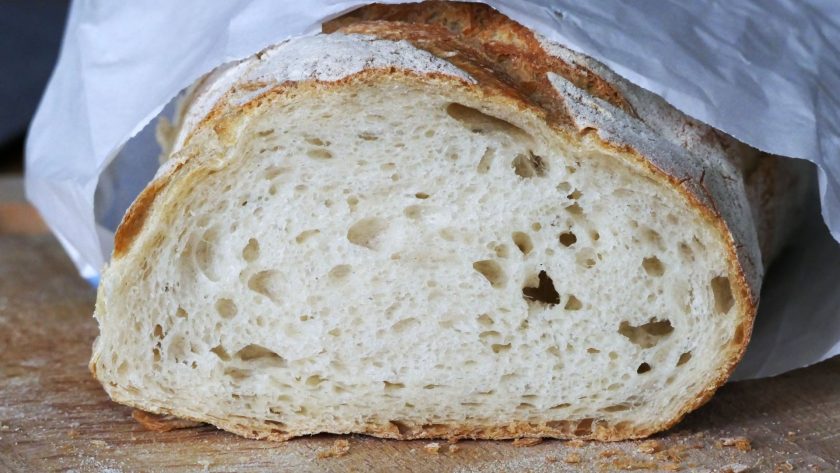
Freezing provides a fantastic way to avoid waste, especially when you’re too busy to bake or can’t finish a whole loaf before it goes stale. Think of your freezer as a pause button for freshness—your bread gets to hang out there until you’re ready for it. Those complex flavors from fermentation—that tangy bite, those nutty undertones—stick around when you freeze properly. The natural acids that give sourdough its signature tang also help slow down how quickly carbs get absorbed, and freezing just adds to that benefit.
The convenience factor is game-changing. Batch baking multiple loaves at once isn’t much harder than making just one—bulk fermentation, bulk baking, all in one go. Pop a couple of loaves in the freezer, and you’ve got your own personal artisan bakery ready whenever you need it. For smaller households, freezing is practically essential. Freeze it in slices, and suddenly you’ve got perfect portions without any pressure. Research suggests that freezing and then toasting sourdough can actually make it healthier by creating resistant starch, which helps lower blood sugar spikes by about 39% compared to fresh bread.
How Freezing Affects Sourdough Texture and Flavor
When your bread hits freezer storage at around 0°F (-18°C), ice crystals start forming in the bread’s moisture. Small ice crystals are way better than large ones—fast freezing creates tiny, uniform crystals that don’t mess with your bread’s structure as much. Sourdough’s gluten structure, already strengthened during fermentation, creates a network sturdy enough to withstand freezing better than regular bread.
Moisture can migrate to form ice crystals, which affects how crispy that crust stays. However, when you thaw and reheat properly, you can revive that crackle. While freezing does impact probiotic viability, it doesn’t eliminate them, and the beneficial compounds created during fermentation—like organic acids—stick around. The texture after thawing depends heavily on technique. Done right, you’re looking at bread that’s maybe 90-95% as good as fresh. When bread cools and especially when it freezes, the starches undergo something called retrogradation, essentially tightening back up into a form that’s tougher for your body to digest quickly—actually beneficial for blood sugar control.
Preparing Sourdough Bread Before Freezing
The prep work you do before freezing can make or break your bread’s comeback. Your loaf needs to cool completely—at least 6 hours after it comes out of the oven. If you wrap warm bread, you’re creating a steam room inside that packaging, leading to a soggy, potentially moldy mess when you thaw it. Let it hang out on a cooling rack completely.
The great debate: to slice or not to slice? Both have merits. Slicing before freezing means ultimate convenience—grab a couple of pieces for toast without thawing the whole loaf. Whole loaves retain moisture better and have less surface area exposed to potential freezer burn. If you’re going the sliced route, place small pieces of parchment paper between each slice to keep them from freezing together. You can reuse those parchment pieces over and over.
The gold standard is double-wrapping: start with plastic wrap to lock in moisture, then add aluminum foil as a protective shield against freezer burn. Think of it like dressing for winter—you want layers. Once wrapped, slide your loaf into a freezer-safe bag and squeeze out as much air as possible. Air causes freezer burn and robs your bread of moisture. If you’ve got a vacuum sealer, use the seal-only setting to avoid squashing your loaf.
Label everything with date and contents. Future you will be grateful.
Related: Can You Freeze Sourdough Bread? Yes, and Here’s How
The Best Way to Freeze Sourdough Bread
Freezing a Whole Loaf
Place your cooled loaf in a large ziplock bag, seal it tightly while removing as much air as possible, and pop it in the freezer. That’s the simplified version that works great for most people. For maximum protection, wrap the entire loaf in plastic wrap or bee’s wrap first, then add a layer of aluminum foil, making sure all edges are sealed tightly, before placing it in a freezer-safe bag. This triple-layer approach might seem like overkill, but when you pull out that loaf months later and it tastes bakery-fresh, you’ll understand why.
Freezing Sliced Bread
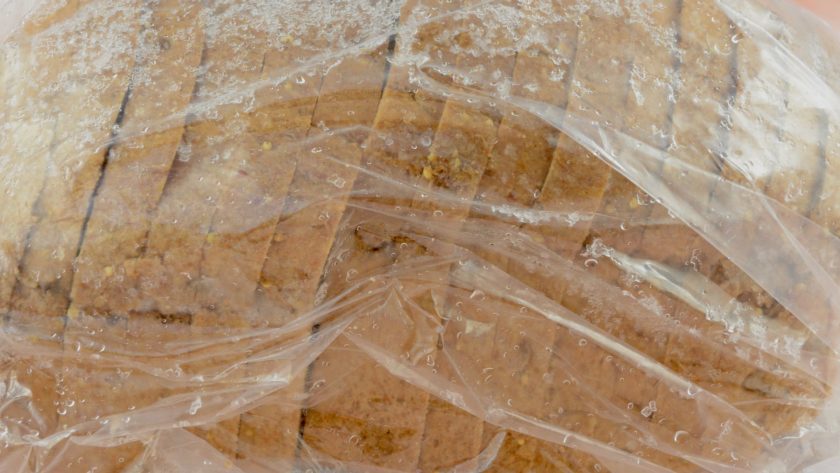
Slice your bread to your preferred thickness, then lay the slices in a single layer on a parchment-lined baking sheet. Stick that sheet in the freezer for about 20 minutes—this flash freezing prevents your slices from becoming one giant bread brick. Once they’re frozen solid enough that they won’t stick together, transfer them to a freezer bag or container.
Want maximum convenience? Keep small pieces of parchment paper between slices before placing them all in a ziplock bag. This way, you skip the flash-freeze step and can still grab individual slices. Some people lay slices flat in the bag, others reassemble them into a loaf shape—do whatever makes sense for your freezer space.
Storage Location
Find a flat surface in your freezer where the bread can lie without getting squished by other items, ideally in the deepest part where temperatures stay most consistent. Temperature fluctuations are bread’s enemy. Every time that temperature bounces around, ice crystals grow and shrink, damaging the texture. The more stable the environment, the better your bread maintains its quality.
Label your bags with the date and type of bread using a permanent marker. Include any special characteristics that help you make good decisions.
How Long Can You Freeze Sourdough Bread
Sourdough bread maintains superior texture and taste for up to 2-3 months in the freezer. That’s your sweet spot for bread that tastes pretty much like the day you baked it. The crust still crisps up beautifully, the crumb stays soft and chewy, and all those complex flavors are right where you left them.
Bread can technically last up to 6 months in the freezer if wrapped well, but after that 2-3 month mark, you’ll start noticing subtle changes. The crust might not get quite as crispy when you refresh it. If you’re planning to toast it, these differences matter less. For sliced bread, aim to use it within 1-2 months for the best quality. More surface area means more opportunity for freezer burn and moisture loss. Your freezer should maintain a consistent temperature of 0°F (-18°C) or below for optimal results.
Related: How to Freeze Sourdough Starter [Top Tips For Success]
How to Thaw Sourdough Bread Properly
Thawing Whole Loaves
Remove your loaf from the freezer and let it thaw at room temperature while still in its wrapping and bag—this takes about 3 hours at room temperature or 12 hours if you pull it out the night before. Keeping it wrapped is crucial because it traps moisture and prevents the bread from drying out as it thaws.
Refreshing the Crust
This is where good bread becomes great bread again. Preheat your oven to 350-450°F, quickly run the thawed loaf under water so it’s coated (not drenched), then bake for 10-15 minutes until the crust is crispy. That water creates steam in the oven, which rehydrates the crust and gives you that just-baked crackle. Start with the oven at 375°F, place the bread directly on the oven rack, and heat for 10-15 minutes. Be careful not to overdo it—you’re refreshing, not rebaking.
Thawing Sliced Bread
This is ridiculously easy. Toast slices straight from frozen—no need to thaw first. Your toaster or toaster oven handles the whole operation. Set it to medium and let it do its thing. For grilled cheese or sandwiches with fillings, thaw the slices at room temperature first so your cheese melts properly without burning the bread. If you’re not toasting, just leave slices out at room temperature for 30-60 minutes.
Pro tip: If you’re refreshing a whole loaf, let it cool for 15-20 minutes after the oven before slicing. Cutting into it immediately releases all that steam and can make the interior gummy.
Mistakes to Avoid When Freezing Sourdough
Learning what not to do saves you from disappointing results. Here are the most common freezing mistakes and how to avoid them:
- Freezing warm bread: Freezing bread that hasn’t completely cooled leads to condensation, which creates ice crystals and results in soggy, potentially moldy bread when thawed. Wait the full 6 hours for complete cooling.
- Using insufficient wrapping: Parchment paper alone or just plastic wrap doesn’t create enough protection against freezer burn and moisture loss. Use multiple layers—plastic or beeswax wrap to trap moisture, then foil or a freezer bag to protect against freezer burn.
- Leaving air in packaging: Oxygen is the enemy—squeeze out as much as possible before sealing. Those pockets of air let moisture escape, and ice crystals form. Get aggressive with pushing air out of bags.
- Refreezing thawed bread: Quality declines with each freeze-thaw cycle. Every time you freeze and thaw, more ice crystals form and break down the bread’s structure. Freeze once, thaw once, that’s it.
- Storing in unstable locations: Temperature fluctuations cause ice crystals to grow and shrink, damaging texture. Find a stable, protected spot away from the freezer door.
- Forgetting labels: Future you will be mystified by those aluminum-wrapped mystery objects. Date them and describe them.
Keep Your Sourdough Fresh Forever (Well, Almost)
Freezing sourdough bread is a simple technique that extends your bread’s life without sacrificing what makes it special. That tangy flavor, chewy crumb, and crackling crust are all preserved beautifully when you freeze properly. When you invest time into baking or purchasing high-quality sourdough, freezing ensures you enjoy every crumb instead of letting it dry out or mold. Done right, frozen and refreshed sourdough can rival a fresh loaf—the crust crisps up beautifully, the interior stays tender, and those complex fermented flavors shine through. Your freezer isn’t just cold storage; it’s your secret weapon for keeping homemade sourdough fresh and always within reach.
FAQs – How to Freeze Sourdough Bread
Does sourdough bread freeze well?
Yes! Sourdough bread freezes exceptionally well, and when done properly, it can taste just like freshly baked bread. The natural fermentation process creates a sturdy gluten structure that holds up beautifully during freezing. For best results, wrap cooled loaves tightly in plastic wrap and aluminum foil, then store in a freezer bag for 2-3 months. The key is proper wrapping and cooling the bread completely before freezing to prevent moisture issues.
How do you thaw frozen sourdough bread?
Remove your loaf from the freezer and let it thaw at room temperature while still wrapped—this takes about 3 hours at room temperature or 12 hours overnight. Keep the bread wrapped during thawing to trap moisture and prevent drying. For sliced bread, toast directly from frozen without thawing. If you’re in a hurry, unwrap and microwave briefly, but watch carefully to avoid creating hot spots or weird textures.
How to refresh sourdough bread after freezing?
Preheat your oven to 350-450°F, quickly run the thawed loaf under water so it’s coated, then bake for 10-15 minutes until the crust is crispy. The water creates steam that rehydrates the crust and gives you that just-baked crackle. Place the bread directly on the oven rack and heat at 375°F for 10-15 minutes. Let it cool 15-20 minutes before slicing to avoid a gummy interior.
Is sourdough bread still healthy after being frozen?
Absolutely! Freezing doesn’t diminish sourdough’s nutritional benefits. While freezing does impact probiotic viability, it doesn’t eliminate them, and the beneficial compounds created during fermentation—like organic acids—stick around. Even better, research suggests that freezing and then toasting sourdough can actually make it healthier by creating resistant starch, which helps lower blood sugar spikes by about 39% compared to fresh bread. The fermentation benefits remain intact, making frozen sourdough a smart choice.

![How to cold proof sourdough [your easy guide]](https://www.mydailysourdoughbread.com/wp-content/uploads/2023/01/blog-images-40-120x120.jpg "How To Cold Proof Sourdough [Your Easy Guide] 4")

![What you need to know about coil fold sourdough [doing it right! ]](https://www.mydailysourdoughbread.com/wp-content/uploads/2023/01/blog-images-27-120x120.jpg "What You Need To Know About Coil Fold Sourdough [Doing It Right!] 6")
![How to stretch and fold sourdough [a detailed guide]](https://www.mydailysourdoughbread.com/wp-content/uploads/2023/06/How-To-Stretch-And-Fold-Sourdough-120x120.jpg "How To Stretch And Fold Sourdough [A Detailed Guide] 7")
