
Last updated on August 18th, 2025
Fall baking season calls for the ultimate comfort food: perfectly moist, spiced pumpkin bread that fills your kitchen with autumn magic. Creating bakery-quality pumpkin bread at home seems tricky, but it’s achievable when you know the right techniques and ingredient secrets.
The difference between ordinary and extraordinary pumpkin bread comes down to understanding which type of pumpkin to use, proper mixing methods, and timing your bake perfectly. These insider tips reveal exactly how to nail that tender, flavorful crumb every single time, plus pro tricks that guarantee your pumpkin bread turns out perfect.
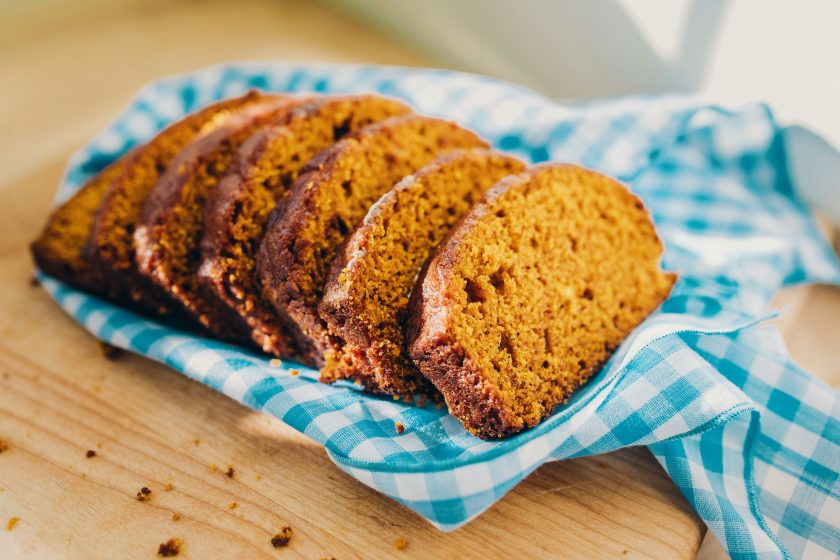
Ingredients
- Pumpkin Purée: 1 cup (15 oz can)
- Brown Sugar: ¾ cup packed
- White Sugar: ½ cup granulated
- All-Purpose Flour: 1¾ cups
- Cinnamon: 2 teaspoons
- Nutmeg: ½ teaspoon
- Ginger: ½ teaspoon
- Cloves: ¼ teaspoon
- Chocolate Chips: 1 cup (optional)
- Chopped Nuts: ½ cup pecans or walnuts (optional)
Tools You’ll Need
- Large mixing bowl (at least 5 quarts) – your command center for combining ingredients
- Whisk or wooden spoon – no electric mixer needed, hand mixing keeps it simple and prevents overmixing
- 9×5-inch loaf pan – metal conducts heat evenly for that gorgeous golden crust
- Wire cooling rack – essential for proper air circulation to prevent soggy bottoms
- Measuring cups and spoons – accuracy matters for perfect texture
- Rubber spatula – gets every bit of batter from the bowl
- Airtight storage container – keeps your finished loaf moist for days
Should You Use Canned or Fresh Pumpkin for Pumpkin Bread?
This age-old baking debate deserves a definitive answer. The truth? Both work beautifully, but canned pumpkin purée wins for most home bakers.
Canned pumpkin puree doesn’t vary much in thickness, texture, or flavor from brand to brand. That consistency means your bread turns out the same delicious way every single time. Visually, the canned pumpkin was thicker and darker in color, which translates to better structure in your finished loaf.
Fresh pumpkin brings charm but challenges. The fresh pumpkin puree was slightly thinner in texture with a more yellowish-golden color. However, the canned option had a more powerful pumpkin flavor and a silkier texture. Here’s the real issue: water content varies wildly between pumpkins, requiring you to blot excess moisture.
The verdict? Homemade pumpkin puree can be as good as canned, but it takes quite a bit of prep work. Save your energy for perfecting that spice blend instead. Always check labels for 100% pure pumpkin purée, not pumpkin pie filling!
Step-by-Step Recipe
Here’s where pumpkin bread proves it’s the most forgiving friend in your kitchen—let’s walk through this step by step:
- Preheat your oven to 350°F and position the rack in the middle for even baking. This sweet spot ensures your loaf bakes evenly without burning the top or leaving the center underdone.
- Prep your loaf pan by greasing that 9×5-inch pan like your bread’s life depends on it—nobody wants half their masterpiece glued to the bottom. Pro tip: dust with flour after greasing for extra insurance.
- Mix dry ingredients in your large mixing bowl: combine flour, spices, baking soda, and salt, then whisk well and set aside. Getting these evenly distributed now saves you from streaky spices later.
- Whisk wet ingredients in a separate bowl: pumpkin purée, sugars, eggs, oil, and vanilla until smooth and well-blended. The mixture might look a bit lumpy at first—that’s normal.
- Combine wet and dry by gently stirring until just combined—a few lumps are fine and proof you’re doing it right. Think gentle folding motions, not aggressive beating.
- Don’t overmix or you’ll end up with tough bread instead of that tender, cake-like texture we’re after. Stop as soon as you can’t see dry flour streaks.
- Pour batter into your prepared pan and smooth the top with your spatula, giving it a gentle tap to release air bubbles.
- Bake 60-65 minutes at 350°F, covering with foil halfway through to prevent over-browning. Every oven’s different, so start checking around the 55-minute mark.
- Test for doneness with the toothpick trick—it should come out clean when inserted in the center, maybe with just a few moist crumbs clinging.
- Look for the crack across the top, which is a tell-tale sign it’s done or close to being perfectly baked.
- Cool completely on a wire rack before slicing (trust me on this one—patience pays off!). This prevents the bread from falling apart and lets the flavors settle.
Related: Baked Sourdough Pumpkin Muffins Recipe
Common Mistakes to Avoid
Wrong Pumpkin Product
One of the mistakes that folks make frequently when it comes to baking pumpkin bread is when they mix up cans of “pumpkin puree” with “pumpkin pie filling.” This innocent swap’ll sabotage your loaf faster than you can say “autumn spice.” Pumpkin pie filling comes loaded with sugar and spices that’ll throw off your recipe’s delicate balance.
Always grab the can labeled “100% pure pumpkin”—nothing else should be on that ingredient list.
Underbaking Issues
Adding too much pumpkin puree can cause underbaking in the center of your bread, but the real culprit is usually impatience. Pumpkin bread, like most quick breads, is dense and heavy.
You want the bread to puff up and crack on top—this is a sign that it has cooked all the way through. Pro move: cover with foil if the top browns before the center’s done.
Overmixing Problems
Overmixing is a typical baking issue that will ruin the moist texture of your bread. Think gentle dance, not a wrestling match. Stop as soon as you can’t see flour streaks—those few lumps aren’t your enemy.
Soggy Texture Issues
If the texture of your bread is soggy and the middle has sunk, it means there was too much liquid in proportion to the dry ingredients. Stick to recipe ratios and cool completely on a wire rack for best results.
Pumpkin Bread Variations
- Chocolate chips – The ultimate crowd-pleaser! Use semi-sweet, dark, milk, or white chocolate chips. Toss them in flour before folding into batter to prevent sinking. Pro tip: sprinkle extra on top for that bakery-style look.
- Walnuts – Add chopped walnuts directly to the batter or sprinkle whole ones on top for visual appeal. Each nut brings a unique flavor—walnuts offer an earthy bite, pecans add buttery sweetness.
- Alternative nuts – Try sliced almonds, chopped cashews, pecans, or hazelnuts. Flavored nuts like cinnamon pecans or roasted almonds add gourmet flair.
- Almond flour version – Replace some all-purpose flour with blanched almond flour for added protein, healthy fats, and an incredibly moist texture. Perfect for those seeking healthier options.
- Vegan adaptation – Pumpkin purée works as an excellent egg replacement. Use plant milk (oat, soy, almond) and coconut oil instead of butter. The bread rises perfectly while staying moist.
- Gluten-free option – Use high-quality 1:1 baking flour like King Arthur Measure-for-Measure. Ensure your blend contains xanthan gum to prevent a crumbly texture.
- Mix and match – Combine variations! Try vegan chocolate chip, gluten-free with nuts, or almond flour with walnuts.
Serving Suggestions
- Coffee Pairing – The bitter notes in coffee create the perfect counterbalance to pumpkin bread’s sweet, spiced warmth, making this combination ideal for breakfast or afternoon snacks. Medium roast coffees work beautifully with pumpkin bread’s dense, cake-like texture, while a homemade pumpkin spice latte complements the fall flavors perfectly.
- Whipped Butter – Whipped butter transforms ordinary pumpkin bread into an indulgent treat. It melts easily into the bread’s texture, creating rich, creamy pockets throughout each slice. Salty honey butter provides an excellent sweet-salty contrast that enhances every bite.
- Cream Cheese Spreads – Whipped cream cheese spread offers a creamy, tangy complement that makes each slice feel like dessert. Mix cream cheese with pumpkin purée, brown sugar, and pumpkin pie spice to create a fall-flavored spread that enhances the bread’s existing spices.
- Brunch Options – Pair pumpkin bread with sparkling wine mixed with orange juice or peach nectar to create elegant fall mimosas perfect for weekend entertaining or special occasions.
Related: Sourdough Pumpkin Rolls
Tips and Tricks for Better Results
The most important doneness test involves checking two spots—insert a toothpick into the center, then test the top half-inch of the loaf. If either spot doesn’t come out clean, cover with foil and continue baking. Watch for that perfect crack running along the top, which signals that the bread has cooked all the way through.
Oil creates incredible moisture and lightens up the crumb better than melted butter. Don’t swap the oil for butter—oil keeps the bread soft and moist, and it stays tender even after refrigeration. This simple ingredient choice makes a significant difference in texture and shelf life.
Always mix pumpkin bread by hand rather than using a stand mixer or electric beaters. This gives you more control and prevents overmixing. Overmixing leads to tough crumb, while undermixing creates uneven air bubbles and pockets of undercooked batter. Stop mixing as soon as you can’t see dry flour streaks.
Generously grease loaf pans with butter and dust with flour, or use baking spray with flour for easy release. Line the pan with parchment paper, then grease it—when ready to remove, just pick up the parchment edges. This double protection ensures your bread comes out intact every time.
If your bread develops a hard exterior but remains undercooked inside, lower the temperature to 325°F and tent with foil to slow browning while the center finishes baking. This temperature adjustment prevents the common problem of burnt tops and raw centers.
Time to Bake Like a Boss
You’ve got everything you need to nail this pumpkin bread every single time. Stick to the big three: canned pumpkin for consistency, hand mixing to keep it tender, and oil for that crazy-moist texture.
Trust that crack on top—it’s your bread telling you it’s done perfectly. Whether you’re throwing in chocolate chips or going gluten-free, you’ve got the skills to make it your own. You’re officially ready to create some serious autumn magic and blow everyone’s minds with your baking game!
FAQs
Why does my pumpkin bread have no flavor?
Your spices might be stale, or you’re not using enough! Fresh spices make a huge difference—replace cinnamon, nutmeg, and ginger if they’re over a year old. Also, make sure you’re using 100% pure pumpkin purée, not watered-down versions. Don’t skimp on the vanilla extract either—it amplifies all those autumn flavors.
What are the ingredients for pumpkin bread?
You’ll need 1 cup pumpkin purée, ¾ cup brown sugar, ½ cup white sugar, 1¾ cups flour, 2 tsp cinnamon, ½ tsp each nutmeg and ginger, ¼ tsp cloves, plus eggs, oil, baking soda, and salt. Optional add-ins include chocolate chips or chopped nuts for extra flavor and texture.
Is pumpkin bread better with oil or butter?
Go with oil! It creates incredible moisture and keeps your bread tender even after refrigeration. Butter can make the bread denser, and it gets harder when cold. Vegetable oil, canola oil, or melted coconut oil all work perfectly. Oil is the secret to that bakery-style soft, moist crumb everyone loves.
Should I bake pumpkin bread in a glass or metal pan?
Metal pans are your best bet for pumpkin bread! They conduct heat more evenly, giving you that gorgeous golden crust and preventing soggy bottoms. Glass pans can cause uneven baking and often result in burnt edges with undercooked centers. Stick with a standard 9×5-inch metal loaf pan for consistently perfect results every time.
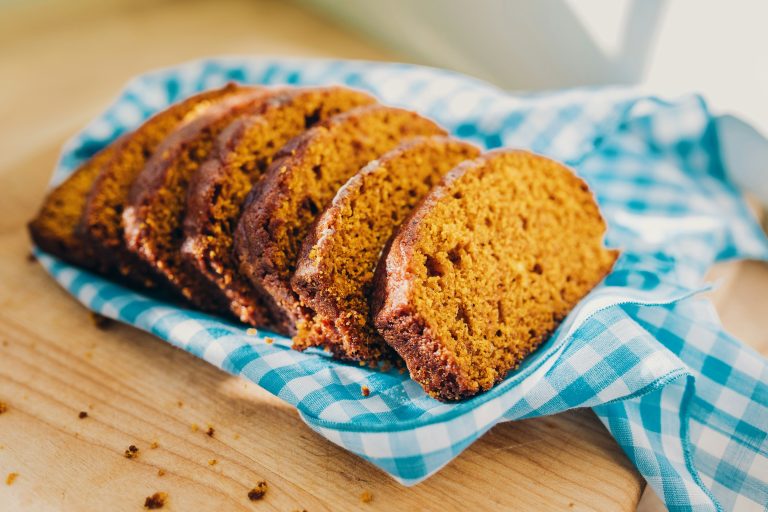
Pumpkin Bread
Homemade pumpkin puree can be as good as canned, but it takes quite a bit of prep work. Save your energy for perfecting that spice blend instead. Always check labels for 100% pure pumpkin purée, not pumpkin pie filling!
Ingredients
- Pumpkin Purée: 1 cup (15 oz can)
- Brown Sugar: ¾ cup packed
- White Sugar: ½ cup granulated
- All-Purpose Flour: 1¾ cups
- Cinnamon: 2 teaspoons
- Nutmeg: ½ teaspoon
- Ginger: ½ teaspoon
- Cloves: ¼ teaspoon
- Chocolate Chips: 1 cup (optional)
- Chopped Nuts: ½ cup pecans or walnuts (optional)
Instructions
- Preheat oven to 350°F, position rack in middle for even baking without burning top or undercooking center.
- Prep loaf pan – grease 9×5-inch pan thoroughly, dust with flour for extra insurance against sticking.
- Mix dry ingredients – combine flour, spices, baking soda, and salt in large bowl, whisk well for even distribution.
- Whisk wet ingredients separately – blend pumpkin purée, sugars, eggs, oil, and vanilla until smooth. Lumps are normal initially.
- Combine gently – fold wet into dry ingredients until just combined. Few lumps are fine and show you’re not overmixing.
- Pour and smooth – transfer batter to prepared pan, smooth top, tap gently to release air bubbles.
- Bake 60-65 minutes, covering with foil halfway through. Check doneness with a toothpick – it should come out clean.
- Cool completely on wire rack before slicing for best texture and flavor.
Notes
If the texture of your bread is soggy and the middle has sunk, it means there was too much liquid in proportion to the dry ingredients. Stick to recipe ratios and cool completely on a wire rack for the best results.





