
Last updated on February 23rd, 2026
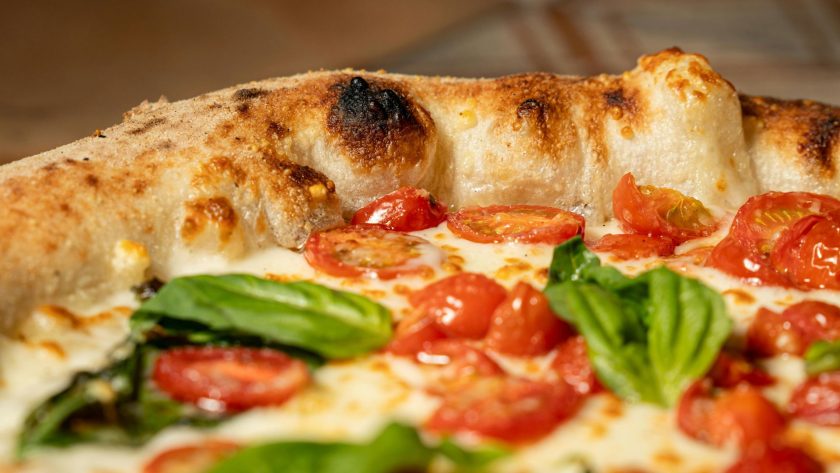
Sourdough pizza crust brings together two incredible things: the tangy complexity of naturally fermented dough and the satisfying chew of a well-made pizza base. If you’ve been maintaining a sourdough starter, this is one of the most rewarding ways to use it. The crust develops a depth of flavor that you simply can’t get from commercial yeast, with crispy edges, a tender interior, and those characteristic air bubbles that make each bite interesting. You’ll notice how the dough becomes more elastic and workable as it ferments, developing strength without becoming tough.
This recipe makes enough for two 12-inch pizzas or one large sheet pan pizza. The dough is forgiving and adapts well to different baking methods, from a blazing hot oven to a pizza stone to a cast iron skillet. You can make the dough in the morning and bake it that evening, or let it ferment in the refrigerator for up to three days to develop even more flavor.
What We’ll Make Today
In today’s blog post, you’ll learn how to make authentic sourdough pizza crust from scratch using your active starter.
We’ll cover the science behind fermentation and flavor development, how to work with different hydration levels, and the best techniques for stretching and shaping dough.
You’ll discover multiple baking methods from pizza stones to cast iron skillets, troubleshooting tips for common issues like dense crusts or tearing dough, and make-ahead strategies for meal planning.
By the end, you’ll understand how to create a crispy, chewy crust with complex flavor that rivals any pizzeria.
Why Make Sourdough Pizza Crust
Store-bought pizza dough gets the job done, but sourdough brings something different to your dinner table.
The natural fermentation creates complex flavors that range from mildly tangy to robustly sour, depending on how long you ferment the dough. The crust browns beautifully in the oven, developing those dark, blistered spots that add visual appeal and a slightly bitter contrast to the toppings.
The texture is what really sets sourdough pizza apart. You get a crispy outside with a chewy, substantial interior. The air pockets created during fermentation give you that artisan pizza look with an irregular crumb structure that holds up well under toppings.
Sourdough pizza dough is also remarkably flexible for meal planning. Once you’ve made it, you can use it right away or store it in the refrigerator for several days. Mix the dough on Sunday, then pull off portions throughout the week for fresh pizza whenever you want it. The flavor actually improves with time in the refrigerator.

Understanding Your Sourdough Starter
Your starter should be active and bubbly before you begin. An active starter is the engine that drives fermentation, so using it at its peak ensures your dough rises properly and develops good flavor.
Signs of a Ready Starter
| What to Check | What You Want to See |
|---|---|
| Timing | Fed within the last 4-12 hours |
| Volume | At least doubled in size |
| Smell | Pleasantly sour and yeasty (not vinegary or alcoholic) |
| Appearance | Bubbly and active throughout |
The hydration level of your starter matters for this recipe. Most starters are maintained at 100% hydration, meaning equal parts flour and water by weight. If your starter is significantly thicker or thinner than this, you may need to adjust the water in the recipe slightly. A thicker starter means you might need a bit more water in your dough, while a very liquid starter might require a touch less.
Don’t worry if your starter is a few hours past its peak. The dough will still work, though it might take a bit longer to rise. If your starter has been in the refrigerator, take it out, feed it, and let it come to room temperature and peak activity before using it.
Flour Selection
| Flour Type | Protein Content | Best For | Result |
|---|---|---|---|
| Bread flour | 12-14% | Most pizza styles | Chewy crust with good structure |
| All-purpose flour | 10-12% | Quick substitute | Slightly tender, less chewy |
| Whole wheat/rye | Varies | Flavor addition (10-20% blend) | Nutty flavor, faster fermentation |
| “00” flour | 11-12% | Neapolitan style | Incredibly tender and soft |
Bread flour is the best choice for sourdough pizza crust because of its higher protein content. This protein develops into gluten, which gives the dough structure and chew. All-purpose flour works in a pinch, but you’ll get a slightly less chewy crust with a more tender crumb.
Some bakers like to add a small amount of whole wheat flour or rye flour to their pizza dough, usually replacing about 10-20% of the bread flour. This adds a nutty flavor and a bit more complexity. Whole grain flours also provide extra food for the wild yeasts and bacteria in your sourdough culture, which can speed up fermentation slightly.
The Role of Hydration
This recipe uses a hydration level of around 70%, which means the water content is 70% of the flour weight. This creates a dough that’s manageable to work with but still produces an open crumb structure with nice air pockets. Higher hydration doughs (75% and above) create even airier crusts but can be sticky and difficult to handle, particularly for beginners.
The water you use matters more than you might think. Chlorinated tap water can inhibit fermentation slightly, though it usually won’t cause problems in pizza dough where fermentation times are relatively short. If your tap water is heavily chlorinated, let it sit out overnight before using it, or use filtered water.
Water Temperature Guide
| Temperature Range | Effect | When to Use |
|---|---|---|
| 60-65°F (15-18°C) | Slows fermentation | When you want more control and a longer work window |
| 75-80°F (24-27°C) | Speeds fermentation | When you’re in a hurry or your kitchen is cool |
Sourdough Pizza Crust Recipe
Ingredients
- 500g bread flour
- 350g water (room temperature)
- 100g active sourdough starter (fed and bubbly)
- 10g salt
- 15g olive oil
- 5g honey (optional, helps with browning)
How to Make
- Mix the water and sourdough starter in a large bowl until the starter is mostly dissolved. It doesn’t need to be completely smooth, but break up any large clumps.
- Add the flour to the bowl and stir with a wooden spoon or your hands until no dry flour remains. The dough will look shaggy and rough. Cover the bowl and let it rest for 30 minutes. This autolyse period allows the flour to fully hydrate and begins gluten development without any work from you.
- Add the salt, olive oil, and honey (if using) to the dough. Wet your hands and squeeze and fold the dough to incorporate the additions. The dough will feel slippery at first but will come together after a few minutes of squeezing and folding.
- Perform the first set of stretch and folds. Wet your hands, grab one side of the dough, stretch it up, and fold it over to the opposite side. Rotate the bowl 90 degrees and repeat. Do this four times, working your way around the bowl. Cover and let rest for 30 minutes.
- Repeat the stretch and fold process three more times, with 30-minute rest periods between each set. After the final set, you should notice the dough is smoother, more elastic, and holds its shape better.
- Cover the bowl and let the dough bulk ferment at room temperature. This typically takes 3-6 hours depending on your room temperature and starter strength. The dough should increase in size by about 50-75% and feel puffy and full of air. You should see bubbles on the surface and around the edges.
- Turn the dough out onto a lightly floured surface. Divide it in half for two pizzas. Shape each piece into a smooth ball by pulling the edges toward the center, then flip it over and use your hands to create tension on the surface by dragging the ball against the counter in small circles.
- Place each dough ball in a lightly oiled container or bowl. Cover and refrigerate for at least 2 hours and up to 3 days. The cold fermentation develops more flavor and makes the dough easier to stretch.
- Remove the dough from the refrigerator 30-60 minutes before you plan to shape and bake it. This allows it to relax and become more extensible.
- Preheat your oven to its highest setting, typically 500-550°F. If using a pizza stone or steel, place it in the oven during preheating for at least 45 minutes.
- On a lightly floured surface, press the dough ball into a flat disk, working from the center outward and leaving a slightly thicker rim around the edge. Pick up the dough and gently stretch it by draping it over your knuckles and rotating it, letting gravity help stretch it into a circle. Alternatively, continue pressing and stretching on the counter until you reach your desired thickness.
- Transfer the shaped dough to a piece of parchment paper or a well-floured pizza peel. Add your toppings, keeping them relatively light to prevent a soggy crust.
- Slide the pizza onto your preheated stone or place it on a baking sheet in the hot oven. Bake for 8-12 minutes, until the crust is golden brown and the edges are deeply colored with dark spots.
- Remove from the oven and let cool for 2-3 minutes before slicing. This brief rest allows the structure to set and prevents toppings from sliding off.

Recipe Tips
Don’t skip the bulk fermentation: The dough needs adequate time to develop flavor and structure. Rushing this step results in dense, flavorless crust. If your kitchen is cold, find a warmer spot like near a heating vent or inside an oven with just the light on.
Use a kitchen scale: Measuring by weight rather than volume gives you consistent results every time. Flour can compact in measuring cups, leading to variations of 20% or more. A scale eliminates this guesswork.
Watch the dough, not the clock: Fermentation times vary based on room temperature, starter strength, and flour type. Learn to recognize the signs of properly fermented dough rather than relying solely on the time listed in recipes.
Stretch gently: Aggressive handling deflates the air pockets you’ve worked hard to develop. Take your time when shaping, and if the dough keeps snapping back, let it rest for 10 minutes to allow the gluten to relax.
Keep your peel moving: If using a pizza peel, give it a little shake before adding toppings to make sure the dough isn’t sticking. Before sliding the pizza into the oven, shake it again to ensure it will slide off smoothly.
Preheat properly: A properly preheated oven and stone create the intense heat needed for a crispy bottom crust. Don’t shortcut this step. The stone or steel needs time to fully heat through.
Consider par-baking: For a crispier crust with juicy toppings, bake the shaped dough without toppings for 3-4 minutes, remove it from the oven, add toppings, and return it to finish baking. This prevents a soggy center.
Troubleshooting Common Problems You Might Face
| Problem | Likely Cause | Solution |
|---|---|---|
| Dough isn’t rising | Weak starter or cold room | Check that starter is vigorous and active; move dough to warmer spot (above 65°F/18°C) |
| Dense, heavy crust | Insufficient fermentation or over-handling | Let bulk fermentation continue until dough is puffy and airy; handle gently when shaping |
| Dough tears when stretching | Tight gluten or cold dough | Let dough rest 10-15 minutes to relax; bring to cool room temperature before shaping |
| Crust is too sour | Over-fermentation | Reduce fermentation time, use less starter, or feed starter multiple times before using |
If your dough isn’t rising, check your starter first. It should be vigorous and active when you add it to the dough. A sluggish starter won’t provide enough leavening power. Your room temperature also matters significantly. Below 65°F (18°C), fermentation slows considerably.
Dense crusts usually result from insufficient fermentation or degassing the dough too much during shaping. Make sure your bulk fermentation goes long enough that the dough is noticeably puffy and airy. Handle the dough gently when shaping to preserve those air bubbles.
If the dough tears when stretching, it likely needs more time to relax. The gluten network tightens during shaping, so letting the dough rest for 10-15 minutes makes it much more cooperative. Cold dough is also harder to stretch, so make sure it has come to cool room temperature before shaping.
Overly sour pizza isn’t to everyone’s taste. If your crust is too tangy, reduce the fermentation time or use less starter in the dough. You can also feed your starter a few times before using it to make it milder. The longer the dough ferments, particularly in the refrigerator, the more sour it becomes.
Variations and Additions
| Variation | What to Add | Result |
|---|---|---|
| Herbed crust | 1-2 tablespoons dried herbs (oregano, basil, garlic powder, Italian seasoning) | Flavor infused throughout the crust |
| Rich and cheesy | Increase olive oil to 30g + add 20g grated Parmesan | More flavorful base that stands up well even without sauce |
| Whole grain | Replace up to 100g bread flour with whole wheat or spelt (add 10-20g extra water) | Heartier texture with nutty flavor |
| Focaccia-style | Increase water to 375g (75% hydration) + use oiled sheet pan | Thicker, airier crust between pizza and focaccia |
Ways to Customize Your Dough
Adding herbs directly to the dough infuses the entire crust with flavor. Try mixing in dried oregano, basil, garlic powder, or Italian seasoning during the final mixing stage. Use about 1-2 tablespoons of dried herbs for the full batch of dough.
For a richer crust, increase the olive oil to 30g and add 20g of grated Parmesan cheese to the dough. This creates a more flavorful base that stands up well even without sauce.
Whole grain variations add nutrition and flavor. Replace up to 100g of the bread flour with whole wheat or spelt flour. These flours absorb more water, so you may need to increase the water by 10-20g. The crust will have a heartier texture and nuttier flavor.
For focaccia-style pizza, increase the hydration to 75% (375g water) and use a well-oiled baking sheet instead of shaping rounds. The result is a thicker, airier crust that’s somewhere between traditional pizza and focaccia bread.
Storage and Make-Ahead Tips
| Method | How Long | Instructions |
|---|---|---|
| Refrigerate shaped dough | Up to 5 days | Store in airtight containers; flavor develops over time |
| Freeze shaped dough | Up to 3 months | Wrap individually in plastic wrap, place in freezer bags; thaw overnight in refrigerator |
| Par-bake and freeze | Up to 2 months | Bake without toppings until just set; freeze, then add toppings and bake when ready |
| Cold bulk fermentation | 12-24 hours | Refrigerate immediately after mixing; shape the next day |
The shaped dough balls store very well in the refrigerator for up to five days in airtight containers. The flavor continues developing, becoming more complex over time. For longer storage, freeze the dough balls individually wrapped in plastic wrap and placed in freezer bags.
Baked crusts can be par-baked (baked without toppings until just set but not browned) and frozen. When you want pizza, pull out a crust, add toppings, and bake. This gives you almost instant homemade pizza while preserving much of the sourdough character.
The unbulked dough can be refrigerated immediately after mixing, skipping the room temperature bulk fermentation entirely. This cold bulk fermentation takes 12-24 hours but provides excellent flavor and fits well into a busy schedule. Mix the dough in the evening, refrigerate overnight, and shape it the next day.
Baking Methods
| Method | Best For | Setup | Result |
|---|---|---|---|
| Pizza stone/steel | Authentic pizzeria-style | Place on lowest rack; preheat 45+ minutes at max temp | Crispy bottom, quick-cooking top |
| Cast iron skillet | Individual pizzas with crispy bottoms | Preheat on stovetop until smoking; add oil | Incredibly crispy bottom from direct contact |
| Sheet pan | Thick crust or feeding a crowd | Oil generously; dimple dough after 15-20 min rest | Crispy edges, fried golden underside |
| Pizza oven/grill | High-heat artisan results | Follow oven instructions (typically 700°F+/370°C+) | Slight smoke flavor, 5-minute cook time |
A pizza stone or steel delivers the most authentic results at home. The retained heat creates a crispy bottom crust while the top bakes quickly in the hot oven. Place the stone on the lowest oven rack and preheat for at least 45 minutes at your oven’s maximum temperature.
Cast iron skillets work surprisingly well for sourdough pizza. Preheat the skillet on the stovetop until smoking, add a drizzle of oil, place your stretched dough in the pan, add toppings, and transfer to a hot oven.
Sheet pan pizza is the easiest method and works great for thicker crusts or when feeding a crowd. Oil your pan generously, press the dough to fit, let it rest for 15-20 minutes, then dimple it with your fingers, add toppings, and bake.
If you have access to an outdoor pizza oven or grill, sourdough crust shines in that environment. The high heat and slight smoke add another dimension of flavor.

Try Making Your Pizza Crust Yourself!
Once you get comfortable with the rhythm of making this dough, it becomes second nature, and you’ll find yourself making pizza from scratch more often than ordering it.
More sourdough pizza recipes:
Print
Sourdough Pizza Crust Recipe
- Total Time: 6-9 hours
- Yield: 2 (12-inch) pizzas, 4-6 servings 1x
Ingredients
- 500g bread flour
- 350g water (room temperature)
- 100g active sourdough starter (fed and bubbly)
- 10g salt
- 15g olive oil
- 5g honey (optional, helps with browning)
Equipment Needed
- Large mixing bowl
- Kitchen scale
- Pizza stone or baking sheet
- Pizza peel or parchment paper
Instructions
- Mix water and sourdough starter in a large bowl until mostly dissolved
- Add flour and stir until no dry flour remains; cover and rest 30 minutes
- Add salt, olive oil, and honey; squeeze and fold to incorporate
- Perform stretch and folds: 4 sets total, 30 minutes apart
- Bulk ferment 3-6 hours at room temperature until dough increases 50-75%
- Divide dough in half and shape into balls
- Refrigerate 2 hours to 3 days in oiled containers
- Remove from fridge 30-60 minutes before baking
- Preheat oven to 500-550°F (260-288°C) for 45 minutes
- Stretch dough, add toppings, and bake 8-12 minutes until golden
Notes
- Refrigerator: Up to 5 days (shaped dough)
- Freezer: Up to 3 months (shaped dough)
- Can be made ahead and refrigerated
- Flavor improves with longer fermentation
- Requires active sourdough starter
- Can par-bake and freeze for quick future meals
- Prep Time: 30 minutes (active), 5-8 hours (fermentation)
- Cook Time: 10-12 mins
- Category: Dinner, Lunch






Very good and so informative. Been making SD bread for 8 years and decided to widen my perspective on wild yeast baking. I certainly appreciate your thorough coverage and so much information to help us all succeed at making sourdough crusted pizza.
Thanks, Steven!
I absolutely love this recipe for sourdough pizza. I have tried so many different recipes, but this is the ONLY one that everyone seems to really like. I make these for family, friends and I even take them to work. I have never had a complaint.
🥰