
Last updated on June 28th, 2026
Sourdough bread requires an active and strong sourdough starter. Your starter can sometimes be weak and produce disappointing results. For successful bread baking, several steps can be taken. Let’s go through how to strengthen a sourdough starter for incredible loaves.
What We Need to Know
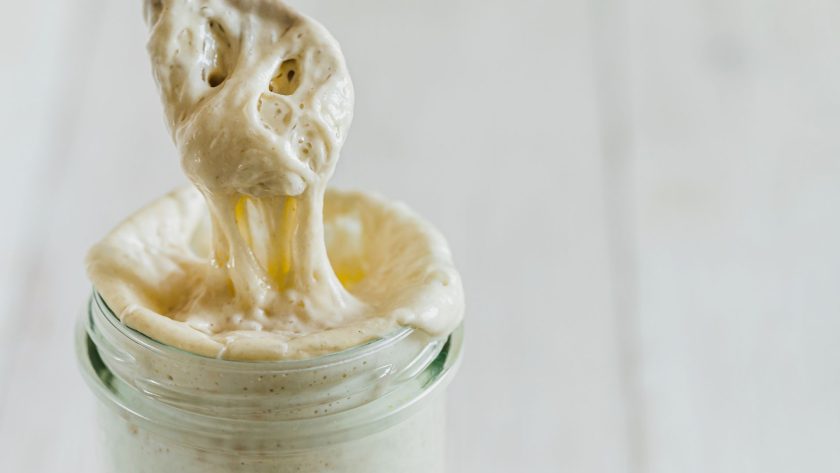
A weak sourdough starter shows little activity, rises slowly, and produces dense bread.
To strengthen it: feed more frequently (twice daily), use bread flour, maintain 75-80°F temperature, adjust hydration as needed, and be patient—it takes 1-2 weeks.
Signs of strength include consistent doubling, pleasant tangy aroma, and reliable bread rise.
Red Flags: Is Your Starter Actually Weak?
Before diving into fixes, let’s diagnose the problem. Your starter might be weak if you notice:
| Healthy Starter | Weak Starter |
|---|---|
| Doubles in 4-8 hours | Takes 12+ hours or doesn’t rise |
| Bubbles throughout | Few or no bubbles |
| Pleasant, tangy aroma | Foul, rancid, or no smell |
| Light beige/tan color | Gray, pink, or very dark |
| Uniform, creamy texture | Watery layer on top (hooch) |
| Consistent performance | Unpredictable results |
Tip: A little liquid on top (called “hooch”) isn’t always bad—it just means your starter is hungry and needs feeding!
The 4 Essential Steps to Strengthen Your Starter
1. Feed More Frequently
Switch from once daily to twice daily feedings for 1-2 weeks. Think of it like training for a marathon—your starter needs consistent fuel to build strength.
2. Upgrade Your Flour
Trade your all-purpose flour for bread flour (12-14% protein). The extra protein gives your starter more gluten to work with, creating better structure and rise.
3. Dial in the Temperature
Keep your starter at 75-80°F (24-27°C). Too cold? It’ll be sluggish. Too hot? You might kill the beneficial microorganisms. Find that sweet spot and stick to it.
4. Adjust the Hydration
Fine-tune your water-to-flour ratio. Most starters thrive with equal parts flour and water by weight, but yours might prefer slightly wetter (more active) or drier (more stable) conditions.
What Makes a Starter “Strong”?
Think of a strong starter as your reliable baking partner. It should:
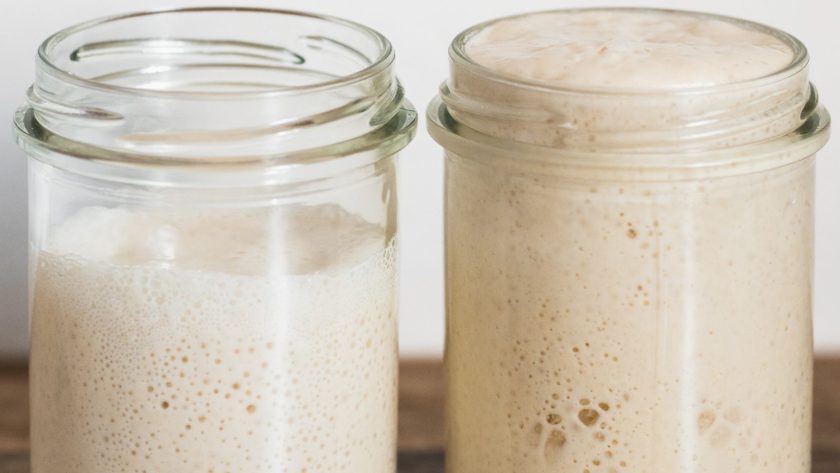
- Rise predictably: Consistently doubles within 4-8 hours after feeding
- Smell right: Pleasant, slightly tangy aroma (not vinegary or rotten)
- Look active: Plenty of bubbles throughout, not just on the surface
- Feel elastic: Creamy texture that holds its shape when stirred
- Bake beautifully: Produces well-risen bread with open, airy crumb
The key word here is consistency. A truly strong starter performs reliably day after day, not just occasionally.
A great starter is often maintained through regular feeding and proper care to keep it active and resilient.
Your 7-Point Starter Strengthening Plan
1. Master Your Starter’s Feeding Schedule
- Feed every 12 hours when strengthening
- Always discard half before feeding (prevents over-acidity)
- Use a kitchen scale for accuracy—eyeballing leads to inconsistent results
2. Right Ratios
Start with 1:1:1 (starter:flour:water by weight). Here are some examples:
| Starter Amount | Flour Amount | Water Amount | Notes |
|---|---|---|---|
| 50g | 50g | 50g | Standard 1:1:1 ratio – most common |
| 25g | 50g | 50g | 1:2:2 ratio – for very weak starters |
| 100g | 100g | 120g | Higher hydration – more active fermentation |
| 50g | 50g | 40g | Lower hydration – more stable, easier handling |
3. Temperature Control is Everything
| Temperature Range | Effect on Starter | Timeline | Action Needed |
|---|---|---|---|
| 65-70°F (18-21°C) | Slow fermentation | 12-24 hours to double | Find warmer spot or reduce feeding frequency |
| 75-80°F (24-27°C) | Optimal activity | 4-8 hours to double | Perfect – maintain this range |
| 85-90°F (29-32°C) | Very active, may favor bacteria | 2-4 hours to double | Monitor closely, may need more frequent feeding |
| 95°F+ (35°C+) | Risk of killing beneficial microorganisms | Unpredictable | Cool down immediately |
4. Timing is More Important Than You Think
Feed your starter when it’s at peak activity—usually when it has doubled and is full of bubbles but hasn’t started to collapse yet.
5. Experiment with Flour Types
| Flour Type | Protein Content | Benefits | Best For |
|---|---|---|---|
| All-Purpose Flour | 10-12% | Readily available, consistent results | Maintenance feeding |
| Bread Flour | 12-14% | Higher protein, stronger gluten development | Strengthening weak starters |
| Whole Wheat | 13-14% | Extra nutrients, enzymes, faster fermentation | Boosting activity |
| Rye Flour | 8-10% | Very active fermentation, complex flavor | Jump-starting sluggish starters |
6. Hydration Fine-Tuning
- 100% hydration (equal flour/water): Most common and versatile
- Higher hydration (120%+): More active fermentation
- Lower hydration (80-90%): More stable, easier to handle
7. Practice Perfect Hygiene
- Don’t let other kitchen bacteria crash the party
- Use clean utensils every time
- Keep containers spotless
- Store away from strong odors
Timeline (aka What to Expect)
Days 1-3: Start twice-daily feeding routine. You might see initial improvement or things might get worse before they get better.
Days 4-7: Should notice increased bubbling and faster rise times. The aroma should become more pleasant.
Week 2: Your starter should be showing consistent doubling and reliable timing.
Week 3+: Time to test your starter in bread. If it produces good rise and flavor, you’ve succeeded!
What to Do When Things Go Wrong
“My starter smells like nail polish remover”
This acetone smell means it’s very hungry. Feed it more frequently and consider increasing the flour ratio temporarily.
“There’s a watery layer on top”
That’s hooch—just stir it in or pour it off, then feed as normal. It’s not harmful, just a sign of hunger.
“It’s not rising at all”
Check your water temperature (should be room temp, not hot), verify your flour isn’t expired, and make sure your kitchen isn’t too cold.
“It was strong, now it’s weak”
Changes in weather, flour brands, or feeding schedule can affect performance. Go back to basics with frequent feeding.

When to Start Over
Sometimes, despite our best efforts, a starter is beyond saving. Consider starting fresh if:
- Pink or fuzzy mold appears (not just surface liquid)
- The smell remains putrid after a week of regular feeding
- No activity appears even after 2 weeks of intensive care
- You suspect contamination from cleaning products or other chemicals
Remember: Starting over isn’t failure—it’s just part of the sourdough journey!
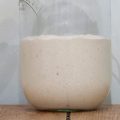
Strong Sourdough Starter
Strengthening a weak sourdough starter is more art than science, but the fundamentals remain the same: consistent feeding, proper temperature, good hygiene, and patience. Your starter is a living ecosystem that responds to care and attention.
Most “weak” starters just need consistent TLC for 1-2 weeks to bounce back. The key is not giving up too early—sourdough rewards persistence.
Once you’ve nursed your starter back to health, you’ll have a reliable partner for years of delicious bread baking. And trust me, that first perfect loaf from your newly strengthened starter will make all the effort worthwhile.
Happy baking! 🍞
Have questions about your starter’s progress? The sourdough community is incredibly helpful—don’t hesitate to share photos and ask for advice in baking forums or social media groups!
FAQs
What if my sourdough starter is not strong enough?
Increase feeding frequency to twice daily, switch to bread flour for higher protein content, and maintain a consistent temperature of 75-80°F. Most weak starters recover within 1-2 weeks with this approach. If there’s no improvement after two weeks of consistent care, or if you see mold or persistent foul odors, it may be time to start fresh with a new starter.
How do you revive a weak sourdough starter?
Feed it twice daily (instead of once) using a 1:1:1 ratio of starter to flour to water by weight. Switch to bread flour for extra protein, keep it at a consistent 75-80°F temperature, and discard half before each feeding to prevent over-acidity. With consistent care, most weak starters show improvement within 3-7 days and fully recover within 1-2 weeks. Be patient – sourdough starters are resilient and usually bounce back with regular feeding and proper conditions.
How to tell when your sourdough starter is weak?
Signs of a weak sourdough starter include no bubbles on the surface of your starter, no expansion after each feed, a thin consistency, a bad smell, or a slow rise time.
Why is my sourdough starter getting weaker?
Your sourdough starter is likely getting weaker due to inconsistent feeding schedules, temperature fluctuations, or using different flour types than usual. Common causes include feeding it too infrequently (letting it get overly hungry), keeping it in a too-cold environment, contamination from dirty utensils, or seasonal changes affecting your kitchen temperature. Sometimes switching flour brands or using chlorinated water can also disrupt the microbial balance. The good news is that most of these issues are easily fixable by returning to a regular feeding routine, ensuring clean tools, and maintaining consistent conditions.
How to keep starter strong?
Maintain a consistent feeding schedule (daily if kept at room temperature, weekly if refrigerated), use the same flour type and ratios each time, and keep it at a stable temperature around 75-80°F. Always use clean utensils, discard half before each feeding to prevent over-acidity, and feed it when it’s at peak activity (doubled in size with lots of bubbles). Store it properly – covered but not airtight – and avoid exposure to strong chemicals or temperature extremes. Consistency is key to a healthy, reliable starter.
How to fix a weak starter?
Start feeding it twice daily using a 1:1:1 ratio (starter:flour:water by weight), always discarding half before each feeding. Switch to bread flour for higher protein content and keep it at 75-80°F for optimal fermentation. Make sure to use clean utensils every time and feed it when it’s at peak activity (bubbly and doubled). Most weak starters recover within 1-2 weeks with this consistent routine – the key is patience and regular care.
How do I tell if I killed my sourdough starter?
You’ve likely killed your sourdough starter if you see fuzzy mold (especially pink, black, or green), it has a persistently putrid or rotten smell that doesn’t improve after feeding, or there’s absolutely no activity (no bubbles, no rise) after a week of regular feeding at proper temperatures. However, don’t give up too quickly – many starters that seem “dead” are just very weak and can be revived with consistent twice-daily feeding for 1-2 weeks. If you see just liquid on top (hooch) or it smells vinegary, that’s normal hunger, not death.
What to do if your sourdough starter is very weak or completely flat?
You may need to feed your starter more frequently, use warm water and flour, change the type of flour, mix in some commercial yeast, and above all practice patience and persistence.
Why is my sourdough starter not very active?
Lack of feeding, inconsistent feeding, cold temperatures, contamination, or low-fiber flour can all be reasons why your starter may not be very active.
Related Articles:
 The Beginner’s Guide to Making Your First Sourdough Starter (Recipe + Schedule!)
 Sourdough Cinnamon Coffee Cake Recipe: 9 Steps to Irresistible Bakery-Style Results
 Strawberry Cinnamon Rolls Recipe: A Sweet Twist on a Classic Favorite
 Sourdough Cinnamon Banana Bread: Easy, Moist & Delicious Recipe
 How to Use Sourdough Starter Like a Pro (Even as a Beginner)
